Tips and Tricks for Handplaning
Tips and techniques for jointing edges, cleaning up end grain, and for smoothing surfaces.
 Aug 30, 2021

The planes you’ll use the most are bench planes: a #3 or #4 smoothing plane, a #5 jack, and a #7 or #8 jointer. How you use them depends a lot on what you make, but it’s sure to involve the basic techniques of cutting true edges or jointing surfaces for such work as edge-gluing boards, smoothing narrow surfaces, trimming parts to exact width and length, and fitting parts together. From there, it isn’t much of a leap to using joinery, molding, or other specialized planes. The best place to start is with an easy-to-handle and versatile #4. Put it to work and get a feel for the way it cuts. It’s time to make some shavings.
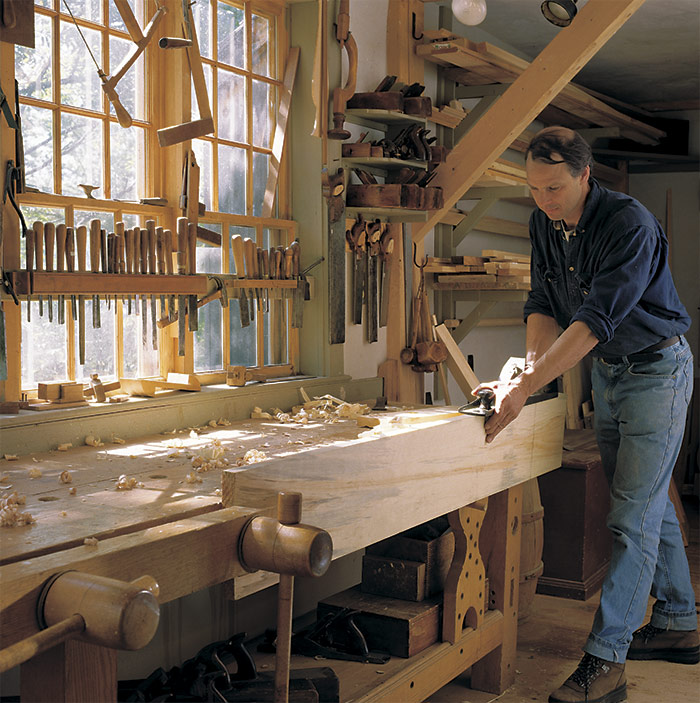
For efficient planing you need a sturdy bench at the right height. Planing takes effort, and you will work up an honest sweat some days; a bench just makes it easier by transferring your energy to the work (and holding it for you). If you are going to plane a lot, you’ll want a lower bench to get the weight of your upper body over the plane. There is no single correct body position, but it should feel natural and comfortable. Spread your feet for stability. Think about moving your body along with the plane (when jointing a board, for example), while keeping it balanced and cutting evenly. All of this might feel awkward at first, but in time it will become second nature.
Jointing
Trimming a drawer face to width, cutting a bevel on the underside of a drawer bottom, shooting the edges of two boards to be glued together or the four sides of a tapered leg are all variations of typical everyday jointing. Think of it as a kind of smoothing, cutting a surface (usually narrower than the width of the iron) flat and true so that two such edges can be joined together seamlessly. Smoothing larger surfaces is different and covered later.
For the most accurate jointing, use the longest plane practical. The longer the plane, the better the ability to ride over the hollows and plane off the high spots. (A shorter plane would fall into the hollows and would have more trouble planing the surface straight.) A long plane also has more mass, which helps power the tool through the cut. This said, for cutting a beveled drawer bottom or tapered leg, where perfect flatness end to end is not vital, a #4 bench plane would be less tiring to use.
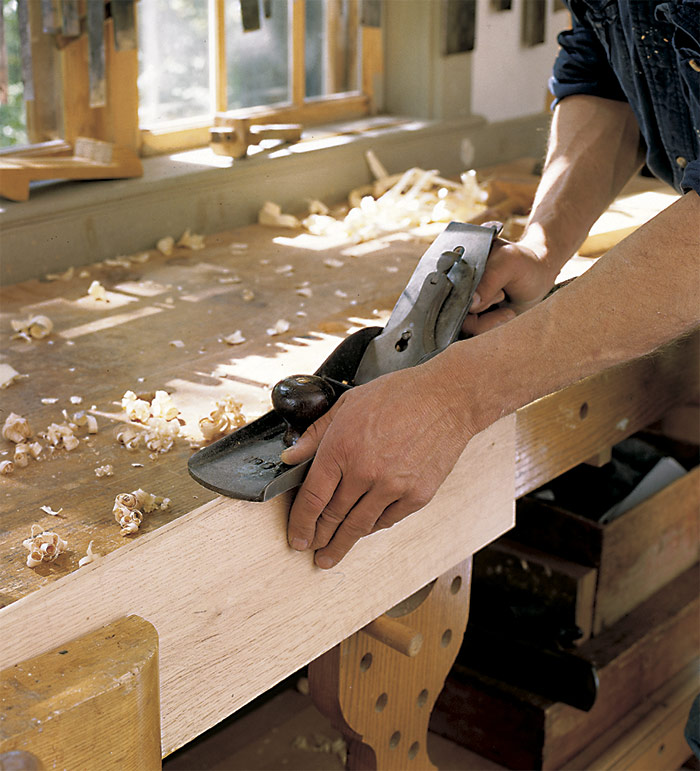
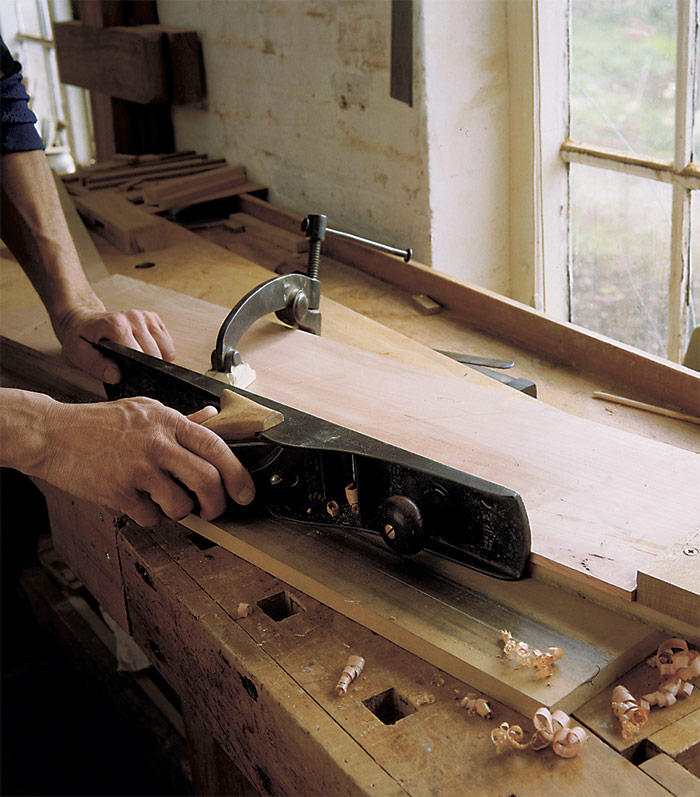
Clamp your board on edge in a side vise, on the top of the bench, or whatever way keeps it steady and well supported. Position the plane on the edge with the iron about to start cutting. The front of the sole guides the cut at the beginning, so keep pressure on it and merely support the rest of the plane with your hand on the rear handle. As you begin cutting, shift some weight toward your rear hand.
Completing the cut is the opposite, with the pressure shifting to the area of the sole behind the iron. If you put pressure on the heel of the plane at the start of a stroke and on the toe at the end, you will gradually cut a convex surface. No matter what plane you are using, keep the pressure focused over the part of the sole in contact with the wood.
There are a number of things to concentrate on all at once while jointing: You’ve got to balance the plane, keep your weight over the correct area of the sole, and apply some downward pressure as well. A heavy plane helps, as does the forward slant of classic plane handles. Balance comes with time. To joint an edge true, start by making it slightly hollow, since this is an easier condition to flatten than a convex one. (Even a long jointer plane will follow a convex surface, but it will cut the ends of a hollow until the surface is flat.) To do this, take a few cuts from the center only and sight down the edge to see how you are doing. If it is slightly hollow, cut end to end, and when you cut a full-length shaving, stop. Do the same thing on another edge, and with any luck, the two boards will fit together seamlessly. When I am jointing two boards, I usually take an extra shaving from the middle to hollow-joint the edges for a stronger joint.
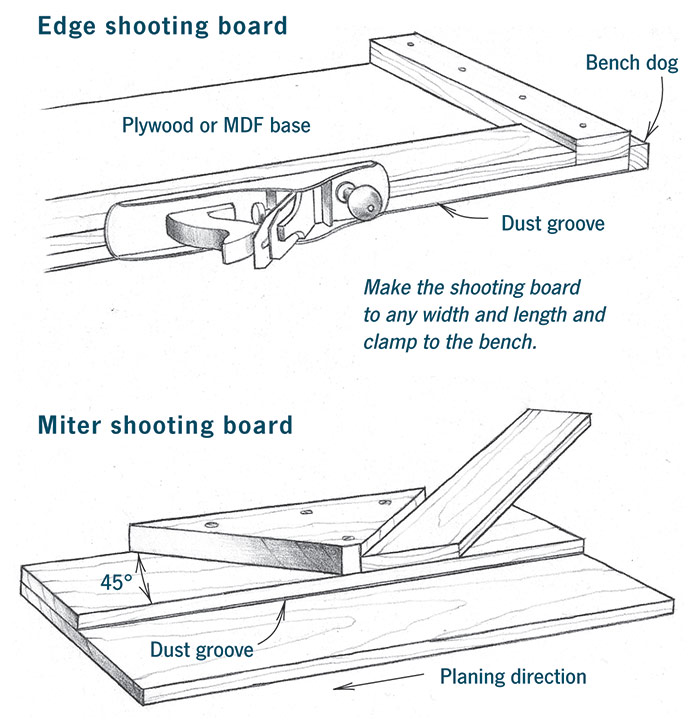
A technique that helps with narrow boards is to joint them at the same time (see the photo). Fold them together, inside to inside, clamp them as one board, and joint them the same way. The thicker edge gives the plane better support, and any slight bevel will be canceled out. A shooting board is a jig that also helps shoot true edges, especially for jointing thin veneers (see the drawing and photo).
Shooting Boards
|
|
|
When it all comes together, you’ll be able to joint two edges for a glue joint superior to anything produced by machine. For one thing, a plane-cut surface is perfectly smooth and free of machine marks; it is flat and true, with fibers cleanly severed for good glue absorption. And for long boards that are always awkward to machine, bringing a plane to the work is far easier.
Planing end grain
Cutting end grain has its own challenges, although the basic planing technique is the same as for jointing long grain. Bench planes, with their high-pitched irons, cut end grain well—in some situations a #5 is my preferred tool—but generally planes specifically designed for working end grain are short and have low-pitched irons. End grain is tough; a low cutting angle is ideal for slicing the fibers like a knife. Tearout is much less of a concern, because the shavings are so fragile they break up, so there is no need for a narrow throat or a cap iron. And because a low pitch orients the cutting forces in line with the cutter (rather than partially against it as in a higher-pitched iron), chatter is less of a problem.
Trimming the end of a drawer face, cutting the shoulder of a tenon, and truing a mitered corner are all typical end-grain tasks. A block plane is the ideal tool for this type of work. The lower the cutting angle, the easier it will work and the smoother the surface will be. Hone a bevel close to 20°, and find a plane with a 12° bed angle for the lowest overall cutting angle. For planing longer end-grain surfaces such as a tabletop, Stanley made a low-angle jack plane and smoothing plane, basically just elongated block planes with bench-plane handles. Although it takes a little more effort, a common jack plane works almost as well.
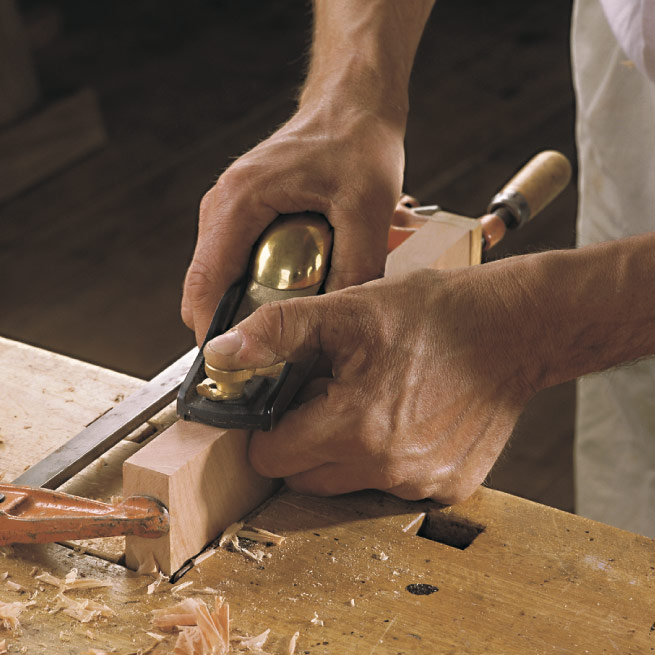
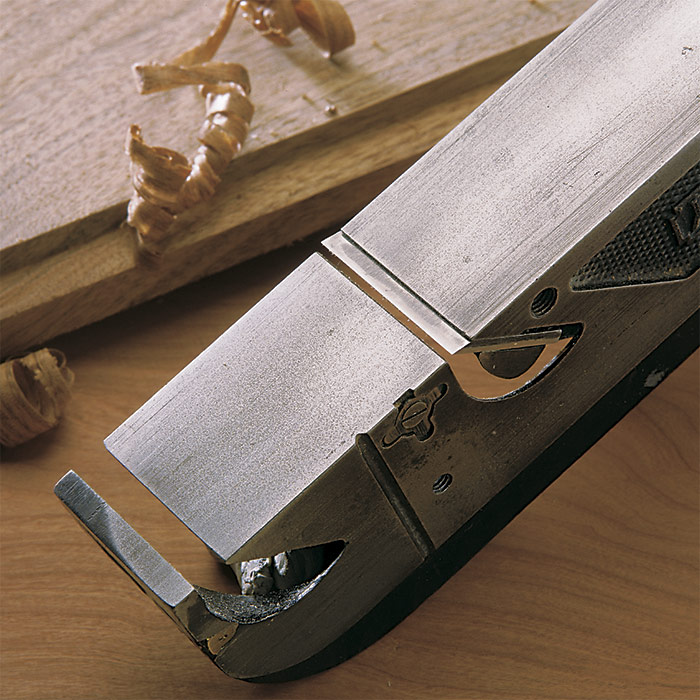
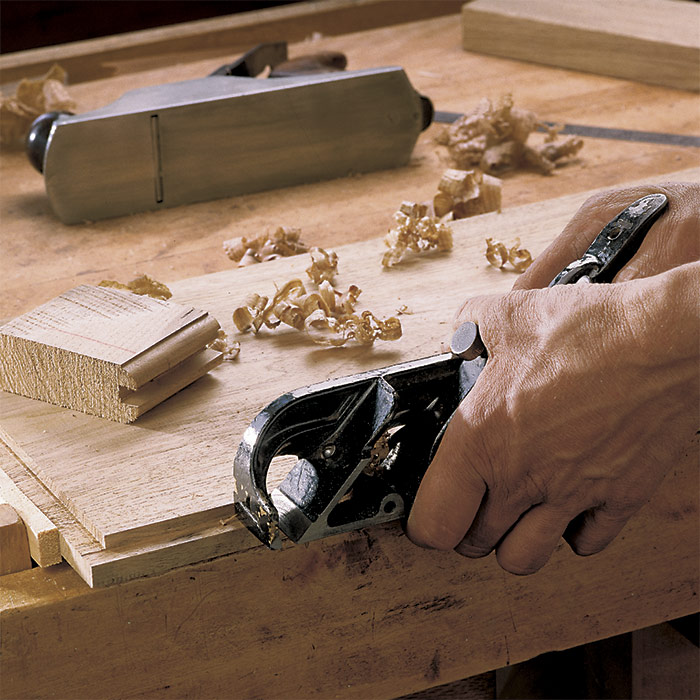
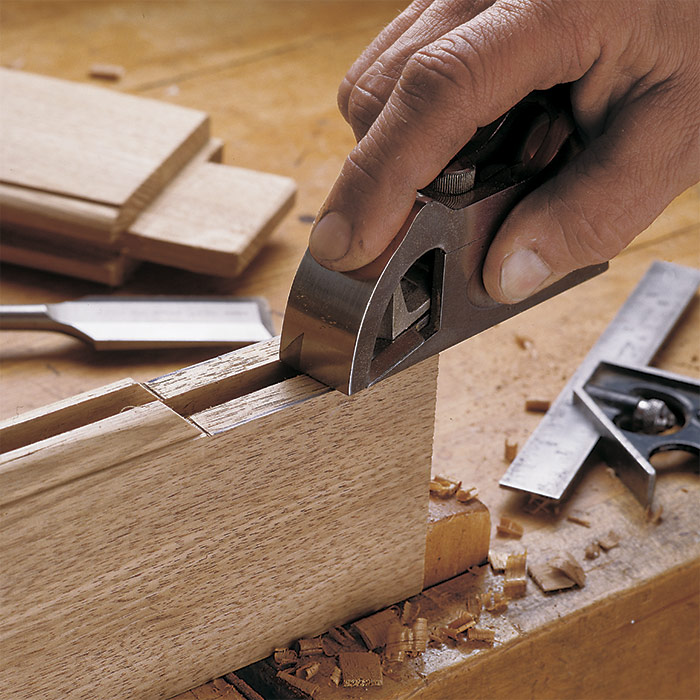
Block planes are terrific tools, but they are useless for working into a corner, when trimming a tenon shoulder, for example. This is when you need a plane with a rabbet mouth, where the iron extends all the way to the side of the plane. Rabbet planes come in an assortment of shapes and sizes, although shoulder planes with heavy bodies and precisely ground sides and soles are the best for working end-grain shoulders. They are low angle and are tuned in the usual way, except that the iron should be positioned ever so slightly beyond the edge of the plane. This is the same with all rabbet planes. There is usually little space for moving the iron laterally, so you’ll have to keep the edge honed square to do this.
No matter what plane you use, it’s easy to split away the end grain fibers by overshooting an edge. The simplest way to overcome this is to chamfer the edge slightly. Clamping a block against the edge does the same thing; the block splits out but not the workpiece (see the photo). A shooting board or bench hook is useful for planing end grain because it holds the work and backs up the fibers. A light cut, skewing to slice the fibers for the least amount of pressure against them, also works. Working from both sides toward the middle avoids the problem entirely.
|
|
|
|
|
|
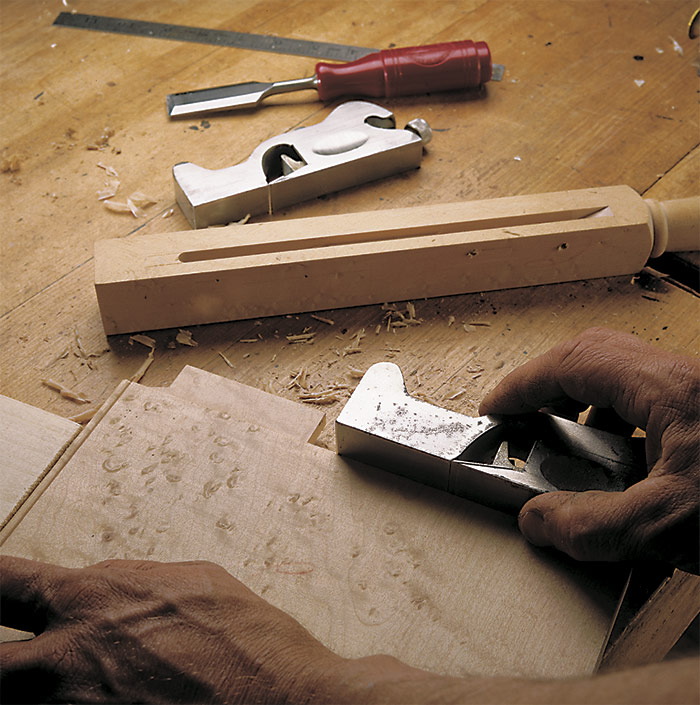
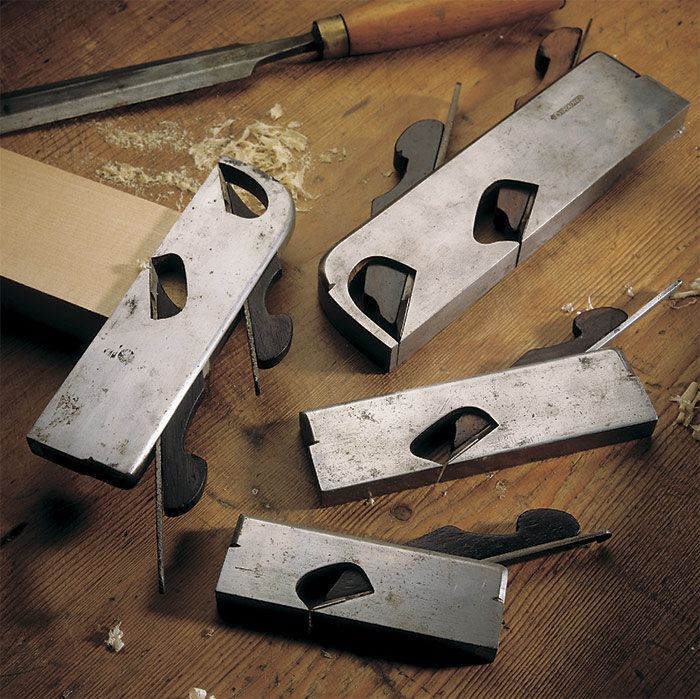
A shoulder plane and block plane are two basic planes that should be in any well-equipped shop. For real versatility, look for a Stanley #90, #92, #93, or #94; they all break apart into useful chisel planes, and can cut tenon shoulders and small rabbets. Block planes fit your hand just right for many trimming tasks, not all of them end grain. They also make great little smoothing planes with only minor adjustments.
Smoothing surfaces
Machines have taken over many of the mundane tasks of working wood once done by planes—quite thankfully. They do their work well, too. But no machine can match the surface cut by a smoothing plane. The flat plane and cleanly sliced fibers cut by a sharp iron have a clarity and brilliance that is unsurpassed. If this weren’t justification enough to start using planes to finish surfaces, consider how efficient they are. It takes just minutes to plane all of the parts for a modest cabinet door or a small tabletop to a finished polish.
Stanley #3 and #4 bench planes are considered smoothing planes and they will smooth some woods, but the best smoothing planes are designed and tuned specifically for this demanding work. You want a plane with lots of mass to give the iron rock-solid support. The thicker the iron, the more stable it is, especially against the extreme cutting pressures of figured hardwoods. A long plane isn’t necessary, because you’re not trying to level the surface (although you do somewhat) but smooth it to a polish.
My favorite smoothing planes are the stunning planes made by a man named Stewart Spiers in Ayr, Scotland, before 1900. Many of his designs were continued by the better-known Thomas Norris. All of these planes combine a steel body dovetailed together with rosewood infill for the handle, front knob, and iron bed, which adds mass to the tool. With irons two or three times as thick as a standard Stanley iron, they are perfectly suited to their task.
| TO STORE their planes more compactly in a chest, joiners once removed irons and wedges. I store my planes in drawers or on shelves with the irons set, ready to go to work—just as I rest one on my bench while working. To protect the exposed iron, either lay a plane on its side or raise the toe on a scrap of wood. For that matter, it’s good practice to lay any cutting edge—saw, auger, chisel, or file—propped on a piece of wood and out of harm’s way. |
Tuning a plane for smoothing is so specific that you should think about using a dedicated plane just for this task. Buy the best plane you can afford; if you are like me, you will use it plenty to make it worth the cost. Wood-bodied smoothers, often made of beautiful tropical or fruit woods with thick irons, make great smoothing planes. Flatten the sole with another plane and inlay a throat plate into the sole to narrow the opening as much as possible. Similarly, adjust the throat on a cast-iron smoother as narrow as possible and keep the cap iron close to the cutting edge. Find the thickest iron that will fit in your plane. Hone it with the slightest camber or round the corners to feather the smoothing strokes seamlessly together.
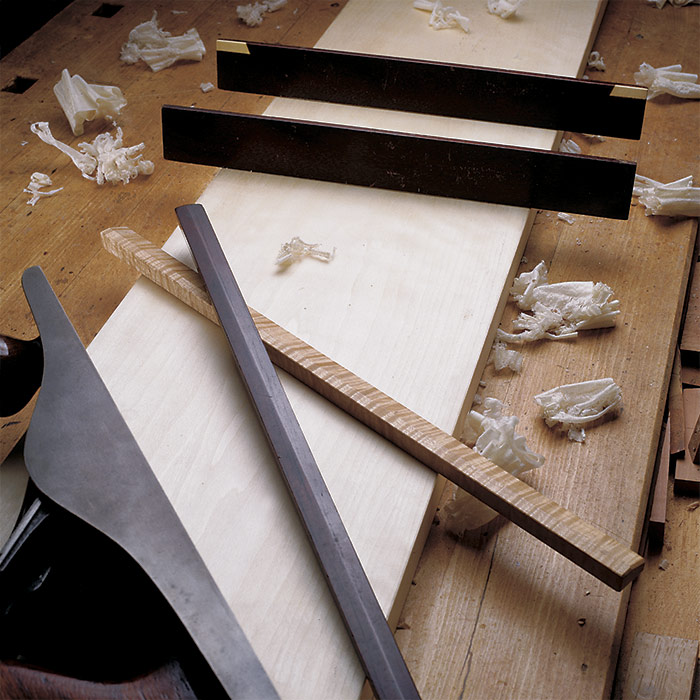
In all woodworking there are surfaces to smooth. Use the same basic planing technique as for jointing with a few minor changes. Take a very fine cut and plane parallel with the grain as much as possible. Skewing the plane often leaves a better surface and is an advantage around areas of difficult grain. Start cutting at one edge and plane to the opposite edge in one stroke; stops and starts leave noticeable marks. Overlap strokes as you move across the width of the surface so that they blend together. If you have to start or stop mid-stroke, glide in or out slowly. If things are working right, you’ll be sending up billowy light shavings and leaving a surface that you can almost see your reflection in.
Smoothing beautiful surfaces—or any planing really—is easily the most satisfying part of working wood, but not the most easily mastered. Only experience can teach you how to read the grain or which tool to choose for a particular situation. There is no better way to learn about planes or gain more confidence using them than by picking one up, tuning it, and making some shavings.
 Excerpted from Classic Hand Tools (The Taunton Press, 1999) by Garrett Hack.
Available at Amazon.com.


Comments
As in all things, really, the old musician's axiom still applies: "If you want to get to Carnegie Hall, 'Practice'". [Just practice the good habits and not the bad.]
Log in or create an account to post a comment.
Sign up Log in