Skip to content
Fine Woodworking
Main Menu
Subscribe
GET THE MAGAZINE & MORE
Magazine Cover
  • Save 69% off the cover price
  • Or, get everything with UNLIMITED, including 40+ years of the online archive.
Subscribe Now!
Subscribe
  • Projects & Plans
  • How-To
  • Shop Tips
  • Tools & Materials
  • Videos
  • Magazine
  • Video Workshops
  • Members
  • Forum
  • Gallery
  • Blogs
  • More
    • Log In
    • Join
    Fine Woodworking Main Menu Subscribe

    Fine Woodworking Project Guides

    Handplanes

    Guide Home
    Chapter
    • All About Handplanes
    • Planes for Surfacing and Smoothing
    • Planes for Joinery and Shaping
    • Block Planes
    • Scrapers and Scratch Stocks
    How-To

    Flat and Square by Hand

    Using hand tools to plane a board flat, straight, and square will train your eye to recognize properly milled stock and build basic skills in layout and handplaning.

    Author Headshot By Philip C. Lowe #191–May/June 2007 Issue

    Synopsis: The first task assigned to any student in Phil Lowe’s furniture-making classes is to use hand tools to plane a board flat, straight, and square. This is more than just an exercise–this assignment trains the eye to recognize properly milled stock, and it builds basic skills in layout and handplaning.

    You often don’t learn the value of stock that is flat, straight, and square until you’ve made furniture from material that isn’t.

    You find out soon enough. A cupped drawer side fights back when you try dovetailing it to the front. A twisted apron can set a table’s legs askew.

    That’s why the first task my students must complete is to mill by hand a piece of hardwood stock flat, straight, and square. This assignment trains the eye to recognize properly milled stock, and it builds basic skills in layout and handplaning.

    Start by tuning your plane iron

    Start with a no. 5 jack plane or a no. 4 smoothing plane. If the edge of the plane iron is perfectly straight, the corners of the iron will score the work as you plane. You can avoid this by sharpening the iron with a very slight convex edge. This “crown” is especially useful when planing edges.

    I get a convex edge by bringing the iron across a grinding wheel at a slight arc. You also can use a coarse stone and apply greater downward pressure at the corners of the iron. For a smoothing plane, aim for a difference of about 1⁄64 in. between the crown’s peak and the edges of the iron. For a jack plane, aim for 1⁄32 in.

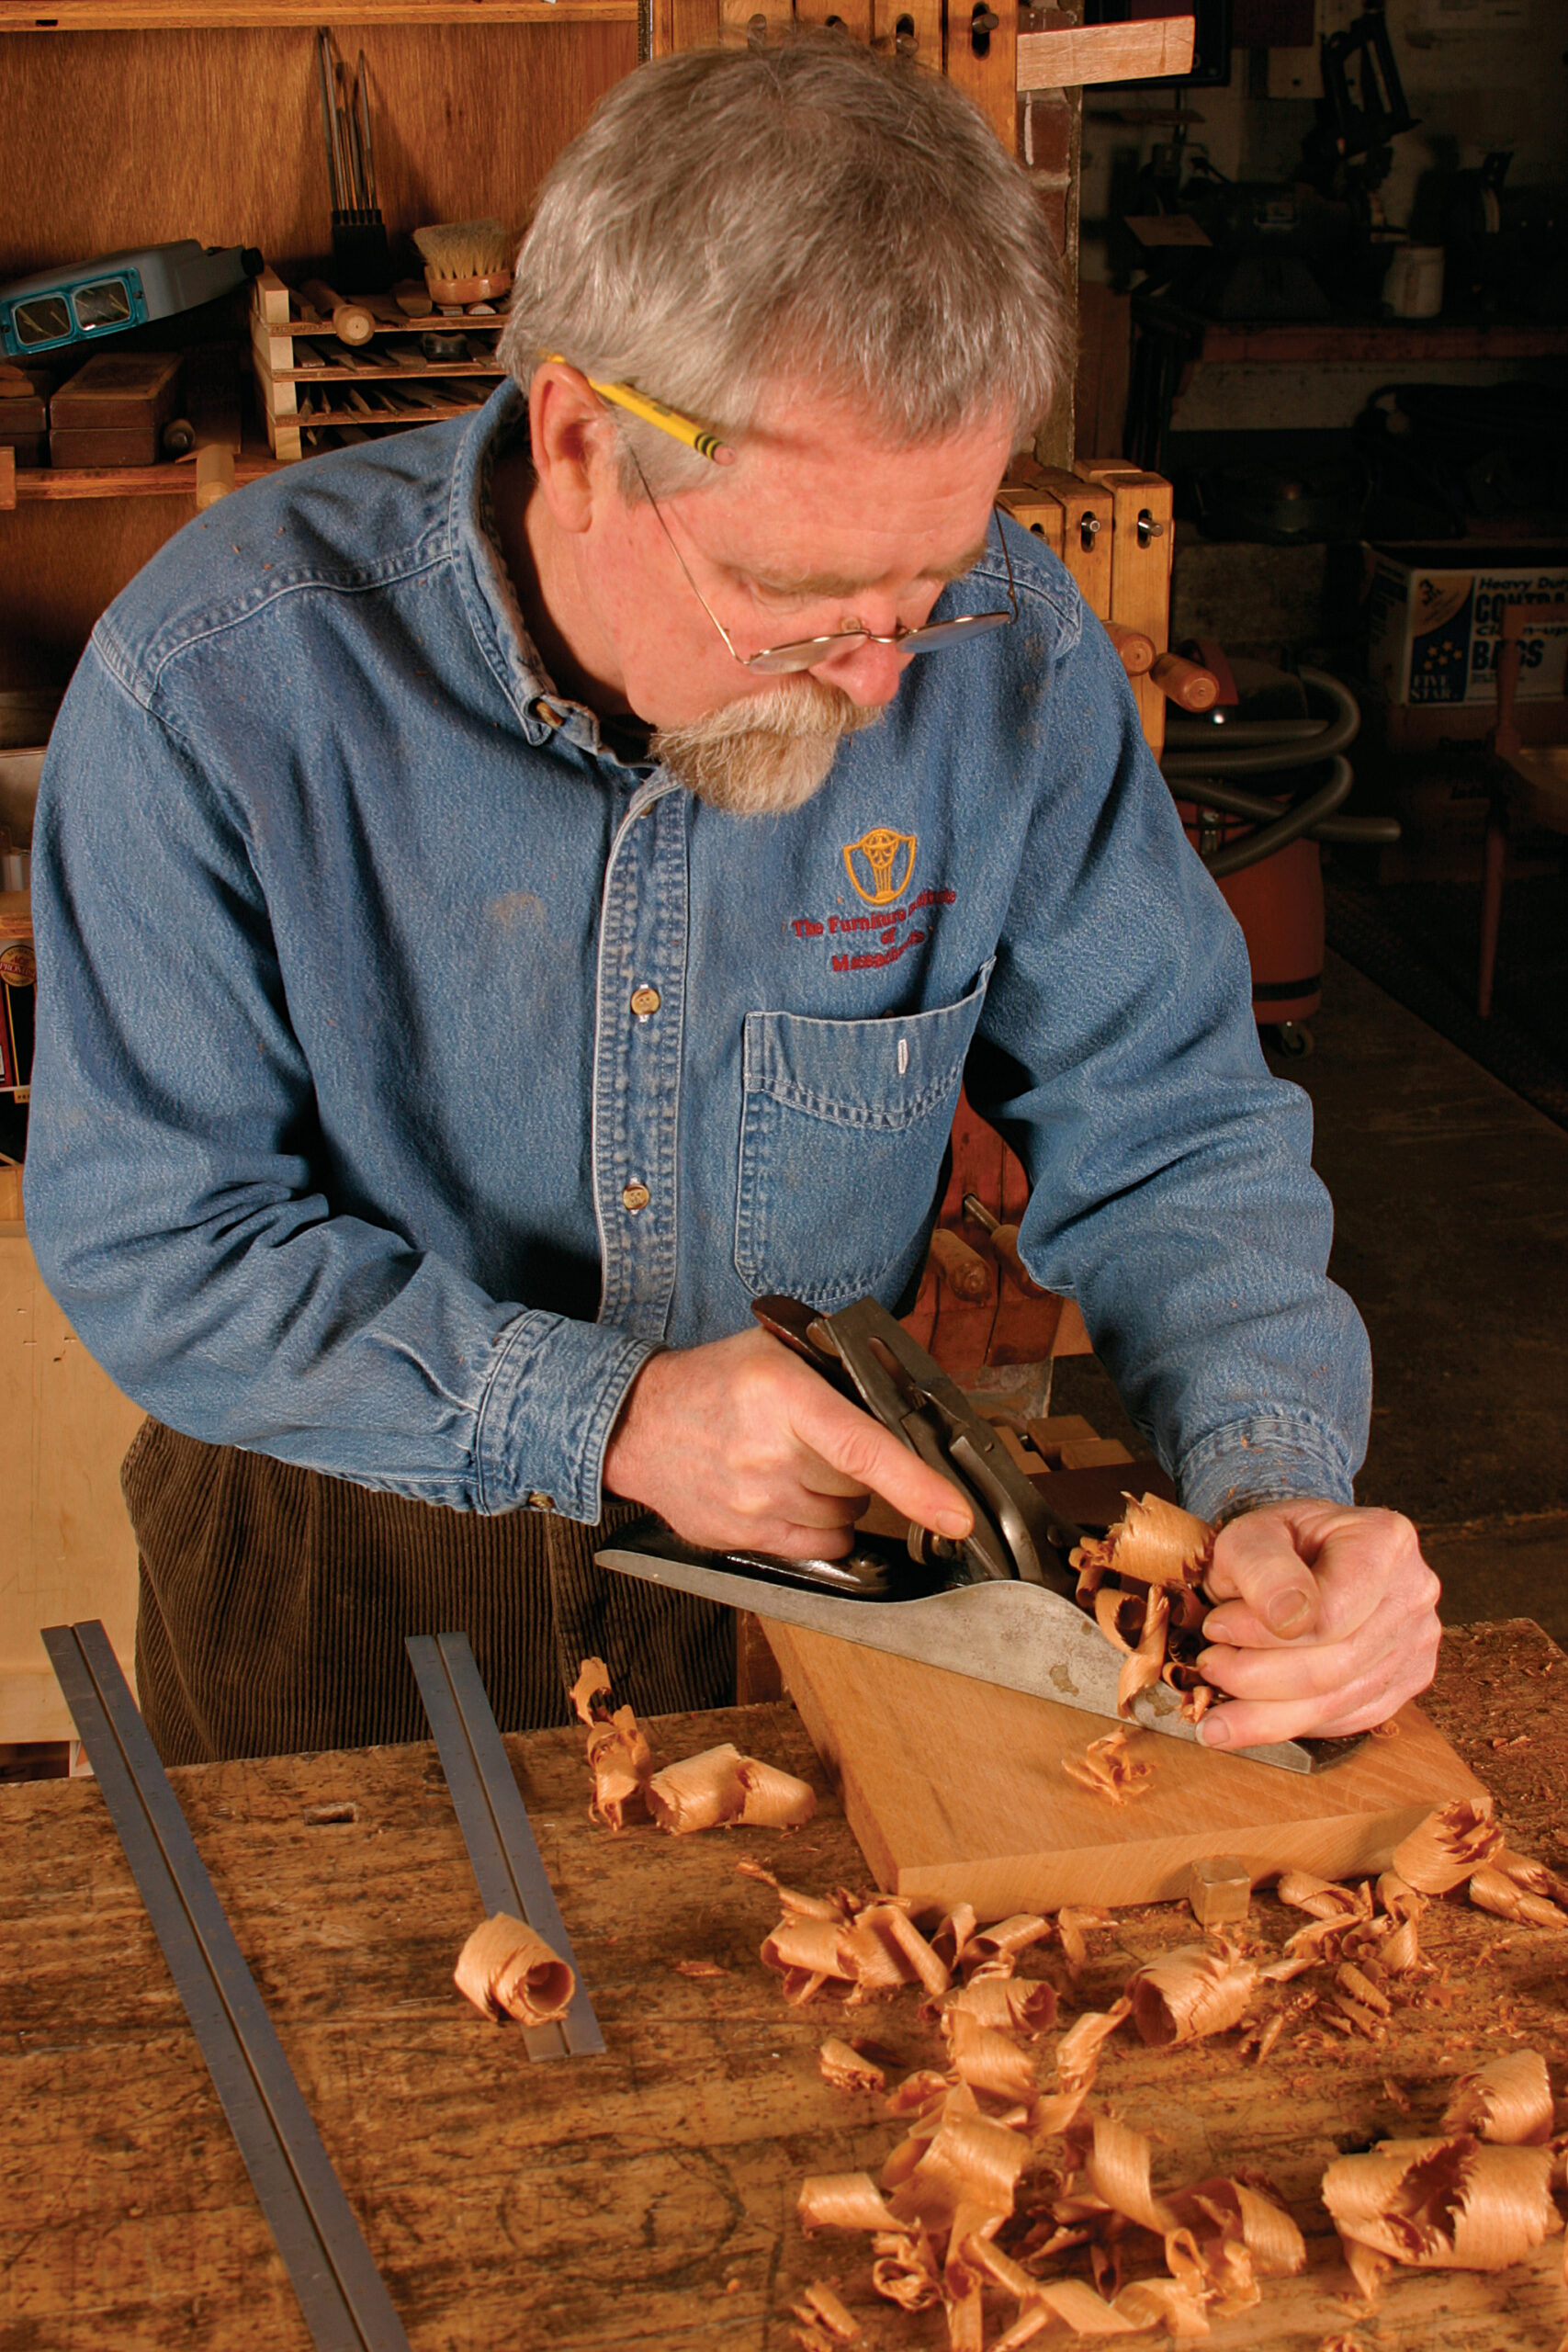
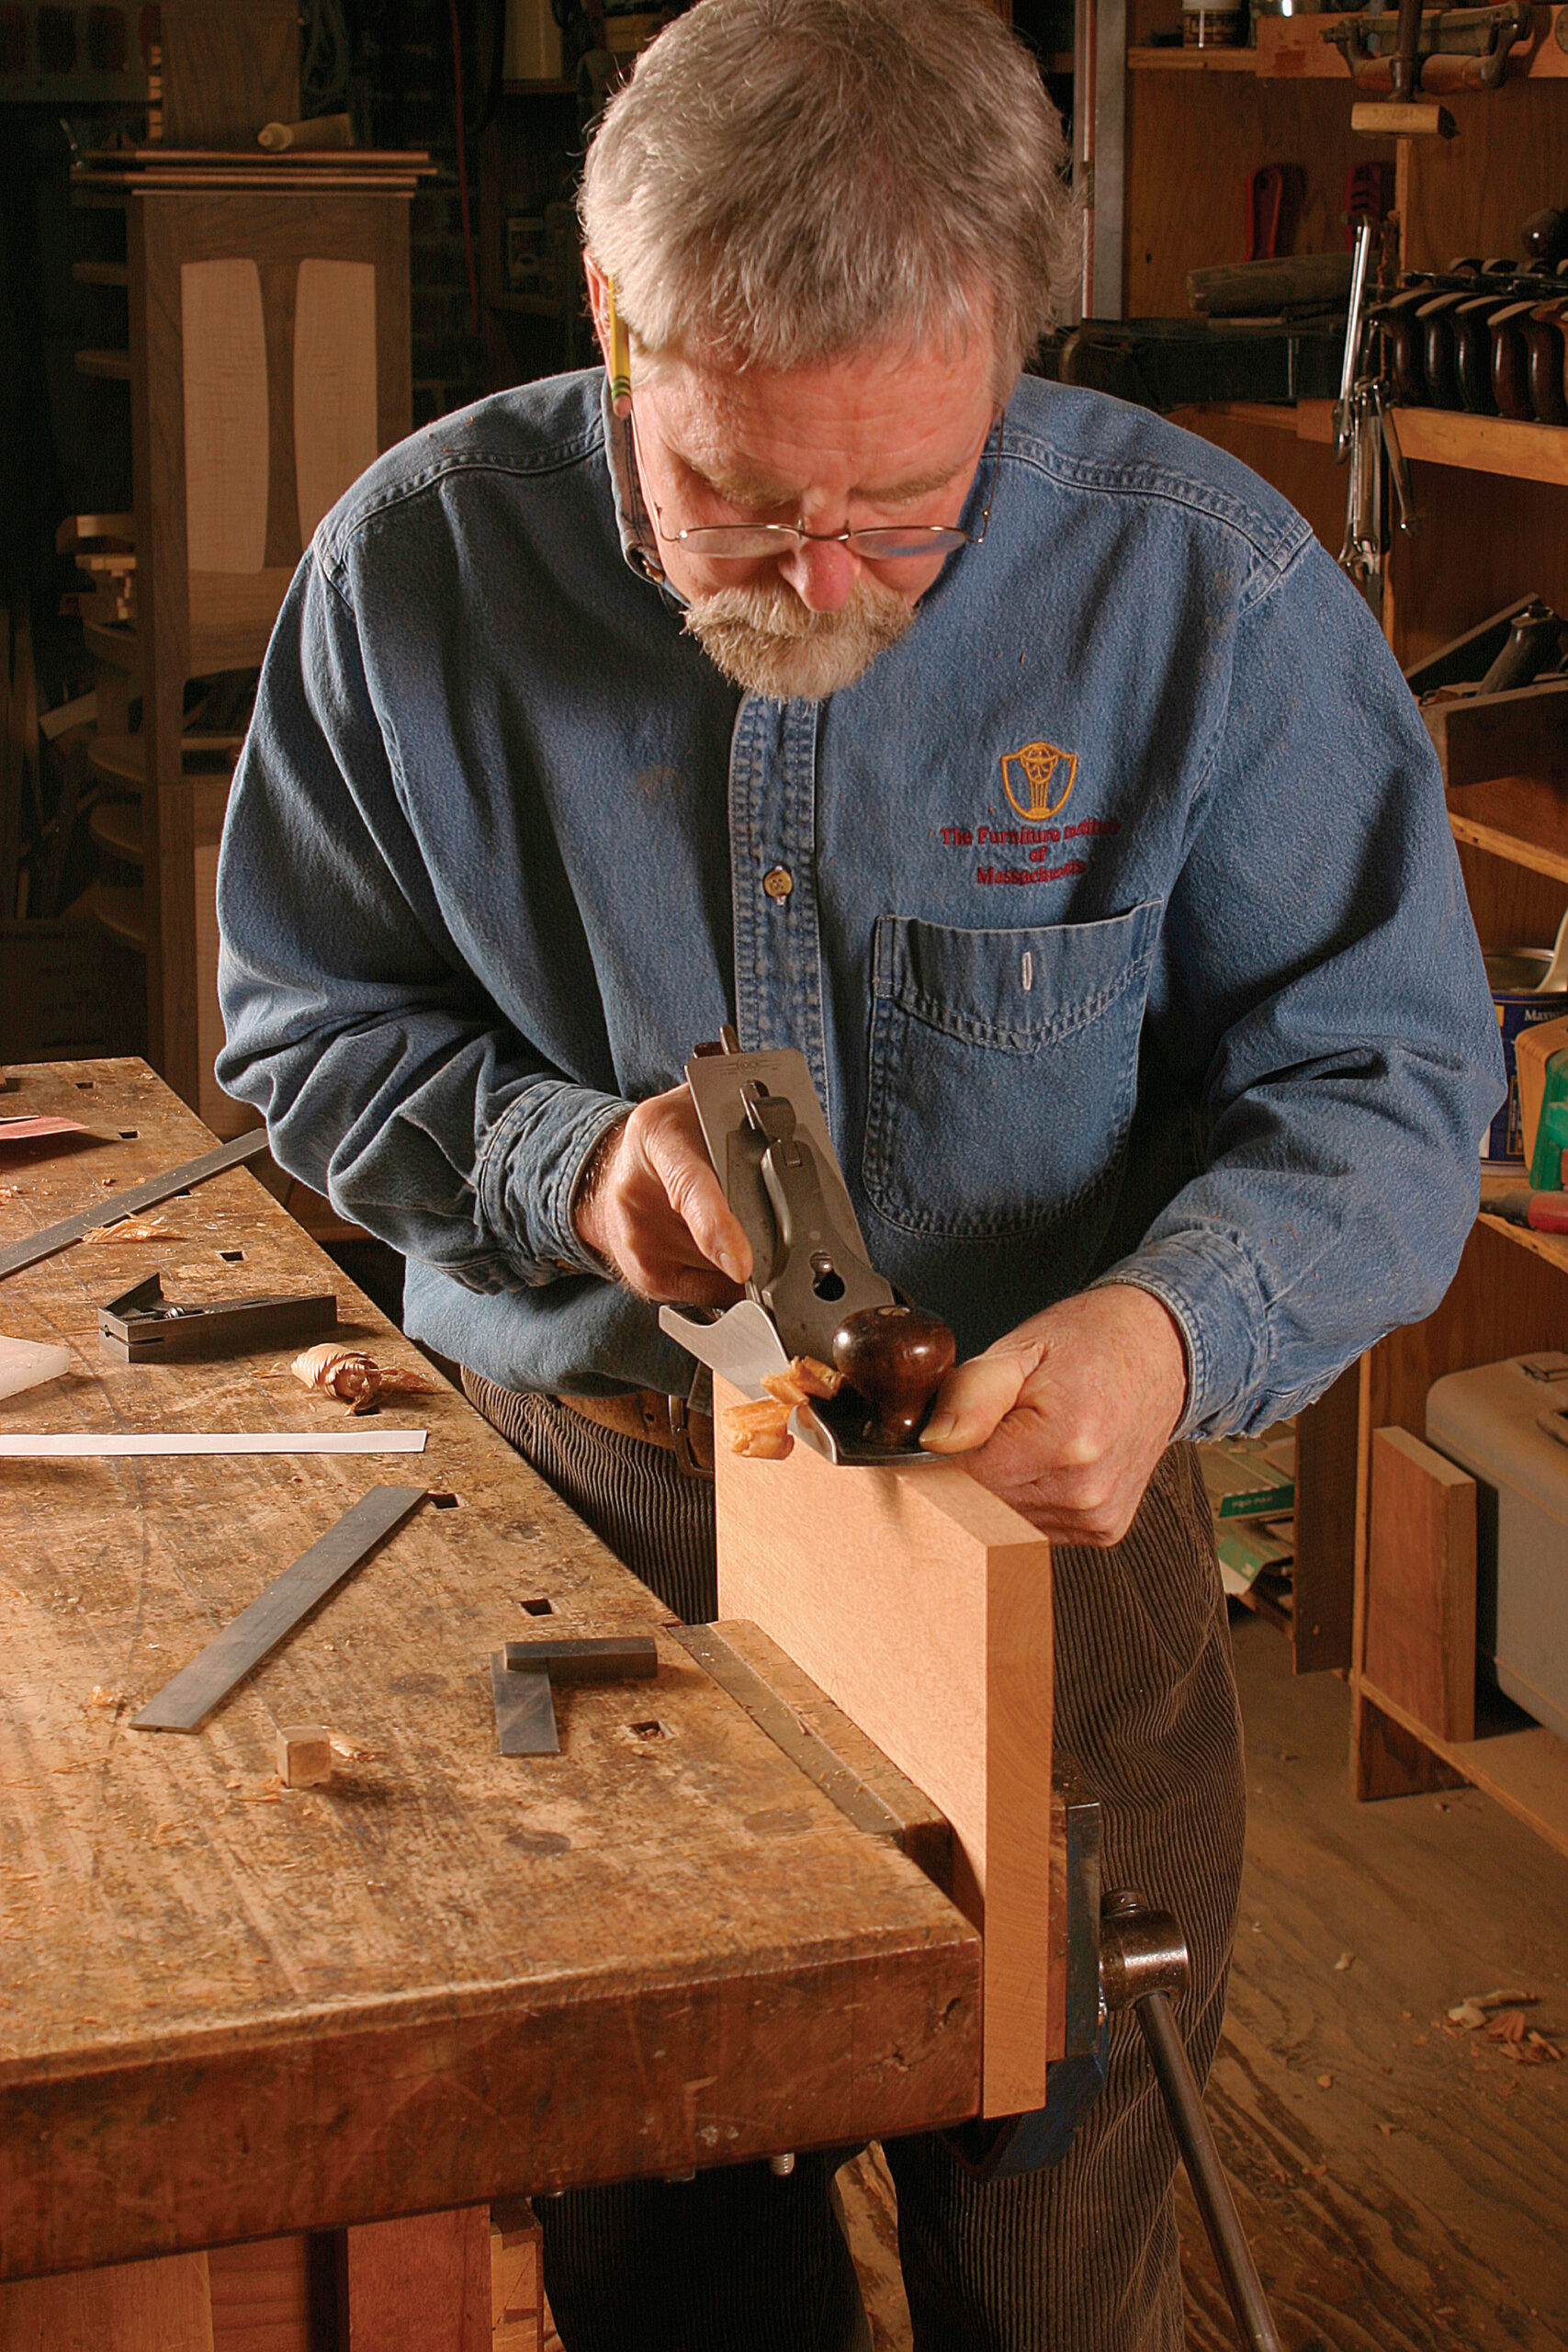
    Flatten the first face

    Start with a piece of stock roughly 1 in. thick, 8 in. wide, and 10 in. long. Lay a straightedge across one of the broad surfaces from end to end, edge to edge, and diagonally across the corners. Note the high and low spots. Begin taking strokes to bring the high spots in line with the lowest point on the surface. If the board is slightly twisted, with one or two high corners, take diagonal passes from high corner to high corner, working enough of the surface to bring the high areas down to the low spots.

    A board that is slightly cupped across its width can be worked with the convex face either up or down. With the convex side down, make straight cuts along both edges to lower the high corners, or make strokes across the board from edge to edge with the plane in a skewed position, working your way down the length to remove the high corners. Use the same technique if the board is tapered, removing thickness at one end. If the board is cupped and the convex side is up, plane straight down the middle until you have flattened the high center.

    Check your progress frequently with the straightedge. When the board is nearly flat, finish with a series of straight smoothing cuts along the board’s length and in the same direction as the grain. For the first pass, align the center of the blade—the peak of its crown—with the left- or right-hand edge of the board. The cut will be deepest at the board’s edge. Overlap each stroke by about half the blade’s width. This will put the blade’s crown into the shallowest part of the previous cut, minimizing surface undulations. Check your work again. you’ll know the surface is flat when no light can be seen under the straightedge in any direction. Mark the flattened surface for use as a reference face in laying out subsequent cuts.

    First, flatten a face

    diagonal plane stroke to tackle twist
    1. A diagonal stroke tackles twist. Work from one high corner to the other.

    finish with a series of straight plane strokes
    2. Finish with a series of straight strokes (the plane is skewed slightly). Overlap the strokes by half the blade’s width to minimize undulations in the surface.

    check for flatness with a straightedge
    3. Check for flatness. Lay a straightedge across the board’s face and look for light underneath it. Check the face diagonally, across its width, and along its length.

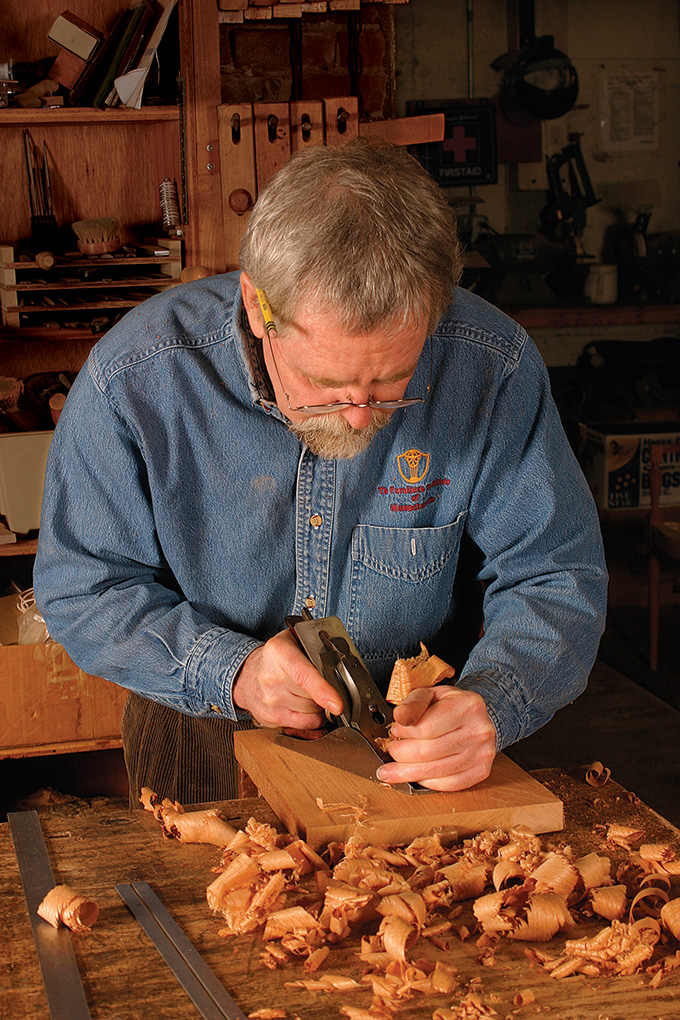
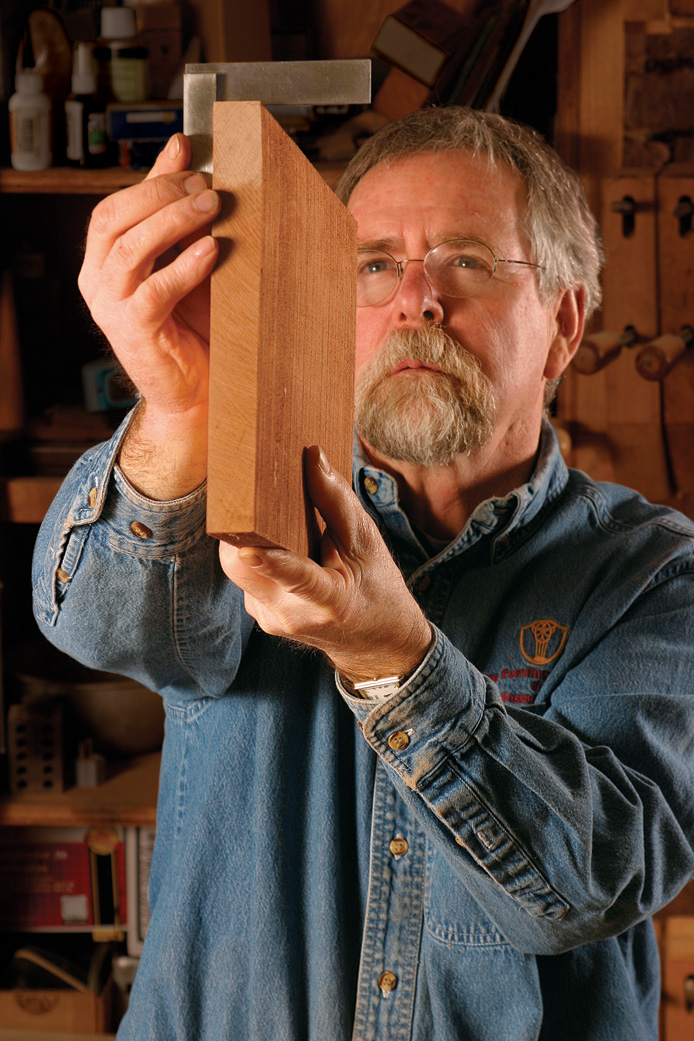
    Next, straighten and square an edge

    The next step is to plane one long edge straight and flat so that it is square to the reference surface you just flattened. Beginners often want to correct an angled edge by tilting the plane’s body to compensate. This would be required if the iron were ground and honed straight. With a crowned iron, it’s unnecessary. Instead, set the sole in full contact with the edge, aligned so the blade’s crown cuts on the high side of the angle. as you make cuts to remove the angle, shift the plane with each cut until the blade is centered on the edge, bringing the high side down and into square.

    To remove a convex surface on an edge, simply make short strokes in the center of the edge and lengthen each consecutive cut until the edge is straight. For an edge that is twisted or high at opposite corners, move the plane laterally from one edge to the other, starting with the plane off to one side as though you were addressing an out-of-square edge. As the cut progresses, the plane will shift so that it is making a cut with the crown in the center, at the square point of the twist, and then gradually will shift to have the opposite side of the crown cutting to remove the opposite angle of the twist.

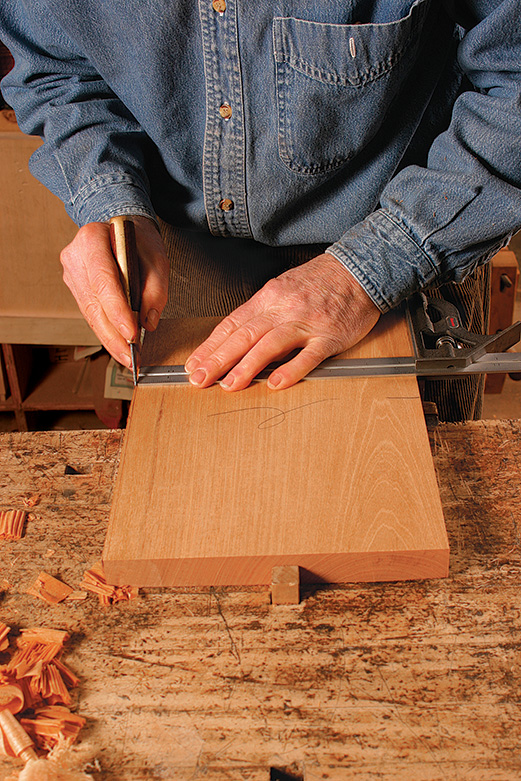
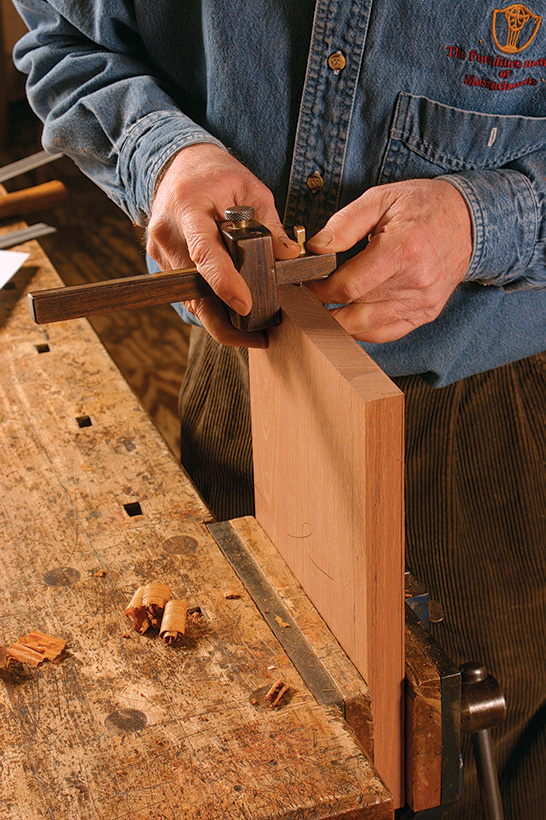
    Use a straightedge to check that the edge is straight and flat. use a square, with the head registered against the reference face, to check that the edge is square. Once the edge is straight and square, mark it, too, as a reference edge. you’ll use it to check that the ends are square and that the opposite edge is parallel.

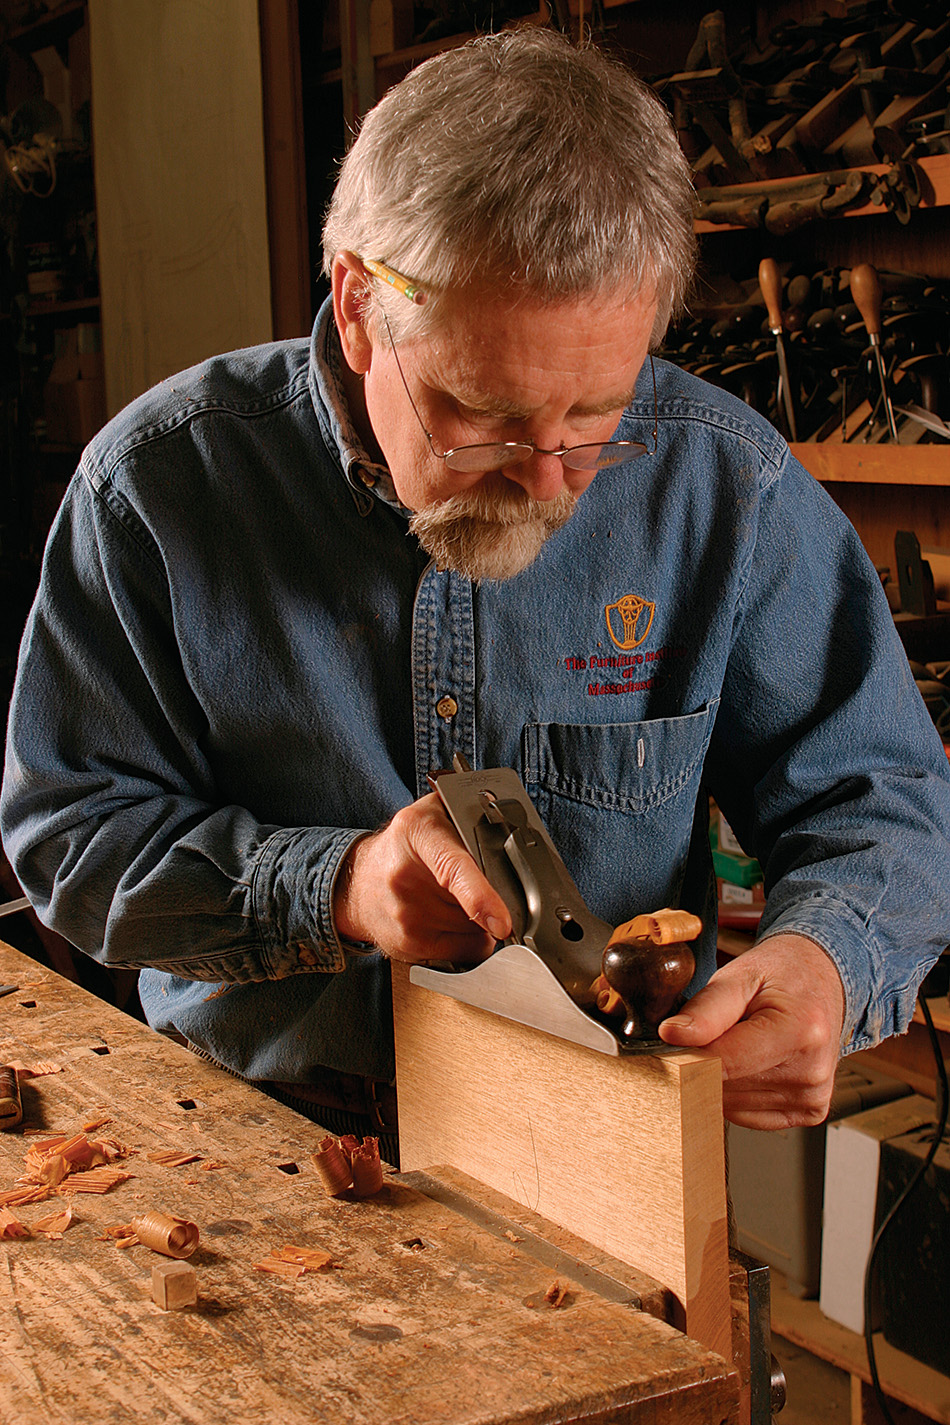
    Next, use the edge-planing techniques to plane the ends of the board so that each is square to both reference surface and edge. With the iron adjusted to make a finer cut, use deliberate strokes, working in from both edges and stopping short of the corners to avoid chipping out.

    Square an edge

    plane flat to the surface using the crown to control the angle
    Use your index finger as a fence. Keep the plane flat on the surface and use the blade’s crown to control the angle of cut.

    straightedge to check for straightness and for square
    Check for straightness and for square. Use a straightedge along the length of the edge to make sure the surface is straight from end to end.

    head of the square against reference surface
    Be sure the head of the square is registered against the reference surface that you have already planed flat.

    Square the ends

    plane the end grain
    Take care when planing end grain. Work toward the center from both edges and stop short to avoid chipping off the corner.

    edge square to the board face
    The edge should be square to the face of the board.

    check other directions for straight plane edges
    Check the other direction. The end should be straight, and square to the edge of the board.

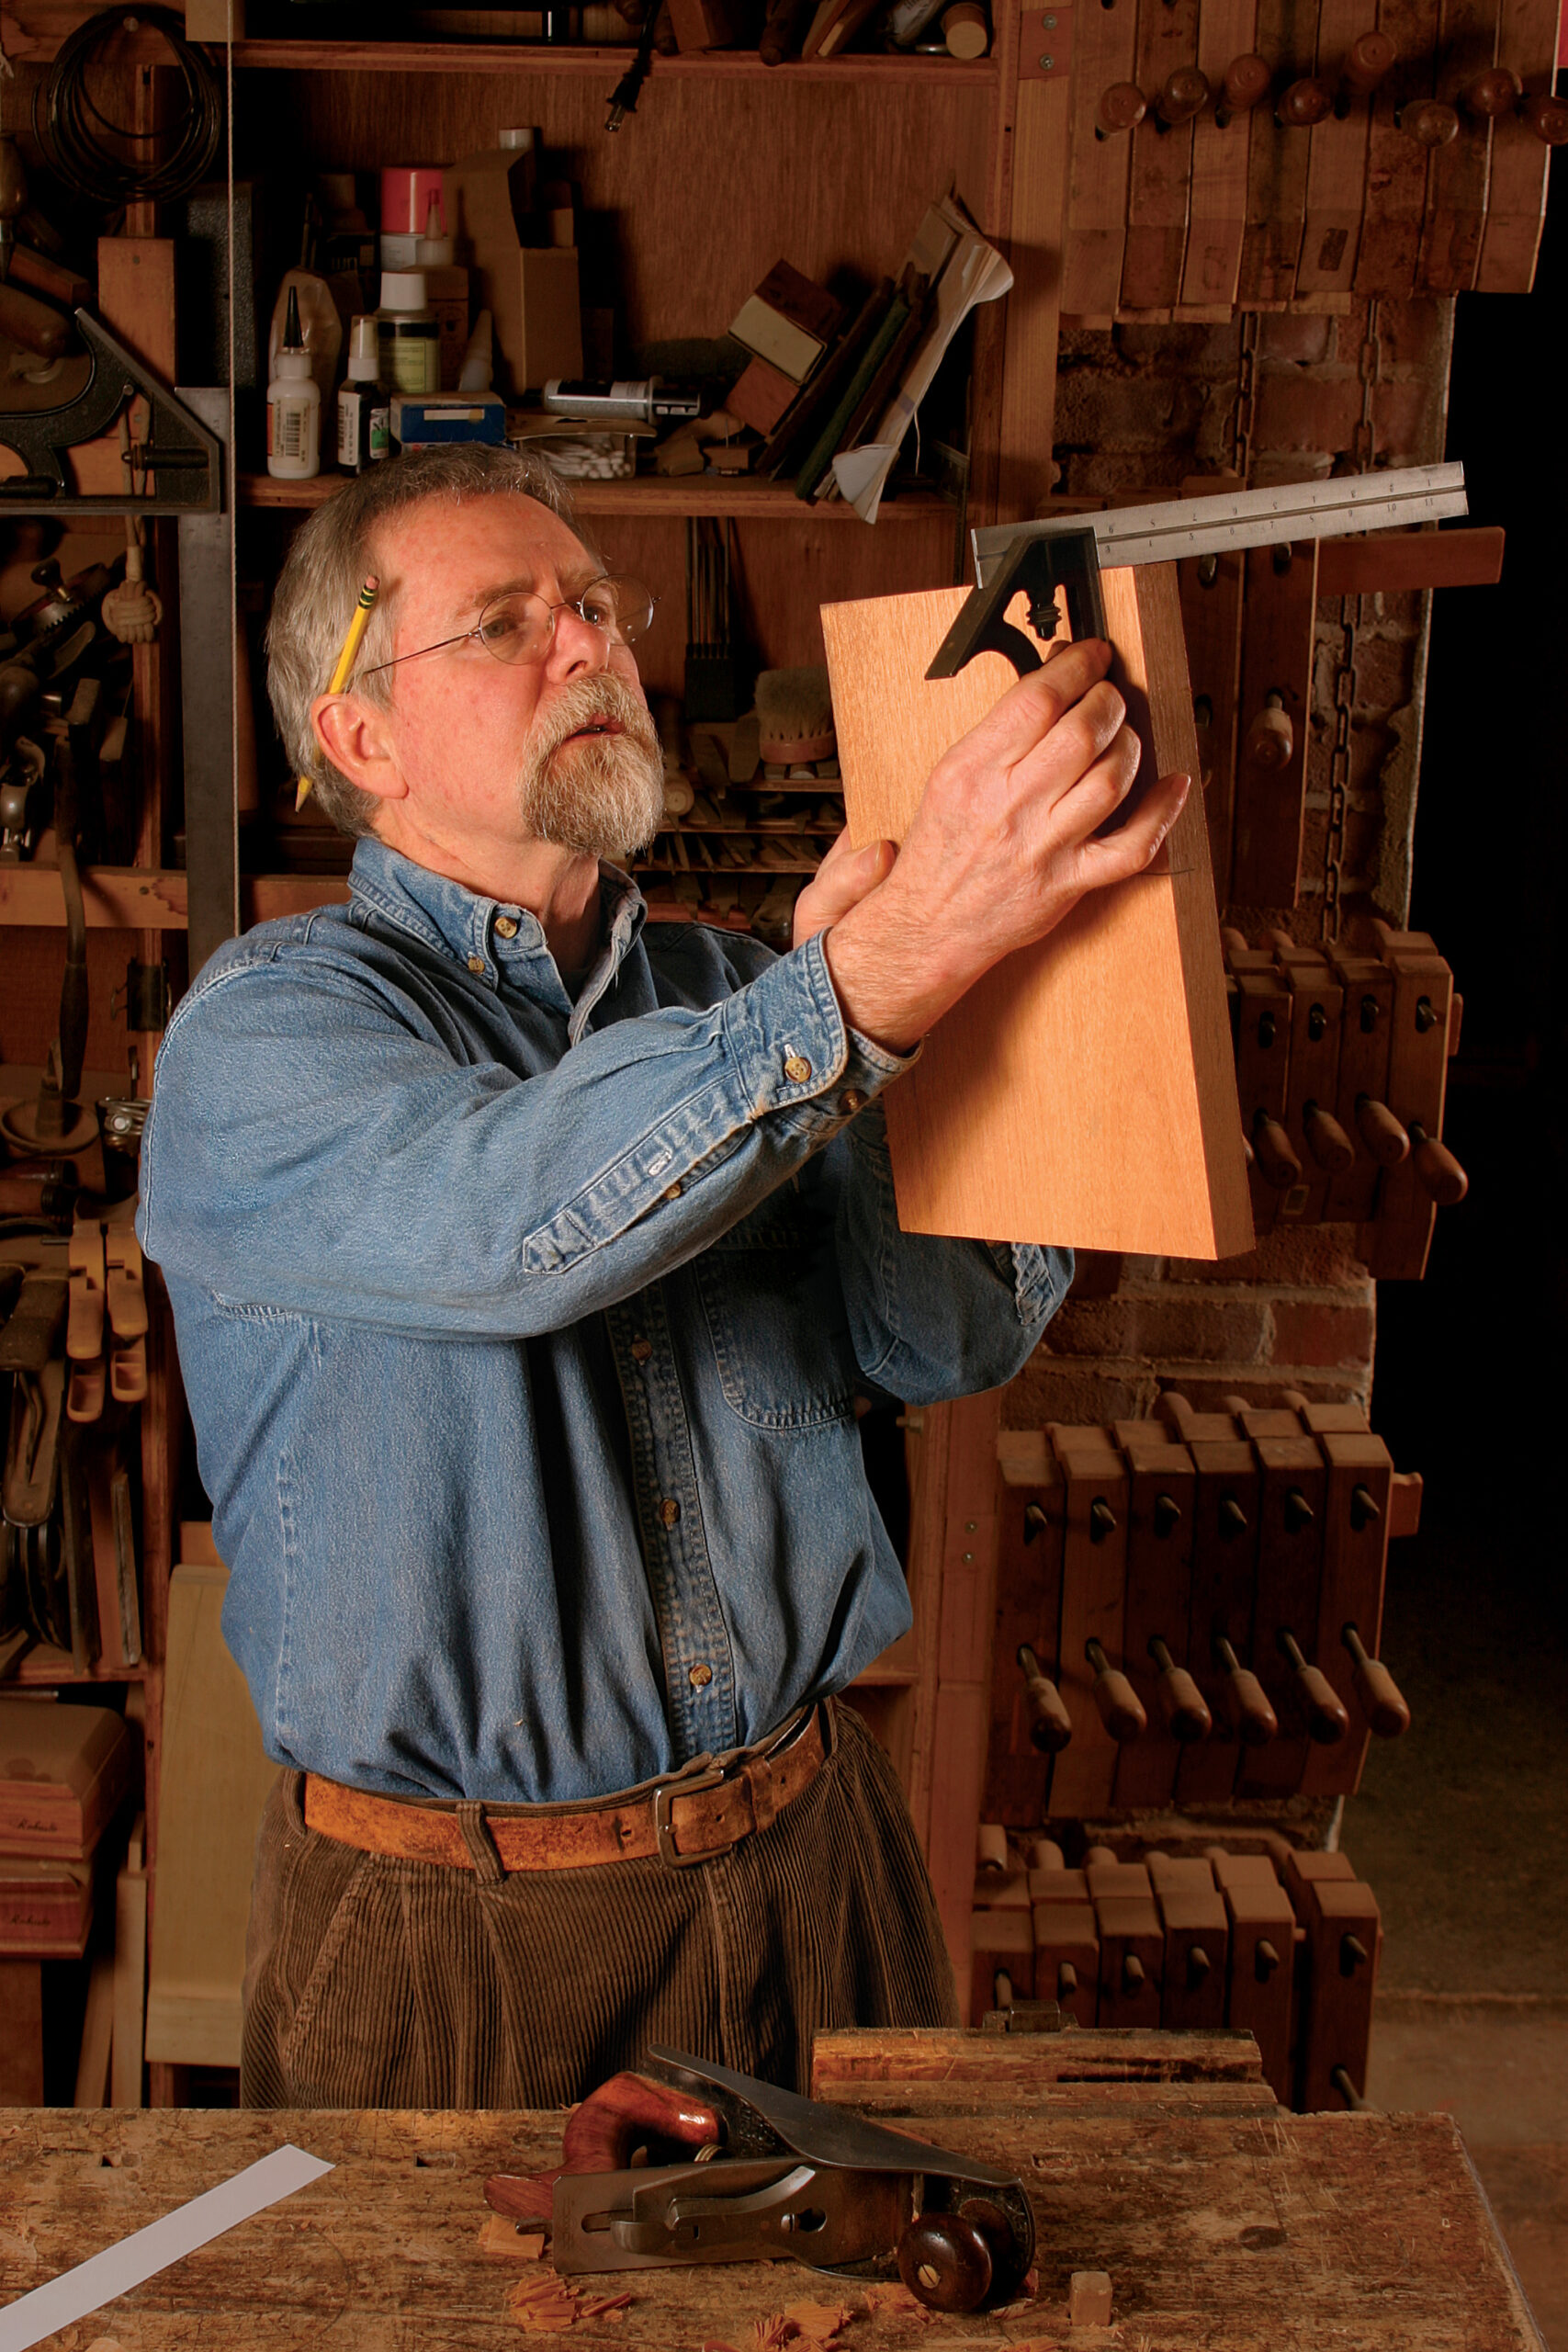
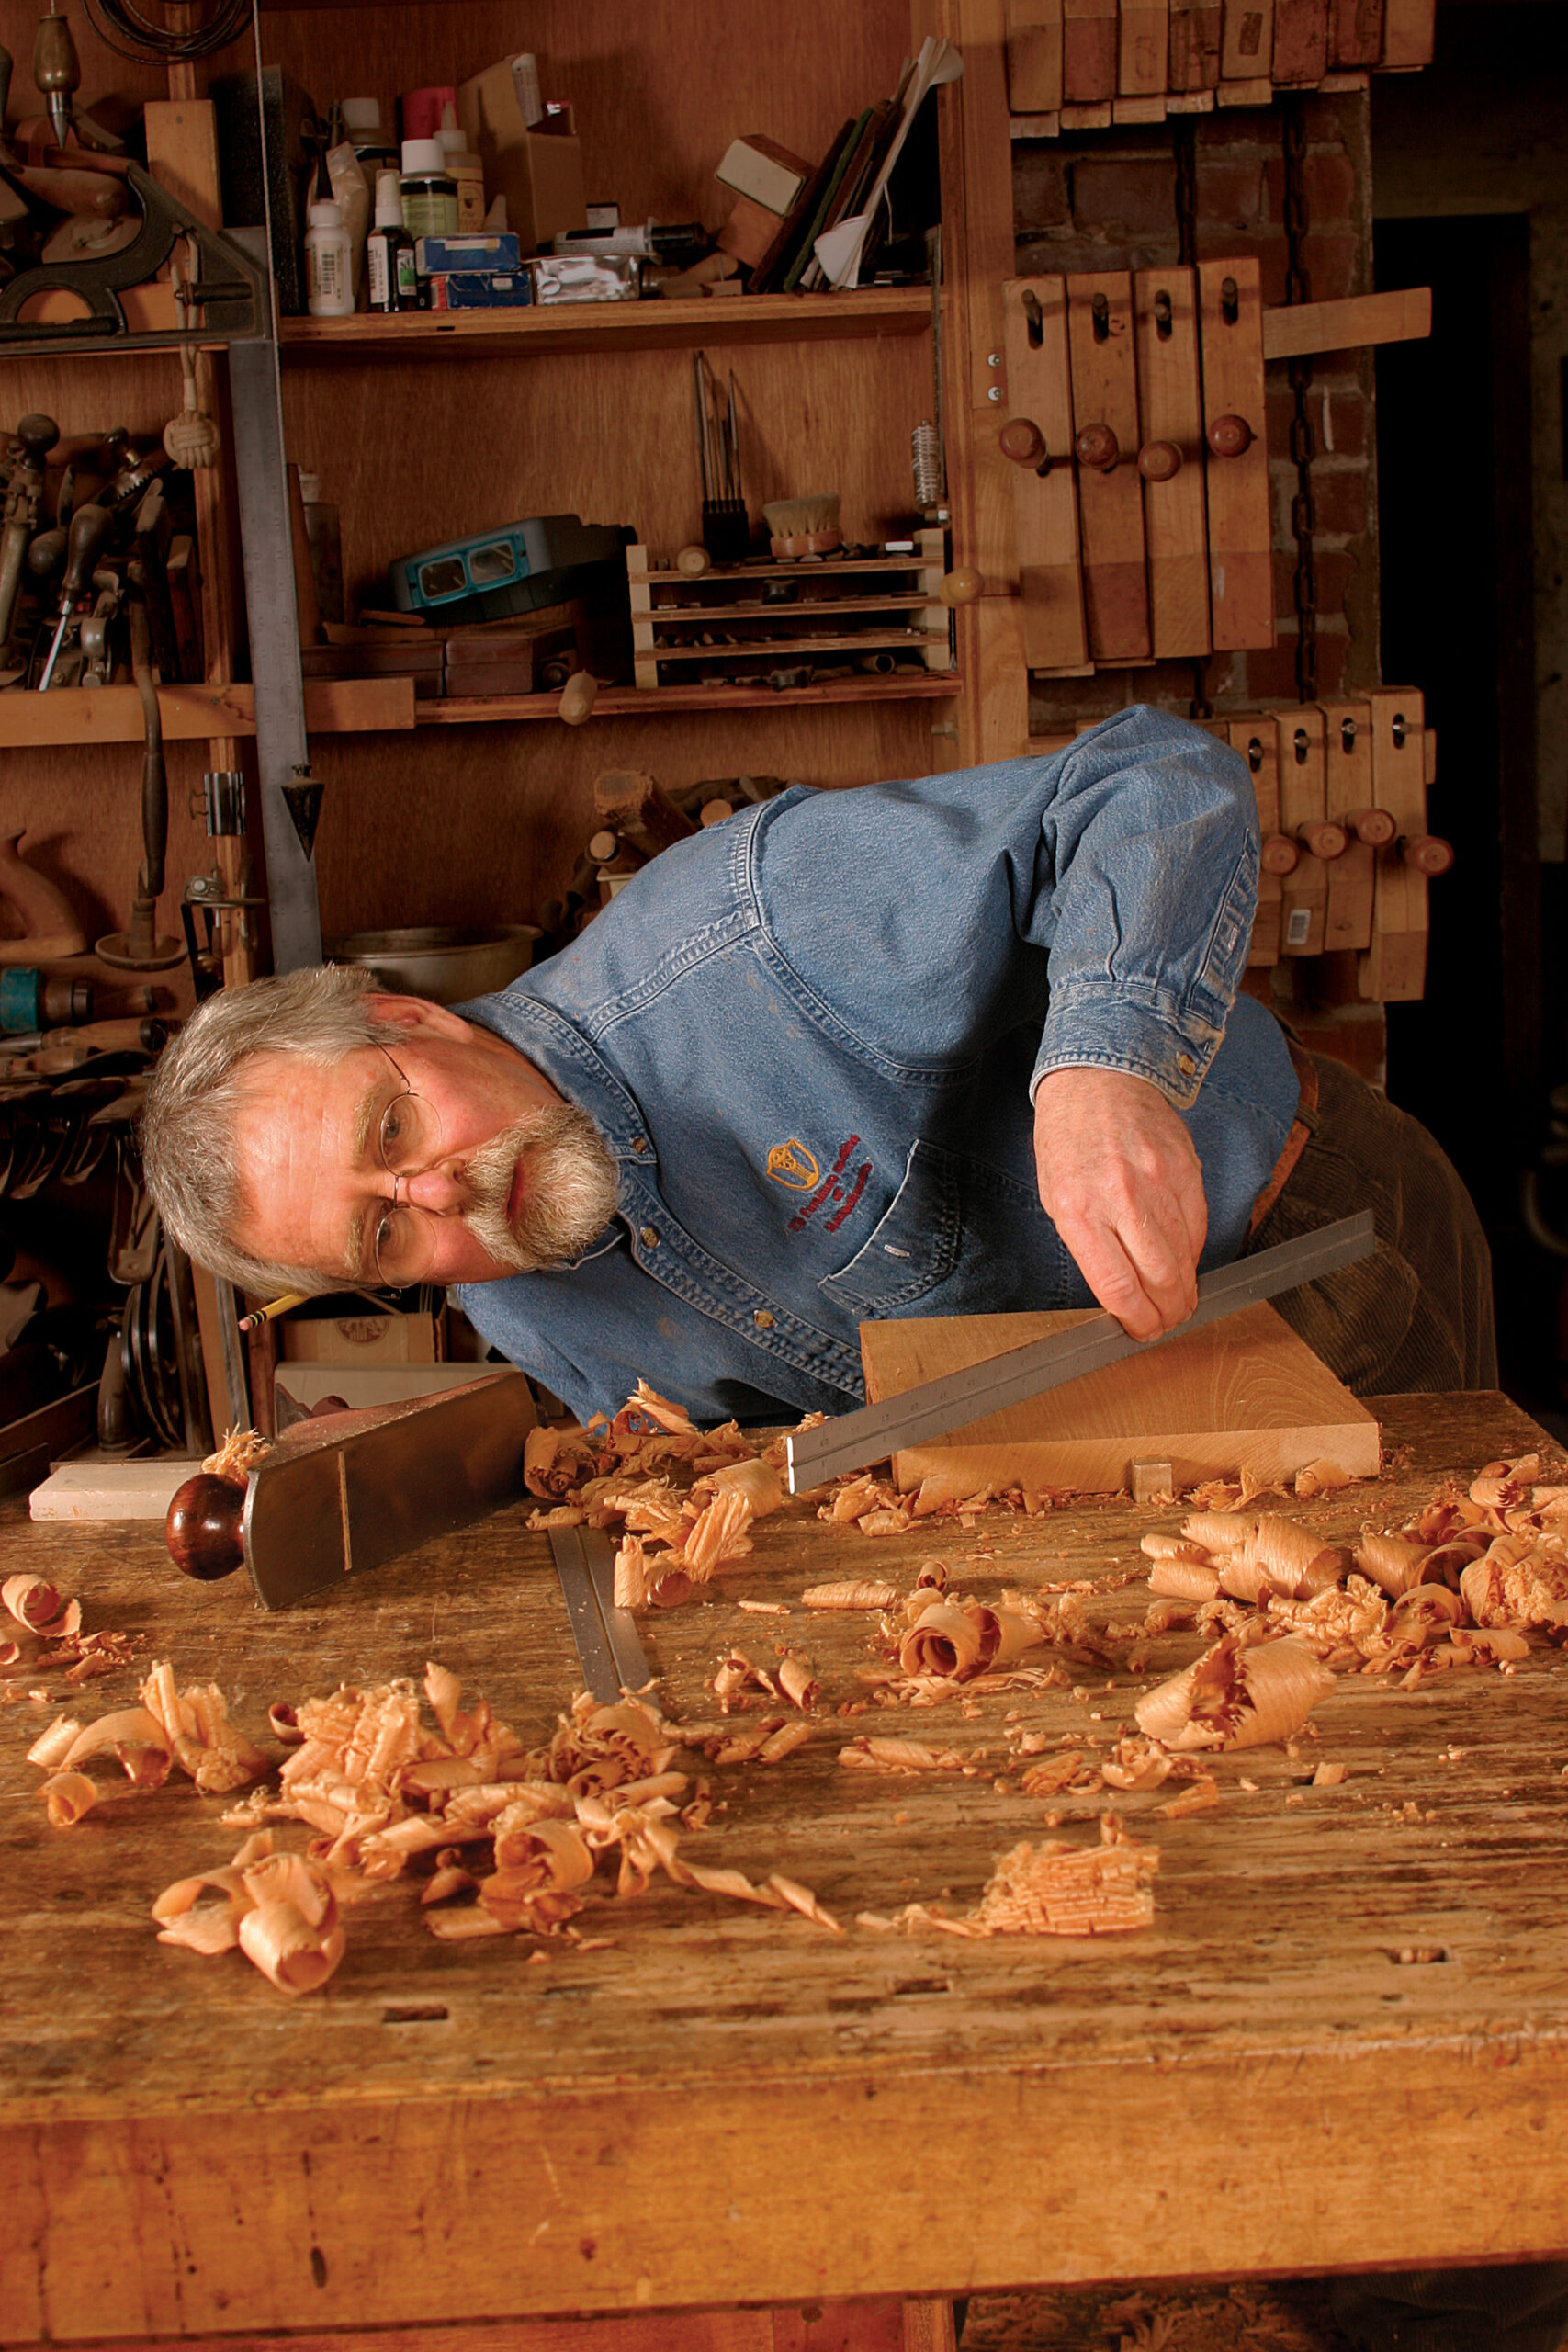
    Make the opposite edge and surface parallel

    Set the head of the square against the reference edge and use the square’s blade to scribe a reference line indicating the board’s finished width. Plane the opposite edge to this width, checking with the square against the reference face for squareness, and using the head of the square and the blade to check for parallel.

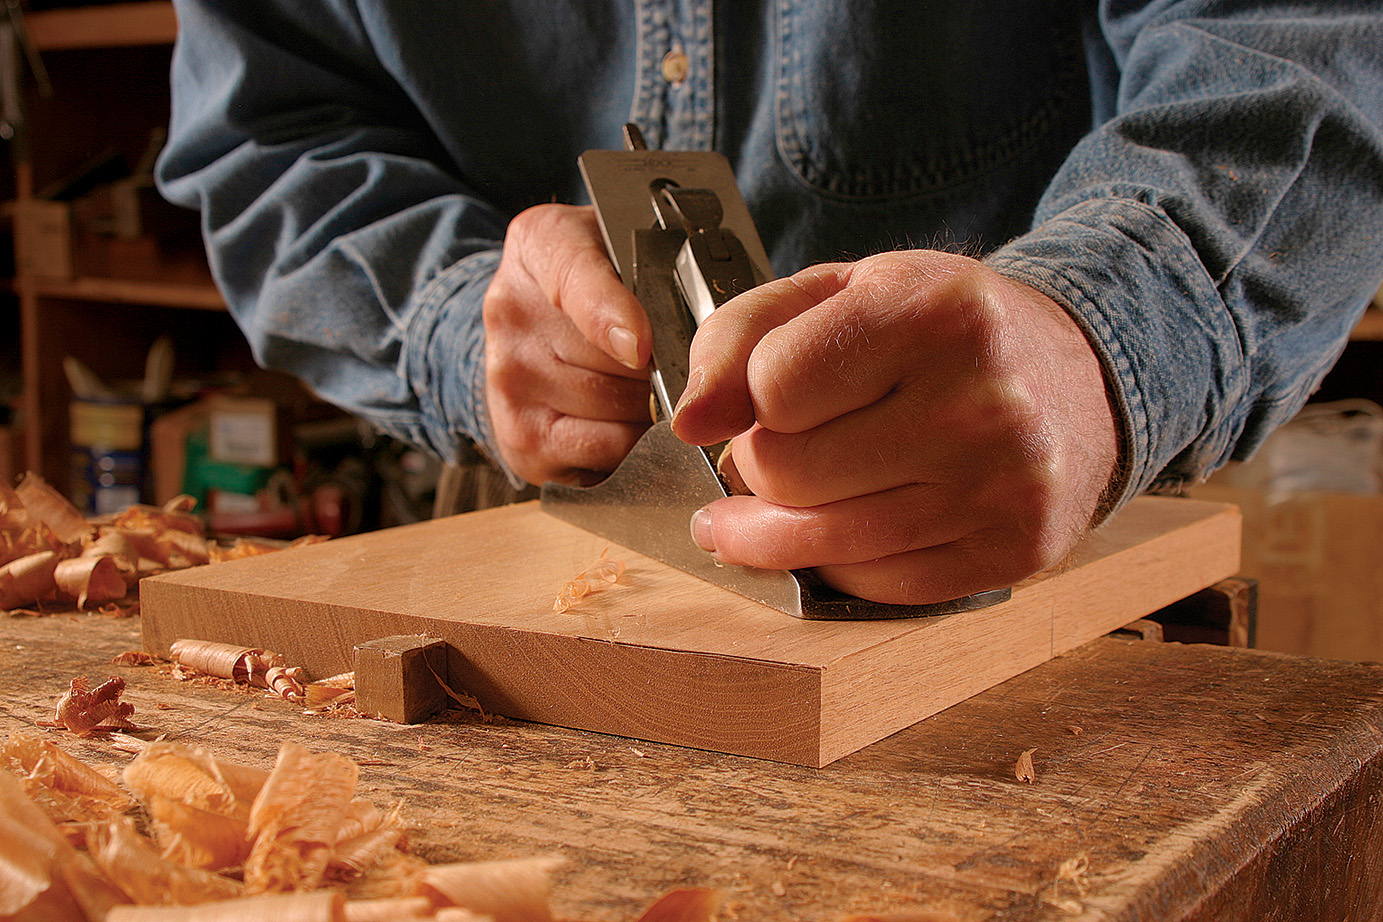
    Finally, plane the remaining surface to bring the stock to finished thickness. use a cutting gauge to scribe a line indicating the final thickness. Working off the reference face, scribe the line all the way around the piece of stock. This line will be parallel to the original reference face.

    Work to bring the high spots in line with the low point on the surface. as you approach the scribe line, you’ll begin to create a feather edge just above it that falls away as you reach final thickness. This feather edge provides good visual evidence that you are getting the surface flat and parallel. If the feathering develops evenly on all four edges, you’re on the right track.

    If you’ve reached the scribe line and still don’t have a parallel surface, strike another line and keep going. Don’t get discouraged. By the time some of my students have completed this exercise, their original 1-in.-thick workpiece is no more than 1⁄2 in. or 5⁄8 in. thick.

    Plane the opposite edge

    plane edges to be parallel
    Make the other edge parallel. Start by scribing a line with the square registered to the reference edge, then plane carefully to the scribe line, keeping the plane square.

    Flatten the opposite face

    create uniform thickness
    Create a uniform thickness. Scribe a line on ends and edges, parallel to the reference face.

    flatten face and reduce thickness
    Then flatten the face and reduce the thickness until you reach the scribed line.

    From Fine Woodworking #191

    For the full article, download the PDF below:

    Sign up for eletters today and get the latest techniques and how-to from Fine Woodworking, plus special offers.

    Sign Up

    Get woodworking tips, expert advice and special offers in your inbox

    Sign Up
    ×
    View FREE Project

    when you enter your email address below.

    Plus, get Fine Woodworking emails filled with plans, how-to, and special offers.

    or Log In

    Read our Privacy Policy
    Questions? Contact Customer Service

    View PDF
    X
    X
    Previous: One Bench Plane Can Do it All Next: Smoothing Wide Boards with a Handplane

    Guide

    Handplanes

    Chapter

    Planes for Surfacing and Smoothing

    Log in or create an account to post a comment.

    Sign up Log in

    Handplanes

    Handplanes

    All you need to know about choosing and using these versatile, must-have hand tools.

    View Project Guide

    View All Project Guides »

    Become a member and get unlimited site access, including the Handplanes Project Guide.

    Start Free Trial

    All About Handplanes
    • Handplane Basics
    • Setting Up a Plane
    • Maintenance and Restoration
    Planes for Surfacing and Smoothing
    • Smoothing and Jack Planes
    • Techniques
    • Sharpening
    Planes for Joinery and Shaping
    • Planes for Joinery
    • Rabbet Planes
    • Shoulder Planes
    • Molding Planes
    • Router Planes
    • Spokeshaves
    • Other Specialty Planes
    Block Planes
    • All About Block Planes
    • Techniques
    Scrapers and Scratch Stocks
    • Card Scrapers
    • Scraper Planes and Cabinet Scrapers
    • Scratch Stocks

    Get the latest from Fine Woodworking Magazine

    • #292-NOV/DEC 2021

      • Kerf-bent wall cabinet
      • Online extras from FWW issue #292
      • How to tame curved parts with patterns
    • #291-Sep/Oct 2021

      • Build a modern coffee table
      • Online Extras from FWW Issue #291
      • Editor's Letter: Something old, something new
    • #290-July/Aug 2021

      • Build a Shaker chest of drawers
      • Online Extras from FWW Issue #290
      • From the editor: What we make matters
    • #289-May/June 2021

      • Arts & Crafts Coffee Table with Story-Book Charm
      • Links from Fine Woodworking issue #289
      • Step-by-Step Guide to Tuning Your Block Plane
    • #288-Mar/Apr 2021

      • Phil Lowe: A craftsman and gentleman
      • Online Extras from FWW Issue #288
      • Phil Lowe: craftsman, teacher, friend

    UNLIMITED membership - Get access to it all

    Start Free Trial Upgrade Membership

    Fine WoodWorking

    Follow

    Newsletter

    Get woodworking tips, expert advice and special offers in your inbox

    Sign Up

    Membership & Magazine

    • Members
    • Digital Libraries
    • Join Unlimited
    • Magazine Subscription
    • Magazine Renewal
    • Gift a Subscription
    • Customer Support
    • Manage Preferences

    Taunton Network

    • Fine Homebuilding
    • Green Building Advisor
    • Fine Gardening
    • Threads
    • About
    • Contact
    • Advertise
    • Privacy Policy
    • Careers
    • Copyright
    • Terms of Use
    • Accessibility
    • California Privacy Rights
    • Site Map

    © 2021 The Taunton Press, Inc. All rights reserved.

    Get step-by-step instructions, woodworking tips, expert advice and special offers in your inbox. Sign Up Now!

      Main Menu

    • Projects and Plans
    • How-To
    • Shop Tips
    • Tools & Materials
    • Videos
    • Gallery
    • Magazine
    • Video Workshops
    • Members
    • Forum

      Popular Topics

    • Design
    • Small Projects
    • Beds
    • Chairs, Benches And Stools
    • Built-ins
    • Storage And Shelves
    • Cabinets
    • Carving
    • Casework
    • Desks
    • Tables
    • Shop Storage And Furniture
    • Woodturning Projects
    • Workbenches
    • Surface Prep

      More

    • TV
    • Forum
    • Blogs
    • Webinars
    • Podcasts
    • Customer Support

      Account

    • Log In
    • Join

      Magazine

    • Current Issue
    • Past Issues
    • Digital Libraries
    • Magazine Index
    • Subscribe

      Membership

    • Member Home
    • Start Free Trial
    • Gift Unlimited
    • Log In

      Shop the Store

    • Books
    • DVDs
    • Taunton Workshops

      Events

    • Fine Woodworking Live
    • Fine Woodworking HANDS ON

      Account

    • Log In
    • Sign Up

    Newsletter

    Get woodworking tips, offers, and expert advice in your inbox

    Sign Up

    Follow

    UNLIMITED

    Become an UNLIMITED member and get it all: searchable online archive of every issue, how-to videos, Complete Illustrated Guide to Woodworking digital series, print magazine, e-newsletter, and more.

    Start Your Free Trial

    Upgrade Membership