Skip to content
Fine Woodworking
Main Menu
Subscribe
GET THE MAGAZINE & MORE
Magazine Cover
  • Save 69% off the cover price
  • Or, get everything with UNLIMITED, including 40+ years of the online archive.
Subscribe Now!
Subscribe
  • Projects & Plans
  • How-To
  • Shop Tips
  • Tools & Materials
  • Videos
  • Magazine
  • Video Workshops
  • Members
  • Forum
  • Gallery
  • Blogs
  • More
    • Log In
    • Join
    Fine Woodworking Main Menu Subscribe
    Blog

    No shame in painting (or in using a roller to do it)

    It's often historically accurate to paint furniture, plus it's a great way to dress up and protect the wood.

    Author Headshot By Megan Fitzpatrick May 25, 2021
    Article Image
    Three water-based paints. On the bottom is latex; on the left is General Finishes (faux) milk paint (acrylic); on the right is actual milk paint.

    A few weeks back, I posted a picture on Instagram of my using a 4-in. roller to paint a tool chest. From some of the comments and direct messages I got, you’d think I’d knocked someone’s ice cream to the ground or kicked their dog. But I stand by my roller use. Below is what I learned from a professional painter, combined with my own experience, about painting furniture.

    Tools

    First, buy good brushes and take care of them; they’ll last for years. (I’ve used my trusty 2-in. angled Purdy for two decades on both walls and furniture.) I keep a supply of 1/4-in. and 3/16-in. nap rollers on hand in 2-in. and 4-in. sizes (and the roller frames, of course), as well as small paint trays. (I don’t like foam rollers; I find they can introduce air bubbles). And you’ll need sandpaper or a fine (or extrafine) sanding sponge; I prefer a sponge.

    Preparation

    If I’m using latex or acrylic paint, I’ll sometimes go over a build’s show surfaces to look for dings. If I can’t steam them out, I’ll fill them with Durham’s rock-hard water putty. A small scoop in a Dixie cup mixed with a little water to reach the consistency of creamy peanut butter, and it’s good to go. (You can’t beat it for price, and I’ve yet to have it shrink out.) I press it into the dent (or knot hole) with an old palette knife, let it dry for a minute or so, then use the side of the blade to remove any excess and level it. After the patch is dry, sand it smooth. With milk paint, I fill dents only if I’m going to be building up the paint for a near-opaque finish (I don’t want the filler to show).

    If there are any doors, lids, locks—anything with hardware—remove the hardware. Then tape off any edges of what will remain unpainted. Try not to be sloppy; tape is not a 100% guarantee that you’ll avoid bleed.

    As with any finish, I break all the sharp edges before applying paint, and either vacuum or wipe off the sawdust. (I’m assuming the panels are already finish planed or finish sanded. If I didn’t plane, I sand to 180 grit when painting.)

    I don’t typically use a primer unless I’ve filled lots of knot holes or dings on the show surfaces. It doesn’t hurt to use one, of course, but I find it easier in most cases to simply count on an additional paint coat; that way there are fewer brushes to clean. If I’m painting a particularly resinous wood, however, I’ll spray or brush on a thin coat of shellac to seal it before painting.

    And finally, if you’re using milk paint, prep a test board of the same species as your project, and finish-sand or plane it just as if it were part of your build. After all your coats are dry you’ll likely want to either burnish the paint or add a topcoat—but you don’t want to do anything without testing it first.

    furniture pieces with masking tape for painting
    It can take some time to tape off all edges contiguous to the surfaces to be painted, but taping takes less time than a) being careful to not spill over and/or b) cleaning up oopsies afterward.

    Kinds of paint

    I use three kinds of paint on furniture (well, four … but the fourth is linseed oil paint, and I use it but rarely).

    1. Latex, if I’m in a hurry or it’s Sunday. (My local hardware store, open on Sundays, carries Benjamin Moore. If I want anything other than latex, I have to plan ahead.)

    2. General Finishes (faux) milk paint. I like this paint; it goes on pretty much like latex but has less sheen than even the flattest latex. And unlike latex, it allows a hint of the wood grain to show through (with one or two coats). It’s a 42-mile round trip for me to pick this up, so I usually order it online and await delivery.

    3. Actual milk paint. This is my favorite paint finish for furniture (and especially tool chests). After it’s completely dry, it’s incredibly hard-wearing, and I like its dead-flat, almost chalky look (but it also looks nice with an oil or other topcoat, which darkens the dried paint and gives it a nice glow). But my favorite milk paint isn’t available at any retail locations in my town (the nearest brick-and-mortar retail seller is 100 miles away), so I have to plan ahead and order it. And unlike latex or the faux milk paint, it has to be mixed, and has a short shelf life once water has been added. Plus it typically takes more coats, and is a bit harder to apply than the other two. So for commission work, there’s an upcharge. (If you want to learn to apply this finish from a milk paint pro, I recommend Peter Galbert’s videos.)

    Application

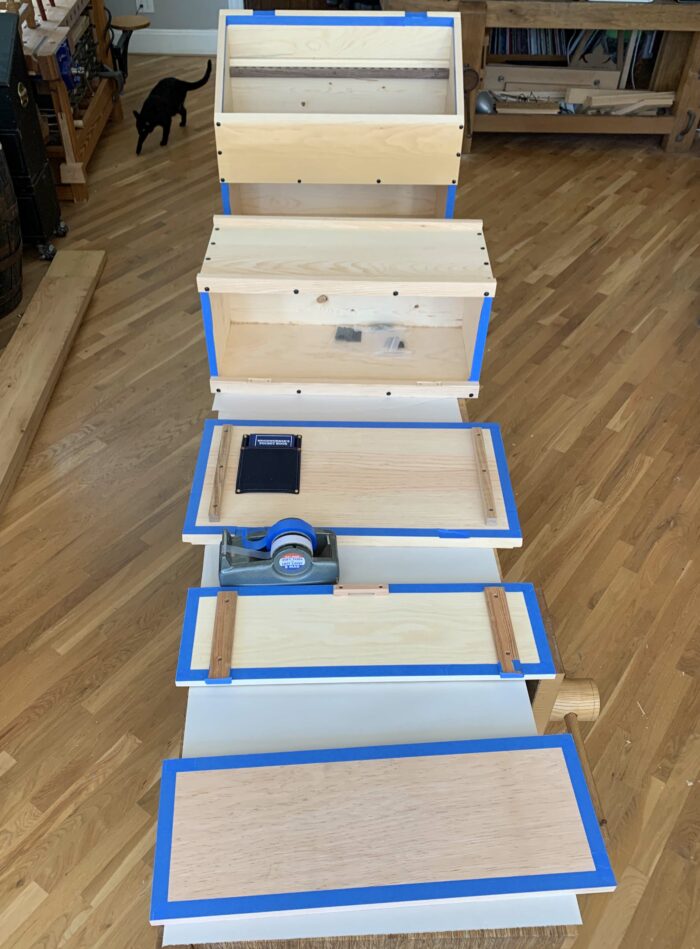
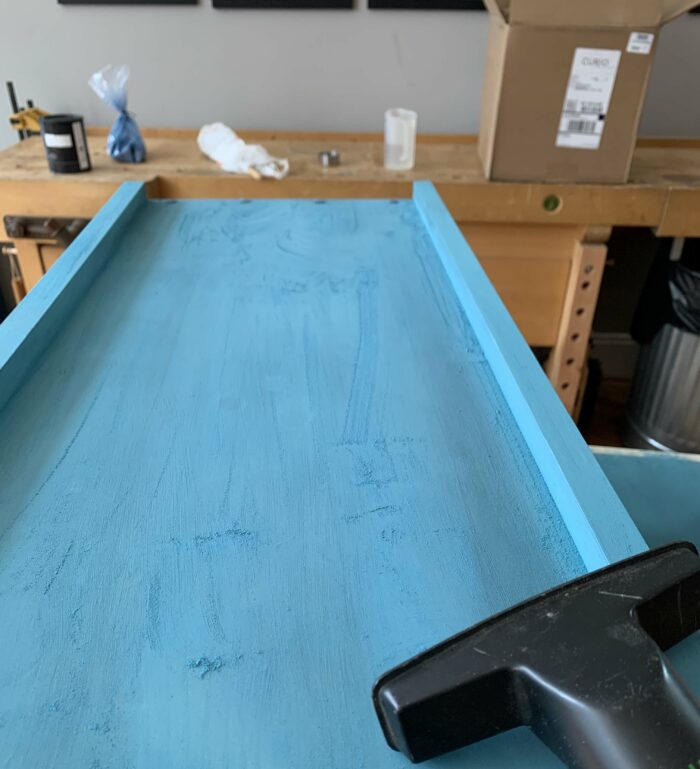
    First, break the project into sections in your head. For example on a Dutch tool chest, I paint panel by panel, doing any cutting-in and painting edges with a brush. If I’m using latex or acrylic paint, I then use a roller to apply it to any large, flat surfaces. With milk paint, however, I always use a brush in the direction of the grain. It dries quickly, and I like seeing the brush marks in milk paint (like jack plane scallops on the underside of a tabletop or slight variations in dovetails, those brush marks say “handmade” t0 me).  Latex and acrylic have a long enough drying time that they lay out flat, brush or no—so I might as well use a roller; it’s faster. I do one panel at a time so that I can always keep a wet edge; that helps to avoid lap marks in the dried paint.

    applying acrylic paint with roller
    Here, I’m applying faux milk paint (acrylic) with a roller. You can see a few bubbles right after rolling, but they’ll lay out flat before this paint dries. And yes, I roll right over the nails. The heads will show through the paint, which will eventually wear off them.

    And I always keep my brush in my left hand while using the roller with my right. That way, if the roller leaves a glop of paint on an adjacent edge (or a drip), I can quickly brush it away. I try to catch any such errors while the paint is wet; it’s a lot easier than sanding them away later.

    Speaking of sanding, after the first coat dries thoroughly, you’ll almost certainly have to sand—particularly with water-based paints—whether or not you have unsightly drips or edges. I don’t bother raising the grain and sanding back before painting. The few times I’ve done so, I still had to sand after the first coat, so why bother? I use a superfine sanding sponge and go over every surface just enough to smooth it without cutting through the paint. And if I’m sanding milk paint, I wear gloves and usually a mask. It powders up more than latex or acrylic (or at least my coats do; I mix it fairly thick), and the dust turns my hands and mucus to whatever color I’ve painted (rainbow snot!). I always use a vacuum on the milk-paint dust.

    milk paint sanding dust
    Milk paint produces more sanding dust in my experience than latex or acrylic paint. Keep a vacuum handy to suck it up.

    Now repeat. And you might even have to do a third coat to get the coverage you want. Or you can layer colors then distress high-wear areas for instant age (or just wait a year or three for the undercoat to start showing in places). You likely won’t have to sand the second coat of latex or acrylic, but do sand the milk paint between coats (I use a fine sanding sponge).

    Once latex paint is dry, you’re done. I don’t put topcoats on the acrylic, either, so once it’s dry, I’m done. General Finishes does sell a topcoat that the company says will make the paint wear harder and change the sheen (if I wanted shiny, I’d probably have used a semi-gloss or gloss latex in the first place). But for milk paint, I recommend burnishing the surface with 1,200-grit sandpaper or a folded brown paper bag. This will knock off any bumpy mineral deposits and keep them from coming off later on your hands or clothes. You can also apply a topcoat of oil, wax, oil and wax, varnish and oil, and burnish that to give the surface a warm glow and make it look and feel less chalky. (I like the chalky look.)

    As I’ve written before, I don’t understand why paint sometimes gets a bad rap these days. Not only is it an historically accurate treatment in some cases, it’s a great way to dress up and protect wood – particularly on items that see a lot of wear, such as tool chests.  I also like it for brightening up the interior backs of cabinets (and covering up the secondary wood I typically use there).


    A Stunning Milk-Paint Finish

    Elia Bizzarri shows how to layer black milk paint over red to create a rich, layered look on his Windsor chairs.

    Traditional Crackle Finish

    A crackled milk paint finish can add bold color and texture to any piece.

    Three Steps to a Flawless Painted Finish

    Pro finisher Paul Snyder explains how to prepare, prime, and apply paint.

    Sign up for eletters today and get the latest techniques and how-to from Fine Woodworking, plus special offers.

    Sign Up

    Get woodworking tips, expert advice and special offers in your inbox

    Sign Up
    ×
    X
    X

    New Feature

    Fine Woodworking Forums

    Ask questions, offer advice, and share your work

    Get It All!

    UNLIMITED Membership is like taking a master class in woodworking for less than $10 a month.

    Start Your Free Trial

    Subscribe to Fine Woodworking

    Save up to 69%

    Subscribe

    Comments

    1. John_C2 | May 25, 2021 05:58pm | #1

      I saw the blog title, and knew it had to be you.

    2. notewell | May 26, 2021 06:26pm | #2

      I'm a big fan of milk paint. A bit of a learning curve and a bit more work if you've only ever used latex, but the finish is totally worth it.

    Log in or create an account to post a comment.

    Sign up Log in

    Up Next

    Featured Workshop

    a diagram of a round Shaker stand and an image or a round Shaker stand

    Shaker candle stand with Christian Beckvoort

    He’s built dozens of round Shaker stands over four decades, so there is no one more qualified than Christian Becksvoort to demonstrate making this classic. In this seven-part video series,…

    Featured Projects & Plans

    Build a Contemporary Sideboard

    Chris Gochnour's sideboard combines usefulness, strength, and beauty in a contemporary case piece

    Related Stories

    • How I choose the finish for a job

    • How to Create a Charred Wood Furniture Finish

    • Video: Creating a charred and painted finish

    • How to rub out a varnish to a mirror shine

    Discussion Forum

    Recent Posts and Replies

    • |
    • |
    • |
    • |
    • |
    • |
    View More Create Post

    Member Exclusives

    More Member Exclusives
    • shou sugi ban

      How to Create a Charred Wood Furniture Finish

      Christopher Miano shares an ancient Japanese technique that preserves wood by charring the surface.

    • Video: Creating a charred and painted finish

      Mark's applies an unusual finish to his wall shelves; first scorching the surface with a torch and then painting to create a one of a kind surface.

    • wiping varnish finish

      How to brush on a varnish finish

      A wiping varnish goes on easily and creates a tough surface ready for rubbing out.

    • Walnut Display Box

      Make a Walnut Display Box, Part 2

      In the second part of this mitered-box project, you'll learn how to assemble the box, set the hardware and glass, and apply the finish.

    Highlights

    • Shape Your Skills

      when you sign up for our emails

      Plus tips, advice, and special offers from Fine Woodworking.

      Sign Up
    • Shop Talk Live Podcast

      Shop Talk Live Podcast

      Our biweekly podcast allows editors, authors, and special guests to answer your woodworking questions and connect with the online woodworking community.

    • Woodpecker Sweepstakes

      Woodpeckers Shop Upgrade Giveaway

      Enter now for your chance to win more than $2,000 worth of woodworking equipment from Woodpeckers. Click for full details.

    • Staff Picks Blog

      Our favorite articles and videos

      We have created these special content collections organized to give you a deep dive into a range of topics that matter.

    Finishing

    View All
    • How I choose the finish for a job

    • varnish with mirror shine

      How to rub out a varnish to a mirror shine

    • Shaker dresser finishing touches

    • Add Richness to Mahogany

    View All

    From the Store

    View More
    • Complete Illustrated Guide to Woodworking USB

      Buy Now
    • The Why & How of Woodworking

      Buy Now
    • Foundations of Woodworking

      Buy Now
    • Tool Guide 2022

      Buy Now
    View More

    Get the latest from Fine Woodworking Magazine

    • #292-NOV/DEC 2021

      • Kerf-bent wall cabinet
      • Online extras from FWW issue #292
      • How to tame curved parts with patterns
    • #291-Sep/Oct 2021

      • Build a modern coffee table
      • Online Extras from FWW Issue #291
      • Editor's Letter: Something old, something new
    • #290-July/Aug 2021

      • Build a Shaker chest of drawers
      • Online Extras from FWW Issue #290
      • From the editor: What we make matters
    • #289-May/June 2021

      • Arts & Crafts Coffee Table with Story-Book Charm
      • Links from Fine Woodworking issue #289
      • Step-by-Step Guide to Tuning Your Block Plane
    • #288-Mar/Apr 2021

      • Phil Lowe: A craftsman and gentleman
      • Online Extras from FWW Issue #288
      • Phil Lowe: craftsman, teacher, friend

    UNLIMITED membership - Get access to it all

    Start Free Trial Upgrade Membership

    Fine WoodWorking

    Follow

    Newsletter

    Get woodworking tips, expert advice and special offers in your inbox

    Sign Up

    Membership & Magazine

    • Members
    • Digital Libraries
    • Join Unlimited
    • Magazine Subscription
    • Magazine Renewal
    • Gift a Subscription
    • Customer Support
    • Manage Preferences

    Taunton Network

    • Fine Homebuilding
    • Green Building Advisor
    • Fine Gardening
    • Threads
    • About
    • Contact
    • Advertise
    • Privacy Policy
    • Careers
    • Copyright
    • Terms of Use
    • Accessibility
    • California Privacy Rights
    • Site Map

    © 2021 The Taunton Press, Inc. All rights reserved.

    Get step-by-step instructions, woodworking tips, expert advice and special offers in your inbox. Sign Up Now!

      Main Menu

    • Projects and Plans
    • How-To
    • Shop Tips
    • Tools & Materials
    • Videos
    • Gallery
    • Magazine
    • Video Workshops
    • Members
    • Forum

      Popular Topics

    • Design
    • Small Projects
    • Beds
    • Chairs, Benches And Stools
    • Built-ins
    • Storage And Shelves
    • Cabinets
    • Carving
    • Casework
    • Desks
    • Tables
    • Shop Storage And Furniture
    • Woodturning Projects
    • Workbenches
    • Surface Prep

      More

    • TV
    • Forum
    • Blogs
    • Webinars
    • Podcasts
    • Customer Support

      Account

    • Log In
    • Join

      Magazine

    • Current Issue
    • Past Issues
    • Digital Libraries
    • Magazine Index
    • Subscribe

      Membership

    • Member Home
    • Start Free Trial
    • Gift Unlimited
    • Log In

      Shop the Store

    • Books
    • DVDs
    • Taunton Workshops

      Events

    • Fine Woodworking Live
    • Fine Woodworking HANDS ON

      Account

    • Log In
    • Sign Up

    Newsletter

    Get woodworking tips, offers, and expert advice in your inbox

    Sign Up

    Follow

    UNLIMITED

    Become an UNLIMITED member and get it all: searchable online archive of every issue, how-to videos, Complete Illustrated Guide to Woodworking digital series, print magazine, e-newsletter, and more.

    Start Your Free Trial

    Upgrade Membership