How I choose the finish for a job
Appearance is just the first of many factors Nancy Hiller considers.

In the past few weeks I’ve had two finishing questions come up – one addressed to me, the other a general question on Facebook.
“How do you handle finishing?” began the former. “I’ve read you use pre-fin[ished maple or birch plywood] for the carcasses but I’m trying to figure out how much I want to invest in a finishing set-up.”
Any adequate answer to such a general question as “How do you handle finishing?” really warrants a book; if you are looking for guidance in French polishing, this is not the article for you. Nor does this post address instructions for applying the finishes I’m going to discuss; my intention is to help readers think about which finish may be best for them in particular situations. Because many of us include built-in cabinetry for living rooms, bathrooms, and kitchens in our repertoire, I’m going to address those as well.
When choosing the finish for a particular job, I take the following into account:
- Appearance
- Performance
- Shop or job-site conditions
- Application and drying time
- Cost
1 Appearance of a furniture finish
Any discussion of custom or commissioned work is likely to involve finish, because the finish of a piece is so important to how the piece looks.
How do your clients want the piece to look? There’s a world of clear finishes, as well as paints, but since we’re just talking about appearance for now, let’s focus on that.
Paint
Most painted finishes are opaque and can be brushed or sprayed. Although I sprayed lacquers at other shops where I worked in the past, I don’t spray in my own shop. My insurance company would require me to install an explosion-proof lighting system and exhaust fan to spray finishes – period — doesn’t matter whether I tell them I’m using an HVLP system, only using water-based finishes, whatever; they know that if you’re spraying, you may decide to spray something flammable. So when my jobs require a sprayed finish (in paint or lacquer), I subcontract them out to a spray shop that has the appropriate equipment.
For most painted kitchens, circumstances permitting, I install carcases bare. That way I can hand-plane out any dings or unevenness in adjacent cabinet parts after installation and not have to replicate my labor. After easing edges and masking off face frames from prefinished interiors as necessary, I remove dust with a brush attachment on a shop vacuum, then tack the surfaces off with a lint-free rag moistened with mineral spirits, and apply primer with a roller made for the type of paint I am applying. I brush out the roller marks with a high-quality brush (again, made for the type of paint I’m applying, whether latex, acrylic, or oil-based). I scuff-sand the primed surfaces when dry, then remove dust again and proceed to apply the topcoats with a brush.
“What about brush marks?” some will ask. You can minimize brush marks in various ways – this post does not allow for a full exposition of any particular method – but in general, my response to this question is: “My clients want a handmade kitchen, so why would I consider brush strokes, which are signs of handwork, inappropriate?” Plenty of contractors still equate “professional” work with work that looks factory-made, untouched by the human hand. I find most of my clients open to having their perspective on this challenged; most of them have simply never even questioned why they equate the “perfection” of mass-produced work with professional quality.
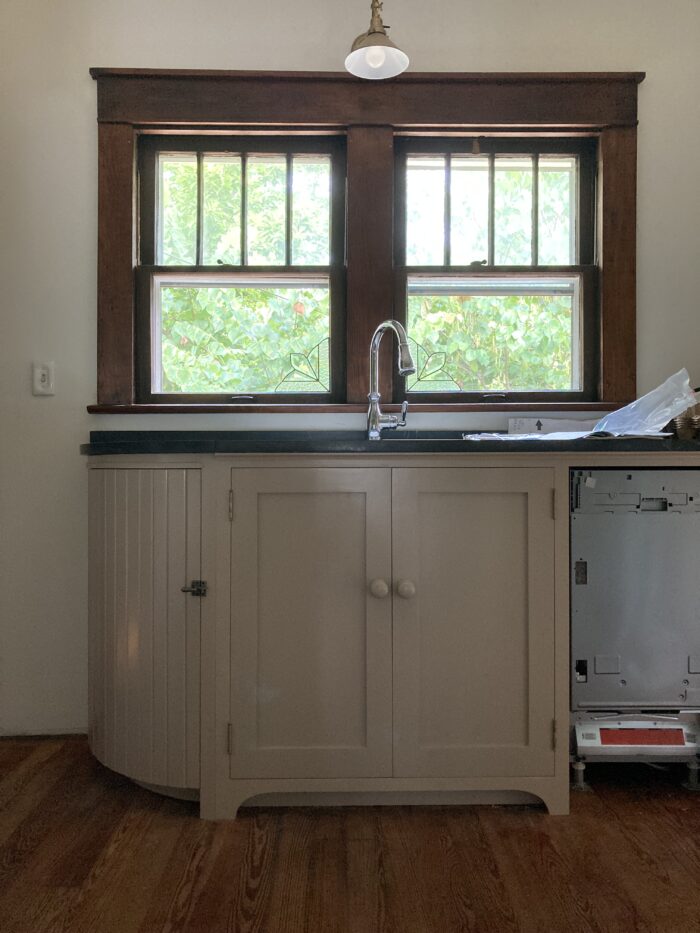
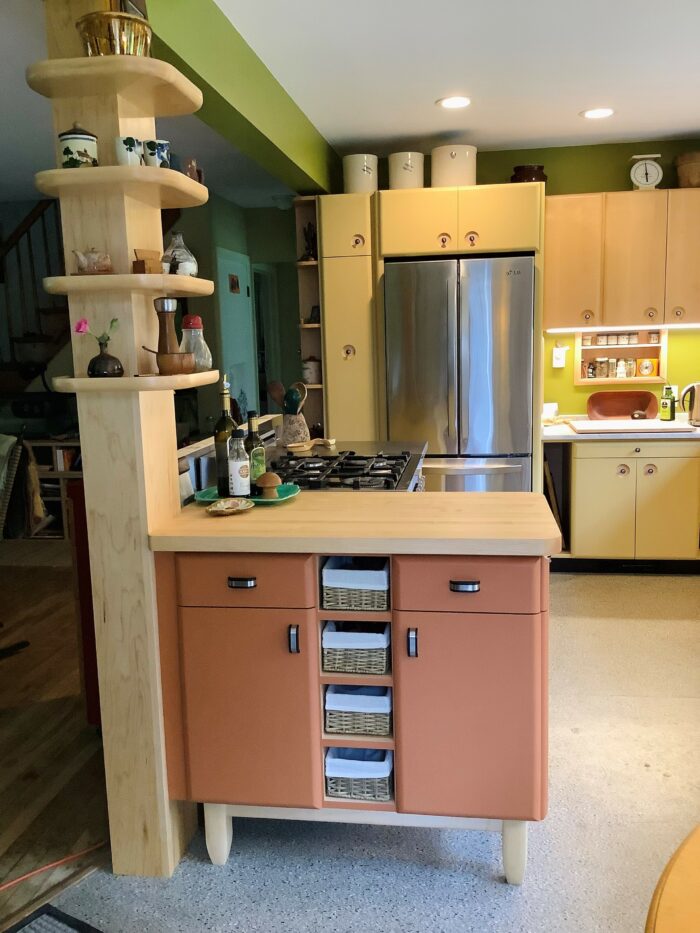
Milk paint
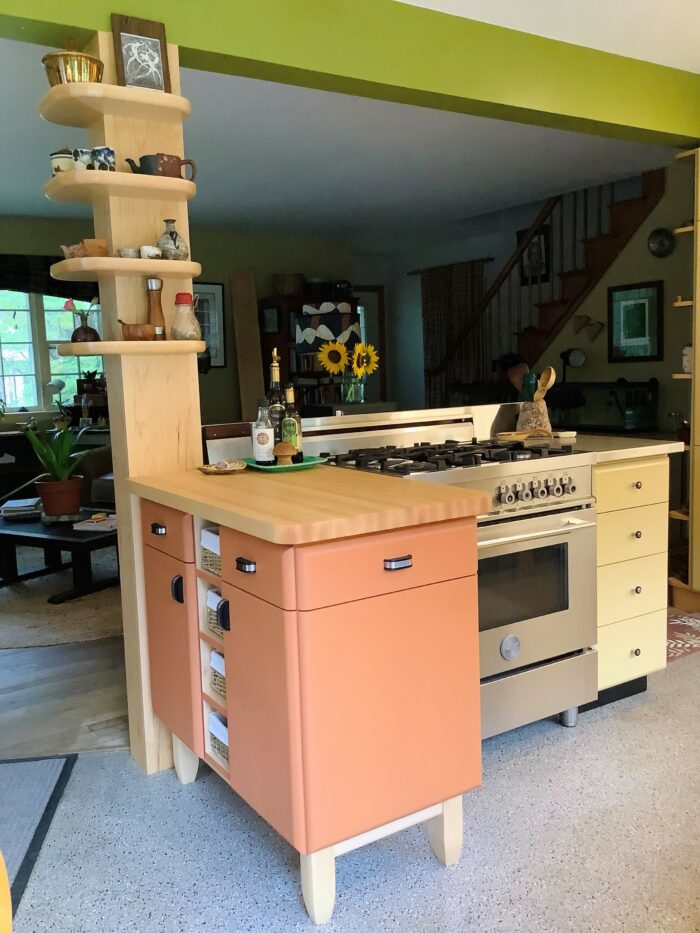
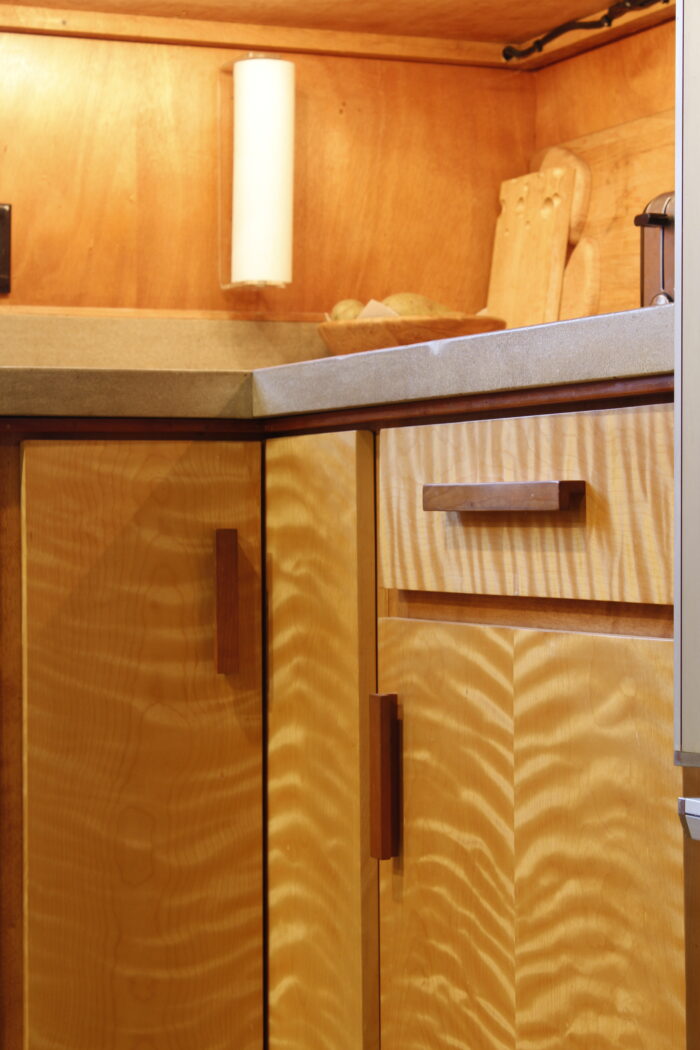
Milk paint offers a variety of other options when it comes to appearance. I have covered some of these, including considerations for protective topcoats, here. While many may be tempted to dismiss milk paint as an option for kitchen or bathroom cabinetry, Lynette Breton’s kitchen cabinets are a good example of the gorgeous possibilities you can achieve with this finish and protective topcoats.
Clear finishes
Clear finishes can be applied over stain, dye, or both, or on bare wood without added color. Without getting into questions of performance, which will be our next stop, here are some of the considerations I take into account:
- Does the client want a matte, hand-rubbed, or even unfinished look, or would they* prefer a film finish?
- Does the client want a warm look that will amber even more over time, or would they prefer something cool?
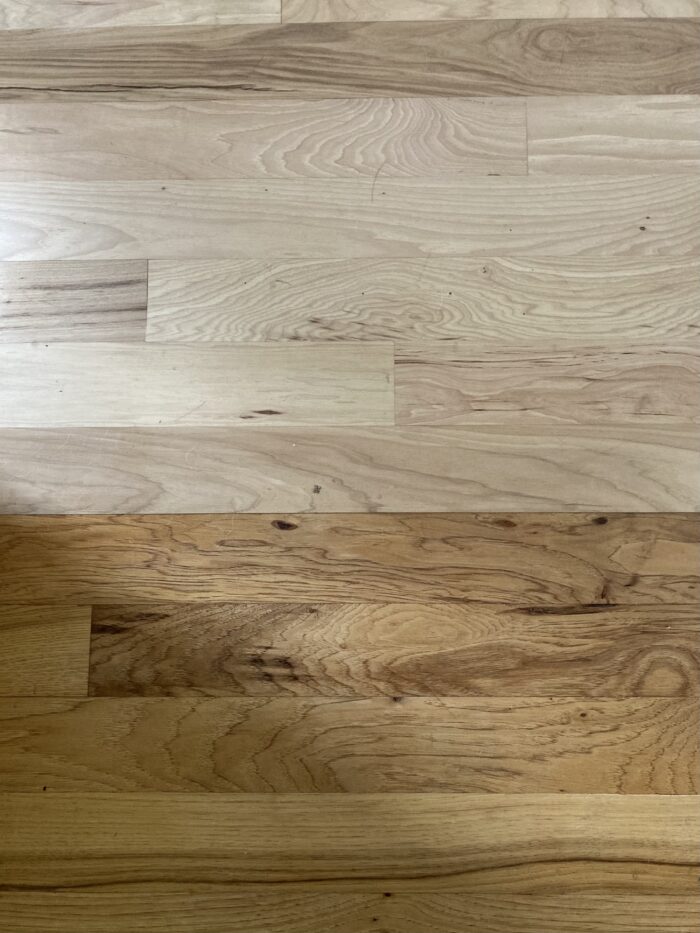
Generally speaking, water-based finishes will be cool, while those that are solvent-based will be warmer. That said, I have not found a water-based polyurethane or other seriously durable topcoat I can recommend, despite trials with many products since the late 1980s; if I had to try one at this point, it might be the Bona waterborne floor finish that our friend John Hewett used for our kitchen floor.
Recently, a number of wax-oil finishes have been developed that protect wood while maintaining a cooler tone. The main range of products with which I’m familiar is from Osmo, which has a wipe-on, buff-off furniture finish containing a small proportion of white particles that works well with pale species such as ash and maple. But given the last decade’s love affair with all things gray (and the corresponding rejection of most things warm or “amber” on the grounds that they look dated), the floor finishing industry has come up with a variety of finishes that are highly protective yet minimally noticeable in terms of sheen and film.
Some finishes can be layered to control the amount of warmth or affect the appearance in other ways. For example, it was pretty common in the early ’90s to apply a boiled linseed oil and oil-based polyurethane mix for a warm-toned finish, allow the piece to darken with exposure to UV light for a few days, then apply compatible protective topcoats such as oil-based polyurethane. The finished wood will continue to darken over time.
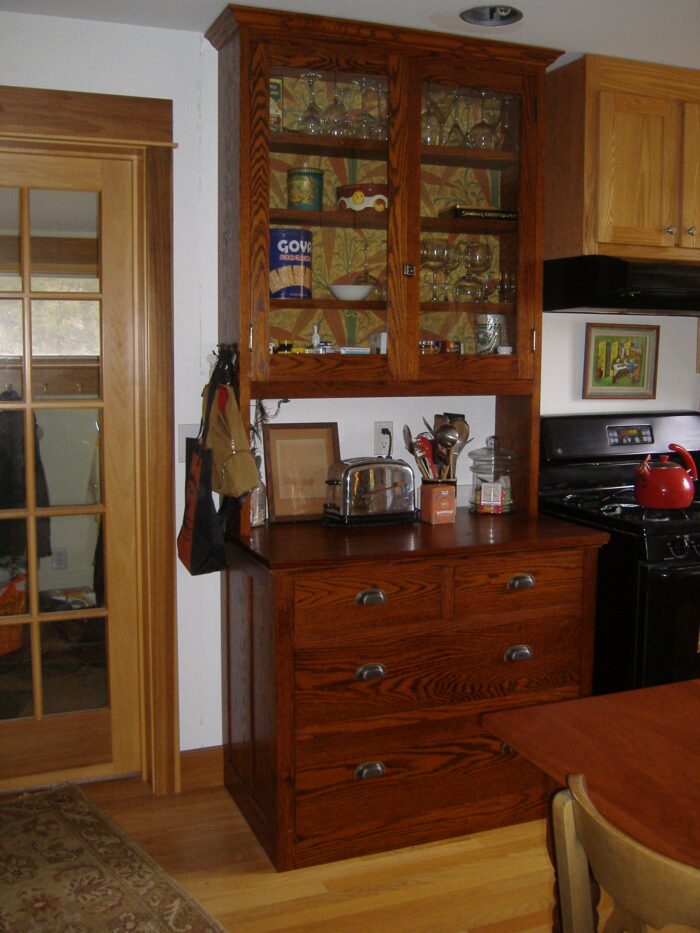
Always be careful when layering different finishes, and make sure they are compatible, to avoid problems with drying or adhesion. A classic example is the finish I wrote about some years ago for Fine Woodworking magazine. To achieve the look of century-old oak trim and built-ins for bungalows and other modest house types from the early 20th century, I use a mix of dye, stain, and amber shellac. Sometimes the piece I’m building requires more protection, so I add oil-based polyurethane. Even though I got clobbered by several readers who noticed that I was recommending poly on top of a kind of shellac that has not been dewaxed, which these readers claimed would cause adhesion problems with the topcoats, their claims were incorrect, as confirmed by the technical staff at Zinsser (the manufacturer of the shellac I recommended, and still recommend) — if you follow the steps in my article fully, thoroughly scuffing the dried shellac, then removing all traces of dust before applying the poly topcoats, you should have no problem with adhesion. I have pieces I finished this way 30 years ago that are still in perfect shape.
2 Performance of a furniture finish
There is no one-size-fits-all when it comes to finishing. For example, while the kitchen cabinet industry may consider sprayed conversion varnish standard for kitchen cabinets, that doesn’t automatically make conversion varnish the only option appropriate to your situation. Yes, kitchen cabinets are subjected to a lot of wear and tear. But some people are happy to take extra care with their cabinets; a Danish oil such as Watco, tung oil such as Waterlox Original, wiped poly, or wax-based finish such as Osmo may be fine for them.
Others want to drop knives and fling tomato sauce with impunity. For them, three coats of thinly brushed oil-based polyurethane would be a minimum in my world. But for a really hard-working finish – like, when your clients have three teenagers who have friends over on the reg – I take cabinets to a professional spray shop for conversion varnish.
In some circumstances when I’m recommending a finish for performance, I find it useful to think about wooden floors. Although floors rarely merit a mention in the realm of fine woodworking, I often look to floor finishes when worrying about whether my preferred choice in terms of aesthetics will be sufficiently hard-wearing. If a finish can protect a floor, it can probably protect a tabletop or wooden counter.
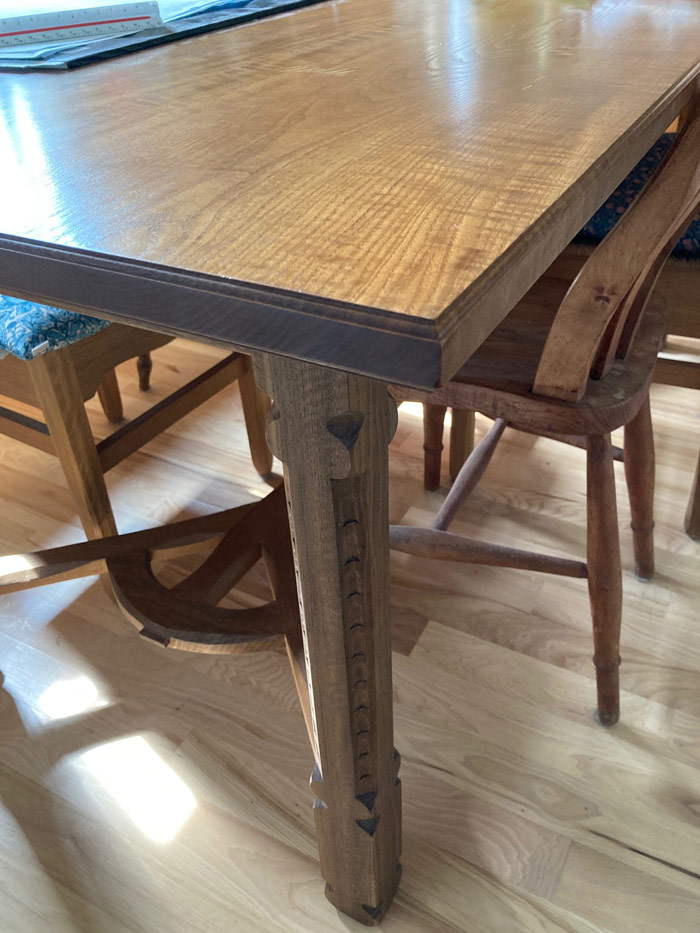
As for polyurethane, I know that many people hate it. I don’t, because I have learned to apply it thinly to produce a film finish with a low luster. Properly applied, oil-based poly does not look like plastic, and it’s a far cry from the plastic-encased look of epoxy coatings such as those used at barbecue joints and diners – not that I have anything against either. To remove the odd remaining brush stroke or dust particle I scuff the finish with 320-grit paper, vacuum and tack it off, then buff with paste wax. Is this finish visible (as distinct from completely matte) on our hayrake table (below), which I built to a design by Ernest Gimson for my book “English Arts & Crafts Furniture: Projects & Techniques for the Modern Maker”) visible? Yes. But minimally so. And after several years of hard use — it’s our kitchen and dining table — there are no stains. Nor have I ever had oil-based polyurethane craze, crack, or flake, even over 30 years of use – but this has as much to do with how I apply it and which brand and product I use as with any other factor. (For most polyurethane-finished jobs I have used Minwax oil-based satin — the kind you brush, not wipe — though lately I’m less pleased with it due to changes made to the formula.)
3 Working conditions
In addition to performance and looks, I keep the realities of my shop circumstances in mind when choosing a finish. My shop has no dedicated finishing space, so if I’m going to apply a slow-drying film finish such as oil-based polyurethane or oil-based paint, I start by giving the place a good sweep with a shop vac that has a HEPA filter. Ideally I leave the space alone for a few days, with no further dust production (and bring the shop cat into the house). I also use an air cleaner mounted on the ceiling, set on low, not just to remove particles from the air, but also to keep air flowing — and in an upward direction, not across the surface of the work — which gently speeds up the formation of a dustproof film on the surface as finish dries.
On the whole, I try to avoid slow-drying film finishes, due to my shop situation. Hand-rubbed finishes such as those produced by Osmo that penetrate the surface of the wood and leave minimal finish on top are great for much of my work; there’s no film to collect dust or other particles, and in many cases these finishes give the requisite performance and looks.
Don’t forget that a single piece of furniture may have different finishes for different parts, depending on expected wear. Our kitchen/dining table, for instance, has an oil mix on the base and three brushed coats of oil-based polyurethane on the top.
4 Application and drying time
Depending on the look and performance my client is after, and which ones my shop setup allows me to apply successfully, I suggest a finish that would fit the job. As a professional, I have to think about how long the finishing process will take. If I have 17 drawer faces and 10 doors brushed with oil-based drying paint in the shop, any “woodworking” for the current or next job has to be on hold. Most of the time I get around this by having other kinds of work I can do, whether in the office (do not even ask about this year’s bookkeeping) or at the drawing table. But not always. A dedicated, dust-free finishing space would be a real asset.
5 Cost
As with other elements in any job, cost is usually a factor. Many of the finishes I’ve mentioned here are steeply priced. High quality paint can easily cost $80 a gallon at this point, and the kinds of Osmo I buy generally come in around $50 for around a quart. Sorry; I don’t have any low-cost work-arounds for this post.
Finally, samples are essential.
Whatever your performance needs and preferred appearance, you should always make a sample on the specific type of material you’ll be using. That’s the only way to know how the finish will make that particular species look. Take the finish sample through the entire process; otherwise your sample won’t be truly representative, as a result of which you may unintentionally mislead your client(s). Then subject it to the kind of wear you anticipate the commissioned piece to get. I usually lay the finish sample down horizontally, for maximum (i.e., worse-case scenario) penetration, and apply the kinds of substances likely to end up on the surface of whatever I am making. For a dining table, coffee table, or kitchen counter, that means red wine, coffee, tomato sauce (or ketchup), mustard, Worcestershire sauce, butter, olive oil, water, and some type of extra-spicy hot sauce such as sriracha. I leave the test substances on the sample overnight, then wipe them off with a water-dampened cloth.
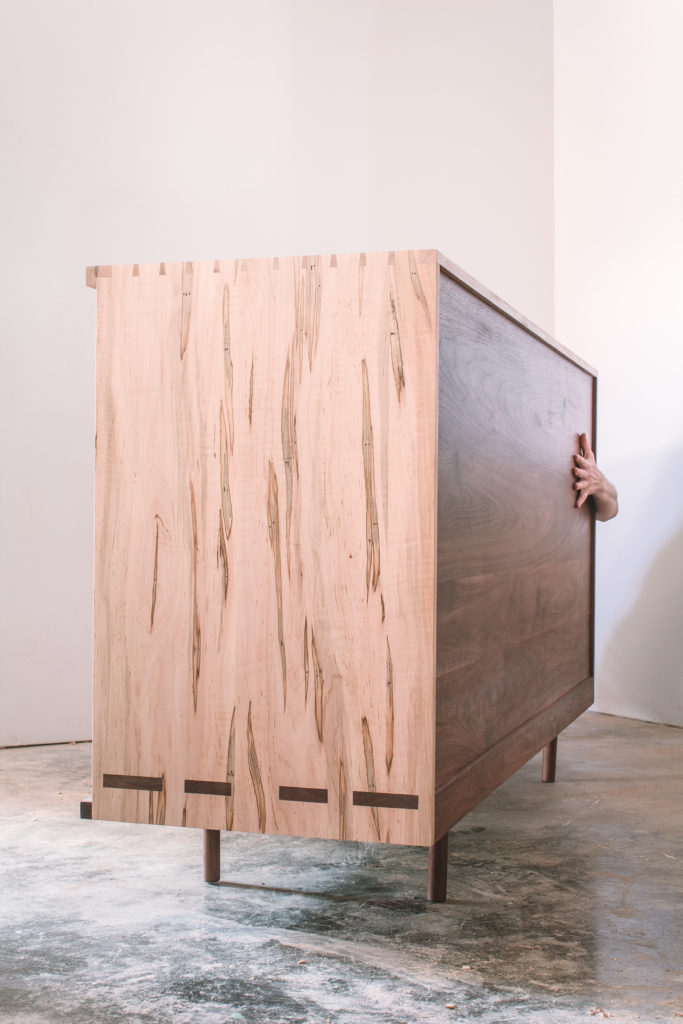
Opening image: A walnut bench with Osmo “Clear” finish in satin. Please note that the carved letters look better in person; they look uneven in this snapshot.
*I am using “they” as a gender-neutral singular pronoun.


Comments
Nancy is a woodworking treasure.
Great hard-won wisdom. Great realistic approach to a mystified subject. Excellent writing. Thank you.
“Sorry; I don’t have any low-cost work-arounds for this post.”
I love the above comment. When it comes to finishing a piece I have a tendency to look for the easiest, lowest cost solution. Finishing is my least favourite part of any build; more from a lack of understanding and experience than anything. Nancy, your article is very helpful and does a great job of highlighting the time and effort required to do the job right. There are no ‘shortcuts’! THANKS.
Log in or create an account to post a comment.
Sign up Log in