Skip to content
Fine Woodworking
Main Menu
Subscribe
GET THE MAGAZINE & MORE
Magazine Cover
  • Save 69% off the cover price
  • Or, get everything with UNLIMITED, including 40+ years of the online archive.
Subscribe Now!
Subscribe
  • Projects & Plans
  • How-To
  • Shop Tips
  • Tools & Materials
  • Videos
  • Magazine
  • Video Workshops
  • Members
  • Forum
  • Gallery
  • Blogs
  • More
    • Log In
    • Join
    Fine Woodworking Main Menu Subscribe
    How-To

    How to rub out a varnish to a mirror shine

    Rubbing out allows you to adjust the sheen of a finish, while removing imperfections like dust nibs, runs, sags, or bumps from the surface.

    Author Headshot By Bob Van Dyke #289-May/June 2021 Issue
    Article Image

    Rubbing out allows you to adjust the sheen of the finish while removing imperfections like dust nibs, runs, sags, or bumps. While these can be minimized by careful application, they are inevitable. In the process of removing them, the sheen is affected, so take advantage of the opportunity and adjust it as you like. As long as the film of finish is thick enough and the finish is hard enough, any luster from dead flat to ultra-high gloss is possible.

    A low sheen is easy enough with 0000 steel wool after the finish cures. For a silky satin sheen or a high-style gloss, the process is more in depth, but the results speak for themselves.

    The most successful rubouts are done on extremely hard finishes like shellac or lacquer, but many varnishes eventually dry hard enough that they respond well to the process. Drying time is the key. Don’t even think of rubbing out a varnish without at least a week and a half of drying time. Two to three weeks is better.

    Unlike traditional methods, this process does not involve lubricants, like paraffin oil. I find liquids add uncertainty because you cannot see if you have rubbed too much until it is too late.

    Tape off the perimeter
    Tape off the perimeter. Apply blue painter’s tape to about 1/4 in. of the panel’s edges and ends. The varnish is likely thin in these areas, and the tape prevents you from rubbing through it.

    Working a flat surface

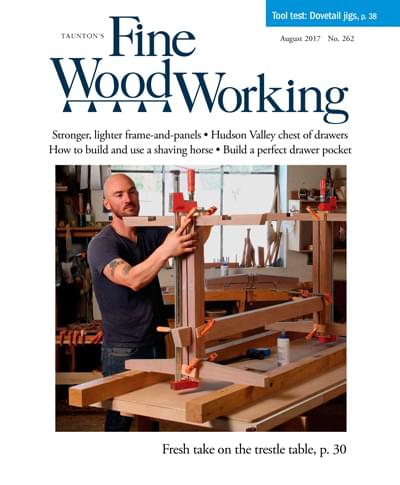
    Start leveling the finish by sanding with 400- or 600-grit sandpaper. This important step removes the dust nibs and, done with care, levels out runs in the finish. For more targeted removal, use a card scraper. Protect the perimeter of the workpiece with blue tape, since the varnish will likely be thin there.

    Check your progress with raking light. When level, the whole surface will have an evenly dull sheen. Low spots in the finish will be shinier. Carefully resolve these for the best results.

    600-grit sandpaper wrapped around a paint roller cover
    600-grit sandpaper wrapped around a paint roller cover levels the surface. Use moderate pressure and straight strokes with the grain that just barely overlap. The roller cover helps distribute pressure evenly. Do not apply pressure over the blue tape.

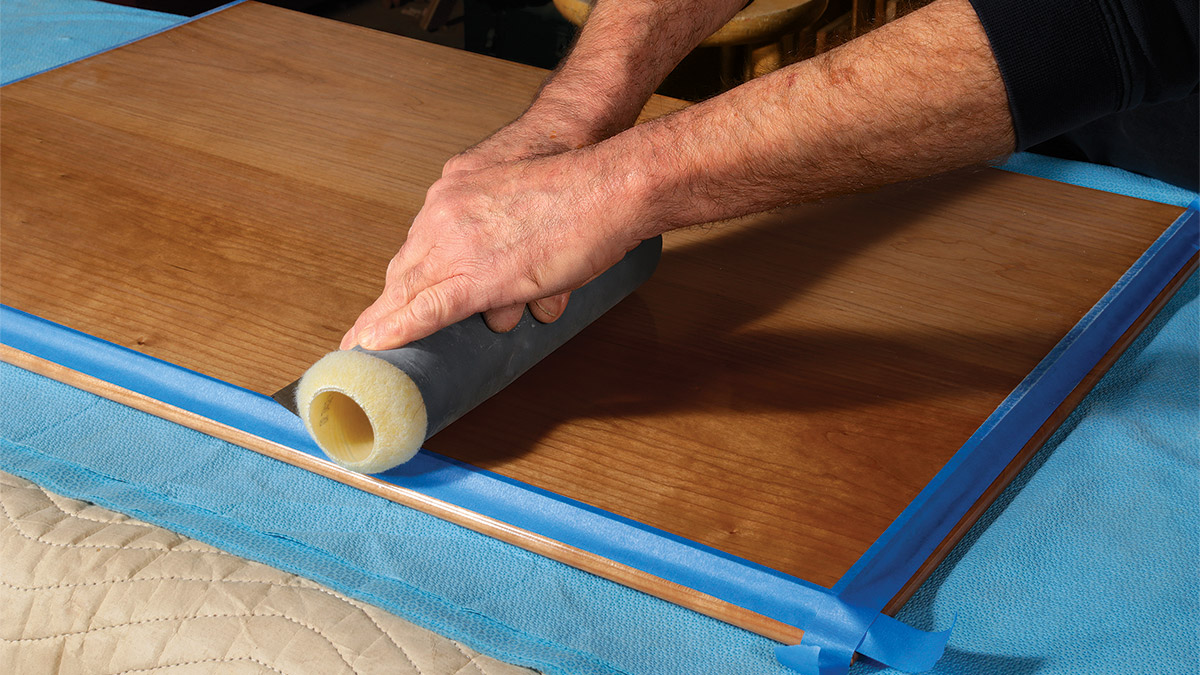
    After leveling, remove all traces of sanding dust using a blue shop towel wrapped around a felt block. Keep rewrapping the block, exposing fresh towel, until you no longer see white dust residue on the towel.

    blue shop towel to clean off sanding dust
    Wrap a blue shop towel around a felt block and clean off the surface. You want to remove all of the sanding dust after each step, since any dust left on the surface can create additional, unwanted scratches with the next step.

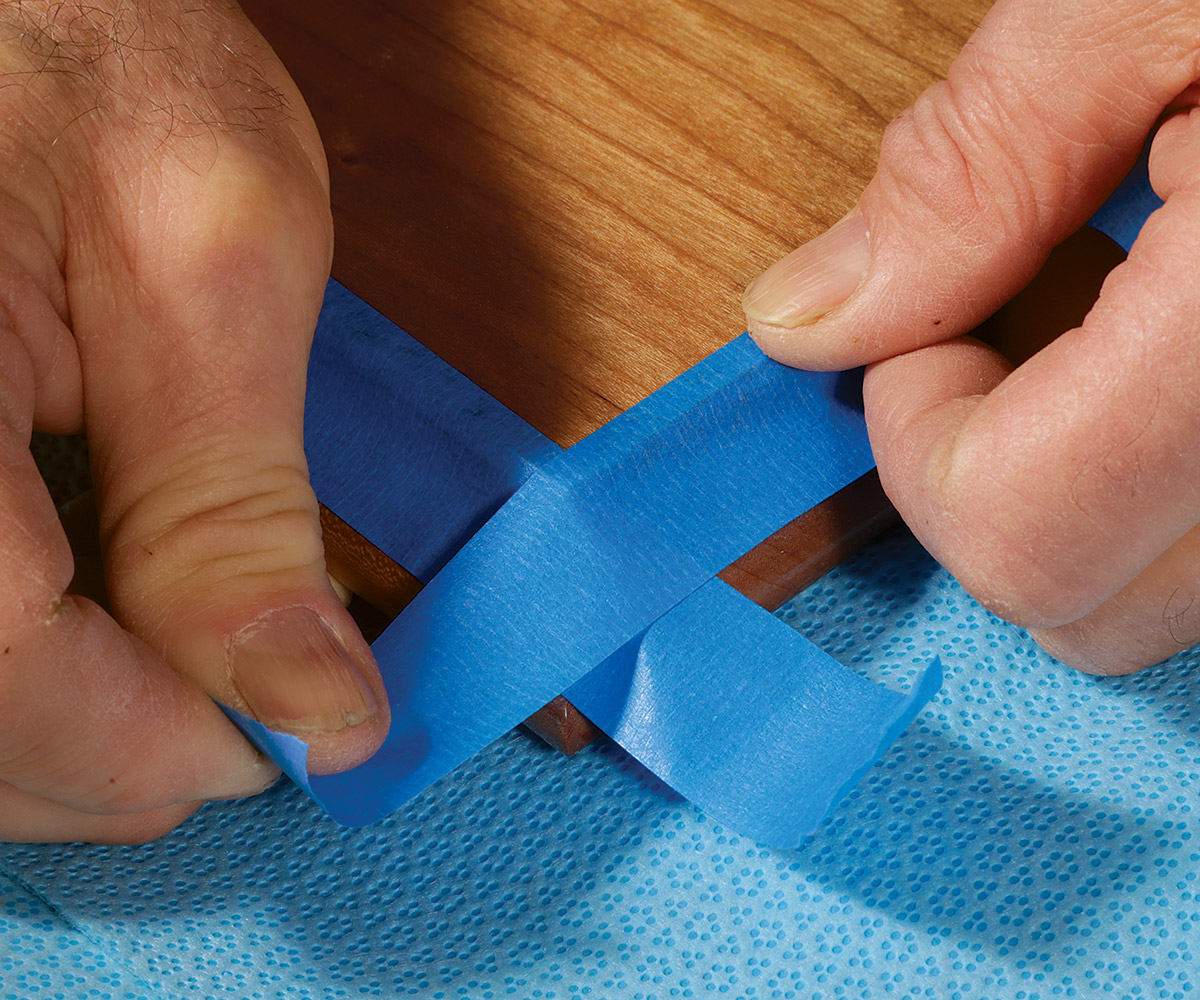
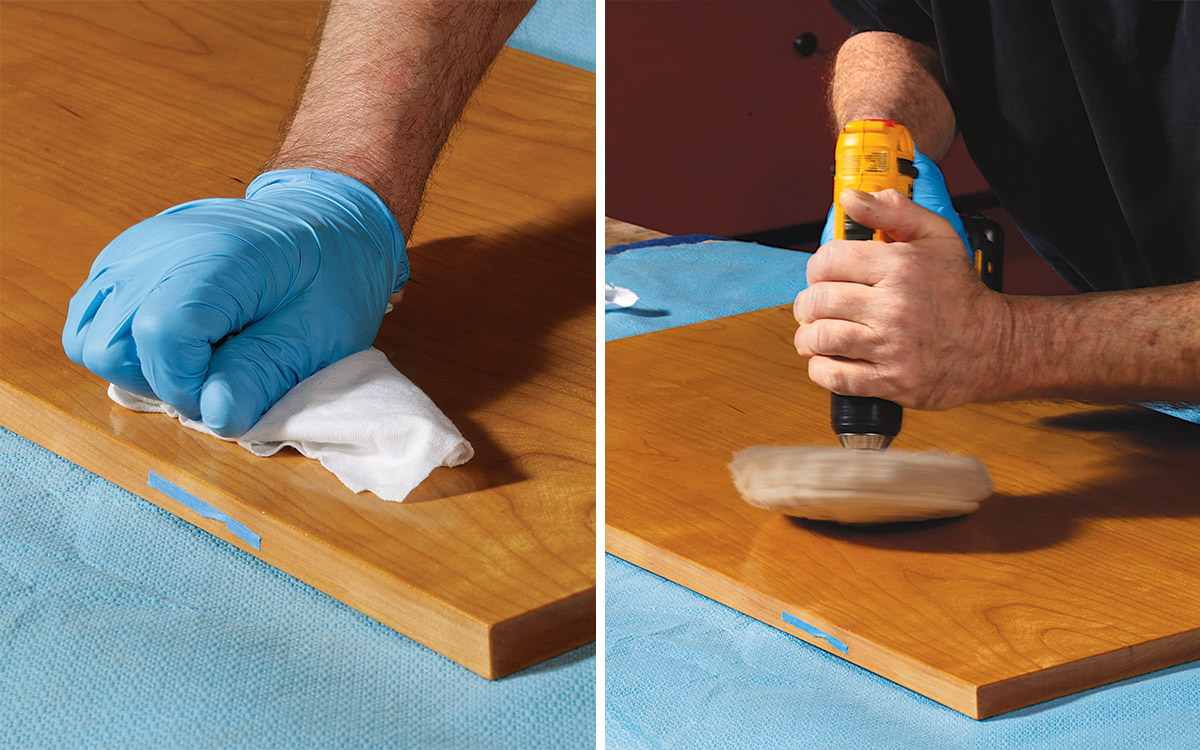
    Next, I move to Mirlon, a superior synthetic pad, in increasingly finer grits, 360; 1,500; and 2,500. Take firm, even strokes as you cover the whole surface. Again, clean the surface completely between grits with a shop towel. You’ll notice the inherent abrasiveness of the towel will bring up the shine slightly when all the surface dust is gone.

    using Mirlon abrasive pads
    Mirlon abrasive pads further polish the finish. To refine the scratch pattern, use a red, 360-grit Mirlon pad followed by a 1,500-grit pad. Back both with a paint roller cover, and rub with even, straight strokes along the grain.

    Mirlon abrasive pads

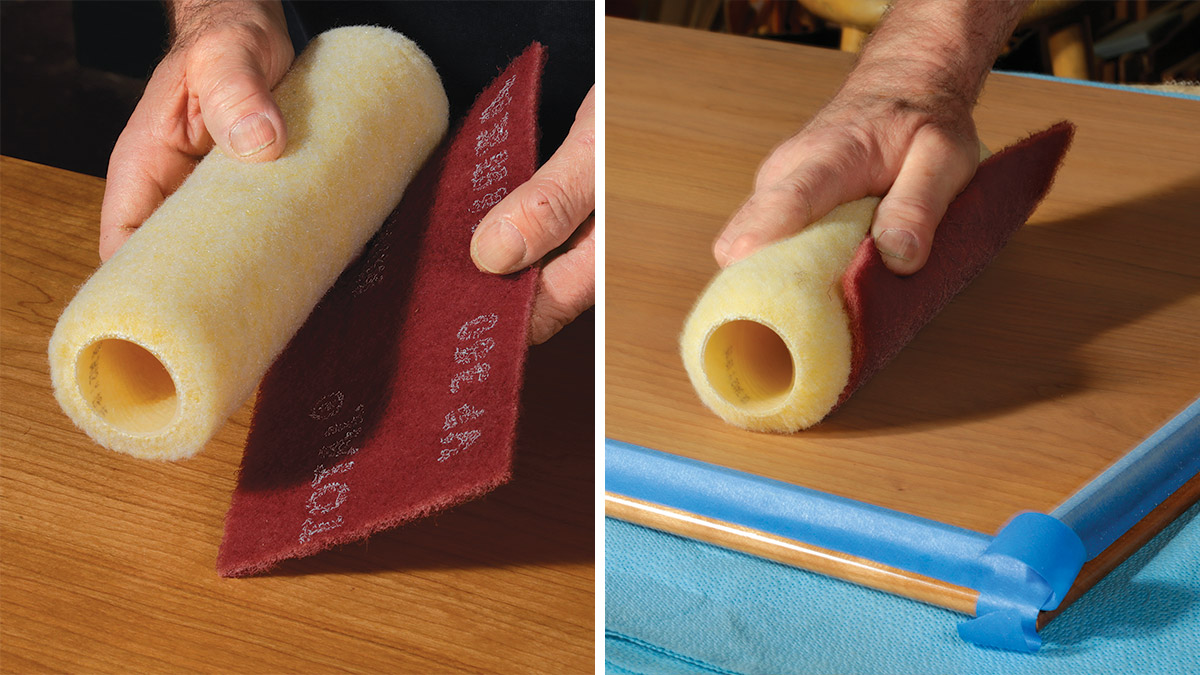
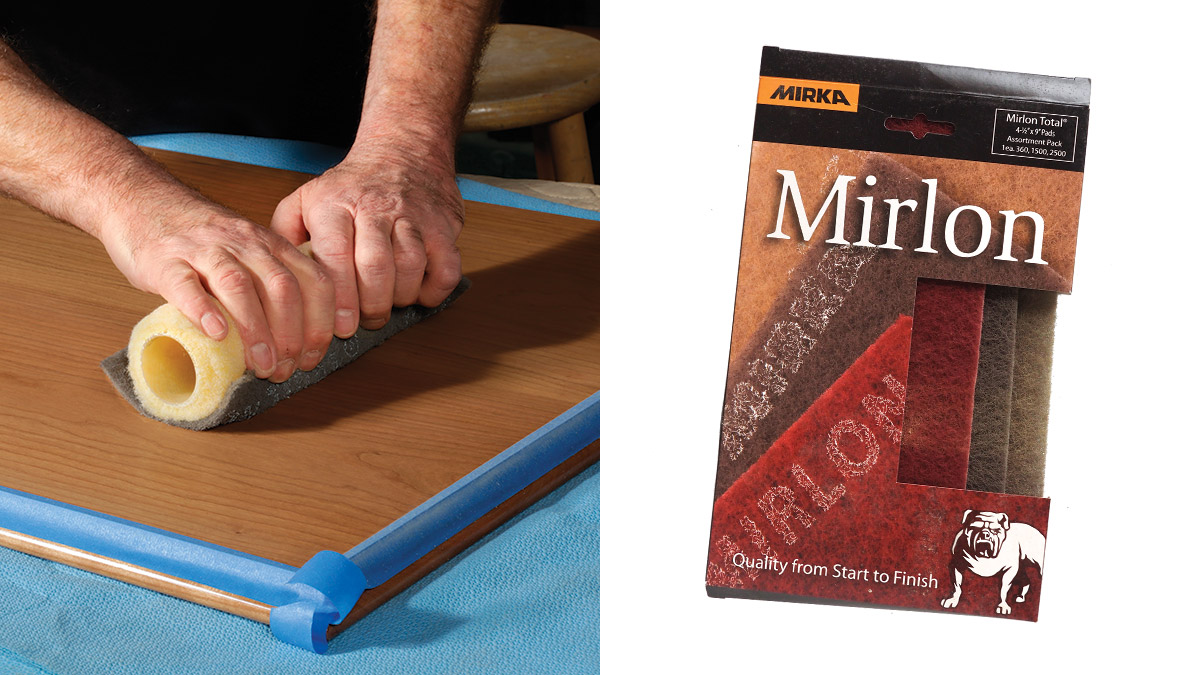
    Before using the finest-grit Mirlon, remove the blue tape that protects the edges. I then use firm, even strokes with the Mirlon wrapped around a felt block. It is especially important to rub out the surface completely and firmly using the blue towel and felt block afterward.
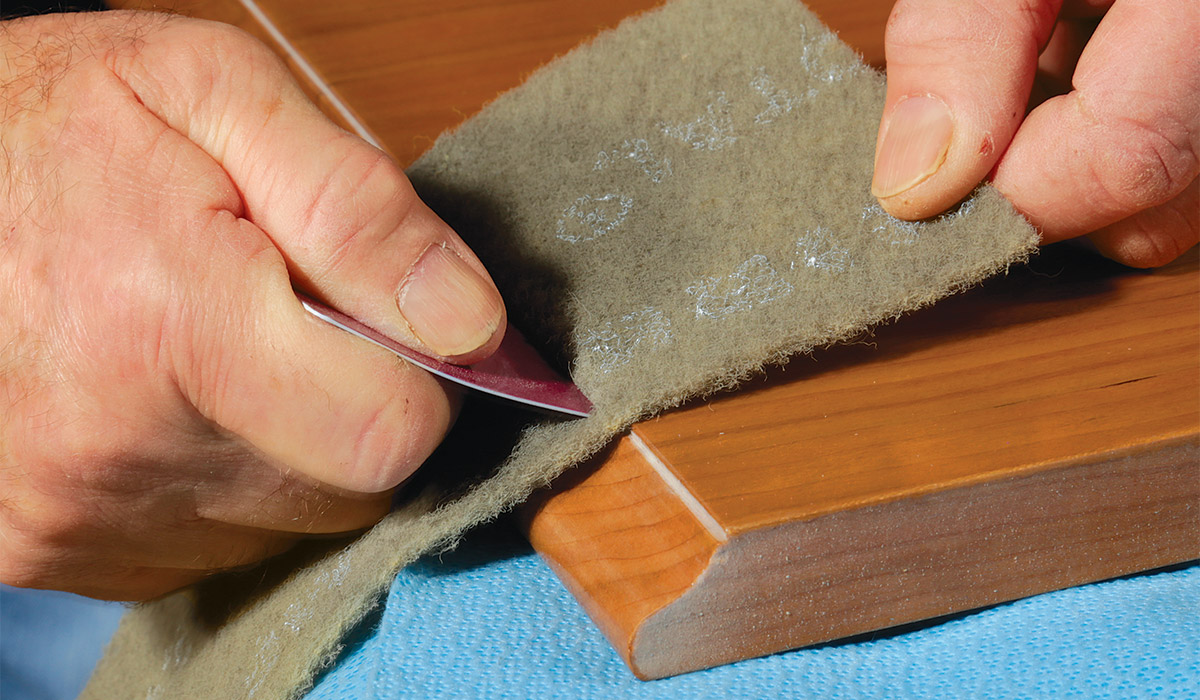
    Address the edges

    sanding edges
    Remove the tape before using a 2,500-grit Mirlon wrapped around a block. This step consolidates the gloss of the area under the tape. Starting about 5 in. from an edge, land the pad lightly, and work back toward that edge, finishing with even, firm strokes.

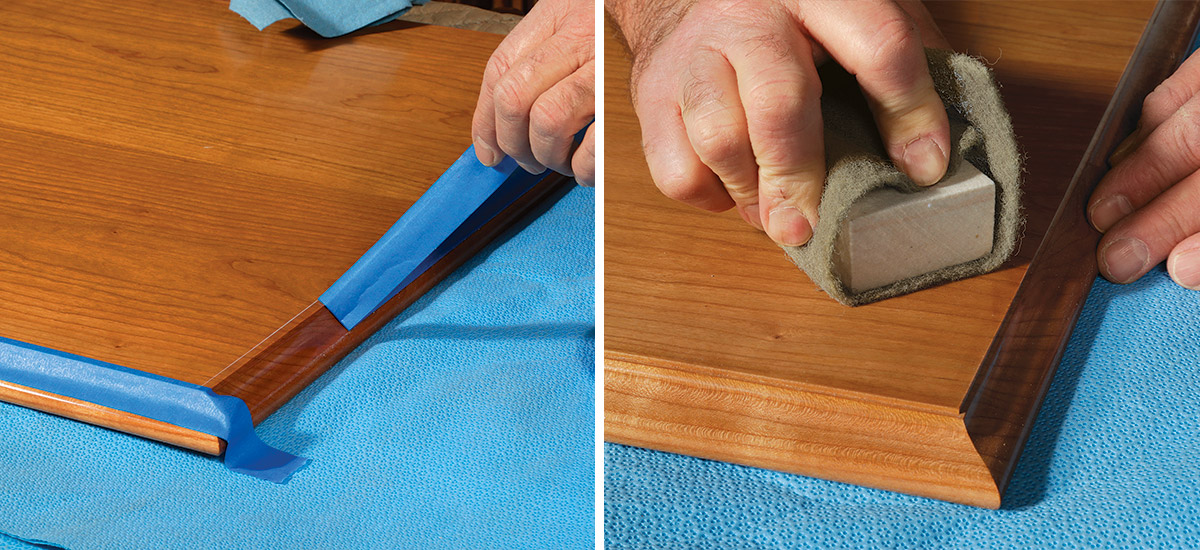
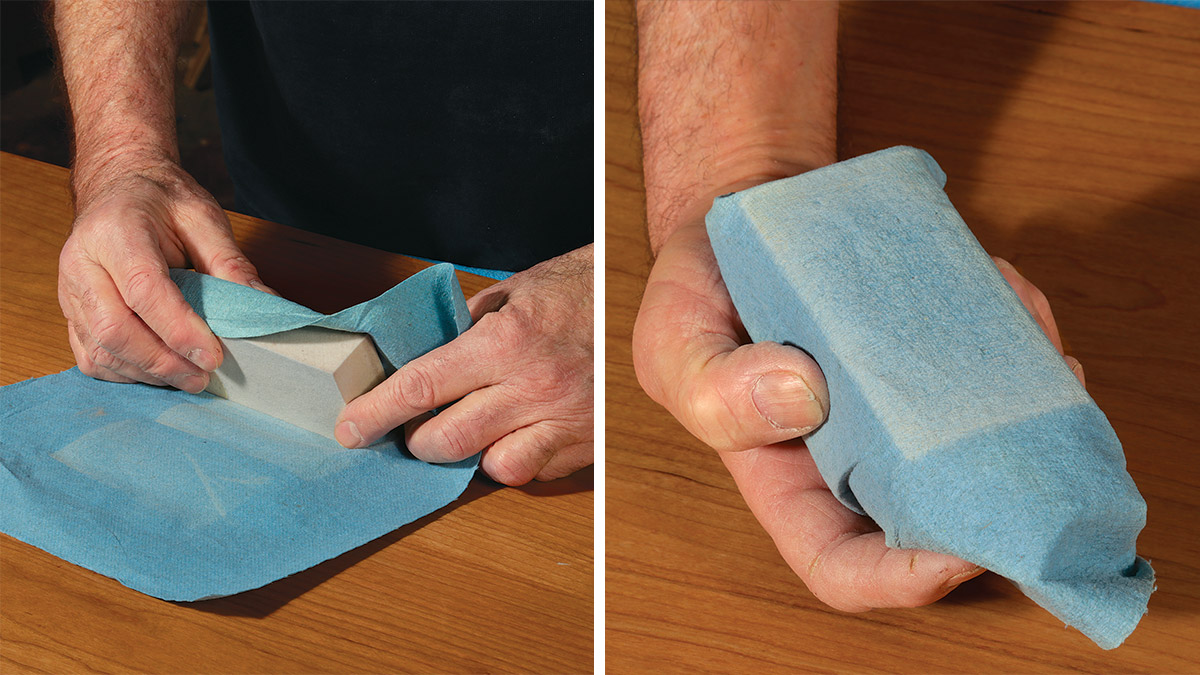
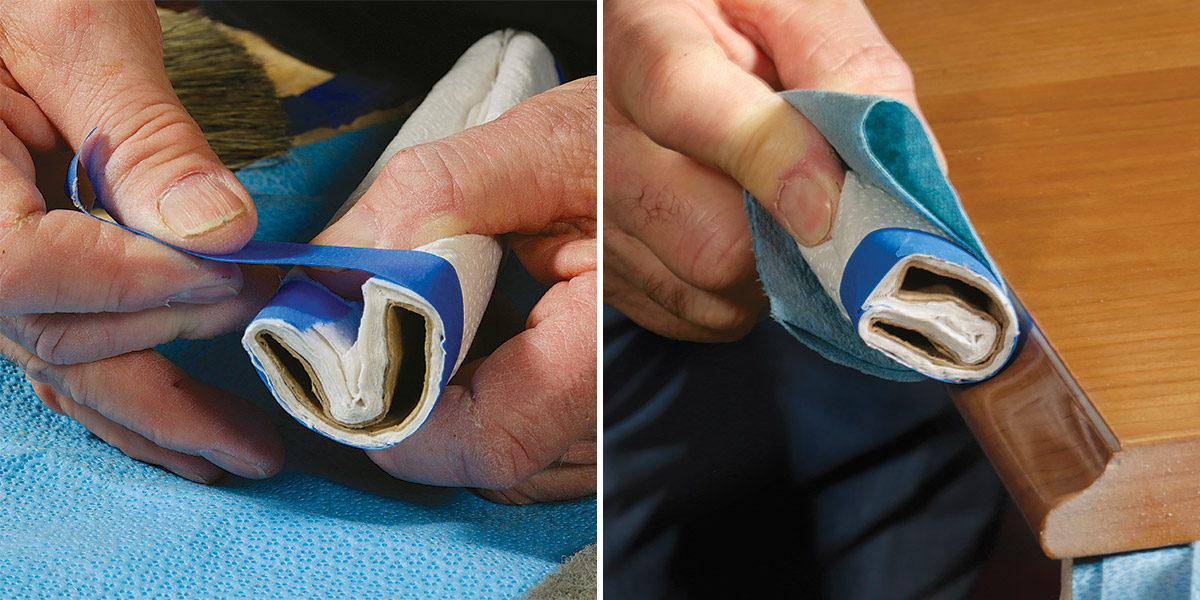
    When you are happy with the flat surface turn to molded edges. Use the same Mirlon pads, this time wrapped around a shaped sanding block. I use a foldedover paper towel tube here, but builder’s insulation foam or a dowel wrapped in paper towel work too. To work into corners, back the Mirlon with a stiff card.

    sanding rounded edges
    Creative solutions for profiles. A folded-over, almost-finished paper towel roll works well as a backer for sanding curves and dusting them off with a blue shop towel afterward. Its soft surface conforms well to profiles. To work into fillets’ small 90° corners, Van Dyke uses a hotel key card or a credit card.

    using a credit card to sand in corners

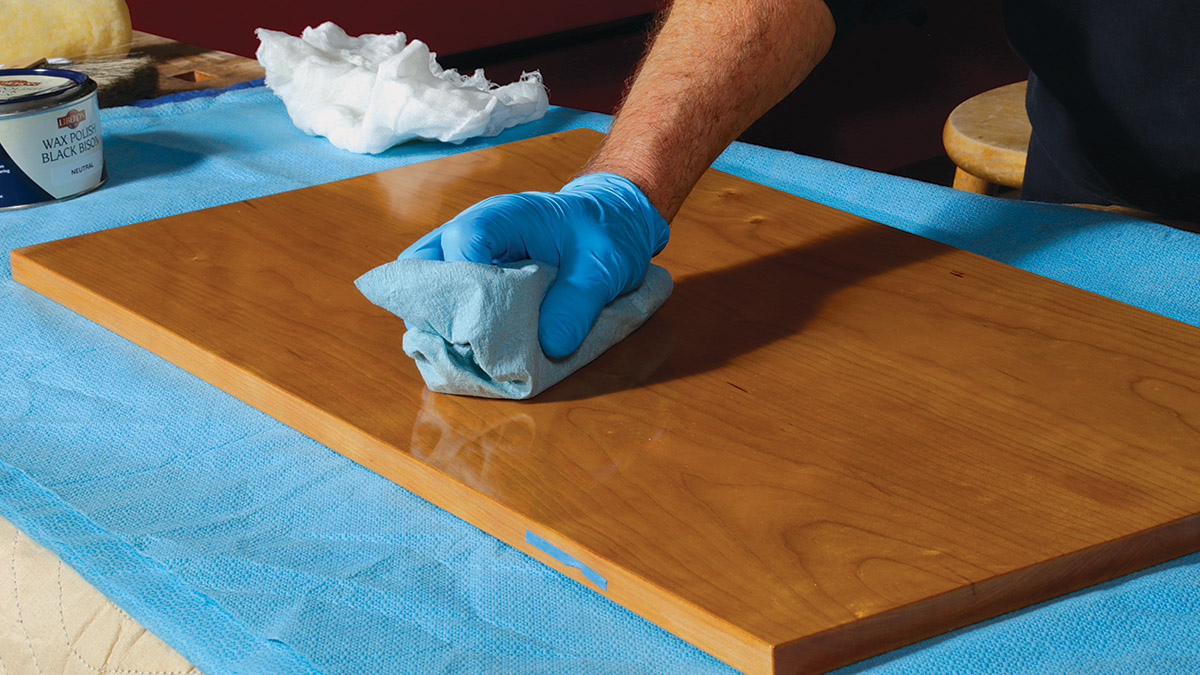
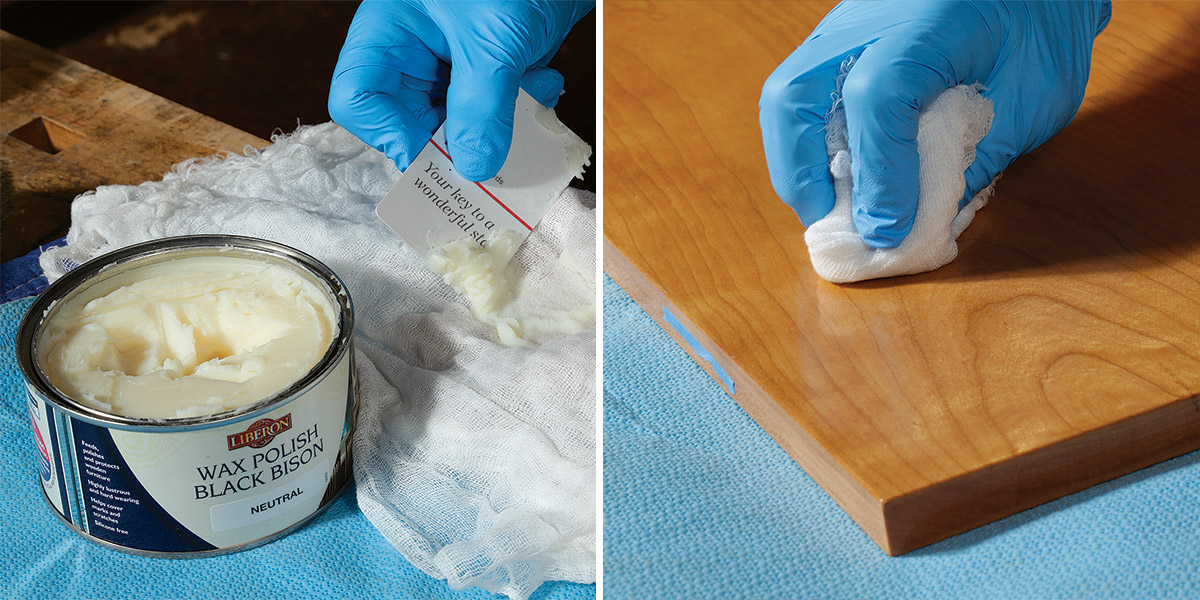
    Add paste wax if desired

    At this point you can stand back and admire your work, or you can decide to add a coat of paste wax. The wax does not add much protection other than making the surface slippery and scratch resistant, but it will sometimes even out an uneven sheen or even raise the sheen slightly. You can always remove the wax with a naphtha-soaked rag if you do not like it. You can also rub back the sheen with 1,500-grit Mirlon.

    Dust off the surface
    Dust off the surface. Especially at this high level of polish, stray dust particles could cause noticeable scratches in the panel.
    applying paste wax
    Apply the wax. Add wax to the center of cheesecloth. By wrapping cheesecloth around a ball of wax, you can apply it evenly. The wax heats up and seeps out with the friction of rubbing it onto the panel. Apply the wax with a small, circular motion that travels along the grain.
    buff and polish paste wax
    Buff and polish. Use a clean cloth to buff the surface out by beginning with the same circular motion, and finishing with long, straight strokes. A lamb’s wool buffing pad brings the panel to its final polish. Again, travel with the grain. Use moderate, even pressure.

    From Bob’s article How to brush on a varnish finish in Fine Woodworking #289

    Sign up for eletters today and get the latest techniques and how-to from Fine Woodworking, plus special offers.

    Sign Up

    Get woodworking tips, expert advice and special offers in your inbox

    Sign Up
    ×
    X
    X

    New Feature

    Fine Woodworking Forums

    Ask questions, offer advice, and share your work

    Get It All!

    UNLIMITED Membership is like taking a master class in woodworking for less than $10 a month.

    Start Your Free Trial

    Subscribe to Fine Woodworking

    Save up to 69%

    Subscribe

    Log in or create an account to post a comment.

    Sign up Log in

    Up Next

    Featured Workshop

    a diagram of a round Shaker stand and an image or a round Shaker stand

    Shaker candle stand with Christian Beckvoort

    He’s built dozens of round Shaker stands over four decades, so there is no one more qualified than Christian Becksvoort to demonstrate making this classic. In this seven-part video series,…

    Featured Projects & Plans

    Build a Contemporary Sideboard

    Chris Gochnour's sideboard combines usefulness, strength, and beauty in a contemporary case piece

    Related Stories

    • How to Create a Charred Wood Furniture Finish

    • How to brush on a varnish finish

    • Fuming Wood with Ammonia

    • A Stunning Milk-Paint Finish

    Discussion Forum

    Recent Posts and Replies

    • |
    • |
    • |
    • |
    • |
    • |
    View More Create Post

    Member Exclusives

    More Member Exclusives
    • shou sugi ban

      How to Create a Charred Wood Furniture Finish

      Christopher Miano shares an ancient Japanese technique that preserves wood by charring the surface.

    • Video: Creating a charred and painted finish

      Mark's applies an unusual finish to his wall shelves; first scorching the surface with a torch and then painting to create a one of a kind surface.

    • wiping varnish finish

      How to brush on a varnish finish

      A wiping varnish goes on easily and creates a tough surface ready for rubbing out.

    • Walnut Display Box

      Make a Walnut Display Box, Part 2

      In the second part of this mitered-box project, you'll learn how to assemble the box, set the hardware and glass, and apply the finish.

    Highlights

    • Shape Your Skills

      when you sign up for our emails

      Plus tips, advice, and special offers from Fine Woodworking.

      Sign Up
    • Shop Talk Live Podcast

      Shop Talk Live Podcast

      Our biweekly podcast allows editors, authors, and special guests to answer your woodworking questions and connect with the online woodworking community.

    • Woodpecker Sweepstakes

      Woodpeckers Shop Upgrade Giveaway

      Enter now for your chance to win more than $2,000 worth of woodworking equipment from Woodpeckers. Click for full details.

    • Staff Picks Blog

      Our favorite articles and videos

      We have created these special content collections organized to give you a deep dive into a range of topics that matter.

    Finishing

    View All
    • How I choose the finish for a job

    • Shaker dresser finishing touches

    • water-based paints

      No shame in painting (or in using a roller to do it)

    • Add Richness to Mahogany

    View All

    From the Store

    View More
    • Tool Guide 2022

      Buy Now
    • Complete Illustrated Guide to Woodworking USB

      Buy Now
    • Foundations of Woodworking

      Buy Now
    • The Why & How of Woodworking

      Buy Now
    View More

    Get the latest from Fine Woodworking Magazine

    • #292-NOV/DEC 2021

      • Kerf-bent wall cabinet
      • Online extras from FWW issue #292
      • How to tame curved parts with patterns
    • #291-Sep/Oct 2021

      • Build a modern coffee table
      • Online Extras from FWW Issue #291
      • Editor's Letter: Something old, something new
    • #290-July/Aug 2021

      • Build a Shaker chest of drawers
      • Online Extras from FWW Issue #290
      • From the editor: What we make matters
    • #289-May/June 2021

      • Arts & Crafts Coffee Table with Story-Book Charm
      • Links from Fine Woodworking issue #289
      • Step-by-Step Guide to Tuning Your Block Plane
    • #288-Mar/Apr 2021

      • Phil Lowe: A craftsman and gentleman
      • Online Extras from FWW Issue #288
      • Phil Lowe: craftsman, teacher, friend

    UNLIMITED membership - Get access to it all

    Start Free Trial Upgrade Membership

    Fine WoodWorking

    Follow

    Newsletter

    Get woodworking tips, expert advice and special offers in your inbox

    Sign Up

    Membership & Magazine

    • Members
    • Digital Libraries
    • Join Unlimited
    • Magazine Subscription
    • Magazine Renewal
    • Gift a Subscription
    • Customer Support
    • Manage Preferences

    Taunton Network

    • Fine Homebuilding
    • Green Building Advisor
    • Fine Gardening
    • Threads
    • About
    • Contact
    • Advertise
    • Privacy Policy
    • Careers
    • Copyright
    • Terms of Use
    • Accessibility
    • California Privacy Rights
    • Site Map

    © 2021 The Taunton Press, Inc. All rights reserved.

    Get step-by-step instructions, woodworking tips, expert advice and special offers in your inbox. Sign Up Now!

      Main Menu

    • Projects and Plans
    • How-To
    • Shop Tips
    • Tools & Materials
    • Videos
    • Gallery
    • Magazine
    • Video Workshops
    • Members
    • Forum

      Popular Topics

    • Design
    • Small Projects
    • Beds
    • Chairs, Benches And Stools
    • Built-ins
    • Storage And Shelves
    • Cabinets
    • Carving
    • Casework
    • Desks
    • Tables
    • Shop Storage And Furniture
    • Woodturning Projects
    • Workbenches
    • Surface Prep

      More

    • TV
    • Forum
    • Blogs
    • Webinars
    • Podcasts
    • Customer Support

      Account

    • Log In
    • Join

      Magazine

    • Current Issue
    • Past Issues
    • Digital Libraries
    • Magazine Index
    • Subscribe

      Membership

    • Member Home
    • Start Free Trial
    • Gift Unlimited
    • Log In

      Shop the Store

    • Books
    • DVDs
    • Taunton Workshops

      Events

    • Fine Woodworking Live
    • Fine Woodworking HANDS ON

      Account

    • Log In
    • Sign Up

    Newsletter

    Get woodworking tips, offers, and expert advice in your inbox

    Sign Up

    Follow

    UNLIMITED

    Become an UNLIMITED member and get it all: searchable online archive of every issue, how-to videos, Complete Illustrated Guide to Woodworking digital series, print magazine, e-newsletter, and more.

    Start Your Free Trial

    Upgrade Membership