Skip to content
Fine Woodworking
Main Menu
Subscribe
GET THE MAGAZINE & MORE
Magazine Cover
  • Save 69% off the cover price
  • Or, get everything with UNLIMITED, including 40+ years of the online archive.
Subscribe Now!
Subscribe
  • Projects & Plans
  • How-To
  • Shop Tips
  • Tools & Materials
  • Videos
  • Magazine
  • Video Workshops
  • Members
  • Forum
  • Gallery
  • Blogs
  • More
    • Log In
    • Join
    Fine Woodworking Main Menu Subscribe
    Member-Only

    Sign in or become a member to access this story

    Sign In

    Build a Contemporary Sideboard

    Chris Gochnour's sideboard combines usefulness, strength, and beauty in a contemporary case piece

    Author Headshot By Chris Gochnour #277-Sep/Oct 2019 Issue
    Article Image

    Synopsis: The half-blind mitered dovetails used to join this sideboard help make it strong and beautiful, with grain that runs up one side, across the top, and down the other for a waterfall effect. All the other joinery is hidden and employs Domino slip tenons. The sliding doors are punctuated with spalted live oak veneers. Follow along as Chris Gochnour shows how to build this classic yet modern beauty, step by step.


    Sideboards are among my favorite pieces of furniture to build. They offer great utility—whether used in a dining room for dishware or a family room for entertainment equipment—and they invite a wide array of approaches in terms of structure and joinery, materials and finishes. With care taken in the design phase, the sideboard form is also often quite beautiful.

    For this sideboard I used half-blind mitered dovetails to join the case, providing excellent strength but also…

    Sign up for eletters today and get the latest techniques and how-to from Fine Woodworking, plus special offers.

    Sign Up

    Start your 14-day FREE trial to continue reading this story.

    Plus, access more than 1,900 in-depth articles and more when you become a member.

    Start Your Free Trial Now

    Already a member? Log In

    Get woodworking tips, expert advice and special offers in your inbox

    Sign Up
    ×
    X
    X

    New Feature

    Fine Woodworking Forums

    Ask questions, offer advice, and share your work

    Get It All!

    UNLIMITED Membership is like taking a master class in woodworking for less than $10 a month.

    Start Your Free Trial

    Subscribe to Fine Woodworking

    Save up to 69%

    Subscribe
    Online Membership

    Comments

    1. User avater
      johnbarfielddesign | Jul 25, 2019 07:37am | #1

      Beautiful and simple, and a well written article. Not a criticism but a concern: My first thought was that the base rails are too long to support the weight of the cabinet without stretchers, but the description and use of the "Barnsley" joint is something that I want to look closely at. I like the clean, minimal look of the base, but I would always worry about the inevitability of someone dragging a fully loaded sideboard across the floor, and leveraging the legs. I probably worry too much about things like this, and I really do like it better without stretchers.

    2. tedodds | Nov 14, 2019 09:33pm | #2

      I'm trying to use the half-blind mitred dovetail joint on a slightly larger cabinet that I'm making from white oak. I've done several test joints. I'm struggling with the "little flap" that is to be left on the ends of the mitres. When I do that, by setting the marking gauge just shy of the width of the stock (as suggested) the pins do not push fully through the tails. Perhaps my pin mitres are off. Any advice would be welcome.

    3. DaveRichards | Nov 15, 2019 09:52am | #3

      I'm not an expert on this but reading through the text in the article and thinking about the joint, it would seem to me that the pins shouldn't quite meet the outer face of the tail board when you first put it together. Mr. Gochnour planes the outer faces down to get rid of the tiny flat at the end of the miters and in the process should bring the surface down to the pins.

      I made a quick illustration.

      The pin board would look something like the first image. After assembly, like the second, and after planing, like the third.

    4. tedodds | Nov 15, 2019 06:30pm | #4

      Dave - Wow, I’m overwhelmed by your kind and thoughtful reply. Not only does your explanation make a lot of sense, you even drafted three Sketchup diagrams! It may turn out that this joint is beyond my skill level, bit you’ve inspired me to continue my test efforts to try to get it right. Thanks a million!

    5. DaveRichards | Nov 15, 2019 07:52pm | #5

      I'm happy if it helps. To be honest, I had already modeled the case for a Design. Click. Build. blog so it was an easy thing to pull it out, add a little thickness to the case parts and make the screen grabs. That old adage about pictures and words is true.

      I expect if you've been able to cut the test joint and get it to go together, you have the skills to do it. Don't give up.

      Dave

    6. jbarduhn | Nov 17, 2019 01:55pm | #6

      I REALLY would love to see a video workshop on this piece. It’s just stunning

    7. user-7158773 | Jan 05, 2020 11:05am | #7

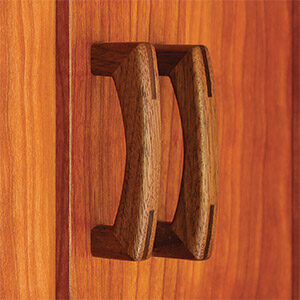
      Were the pulls turned on a lathe or ordered pre-made? If pre-made, where can I find the same ones? Thanks so much. Looking forward to building this beautiful piece.

    8. DaveRichards | Jan 05, 2020 11:40am | #8

      Considering that the dimensions and profile of the pull is shown in the article, I expect Mr. Gochnour made his pulls and the lathe would make the most sense. I suppose for your version of it, you could use store bought pulls if you want.

    9. Mapletrim1 | Mar 04, 2020 05:11pm | #9

      Does anyone see the inset distance from the front for the top and bottom groove for the sliding doors? Is it in the diagram but I am missing it? This is an important measurement so the doors slide across the inset drawers.

    10. DaveRichards | Mar 04, 2020 06:10pm | #10

      I don't see anything to indicate that dimension but some figure shows it must be between 5/8 and 7/8 in from the front edge of the top and bottom (Not measuring from the cove but the actual edge of the board). From the photos in the article it appears the drawer fronts sit slightly behind the front edges of the vertical partitions. With the drawer fronts 1/8 in. back from the front of the partitions and the front of the groove 7/8 in. back, I get about 3/64 in. of clearance. A little snug for me. At 3/4 in. back, the front of the door rails would be about 1/8 in behind the cove.

      FWIW, you could do what I've done to figure this out and create a model in SketchUp or some other 3D modeling application. This would make it easier to work out details like this and let you visualize them before cutting wood.

    11. Mapletrim1 | Mar 04, 2020 07:46pm | #11

      Thank you, Dave. I didn’t think I had missed it somewhere. Yes, a 3-D model or something like that with all the correct measurements would be very helpful. This is a somewhat complex piece with lots of important details and some of us have invested a lot of time and some fancy figured wood building it. Thanks again.

    12. kkwink | Jul 23, 2020 08:34pm | #12

      Where can I find the 1 3/4" radius cove bit mentioned in the article. It was used to inset the drawer pulls. Can't seem to find one that size online.

    13. DaveRichards | Jul 24, 2020 08:45am | #13

      I think there's a typo in that description somewhere. Probably the bit should be listed as 1-3/4 in. dia., not radius. If you used a 3-1/2 in. dia. cove bit and plunged it in 3/8 in., the perimeter of the recess would be more than 2 in. in diameter.

      FWIW, a quick search for cove router bits turns up large bits for making crown molding like Infinity Tools 56-602 which is 1-3/4 in. dia.

    14. user-178296 | Sep 02, 2020 05:19pm | #14

      I'm a bit confused over the Domino Tenon lengths listed at 40 mm, as a 20 mm Domino Mortise would exceed the 3/4 inch (.75 inch) thickness of the case top and bottom (2mm = .79 inch). Is the tenon offset deeper into the partition?

    15. DaveRichards | Sep 02, 2020 06:37pm | #15

      I don't see anything in the article that calls out the depths of the mortises but I would expect to make the mortise deeper in the vertical pieces and not go more than 12 or 14 mm deep in the top and bottom panels.

    16. user-6047526 | Dec 08, 2020 07:11pm | #16

      How did he end up finishing the piece? Same over both the fumed and unfumed portions? I'd love to try fuming to get that rich chocolate brown but uncertain where to go after the fuming.

    17. User avater
      Mattk41 | Feb 18, 2021 10:40am | #17

      I'm looked at various parts of this article over and over...its a good one! Maybe less complicated than working out all the offset and reveals, but still a missed detail is how and when he set the 5mm shelf pin holes. One set is on each case side and each opposing/mating set are in the recessed partitions. Did make two separate jigs - one for side and another for partition? Drilled before glue-up and risk them not being perfectly registered? Or drill after glue-up and register the jigs to the case bottom?

    Log in or become a member to post a comment.

    Sign up Log in

    Up Next

    Featured Workshop

    a diagram of a round Shaker stand and an image or a round Shaker stand

    Shaker candle stand with Christian Beckvoort

    He’s built dozens of round Shaker stands over four decades, so there is no one more qualified than Christian Becksvoort to demonstrate making this classic. In this seven-part video series,…

    Featured Projects & Plans

    Chris Gochnour's sideboard combines usefulness, strength, and beauty in a contemporary case piece

    Related Stories

    • Japanese joinery in practice

    • Tips for drop-leaf tables

    • Continous grain, mitered door and drawer pulls

    • Workshop Tip: Miter box parts on the router table

    Discussion Forum

    Recent Posts and Replies

    • |
    • |
    • |
    • |
    • |
    • |
    View More Create Post

    Member Exclusives

    More Member Exclusives
    • kerf-bent cabinet

      Kerf-bent wall cabinet

      Philip Morley's small wall cabinet has sides that curve inward at the top, with an asymmetrical arrangement of drawers, door, and open shelves.

    • Floating display shelf

      Split turning techniques make a fun and functional shelf.

    • door and drawer pulls

      Continous grain, mitered door and drawer pulls

      Larissa Huff and Robert Spiece's smart construction techniques make fashioning their small parts safe and repeatable.

    • Ship-inspired wall shelf

      Ship-inspired wall shelf

      Graduated shelves and graceful symmetry hang on a single stud.

    Highlights

    • Shape Your Skills

      when you sign up for our emails

      Plus tips, advice, and special offers from Fine Woodworking.

      Sign Up
    • Shop Talk Live Podcast

      Shop Talk Live Podcast

      Our biweekly podcast allows editors, authors, and special guests to answer your woodworking questions and connect with the online woodworking community.

    • Woodpecker Sweepstakes

      Woodpeckers Shop Upgrade Giveaway

      Enter now for your chance to win more than $2,000 worth of woodworking equipment from Woodpeckers. Click for full details.

    • Staff Picks Blog

      Our favorite articles and videos

      We have created these special content collections organized to give you a deep dive into a range of topics that matter.

    • Projects & Plans

      Digital Plans Library

      Browse our collection of 100+ complete digital plans, including Shaker furniture, Arts and Crafts pieces, beds, chairs, workbenches, tool storage, and more. Join now for complete access.

    Storage And Shelves

    View All
    • Make a shelf on the lathe

    • Make a dovetailed desktop organizer

    • modern wall shelf

      Build a Modern Wall Shelf

    • How to Build a Desk Gallery

    View All

    From the Store

    View More
    • Foundations of Woodworking

      Buy Now
    • The Why & How of Woodworking

      Buy Now
    • Complete Illustrated Guide to Woodworking USB

      Buy Now
    • Tool Guide 2022

      Buy Now
    View More

    Get the latest from Fine Woodworking Magazine

    • #292-NOV/DEC 2021

      • Kerf-bent wall cabinet
      • Online extras from FWW issue #292
      • How to tame curved parts with patterns
    • #291-Sep/Oct 2021

      • Build a modern coffee table
      • Online Extras from FWW Issue #291
      • Editor's Letter: Something old, something new
    • #290-July/Aug 2021

      • Build a Shaker chest of drawers
      • Online Extras from FWW Issue #290
      • From the editor: What we make matters
    • #289-May/June 2021

      • Arts & Crafts Coffee Table with Story-Book Charm
      • Links from Fine Woodworking issue #289
      • Step-by-Step Guide to Tuning Your Block Plane
    • #288-Mar/Apr 2021

      • Phil Lowe: A craftsman and gentleman
      • Online Extras from FWW Issue #288
      • Phil Lowe: craftsman, teacher, friend

    UNLIMITED membership - Get access to it all

    Start Free Trial Upgrade Membership

    Fine WoodWorking

    Follow

    Newsletter

    Get woodworking tips, expert advice and special offers in your inbox

    Sign Up

    Membership & Magazine

    • Members
    • Digital Libraries
    • Join Unlimited
    • Magazine Subscription
    • Magazine Renewal
    • Gift a Subscription
    • Customer Support
    • Manage Preferences

    Taunton Network

    • Fine Homebuilding
    • Green Building Advisor
    • Fine Gardening
    • Threads
    • About
    • Contact
    • Advertise
    • Privacy Policy
    • Careers
    • Copyright
    • Terms of Use
    • Accessibility
    • California Privacy Rights
    • Site Map

    © 2021 The Taunton Press, Inc. All rights reserved.

    Get step-by-step instructions, woodworking tips, expert advice and special offers in your inbox. Sign Up Now!

      Main Menu

    • Projects and Plans
    • How-To
    • Shop Tips
    • Tools & Materials
    • Videos
    • Gallery
    • Magazine
    • Video Workshops
    • Members
    • Forum

      Popular Topics

    • Design
    • Small Projects
    • Beds
    • Chairs, Benches And Stools
    • Built-ins
    • Storage And Shelves
    • Cabinets
    • Carving
    • Casework
    • Desks
    • Tables
    • Shop Storage And Furniture
    • Woodturning Projects
    • Workbenches
    • Surface Prep

      More

    • TV
    • Forum
    • Blogs
    • Webinars
    • Podcasts
    • Customer Support

      Account

    • Log In
    • Join

      Magazine

    • Current Issue
    • Past Issues
    • Digital Libraries
    • Magazine Index
    • Subscribe

      Membership

    • Member Home
    • Start Free Trial
    • Gift Unlimited
    • Log In

      Shop the Store

    • Books
    • DVDs
    • Taunton Workshops

      Events

    • Fine Woodworking Live
    • Fine Woodworking HANDS ON

      Account

    • Log In
    • Sign Up

    Newsletter

    Get woodworking tips, offers, and expert advice in your inbox

    Sign Up

    Follow

    UNLIMITED

    Become an UNLIMITED member and get it all: searchable online archive of every issue, how-to videos, Complete Illustrated Guide to Woodworking digital series, print magazine, e-newsletter, and more.

    Start Your Free Trial

    Upgrade Membership