
How to make a salt box
Make one for yourself, or a bunch for family and friends (and yourself)

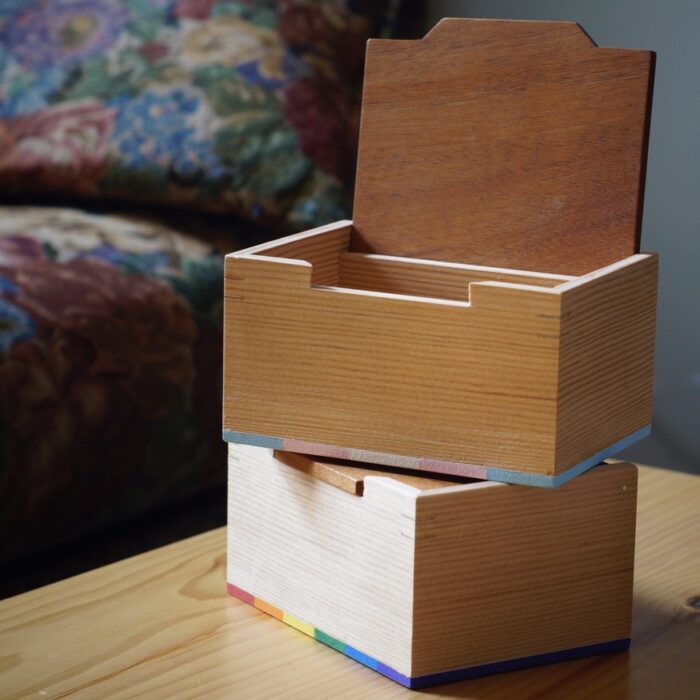
Salt boxes are appealing little things. In the kitchen, they offer a quick and ready way to grab a literal pinch of salt. In the shop, they’re small, fast, giftable projects—a winning trio. Fine Woodworking’s own John Tetreault made three lovely ones with mitered dovetails and a sliding lid in 2015. Me, I wanted a hinged lid. But none spoke to me until I saw chef J. Kenji López-Alt’s. I tweaked the concept some to better fit my tooling and aesthetics. The result is a project that ticks some boxes for woodworking nerds, like continuous grain and contrasting woods, and some for cooks, like sizing for an adult’s hand and a sealed container to limit air flow.
I’ve made these boxes from quartersawn white oak, cherry and pine, and, in this blog, CVG (Clear, vertical grain) Douglas fir and some sort of mahogany (I think).
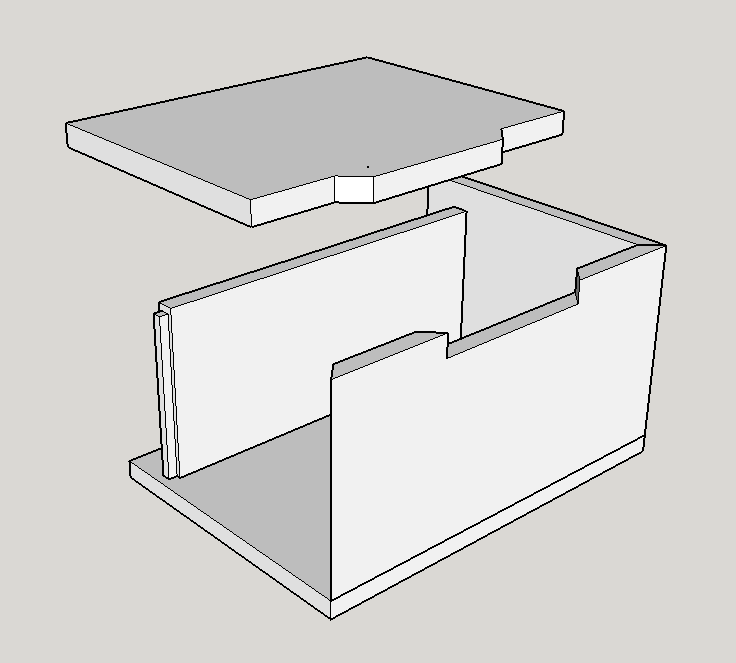
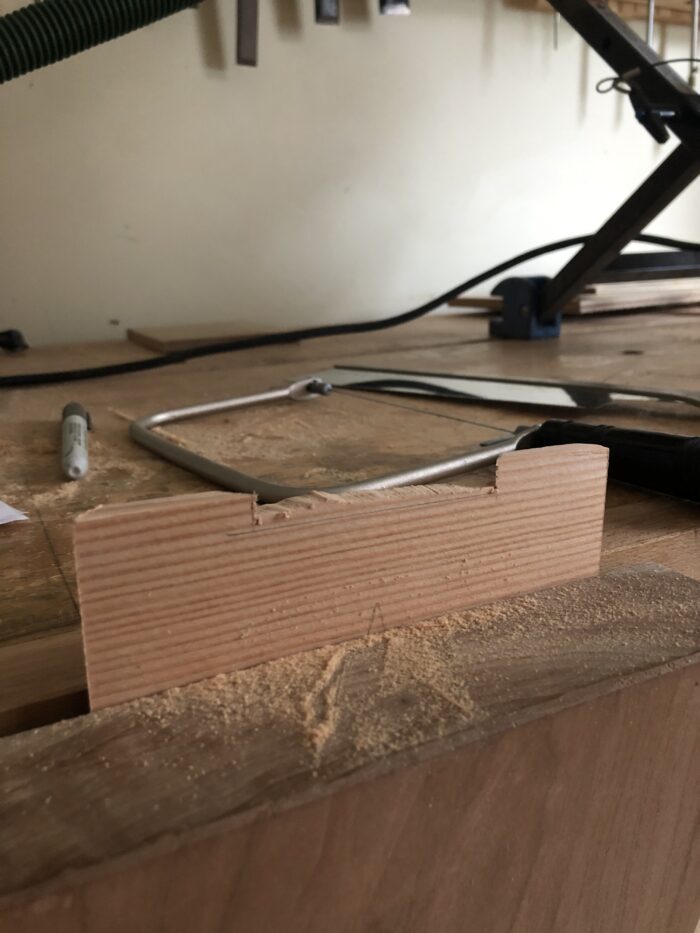
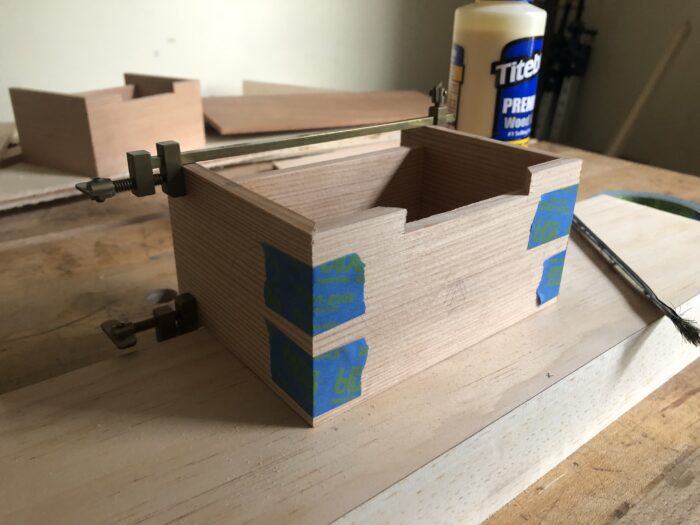
Cut the front and sides from one continuous board. The back, which is recessed, can be whatever. To complement the continuous grain, I miter the front corners. (If I had a tablesaw, you’d better believe I’d use that for these miters.)
The back is trapped in stopped dadoes on the side. Don’t worry about squaring up the top of the dado. The back gets shouldered at the top, covering the joint.
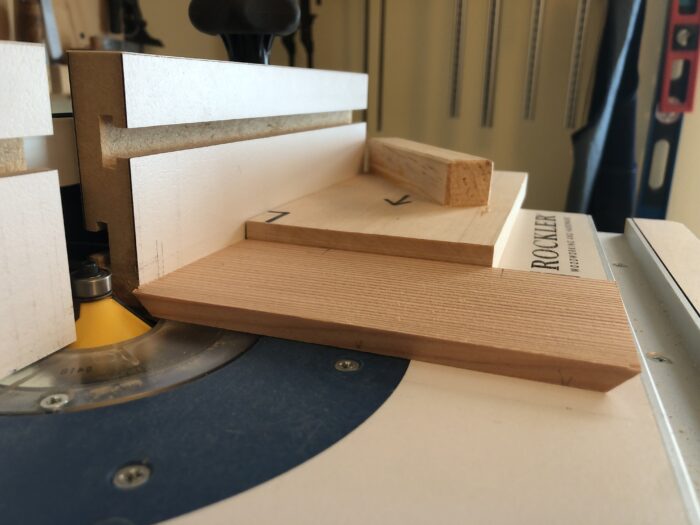
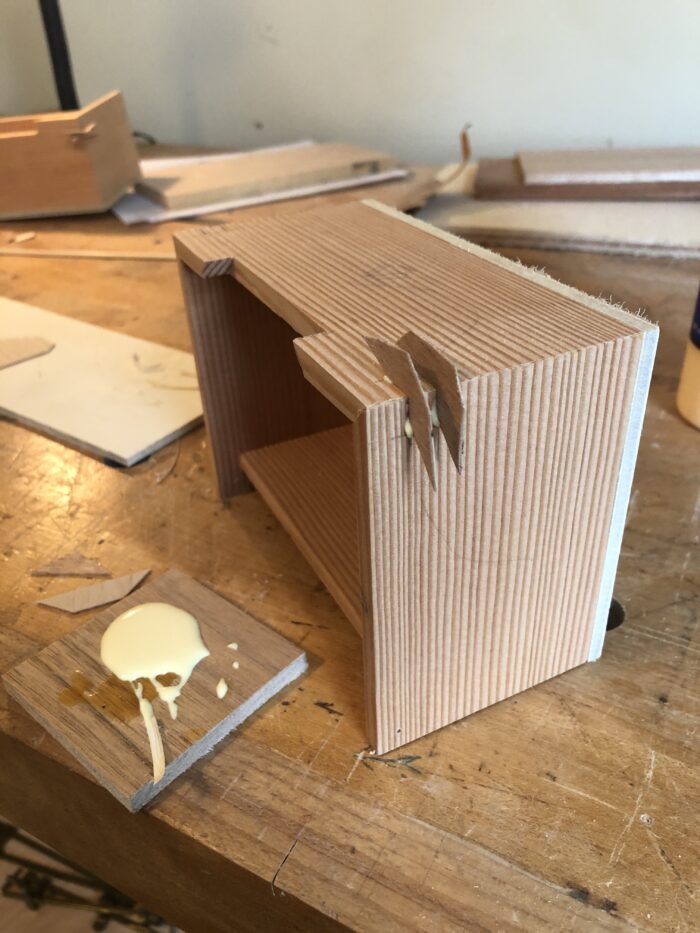
These cuts are stopped, and layout lines on my fence and box sides tell me where to stop one cut and where to start the other. Bob Van Dyke gets into it in more detail in this article, but the key is to not climb cut. So the lines on the fence represent the diameter of the bit. To rout the box’s left side, I stop on the right line. To rout the box’s right side, I plunge at the left line and rout through. Stops, not pictured, add extra safety and repeatability.
A hearty bit takes care of the back’s corresponding stub tenon—easy enough. The caveat is that the shoulder-to-shoulder distance between tenons needs to match the dimension between miters on the box front. Otherwise, the box won’t have a chance of being square. So I sneak up on this dimension, beginning with a back that’s overlong and tapping the fence very lightly between passes until I hit the right setting. Then I trim the stub tenons to length.
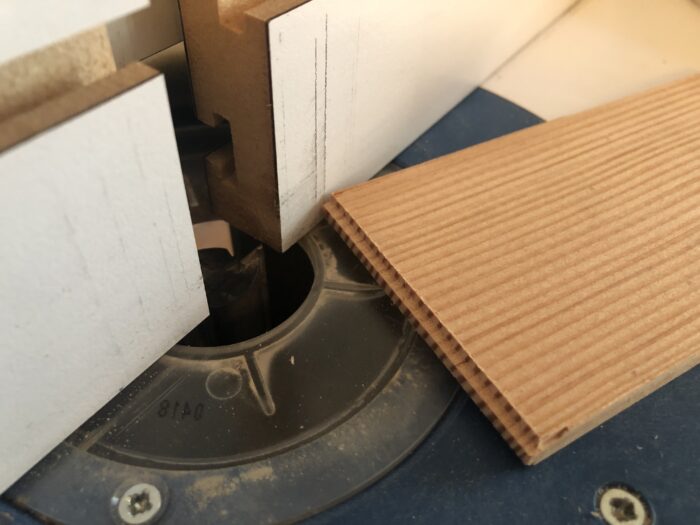
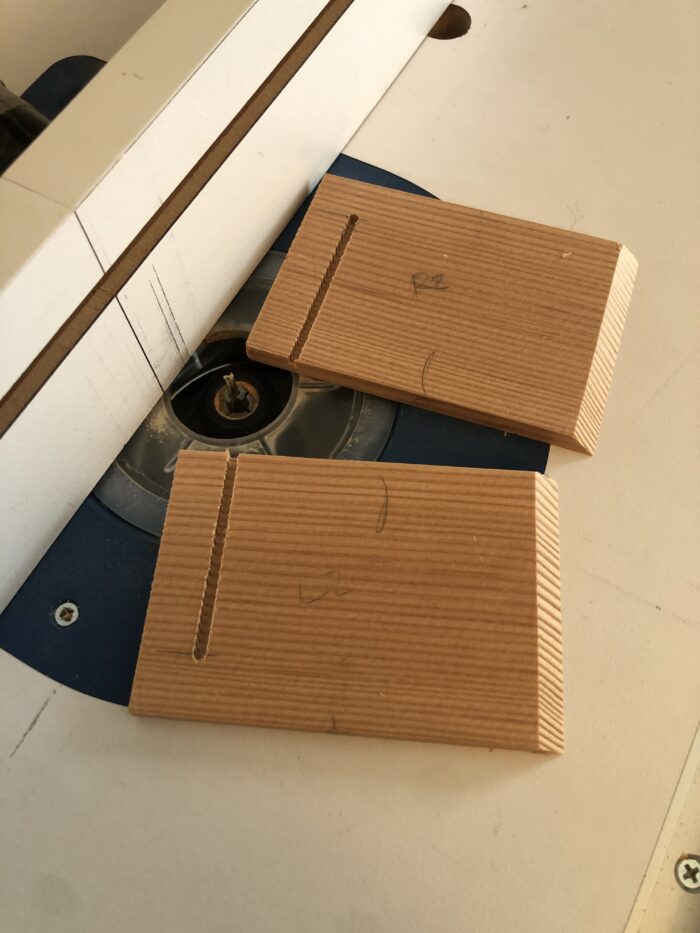
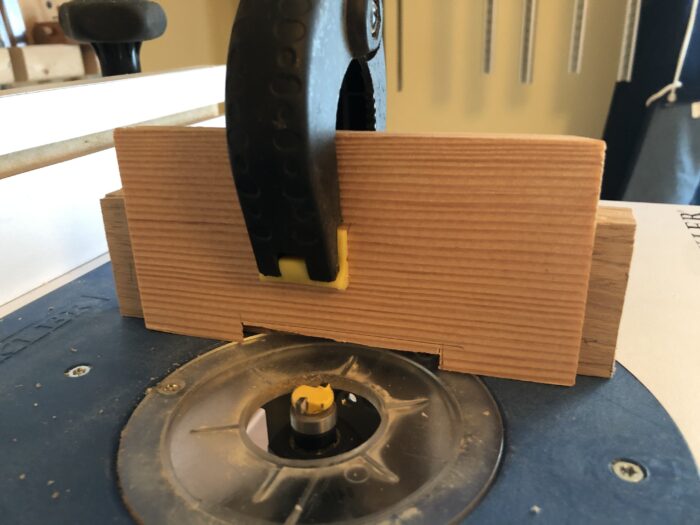
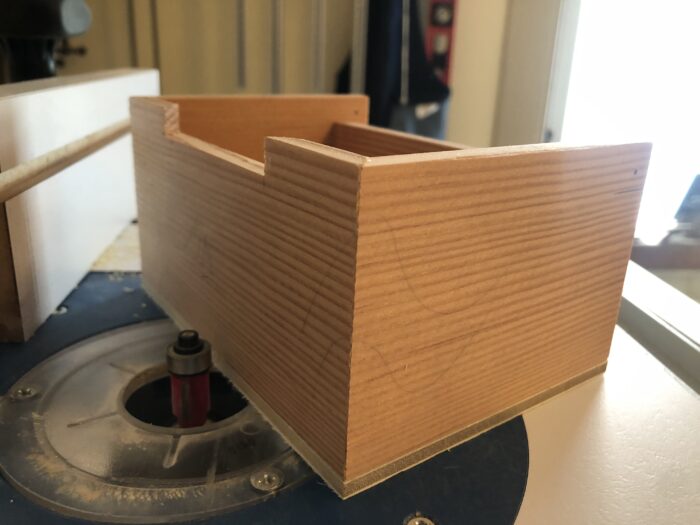
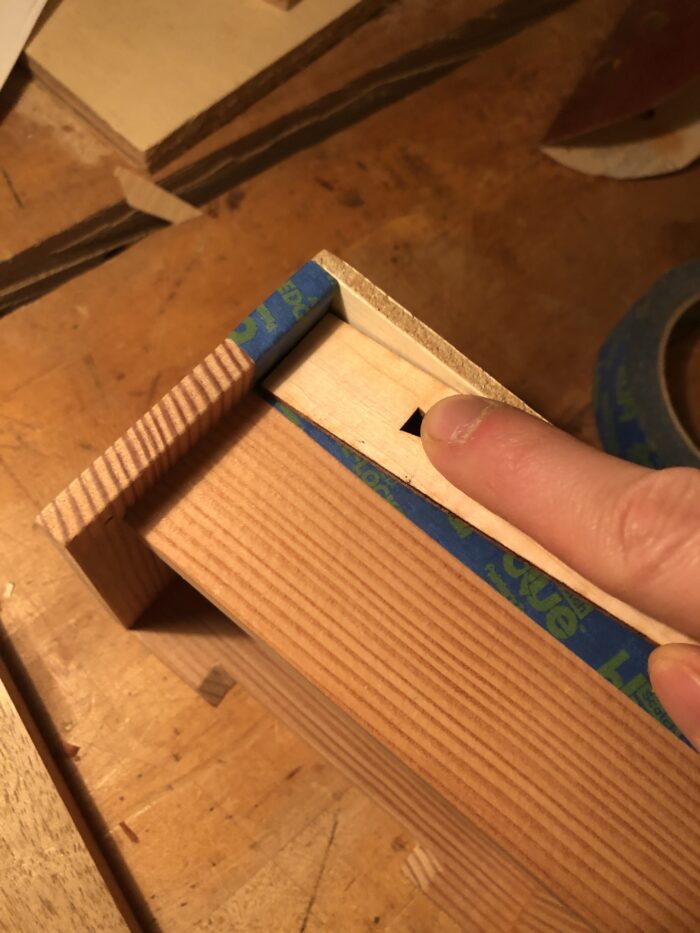
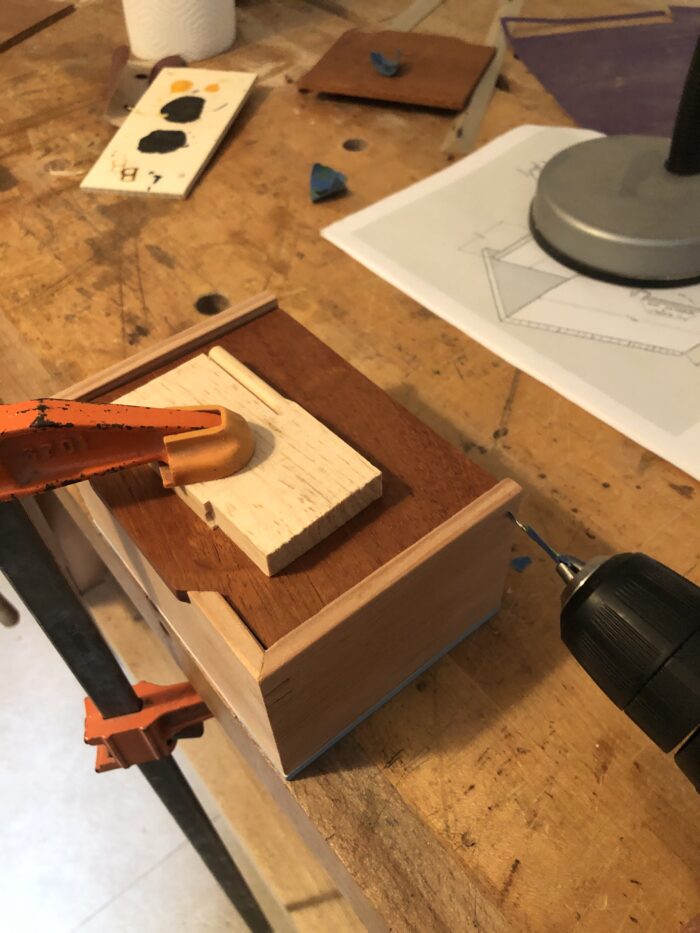
The front needs a cutout to accommodate the lid’s tab. I start this by hand, cutting the 45° ends with a fine-tooth handsaw before coping out much of the middle.
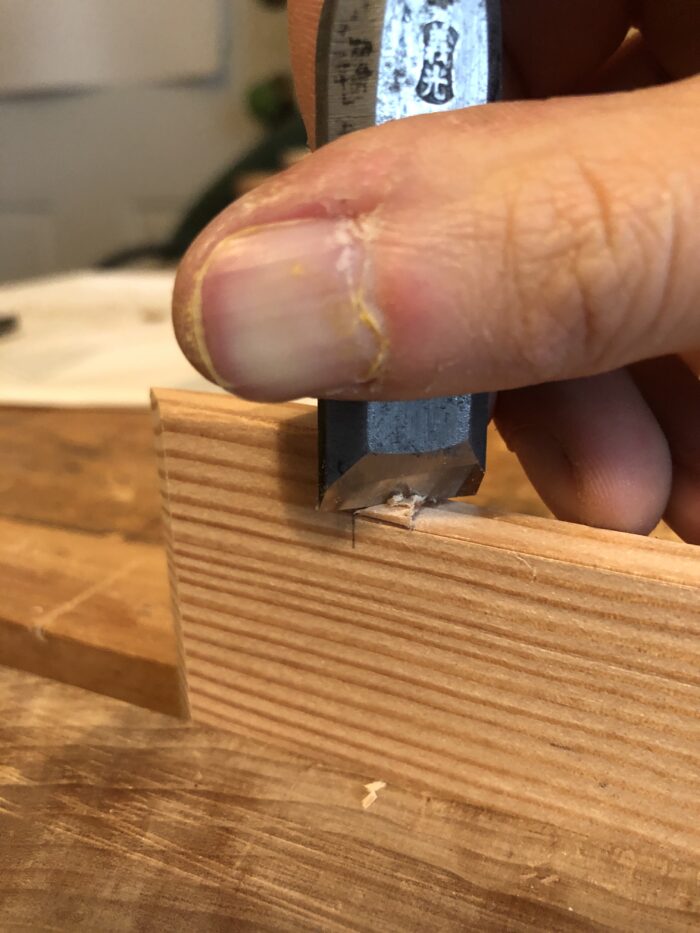
Then I incrementally work to my baseline with a stubby pattern bit. The ⅛-in.-long cutter means the bearing hits my side walls from the very first pass provided I coped out enough waste. A backer block keeps my fingers away from the bit. The backer is excavated a little in the middle of the bottom edge to let the bit and bearing pass through the whole front. (I’ve done this step after glue-up too; I’m not sure which one I like more.)
If the backer isn’t excavated enough, you may be left with a little waste. A chisel handles that no problem.
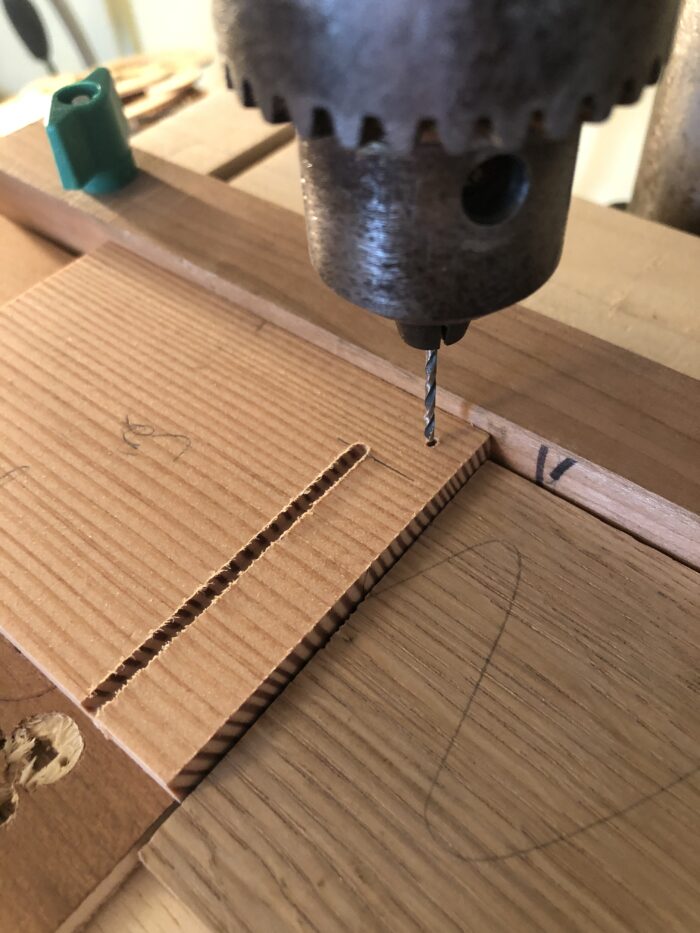
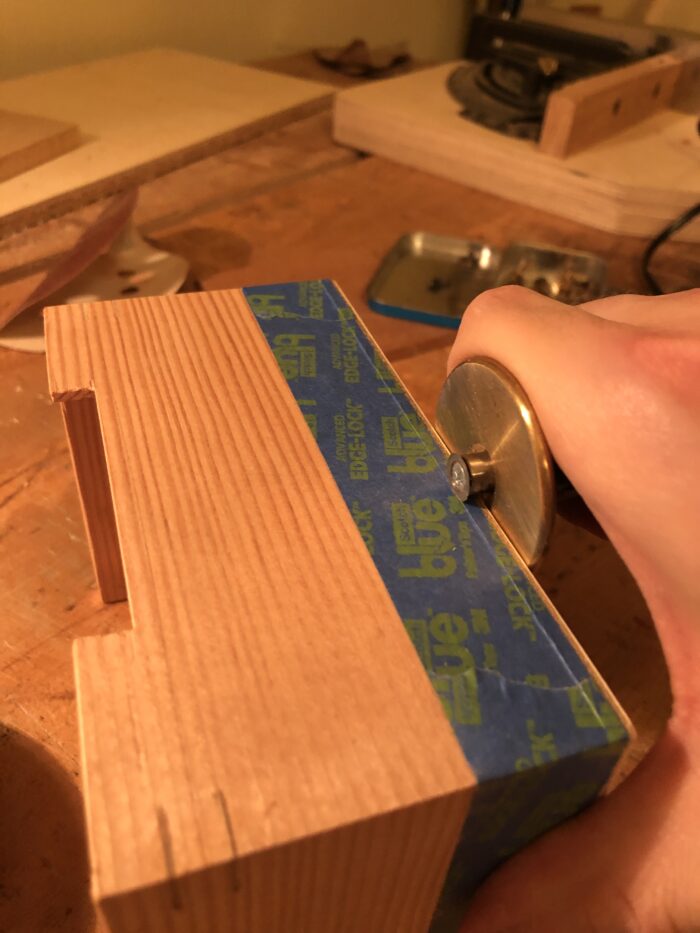
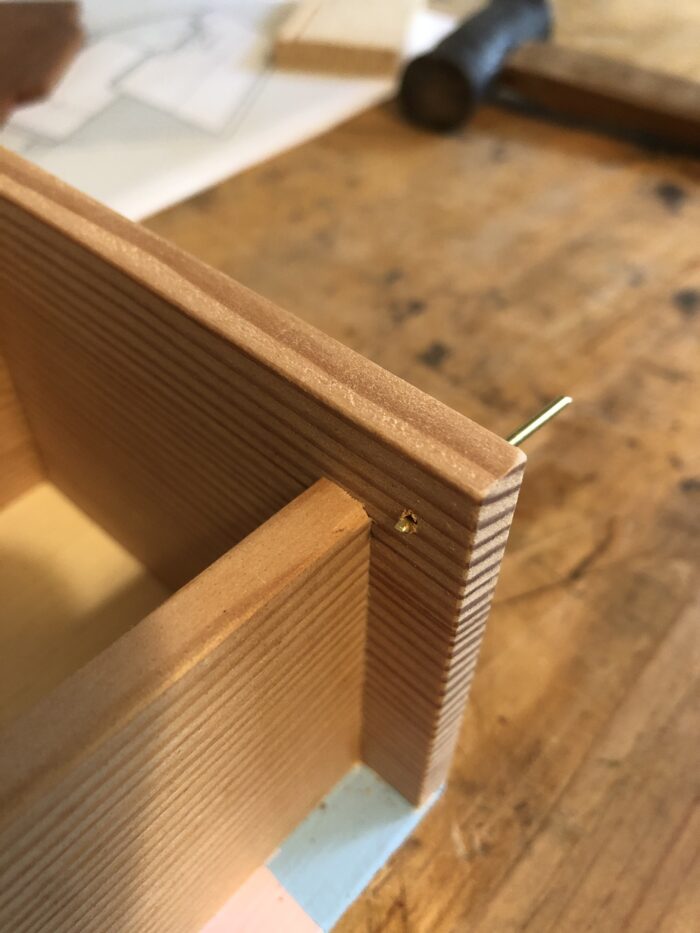
The back pivots on an 1/16-in.-thick brass rod. I locate the hole top-to-bottom so the pin’s centered on the lid’s thickness and there’s a small shadow line above the top. Left to right, the hole’s placed so the top can open entirely but the back still acts as a stop. There’s also no gap between the top and the back, minimizing airflow in hopes that your salt doesn’t absorb ambient moisture as quickly.
The box’s size belies how finicky the glue-up can be. I use tape at the miters and wee clamps at the dado—simple enough—but maintaining square is the headache. With such little bearing surface all around, I’ve found it easy to fall out of square real fast.
The bottom is plywood glued right to the box. Classless for now, sure, but it adds immediate strength to the box. Plus, I gussy it up later. A heavy weight and a fat caul in the back and clamps up front ensure adequate clamping pressure all around. Make sure the back edge of the plywood is flush with the back of the box. Also, be judicious with glue to minimize squeeze-out. There’s very little room to clean it up easily, and you won’t be able to see it during the glue-up.
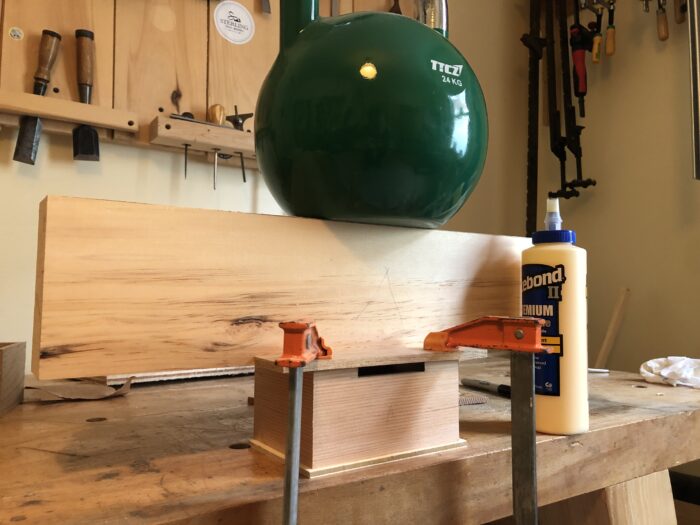
When the glue’s dry, flush the bottom to the box’s front and sides. I do not rout around the back.
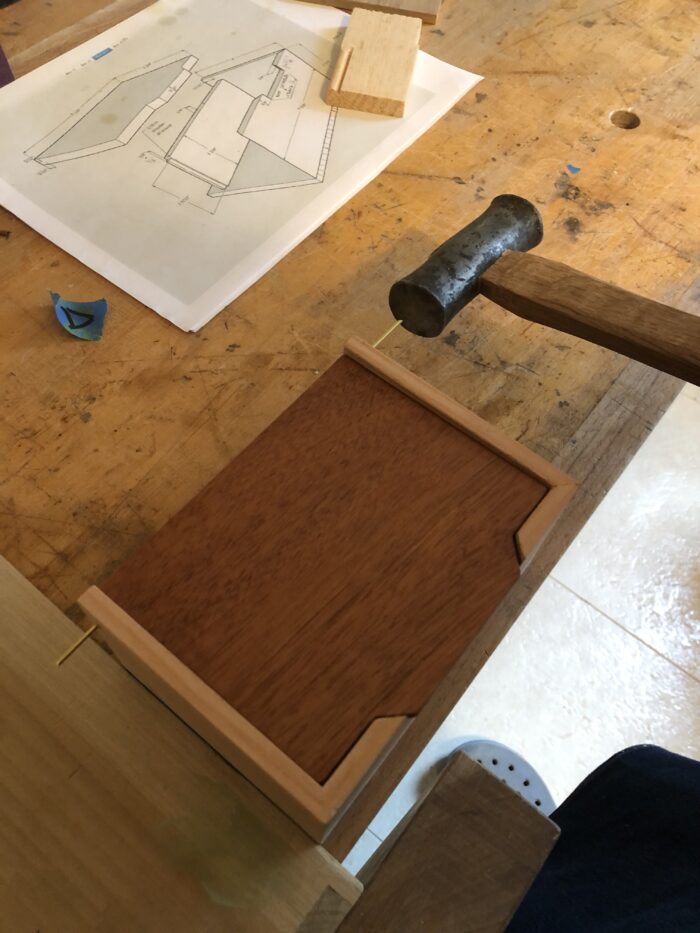
With the plywood strengthening the bottom of the box, I add splines toward the top to maintain the miter there. Veneer fits excellently in my dozuki’s sawkerf. Sometimes I need to pound the veneer thinner with a hammer, but that’s no matter, since the glue swells it right back up.
Now, onto the gussying. I like plywood bottoms because, when glued on, they’re instant reinforcement. They’re ugly too, but that’s another benefit: They’re just begging for a glow-up. So, I paint them.
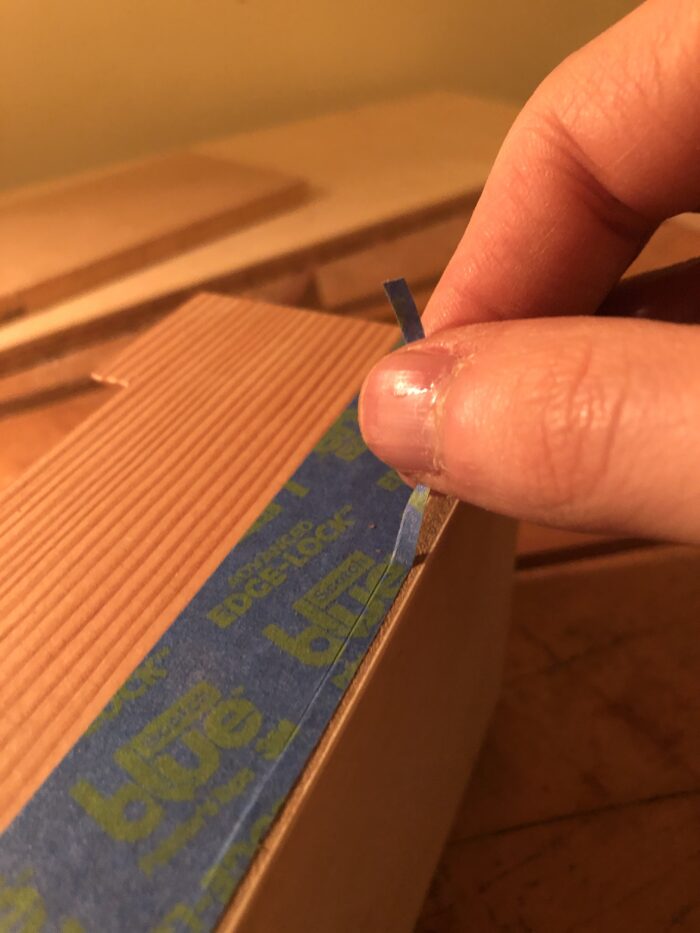
The first step is to tape off the box and, just slightly, the bottom. Then trim the overlapping tape with a cutting gauge set to the thickness of the bottom and peel off the thin strip covering the plywood.
Tape around the back too, so you can paint that plywood safely too. I use a thin piece of wood to make sure the tape adheres well to the box, including where the back meets the sides. A credit card works too. Push the tape down around the rest of the box too. You don’t want the paint to bleed.
Now, paint.
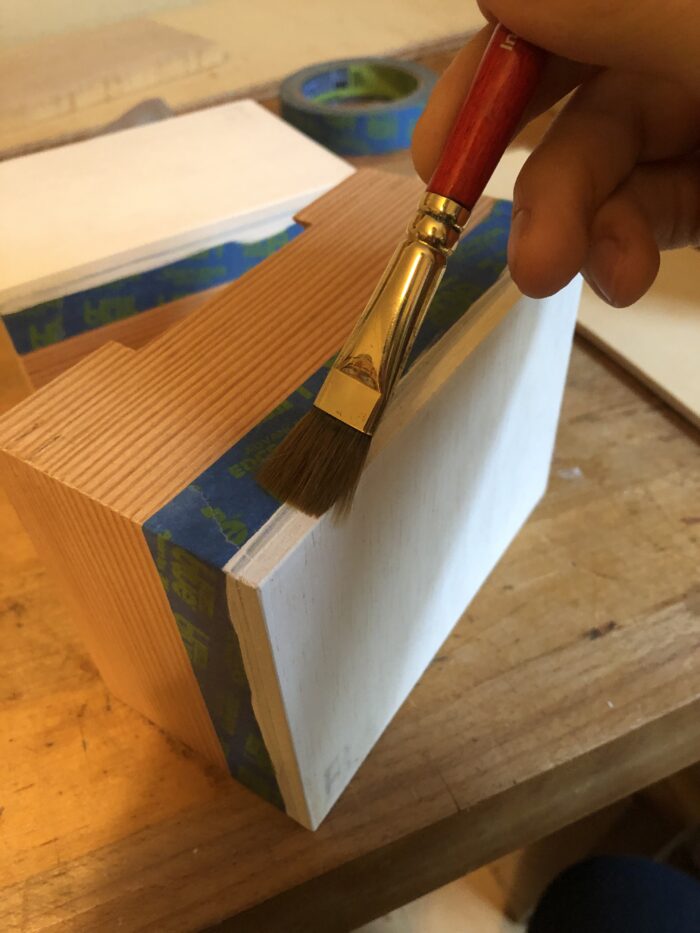
I also shellac the inside of the box. The front, sides, and back get shellacked before glue-up, and the bottom after. I don’t paint the bottom on the inside. Since this is a salt box, I want to keep it food safe.
After you cut the top to size and shape, put it in place to drill its holes for the hinge. You want the back edge to be flush with the box, and the front to overhang a 1/16 in. or so. The holes in the sides will guide your drill. Clamp the top in place to prevent it from moving, since any shift would ruin the hinge action.
Even though I locate the holes so the top doesn’t hang up on the back, sometimes I don’t get it spot on. So, I test the hinge with the brass pins installed just a touch–enough where they grip the lid gingerly, but I can still slide the piece on and off. If the top catches on the back, round over or chamfer the bottom of the back edge with a handplane. Re-test frequently. Done right, there still shouldn’t be a gap between the lid and top.
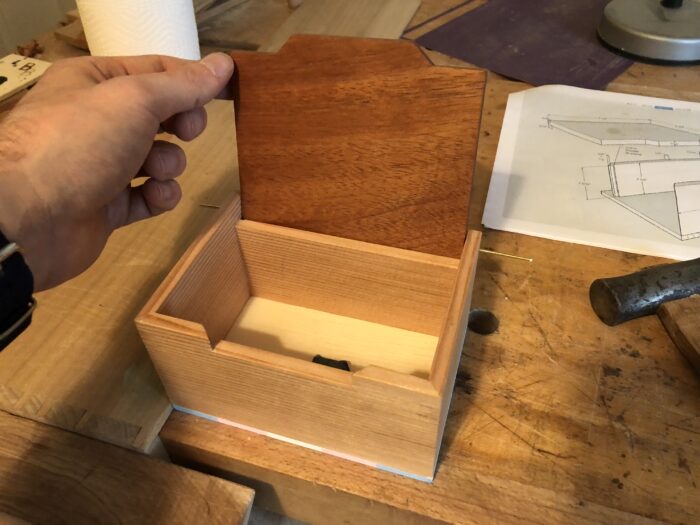
I was living right with this box: The lid worked just fine without any beveling.
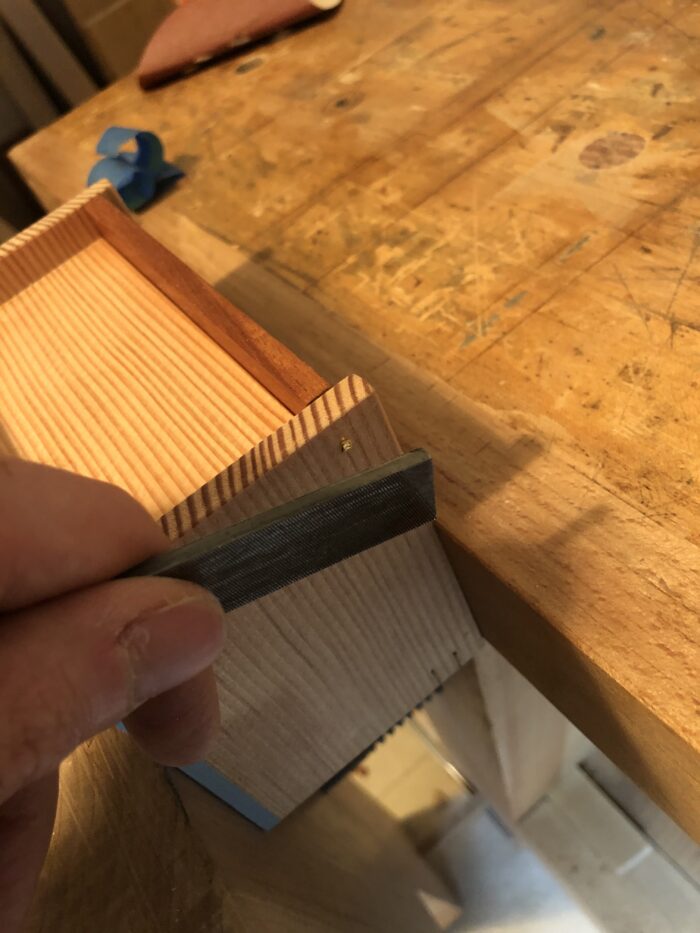
When you’re lid’s good to go, hammer the pins home, snip them as close to the box as you can manage, and file what’s left flush very, very carefully.
Lastly, take a shot for the ‘gram.
Dovetailed Salt Box
One-day woodworking projects


Comments
I was wondering if you could send me the measurements of the box. I see you have them in one of the photos but it is too small to read.
Do you have a link to the measured drawing? Great box!
Log in or create an account to post a comment.
Sign up Log in