
The Basics of Box Making
Get an inside look at how to make a mitered box with continuous grain around all four sides.
 Apr 06, 2021
I approach the process of making boxes the same way I approach designing them. Keep it simple, clean, and precise. An understated but elegant box should not be difficult to make, nor should it be made sloppily. I’ve given a ton of thought to how I make boxes, and I’ve tried another ton’s worth of techniques. What I like most about the techniques I use is that they don’t get in the way. They aren’t flashy. When I look at a completed box, I don’t get caught up by an insanely complex corner joint and a set of wickedly curvaceous legs. I see a beautiful box. That’s what it’s all about. Make something that evokes this reaction: Wow. That’s beautiful. Anything else is unimportant.
The importance of continuous grain
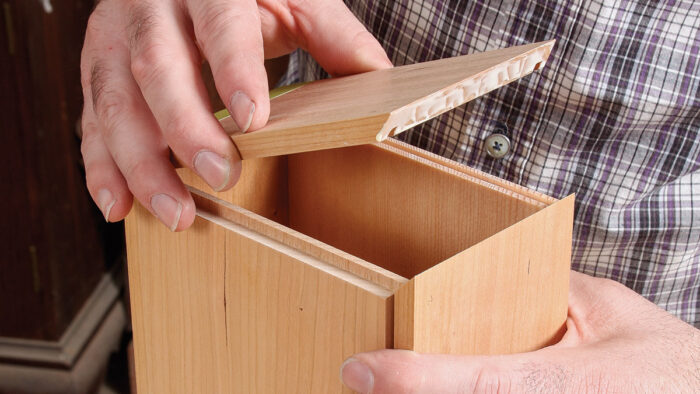
There are many things that I obsess about when making a box, but none more so than grain that wraps seamlessly around all four corners of the box. It’s a small detail, but one that can be the difference between a really good box and one that sings beautifully. It’s less important on boxes that have dovetails, rabbets, and finger joints at the corners. It’s absolutely necessary on a mitered box. When the grain swings uninterrupted around the joint, a lovely, harmonious cosmic music strikes up and warms your soul. If the grain comes to a stop on one side and is met by unmatched grain on the other side of the joint, the effect is discordant.
Make two boards from one for perfect grain
The question, then, is how to create a box with grain that flows continuously around all four corners in an unbroken loop. The answer is resawing. Start with a thick board, at least 5/4 thick. Slice it down the middle at the bandsaw. The newly sawn faces of the two new boards become the outside of the box. What were the outside faces of the original board become the inside. Open the board like a book, but with the binding along the short edge. Hinge the boards at one end. See how the grain flows from one board to the next? That’s the secret to a four-corner match. Make a joint there and you have continuous grain. Another joint will come a bit farther in the board, and you’ll get grain match there, too. The same goes for the second board. Now we have grain match at three corners. And just like the grain matched at the end where the two boards first met, it will match at the other end after you’ve cut out the sides (if you cut them out the correct way). That’s the fourth corner. Now you’ve got grain running continuously around all four joints.
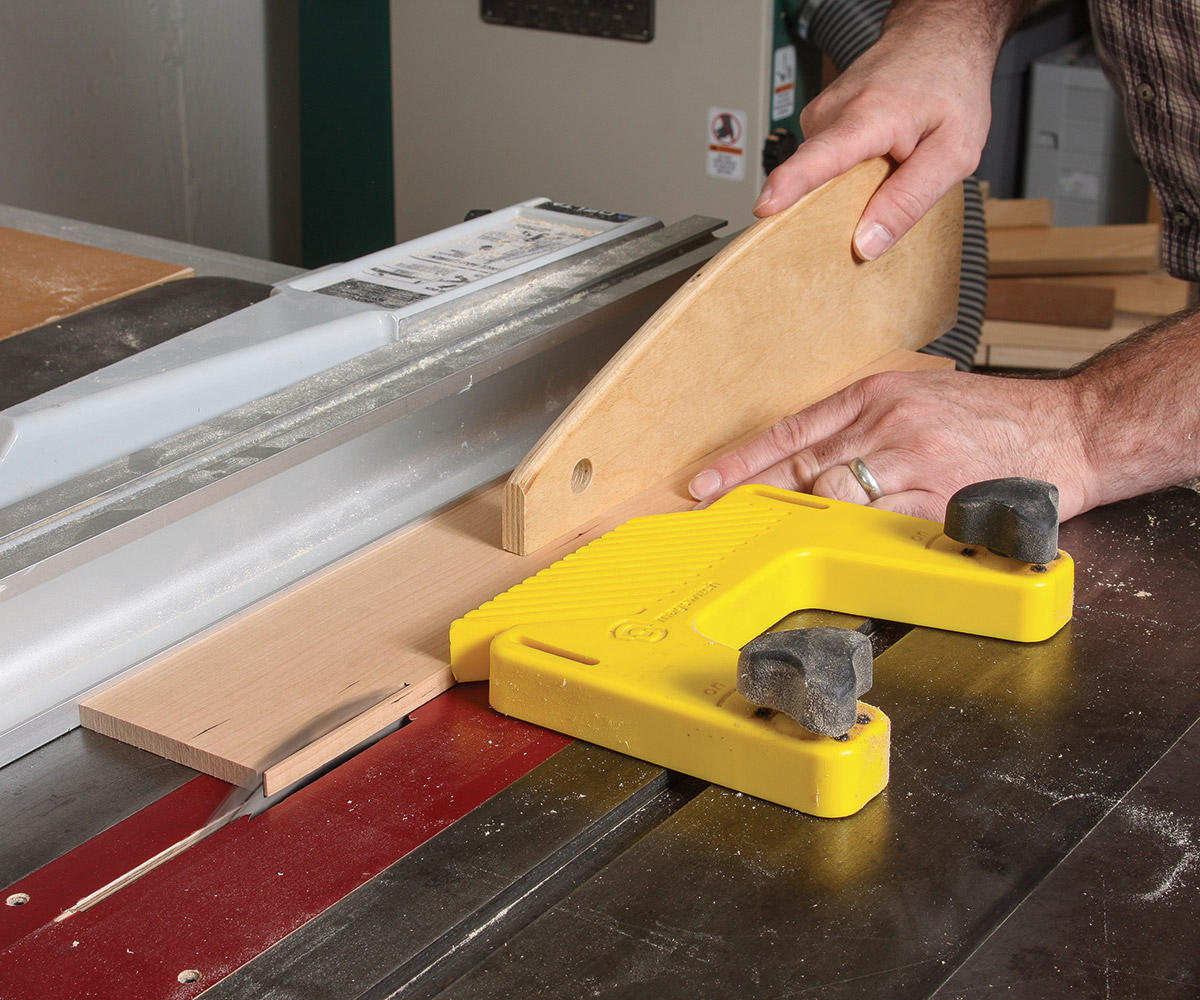
There’s more to it than that, certainly, but it’s all manageable. Here’s how I do it. Starting with a thick board, I joint one face and one edge. I then set up my bandsaw to cut about 1/8 in. thicker than the final thickness of the box’s sides and resaw a new board. I clean up the sawn face on the original board with a jack plane, taking very light shavings until all the sawmarks are just gone. This might seem a bit fussy, but the less material you remove from the bandsawn faces, the better that grain match will be at the corners. I then cut a second board. I joint the bandsawn face of the first new board cut, then take both of them to my planer and take them down to 1/32 in. over their final thickness. This extra bit of material lets me plane both surfaces to remove the machine marks.
 |
 |
| 1. Set the bandsaw fence to cut the board a little thicker than the side’s final thickness. | 2. Check to make sure the fence face is parallel to the blade. |
 |
 |
| 3. Joint one face of the board. | 4. Joint one edge. |
 |
 |
| 5. Resaw the first new board. | 6. Re-joint the original face with a No. 5 jack plane. |
 |
 |
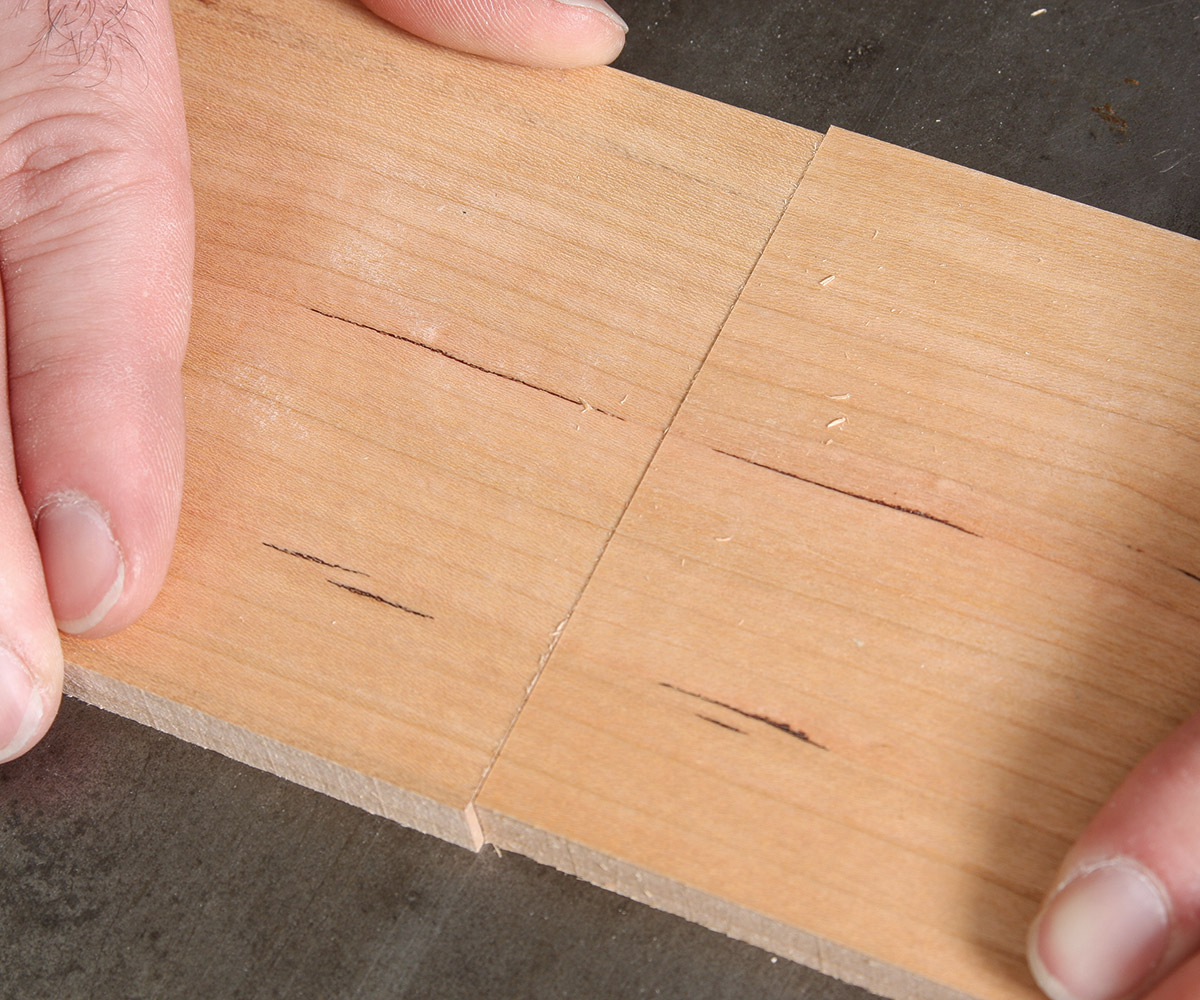
| 7. Adjust the sides up and down until the grain aligns along the two boards. | 8. Trim excess width from the overhang of one board. |
At this point, the grain match at the corners where the two different boards meet will be close, but not perfect. Here’s how I dial it in. Lay the boards down, outside faces up, so that they butt against one another end to end. Shift one board up and down until its grain lines up with the other. One board will end up lower than the other. Trim the bottom of that board so that the bottom edges on both pieces align. Next, rip both pieces to final width, placing the bottom edges against the rip fence. Once the pieces are mitered, the grain should wrap around the box perfectly.
Cut the sides to length, then miter them
Before I cut the sides to length, I cut the rabbet for the top and bottom. Then it’s time for the miters. As simple a joint as a single miter is, it can be infuriating to get right. After cutting them by hand and machine a dozen different ways, I’ve settled on a method that gives perfect results, and I use it for all but the smallest boxes (I use hand tools for those). I cut them in two steps at the tablesaw with a sled that crosscuts and miters.
A sled for crosscuts and miters
Kenney uses a single sled for both square and mitered crosscuts. The key is a single rail that can be used in either miter-gauge slot. He has a right-tilt saw; those with left-tilt saws should reverse the sides of the sled.


Cutting sequence

Begin by cutting the sides to length using a stop block to ensure that parallel parts are the same length. The two boards will each yield one long and one short side. It’s important to cut each board starting from the same end to make sure the grain stays matched around the box.
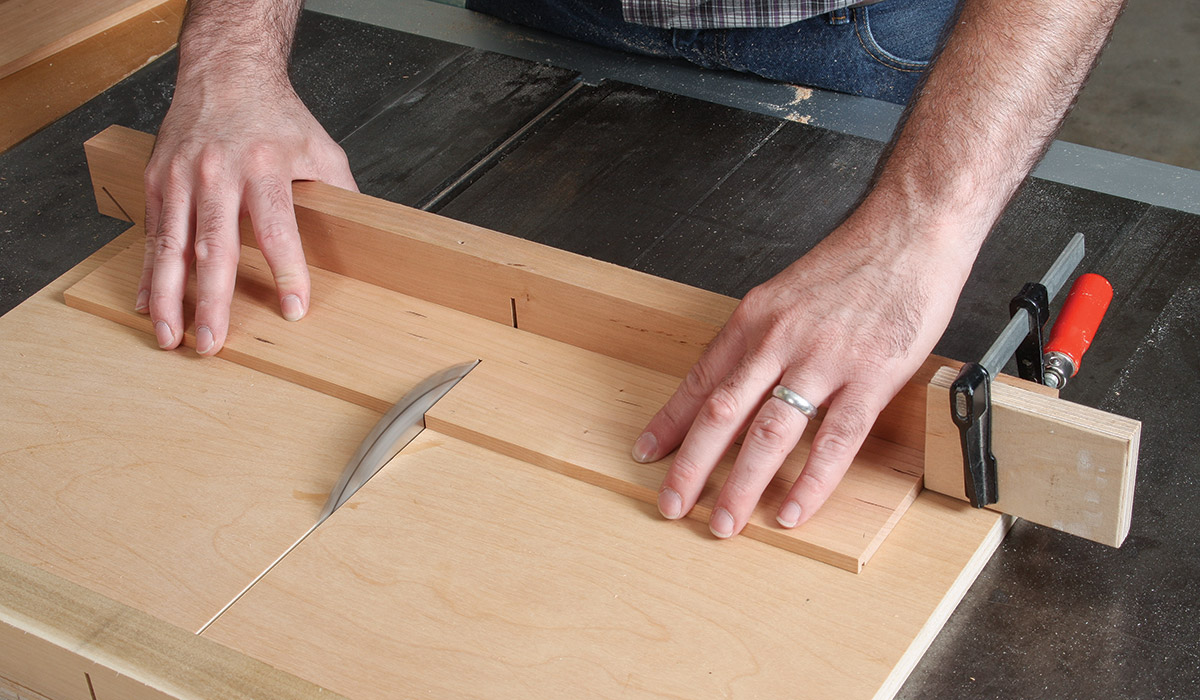
What I’m about to explain might sound complicated, but check out the “Cutting Sequence “drawing; it shows what I’m doing. Set up a stop block for the long side and put the matched end of one board against the stop. Cut the first long piece and then set up another stop to cut the short side of that board (keep the first stop in place). Use the same stop to cut the short side of the next board, placing the matched grain end against the stop. Finally, remove the stop for the short sides and cut the last long piece.
To cut the miters, tilt the blade to 45°, put the sled in the opposite miter slot, and cut a kerf in the sled fence. Set a short side on the sled and move it up until the top corner of the end is right next to the kerf. Clamp a stop block against the other end. When you make the cut, the blade will cut the miter, but won’t shorten the side, which will preserve the grain match. After making the first cut, turn the side end for end and cut the second miter. Repeat for the second short side and then miter the long sides in the same way, moving the stop block as needed.
The box sides are now mitered at 45° and the components are all set for glue-up. Any inside surface should be sanded or planed and finished before moving on.
 |
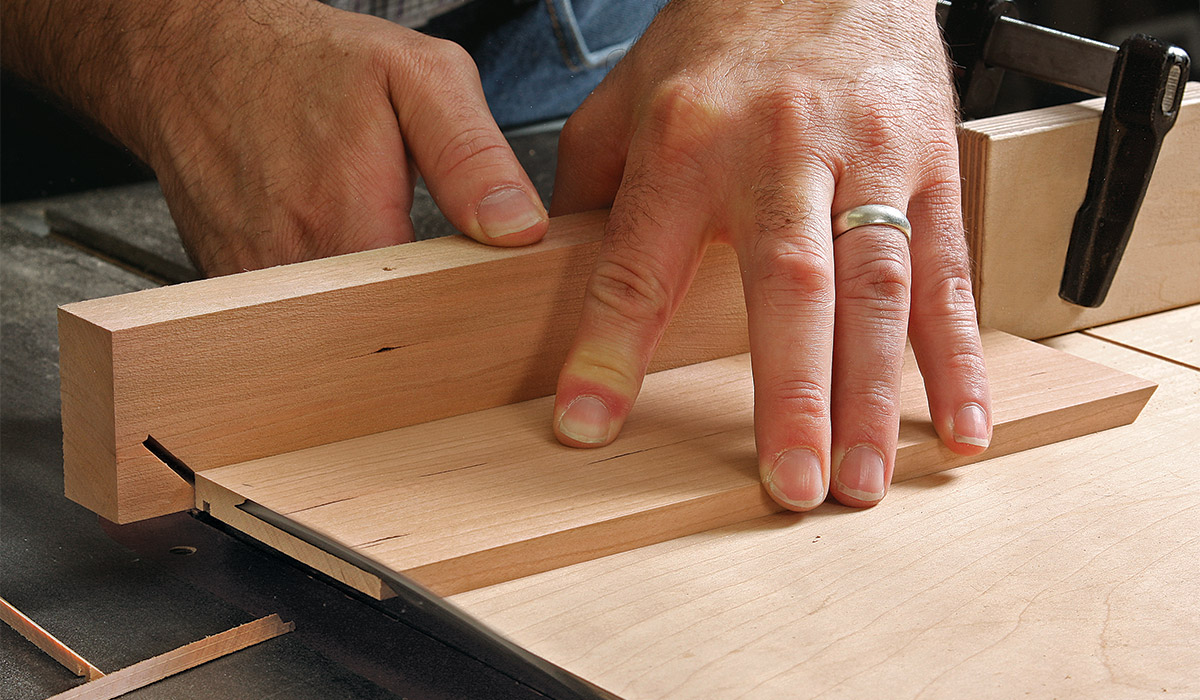 |
| 1. With a stop block clamped to the crosscut sled, cut the box sides to length. | 2. With the top corner of the side aligned with the edge of the in the sled fence, cut the miters at the tablesaw. |
Glue size makes for stronger glue
Gluing up end-grain miters on a box like this can pose some interesting issues, such as how to keep the end grain from soaking up the glue and starving the joint, or how to accurately keep pressure on all four miters while keeping the joints square.
To help avoid glue starvation, coat all of the joints with glue size using a small brush and let it dry before assembly. Glue size is a mixture of equal parts yellow glue and water that saturates and clogs the end grain. Let it dry for two hours before gluing up the box. Now, a full-strength glue spread won’t wick into the end-grain fibers, and the resulting joint will be solid.
The best way to clamp a mitered box while keeping it square is with painter’s tape. Lay out all four sides, miters face-up and touching, with the top and the bottom pieces within reach. Put tape on one side of the joint with enough overhang for the mating piece. With the mating piece vertical, press the mitered points together, then lay the piece flat. Now when the joint closes, the tape will stretch, keeping the joint tight and in line while the glue dries.
 |
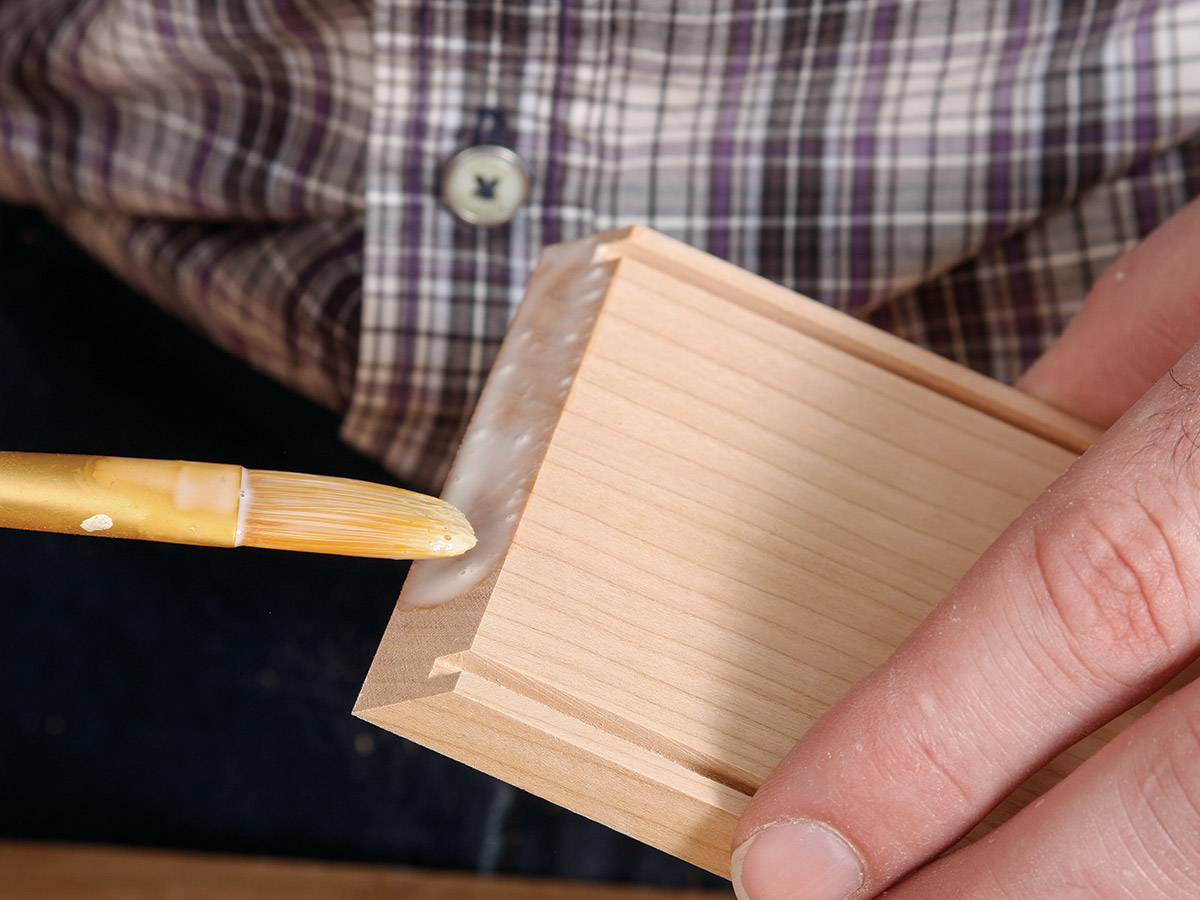 |
| 1. Mix the glue size using equal parts yellow glue and water. | 2. Spread the size on the mitered joints. |
 |
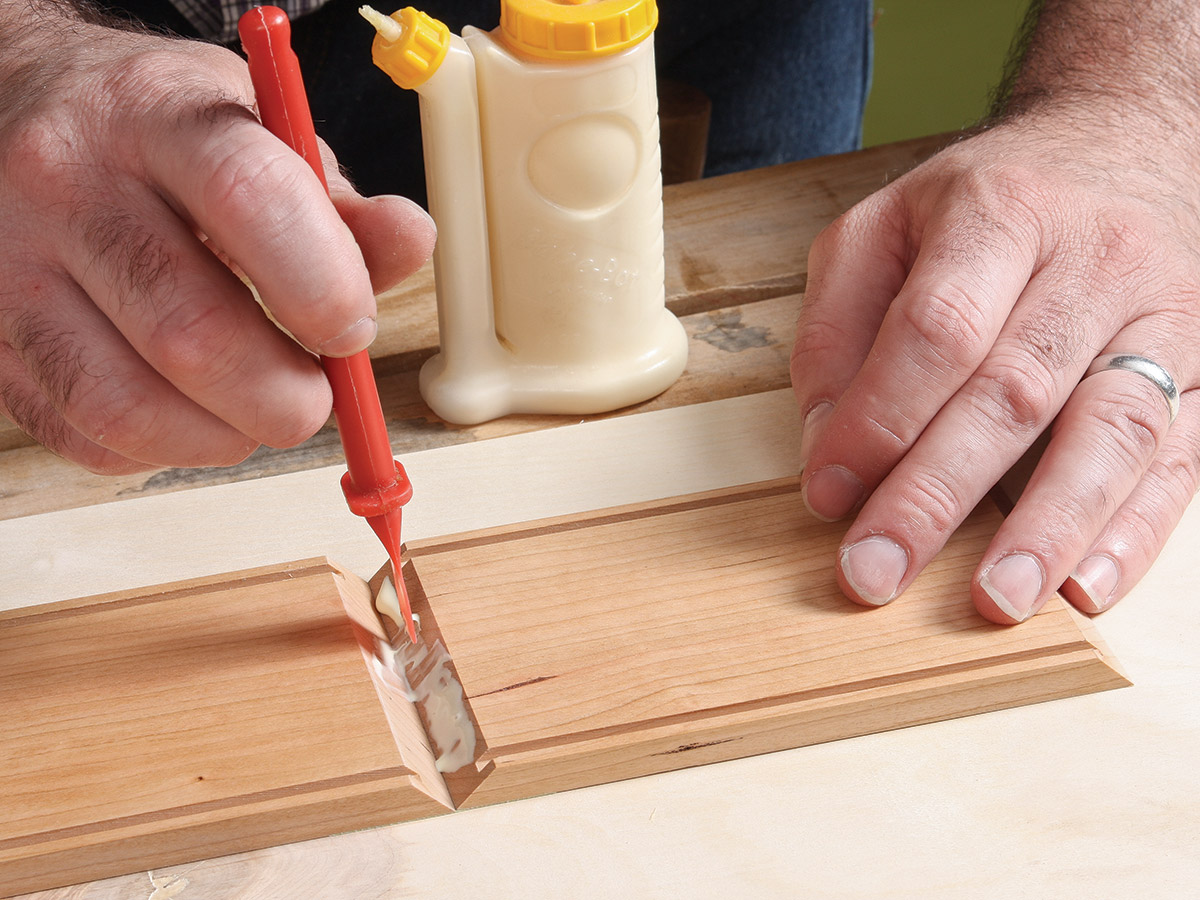 |
| 3. Keeping the two mitered tips tight together, tape up the first joint. | 4. Carefully spread glue over the miter joints, except the open ends. |
 |
 |
| 5. Place the top and bottom in the grooves in the sides and fold the sides around them. Before closing the final corner, apply glue to the miter faces there. | 6. Stretch tape over the last mitered corner to apply clamping pressure. |
 Excerpted from Matt Kenney’s book, 52 Boxes in 52 Weeks.
Browse the Taunton Store for more books and plans for making boxes.


Comments
“[Deleted]”
Log in or create an account to post a comment.
Sign up Log in