
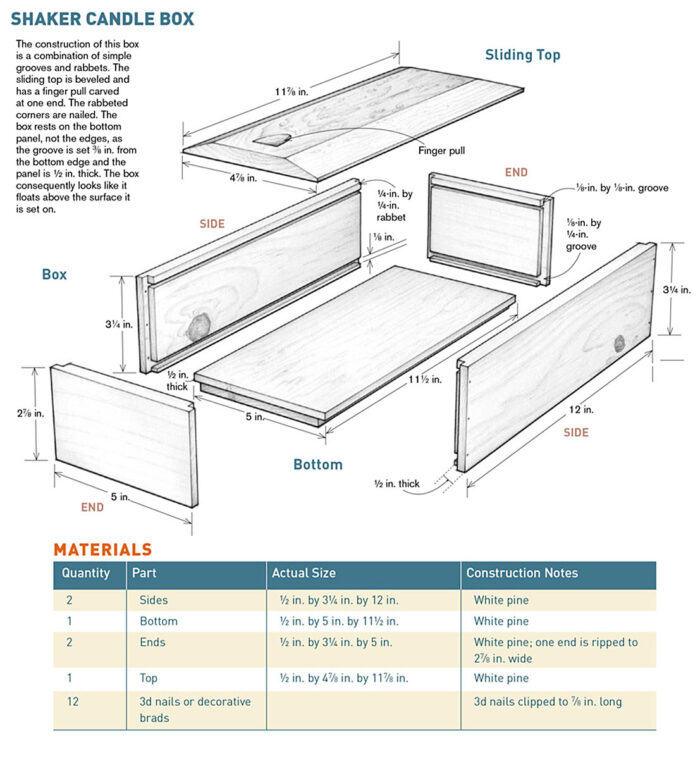
Make a Shaker Candle Box, Part 1
Simple grooves and rabbets are at the core of this beginner-level box.

I have two candle boxes in my house, neither for candles. One holds loose change, like a piggy bank. The other keeps pencils and pens. A friend uses one for receipts—they go from his wallet into the box every day, where they stay until he summons the courage to record and file them. Until then, he looks at a nice box instead of a stack of paper.
Before the appearance of light bulbs, candle boxes held candles, a primary source of household light after dark. But candle boxes have evolved into simple, small storage boxes for everything from poker chips and seashells to drink coasters and bulk spices.
Whatever you make a candle box for, tailor the interior dimensions accordingly. Make the interior big enough to hold what you want, then add space to fit a finger inside to pull the contents out. This candle box is a few inches wider and longer than a business envelope. I’ll use it for pencils and pens. Then again, my daughter may take it for her rubber lizard collection.
Historically, Shaker candle boxes have ranged from simple and crude construction with butt joints and nails to more sophisticated designs with elegant dovetails. The design of this one comes from no particular candle box, but a mixture of several. The rabbeted and nailed corners are easy to build and attractive. The sliding top with a carved finger pull is straightforward and practical. Pine is easy to work and wears gracefully. Use it daily, and the box will take on a nice patina within a year. You can find dimensioned white pine at most lumberyards. The #2 grade is cheap, but will give you knots that are hard to work (though they have an interesting look). Clear white pine is more expensive, but for a small box project it won’t dent the wallet badly.
 |
Prep Work
Commercially dimensioned lumber is rarely straight and flat. For a small box, the parts don’t have to be perfect. But the closer you can get, the better. Also look for pieces with interesting figure. I found a board with a little bird’s-eye figure at one end to use for the top.
| Checking for Warps in Small Stock
When checking if small stock is warped, looking down the board can sometimes fool the eye. There just isn’t enough distance to gauge the warp. And twists are nearly impossible to see. But set the board on a very flat surface, such as a jointer bed, and you’ll be able to tell instantly. A twisted board will rock from corner to corner. On a bowed or cupped board, you’ll be able to see where it touches the table and where it doesn’t. No squinting necessary. |
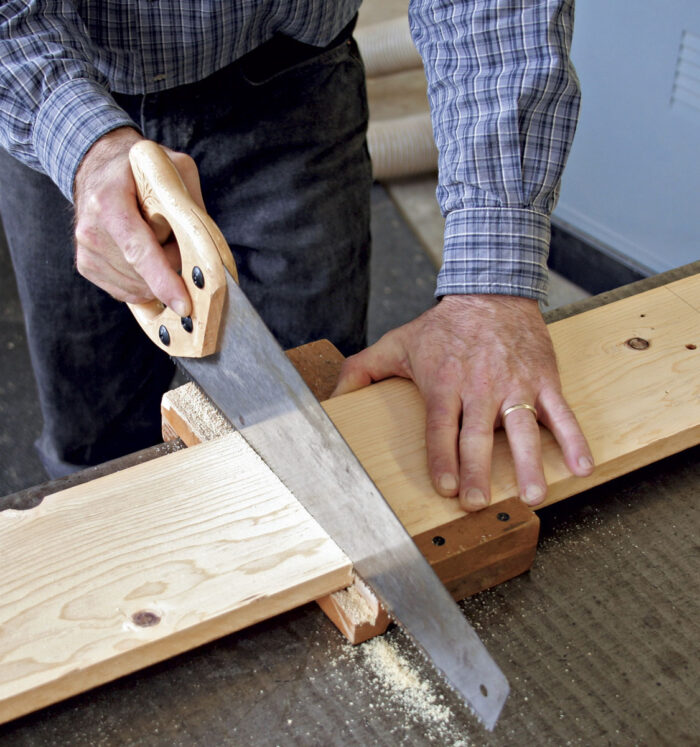
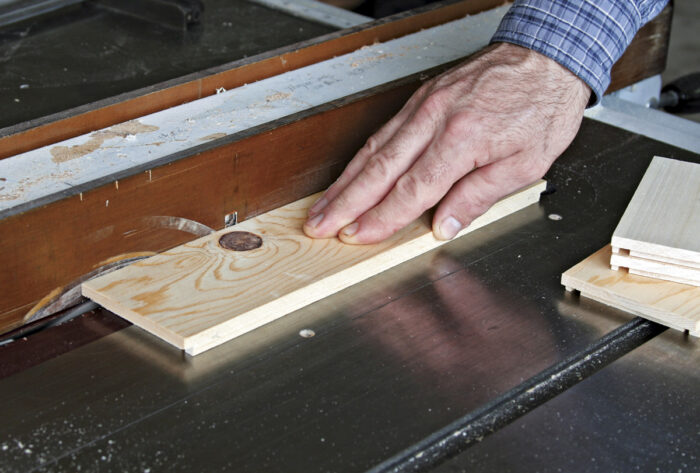
1. Crosscut your boards to oversize lengths, an inch or two longer than the finished dimensions. However, don’t cut the ends to rough length just yet. They would be too short to joint and plane. So leave them as a single 12-in. piece until you cut final dimensions in a later step. A
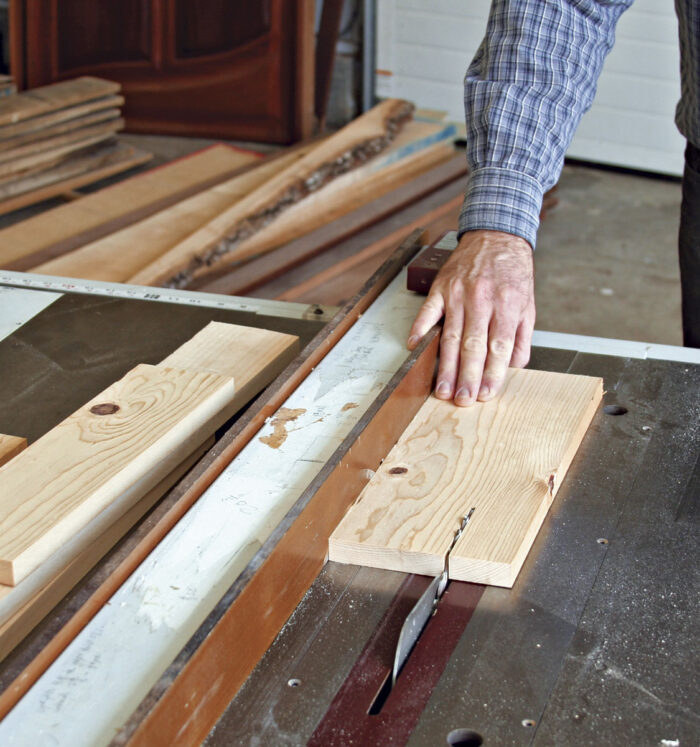
2. Rip the boards 1/4 in. wider than their final dimensions. B
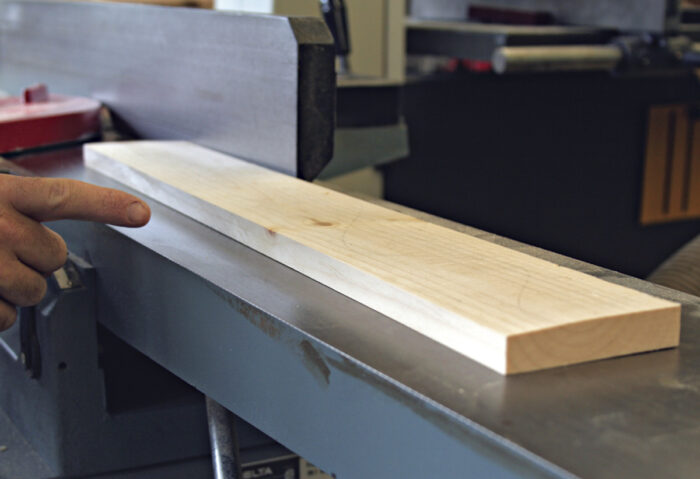
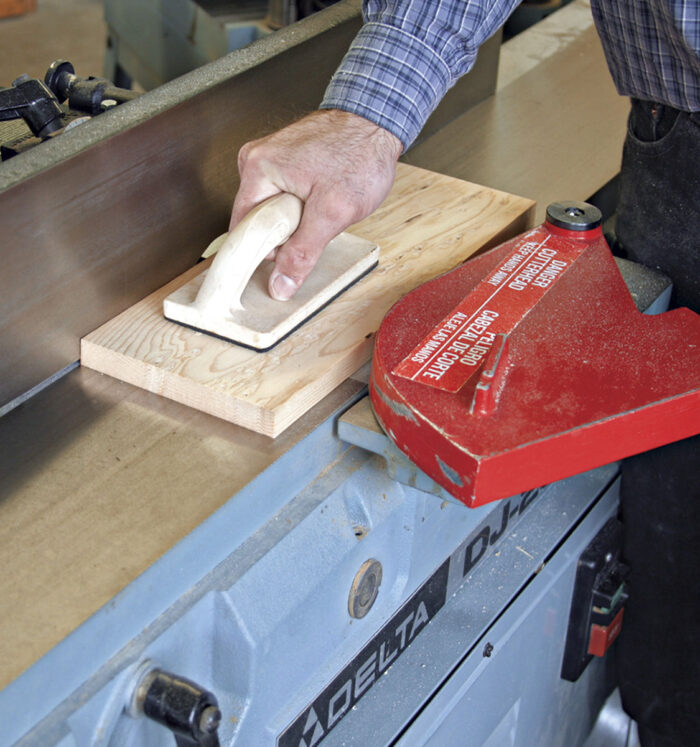
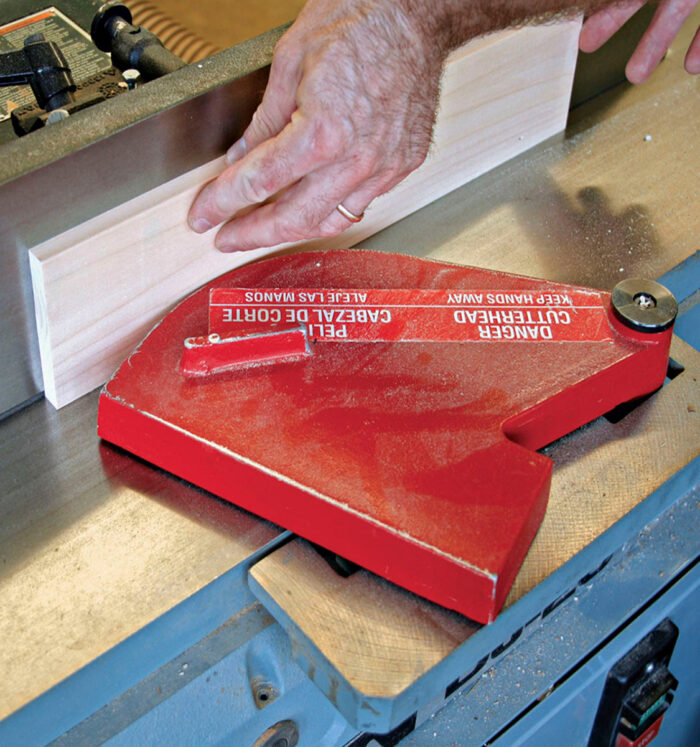
3. Joint one face of each of the boards. If they’re flat from the lumberyard, then don’t bother with this step. C
4. Plane all the boards to about 9/16 in. thick.
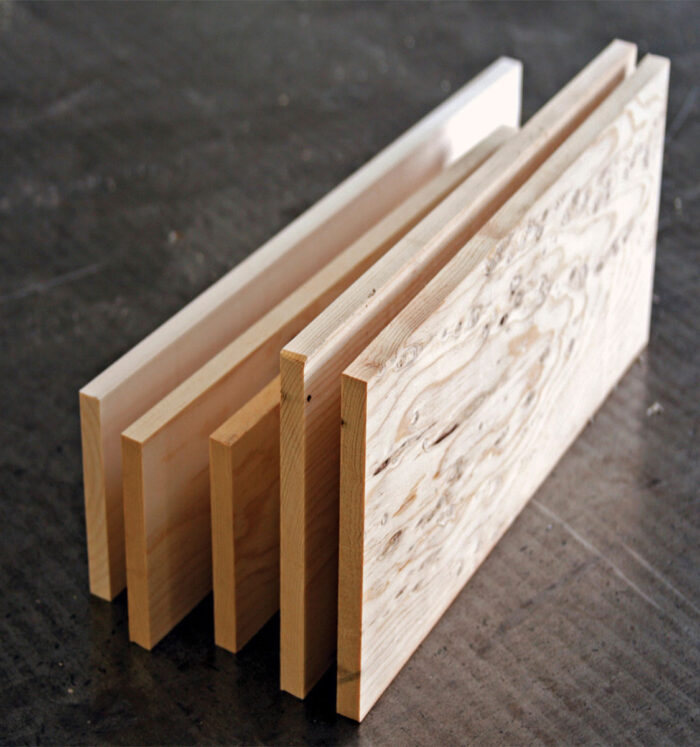
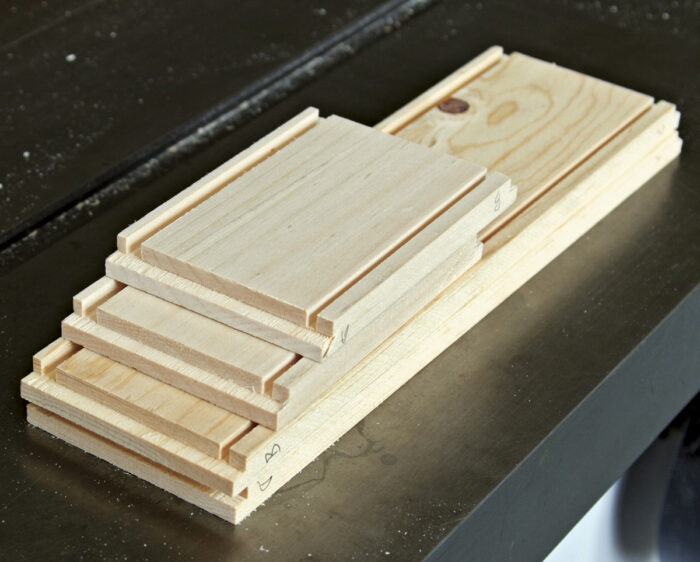
5. Stack the boards on edge with space between each. Let them sit overnight or longer. This gives any internal stress a chance to express itself before you mill the parts to final dimension. D
6. In the morning, check the boards for warping. Re-joint the faces flat again if needed. Otherwise skip this step.
7. Plane the stock down to the final 1/2 in. thickness.
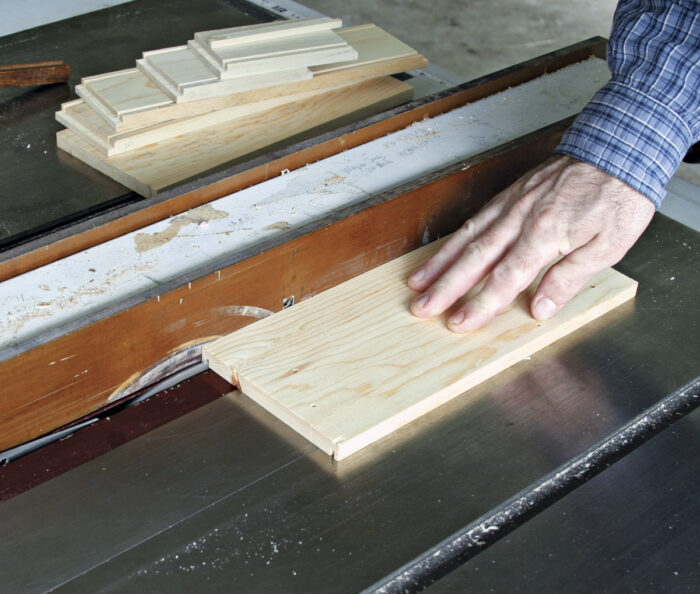
8. Joint one edge square on each of the boards. Then rip the opposite edge of each board to final width. Remember that the sides and ends should be 3-1/4 in. wide, the bottom should be 5 in. wide, and the top should be 4-7/8 in. wide. You’ll cut the one end down to 2 7/8 in. later. E
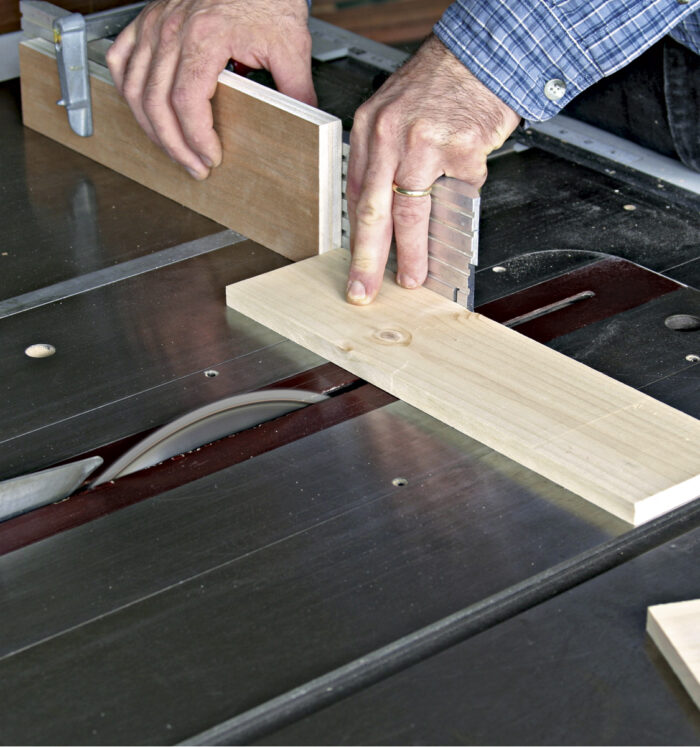
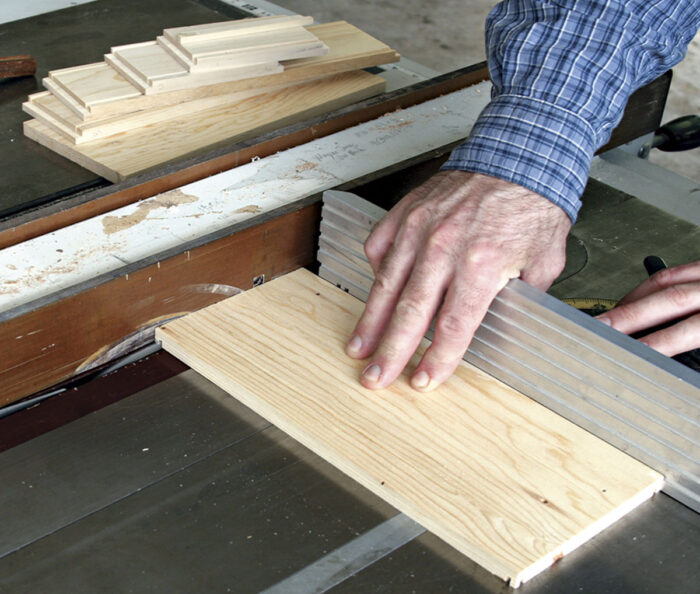
9. Before you crosscut your pieces to final length, check that your tablesaw’s miter gauge is accurately at 90 degrees (unplug the saw before checking). It surprises me how often and easily miter gauges go out of square, so it’s good insurance to check before every use. F
10. Crosscut each piece to length. For the sides and ends, it pays to use a stop block. This helps ensure both pieces are the same length and that your box will be rectangular. G
| A
|
B
|
| C
|
D
|
| E
|
F
|
G
|
| Flattening Milled Stock
Jointing a bow or twist from a roughsawn board is much easier than doing it from a milled board. The reason is because you can easily see where you’re cutting—the roughsawn face contrasts with the smooth jointed face. On a milled board, it’s hard to see where you’re cutting and where you’re not. You can hear that you’re cutting the board, but the sound doesn’t tell you where the cut is made. Scribbles with a pencil solve this problem easily. Just draw across both faces. As you joint, the pencil lines will stay on the higher parts. When you’ve gotten rid of all the pencil lines, you’ve made a fully engaged cut. |
Cutting the Rabbets
Rabbet joints are easy to make on a tablesaw. You use the rip fence and miter gauge simultaneously. When you cut through a board, this is a recipe for a kickback. But as you’re not cutting through boards, this combination isn’t any more dangerous than usual tablesaw use. It’s also possible to cut the rabbets by hand if you prefer.
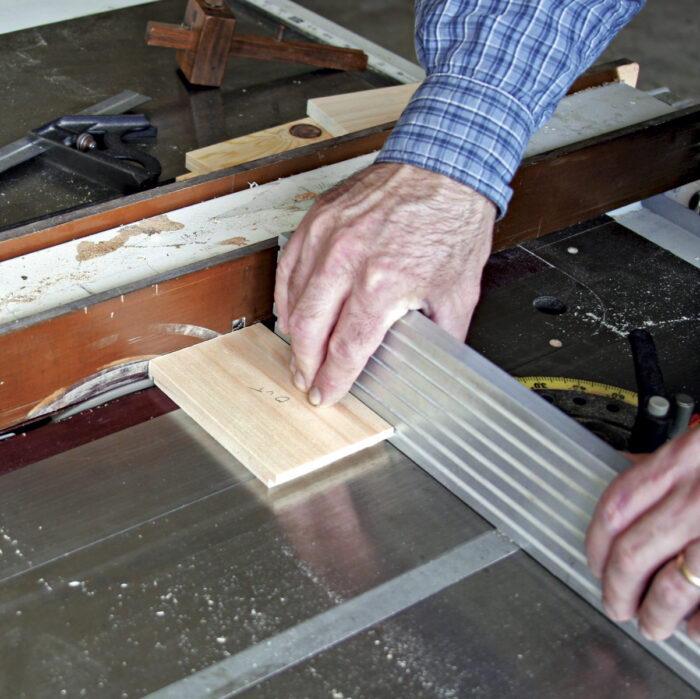
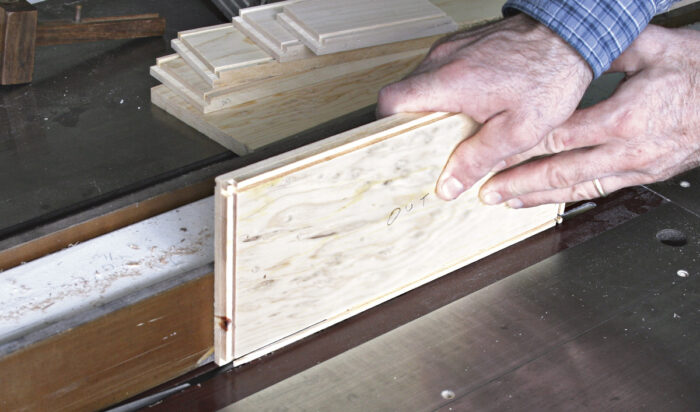
1. Orient the sides and ends the way you want them when the box is finished. Label each joint with letters or numbers (or cryptic symbols if you like). Pine dents easily, so use a light touch or your marks will be hard to sand out. Most helpful, label the outside face of each piece (I write “out”). These markings will help you avoid the mistake of cutting the rabbets on the wrong side of the board. A
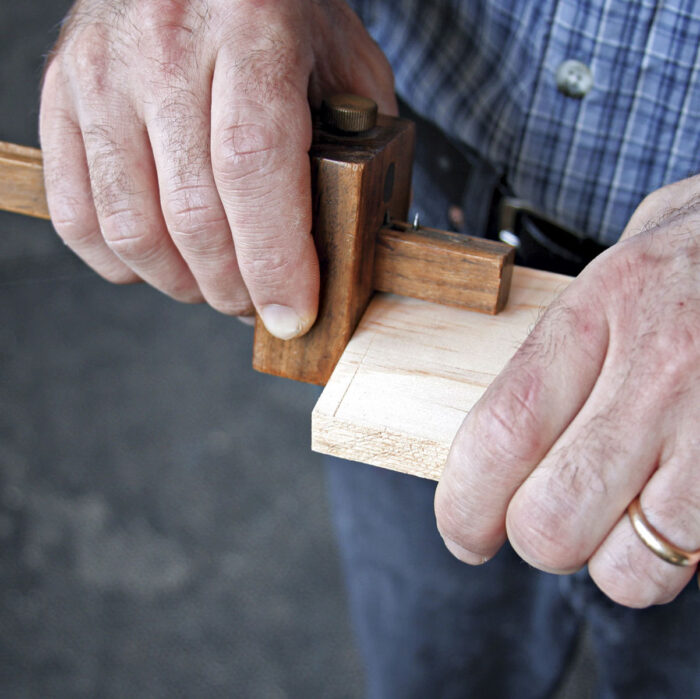
2. I scribe rabbets with a marking gauge even when cutting them on the tablesaw. It gives a clear indication of where the cuts should be and, again, helps me avoid mistakes. Scribe the 1/4-in. by 1/4-in. rabbets on the inside of the side pieces, first along the edge, B then along the face. C
3. Fit your tablesaw with a rip or dado blade if you have either, as a sawblade with a flat-topped tooth profile produces the best rabbet. However, you can use a common ATB profile blade, which cuts a V-shaped kerf. You just have to clean up the cut with a shoulder plane afterward (that’s what I did).
4. Set the blade just less than 1/4 in. high. If the blade cuts a 1/8-in. kerf, then set your fence just less than 1/8 in. from the blade (the blade kerf and distance to the fence should add up to 1/4 in.). Make test cuts with a piece of scrap until you cut perfect 1/4-in. by 1/4-in. rabbets.
Work SmartBefore you make a cut, check the marks you’ve made on your workpieces. Their job is to remind you of the proper orientation when there’s an opportunity to make a mistake. And every cut is an opportunity for a mistake. |
- It will take two passes to cut the rabbet with a 1/8-in. blade. For the first cut, the workpiece should be tight to the fence. For the second cut, move the workpiece 1/8 in. away from the fence, essentially flush with the blade. D
| A
|
B
|
| C
|
D
|


Cutting the Grooves
The tablesaw is also the best tool to cut the grooves for the captured bottom and sliding top. The kerf does not need a flat bottom, so using an ATB blade is fine.
1. After cutting the rabbets, leave the blade height at 1/4 in. Set the rip fence 1/4 in. from the blade.
2. Rip the 1/8-in.-wide groove for the top on both side pieces and only one end piece (see step 4 for the other end piece).
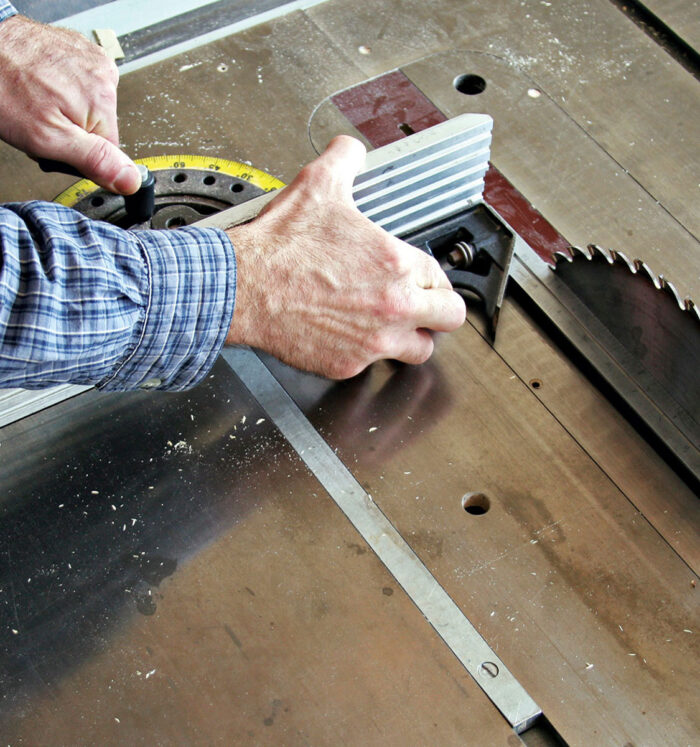
3. Rip the 1/4-in. groove for the captured bottom with two passes (unless you’re using a dado blade). Move the fence 1/8 in. after the first pass. Your grooves and rabbets should be the exact same depth. A & B
4. Raise the blade and reset the rip fence on the tablesaw to 2-7/8 in. from the blade and rip the second end piece. The top edge of the end piece should align with the bottom of the groove on the side pieces. This cut allows the top to slide in and out of the finished box.
| A
|
B
|
Make the Bottom
The bottom is captured in the groove on the ends and sides. To fit it, you simply cut a1/4-in. by1/4-in. rabbet on all the edges. The ends can be rabbeted the same way as the joints shown previously. The following steps show how to cut rabbets on the sides of boards, which you shouldn’t do with a miter gauge.
1. Mark the 1/4-in. by 1/4-in. rabbet on the edges and ends of the side boards with a marking gauge.
2. Set the tablesaw rip fence 1/8 in. from the blade. Set the blade height to 1/4 in.
3. Rip grooves on the outside face (the face that will be outside of the box when assembled). A
4. Cut grooves on the ends using the miter fence as a guide. B
5. Finish the rabbets on the ends by pulling the workpiece away from the rip fence and cutting away the waste. This is how you cut the rabbet joints. However, this technique won’t work for cutting the rabbets along the edges. Therefore, reset the rip fence 1/4 in. from the blade and run the workpiece on edge against the rip fence. C
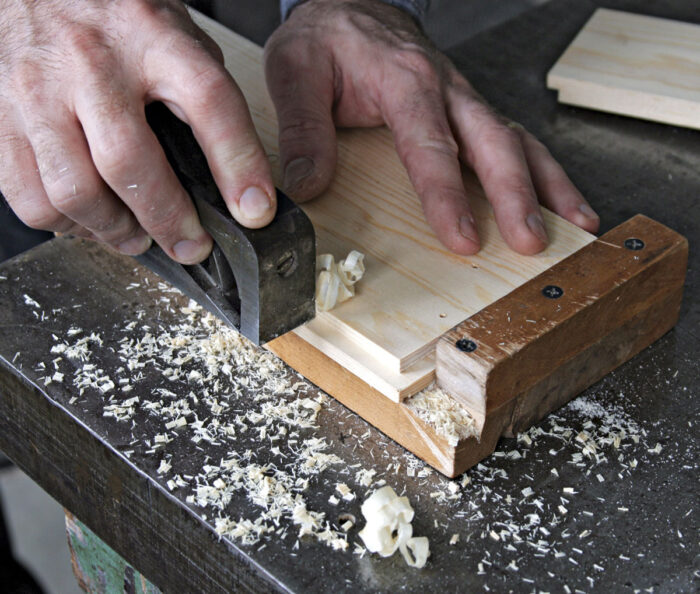
6. If the rabbet is too thick to fit in the groove easily, use a shoulder plane to shave it down and use a bench hook to hold the piece. [LINK to bench-hook sidebar in “Shaker Candle Box: Assembly and Finishing”] Take light passes and check the fit often until each side and each end fits snugly into the appropriate groove. D
| A
|
B
|
| C
|
D
|
 Excerpted from Strother Purdy’s book, Traditional Box Projects.
Browse the Taunton Store for more books and plans for making boxes.


Log in or create an account to post a comment.
Sign up Log in