Skip to content
Fine Woodworking
Main Menu
Subscribe
GET THE MAGAZINE & MORE
Magazine Cover
  • Save 69% off the cover price
  • Or, get everything with UNLIMITED, including 40+ years of the online archive.
Subscribe Now!
Subscribe
  • Projects & Plans
  • How-To
  • Shop Tips
  • Tools & Materials
  • Videos
  • Magazine
  • Video Workshops
  • Members
  • Forum
  • Gallery
  • Blogs
  • More
    • Log In
    • Join
    Fine Woodworking Main Menu Subscribe

    Fine Woodworking Project Guides

    Boxes

    Guide Home
    Chapter
    • Box-Making Fundamentals
    • Mitered Boxes
    • Dovetailed Boxes
    • Veneered Boxes
    • Bandsawn Boxes
    Projects and Plans

    Biscuits strengthen this mitered box

    Biscuit joints and a clever clamping trick ensure these mitered joints stay closed forever.

    Author Headshot By Pete Michelinie Aug 04, 2021

    In my article “Build an heirloom box” (FWW #291), I take you through some of the more difficult aspects of building my heirloom jewelry box: veneering and banding, and sizing the drawer fronts. After all, that box’s design hinges so much on the drawers, and the box construction is fairly simple. It’s just some dadoes and mitered corners reinforced with biscuits.

    But that simplicity doesn’t mean you should overlook the task. The veneered drawer fronts with continuous grain won’t be as striking if your miters are wonky and drawers slide poorly. Plus, these simple construction methods are foundational woodworking, so even if you’re not building a box like my Art Deco–inspired one, getting the basics down will always pay off. There’s even a little trick for making drawer runners without having to worry about cross-grain construction.

    At the tablesaw, a tight shot of cutting thin a walnut board to 45° on one end. The other end has already been cut.

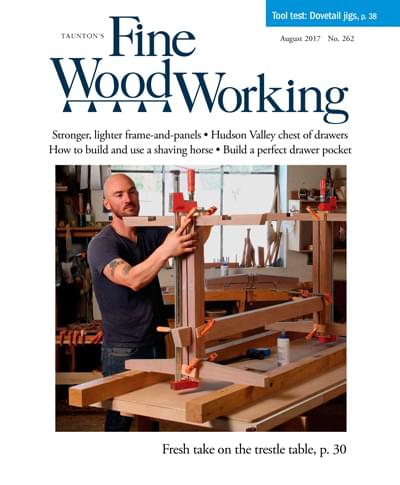
    After cutting the box parts to length, angle the tablesaw blade to 45° and cut the miters. I use a miter gauge with a zero-clearance fence and stop block. While I’m at the tablesaw, I also rabbet the back for the back boards.

    The author using a chisel to square up a dado. He is holding one chisel in his hand, and the handles of two others are in shot. There are two dadoes on the inside of the box side.
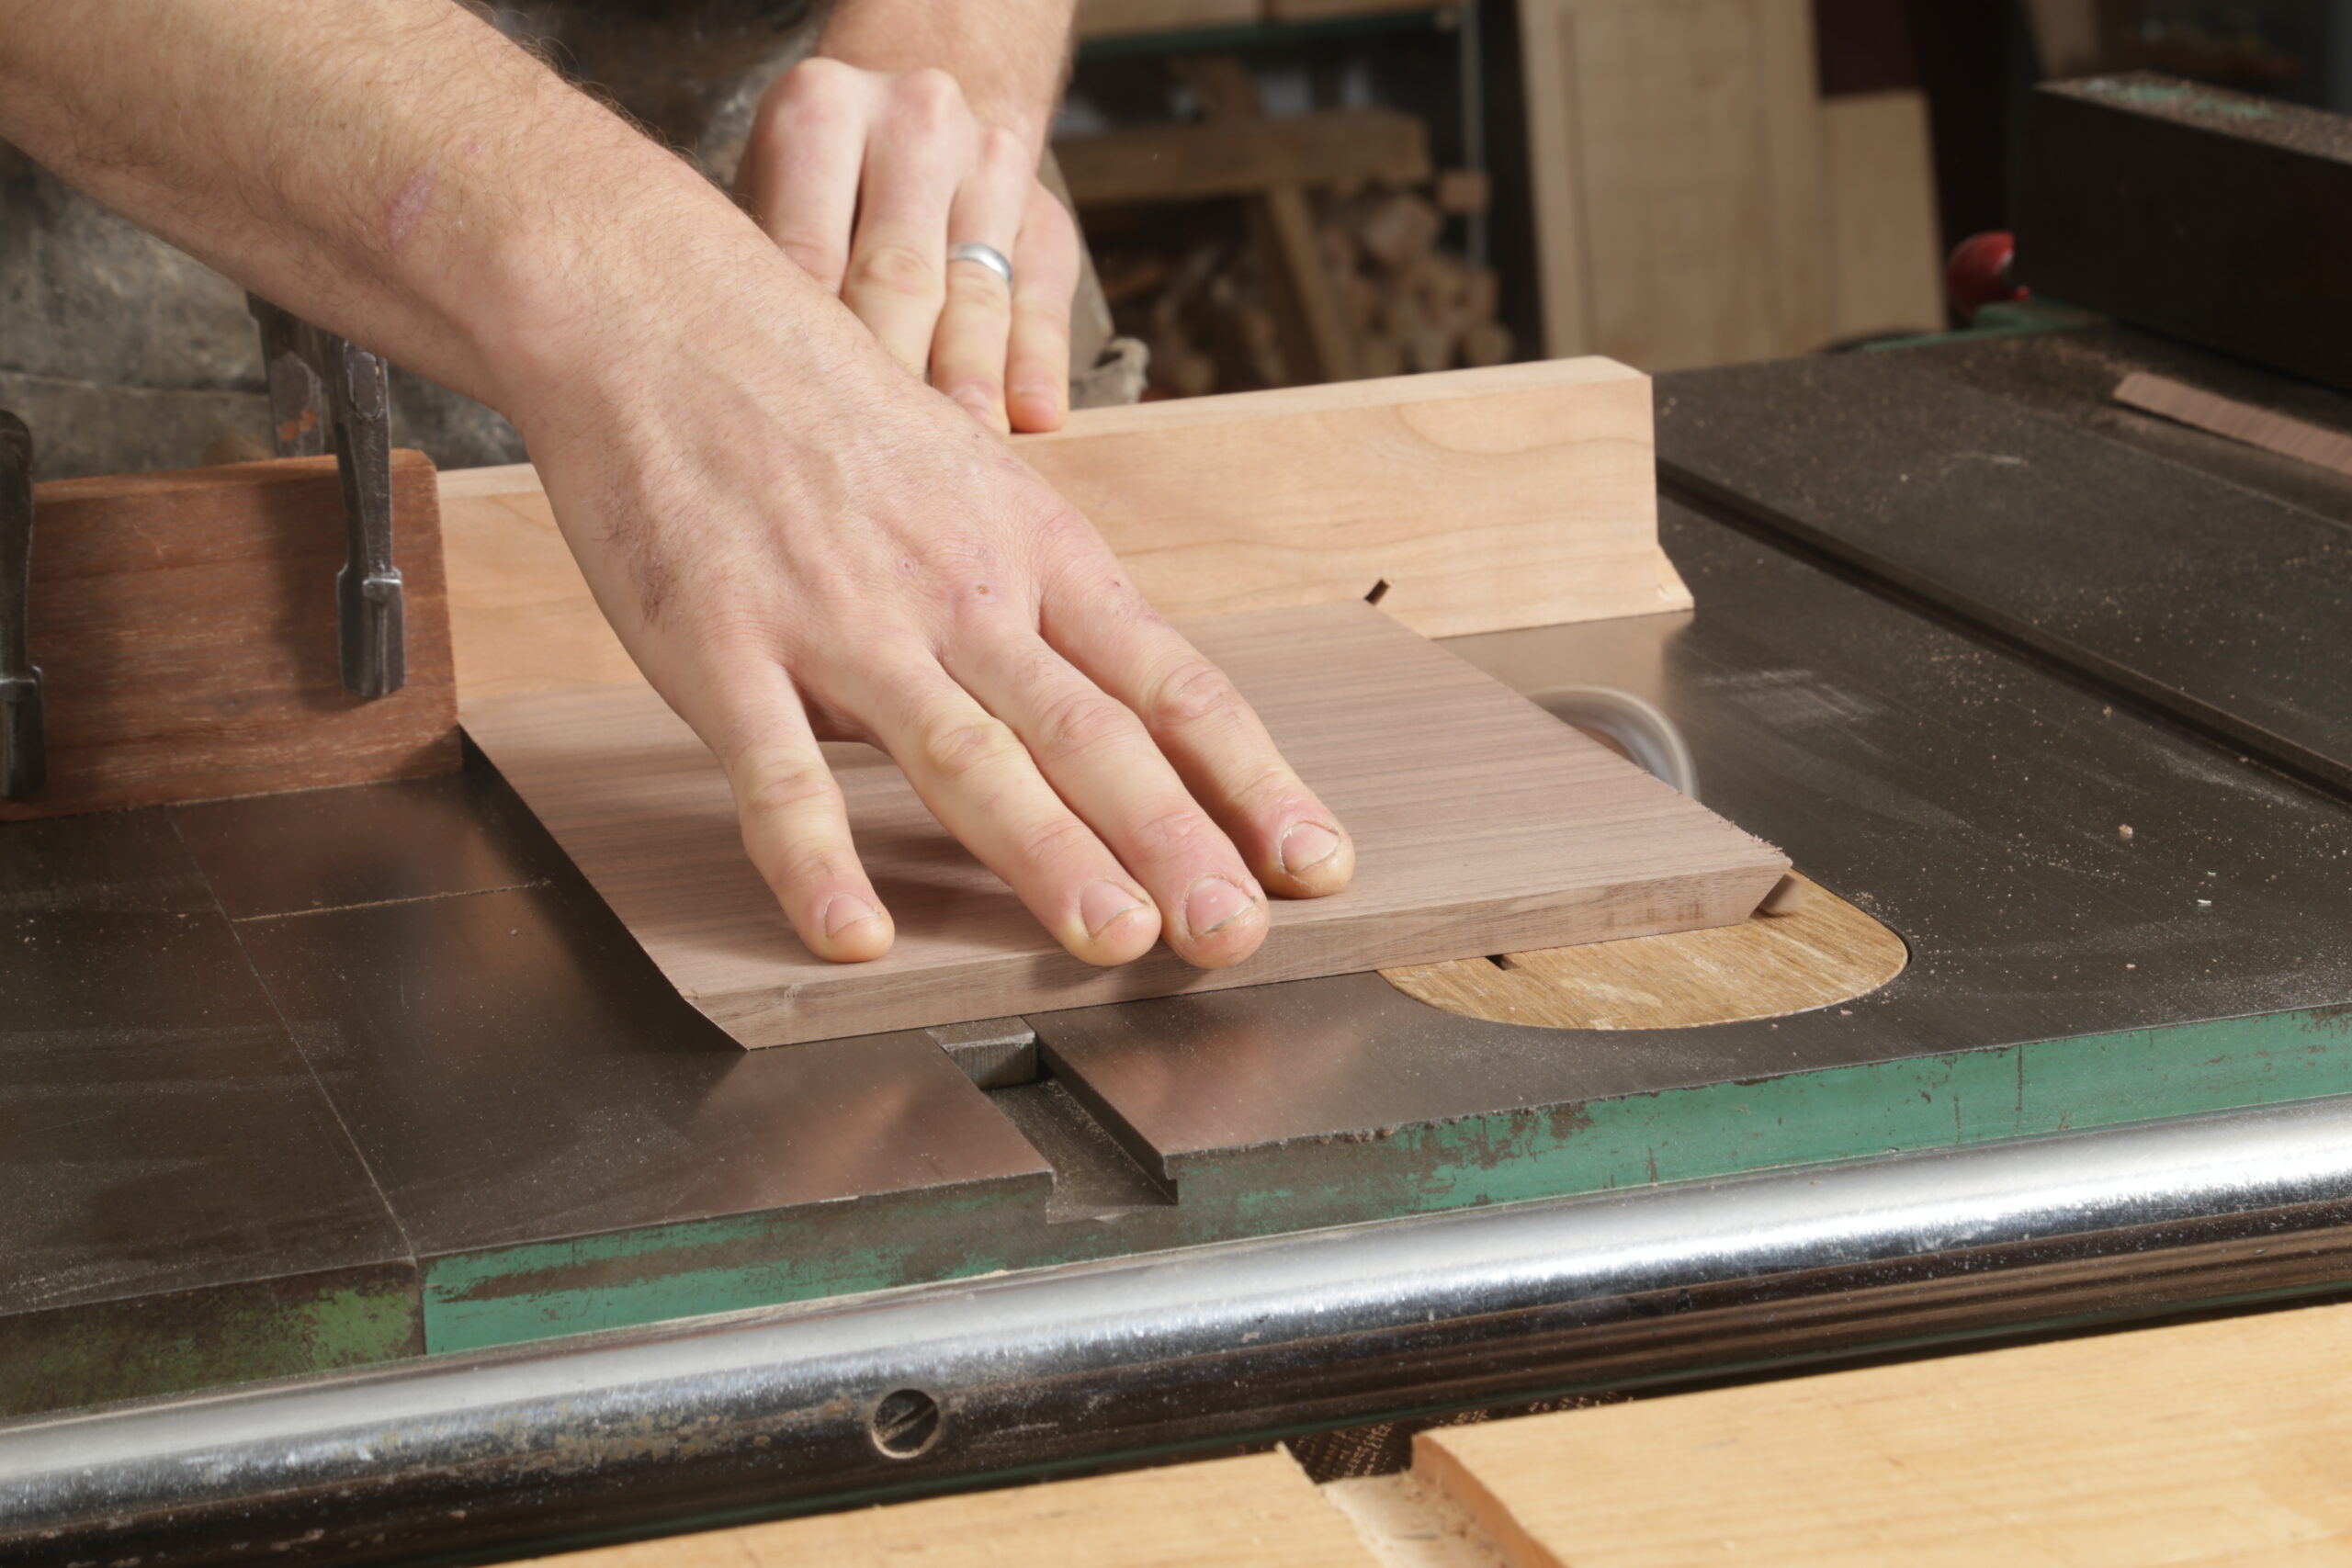
After cutting the stopped dadoes, square up the ends with a chisel. I first sever the side walls’ end grain with a wide chisel before carefully chopping the stopped ends’ long grain.

    The author crosscutting a narrow strip from the end of a walnut board. This strip will be a runner for drawers. or safety, he is using a push stick to keep his right hand away from the blade.  The author is gluing the second runner into the box side. The runners sit slightly proud of the inside surface of the box side, leaving a ledge for the drawers to ride on. There is a glue bottle in the background.

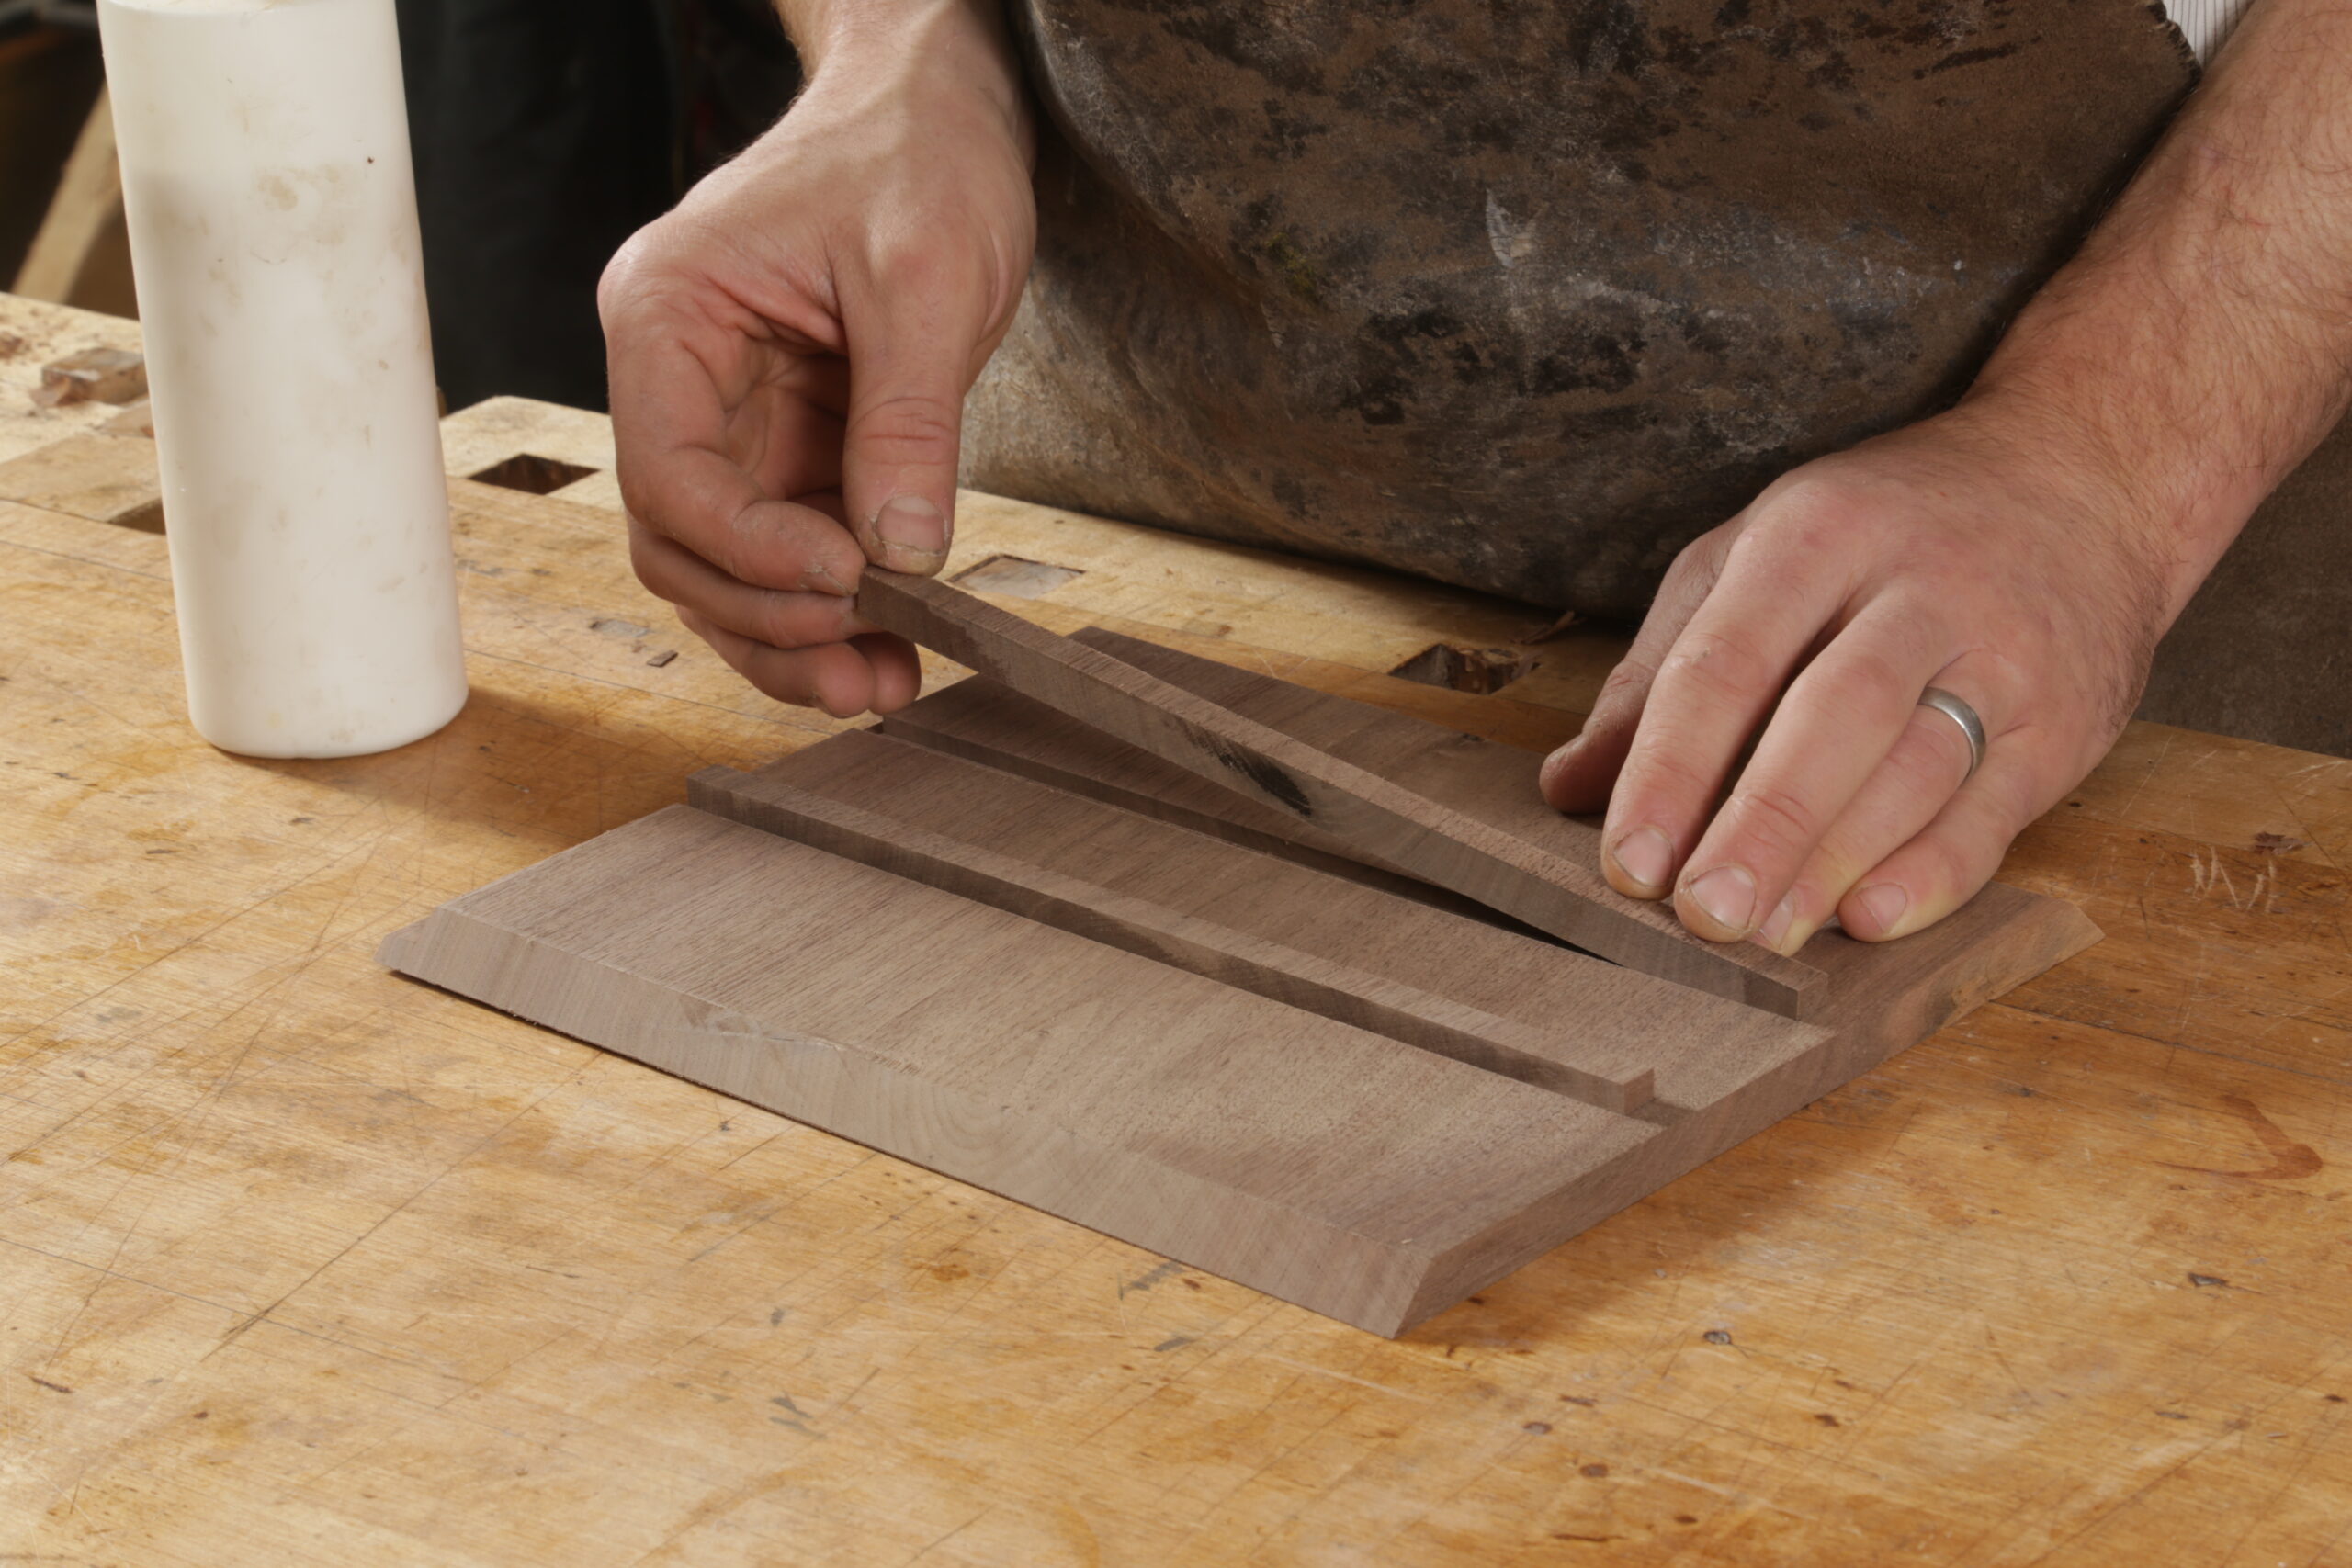
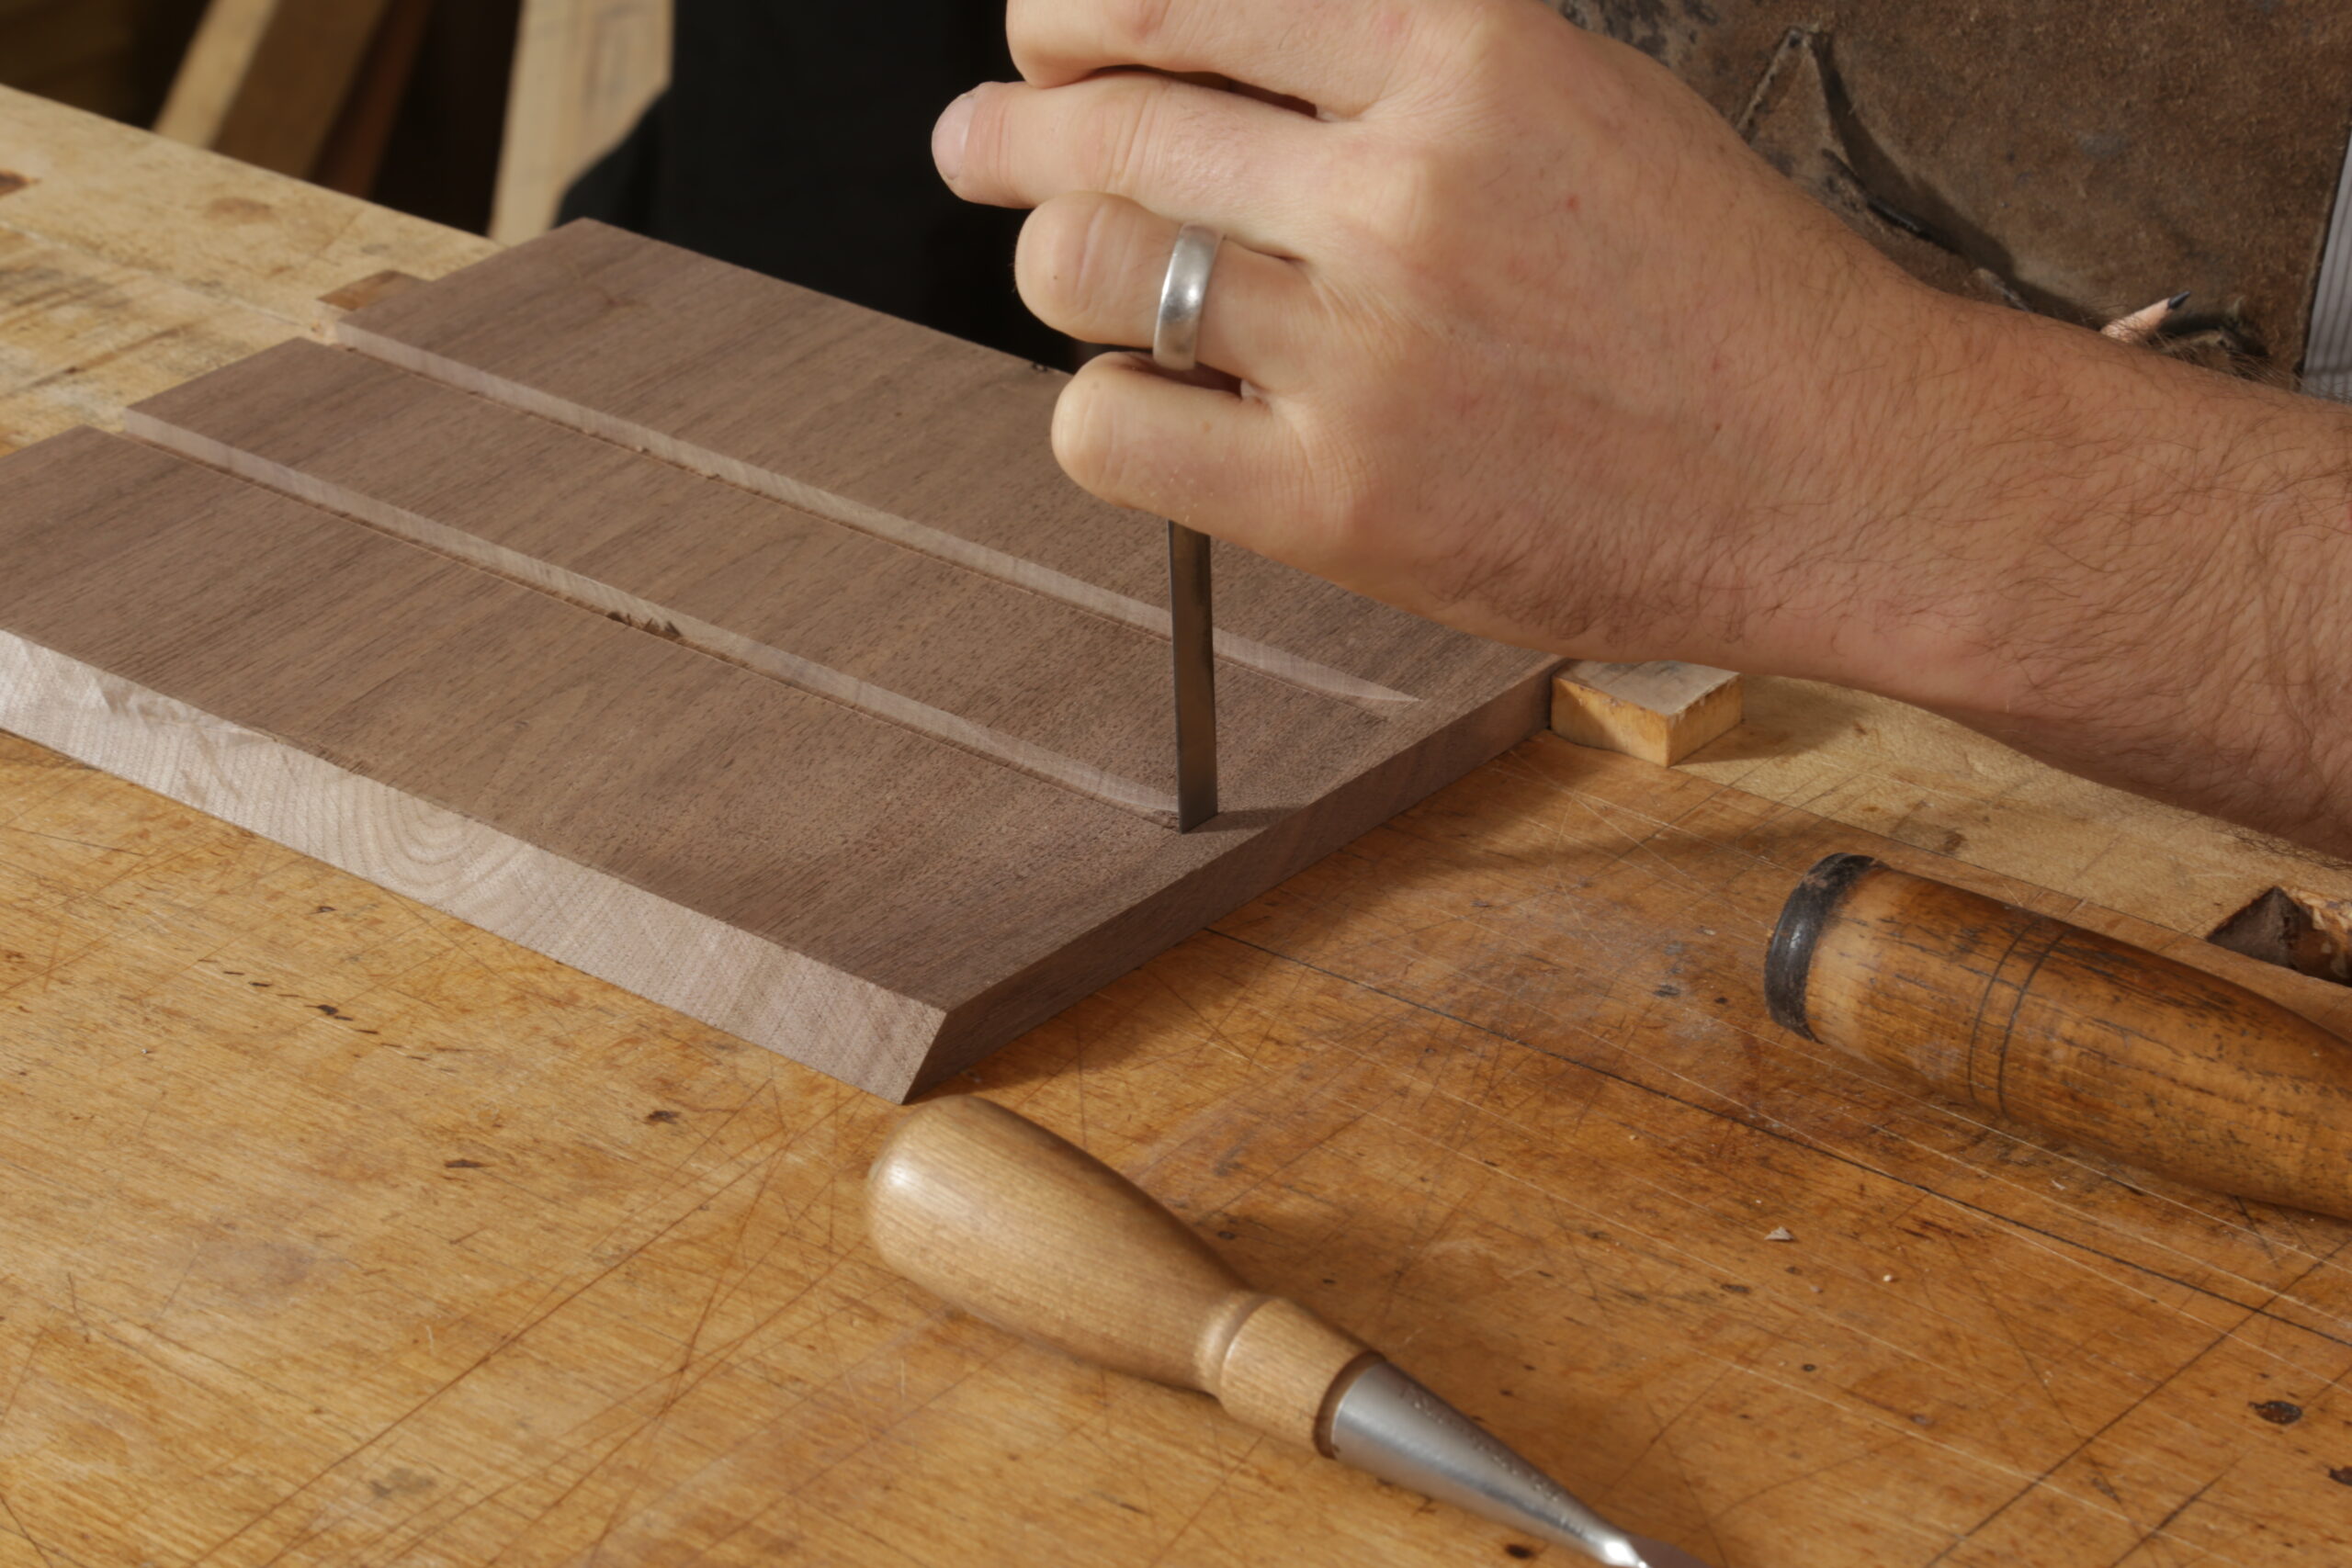
    The runners are short-grain strips. As a result, you can glue them to the entire dado because their grain direction is identical to that of the sides. In other words, there is no worry of any grain contradiction as the sides expand and contract seasonally.

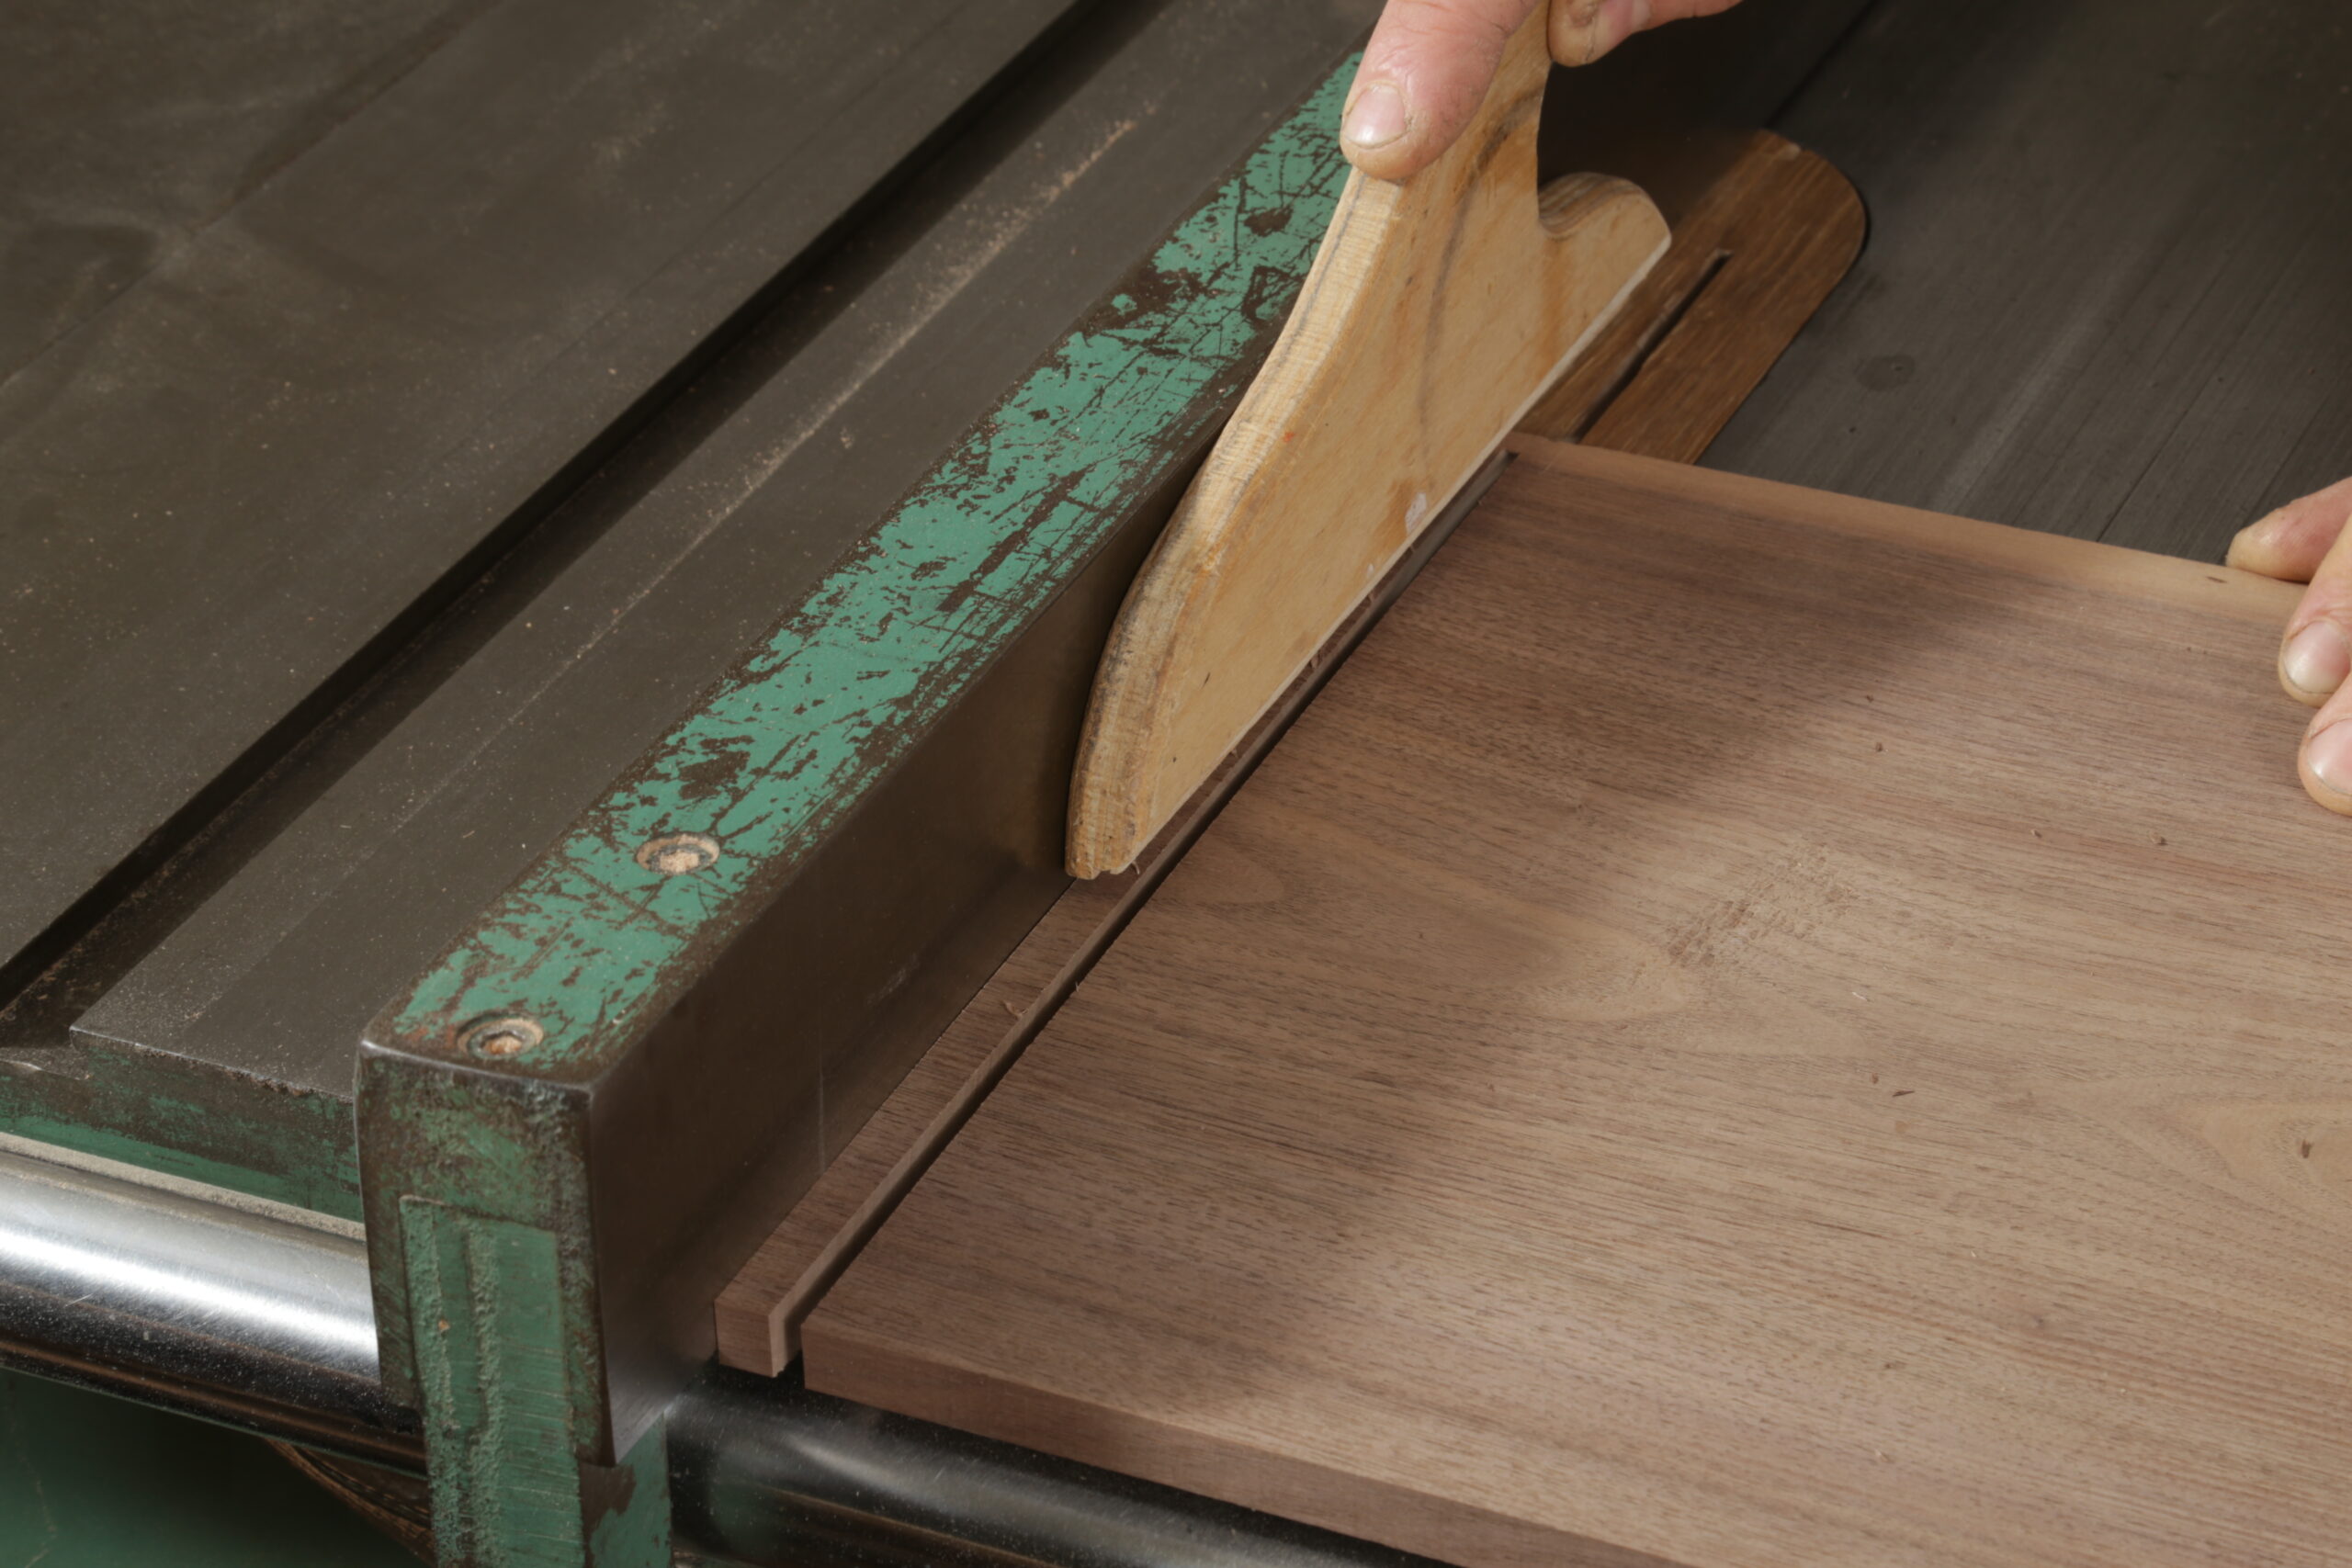
    Size these runners so they’re a pressure fit into the dadoes. Also, cut them a little short, so they don’t interfere with the box’s back.

    With the box held upright at the workbench, the author is using a biscuit joiner to cut slots in a mitered end. The slots are thin, and there are four of them along the miter. The biscuit joiner is predominantly yellow.

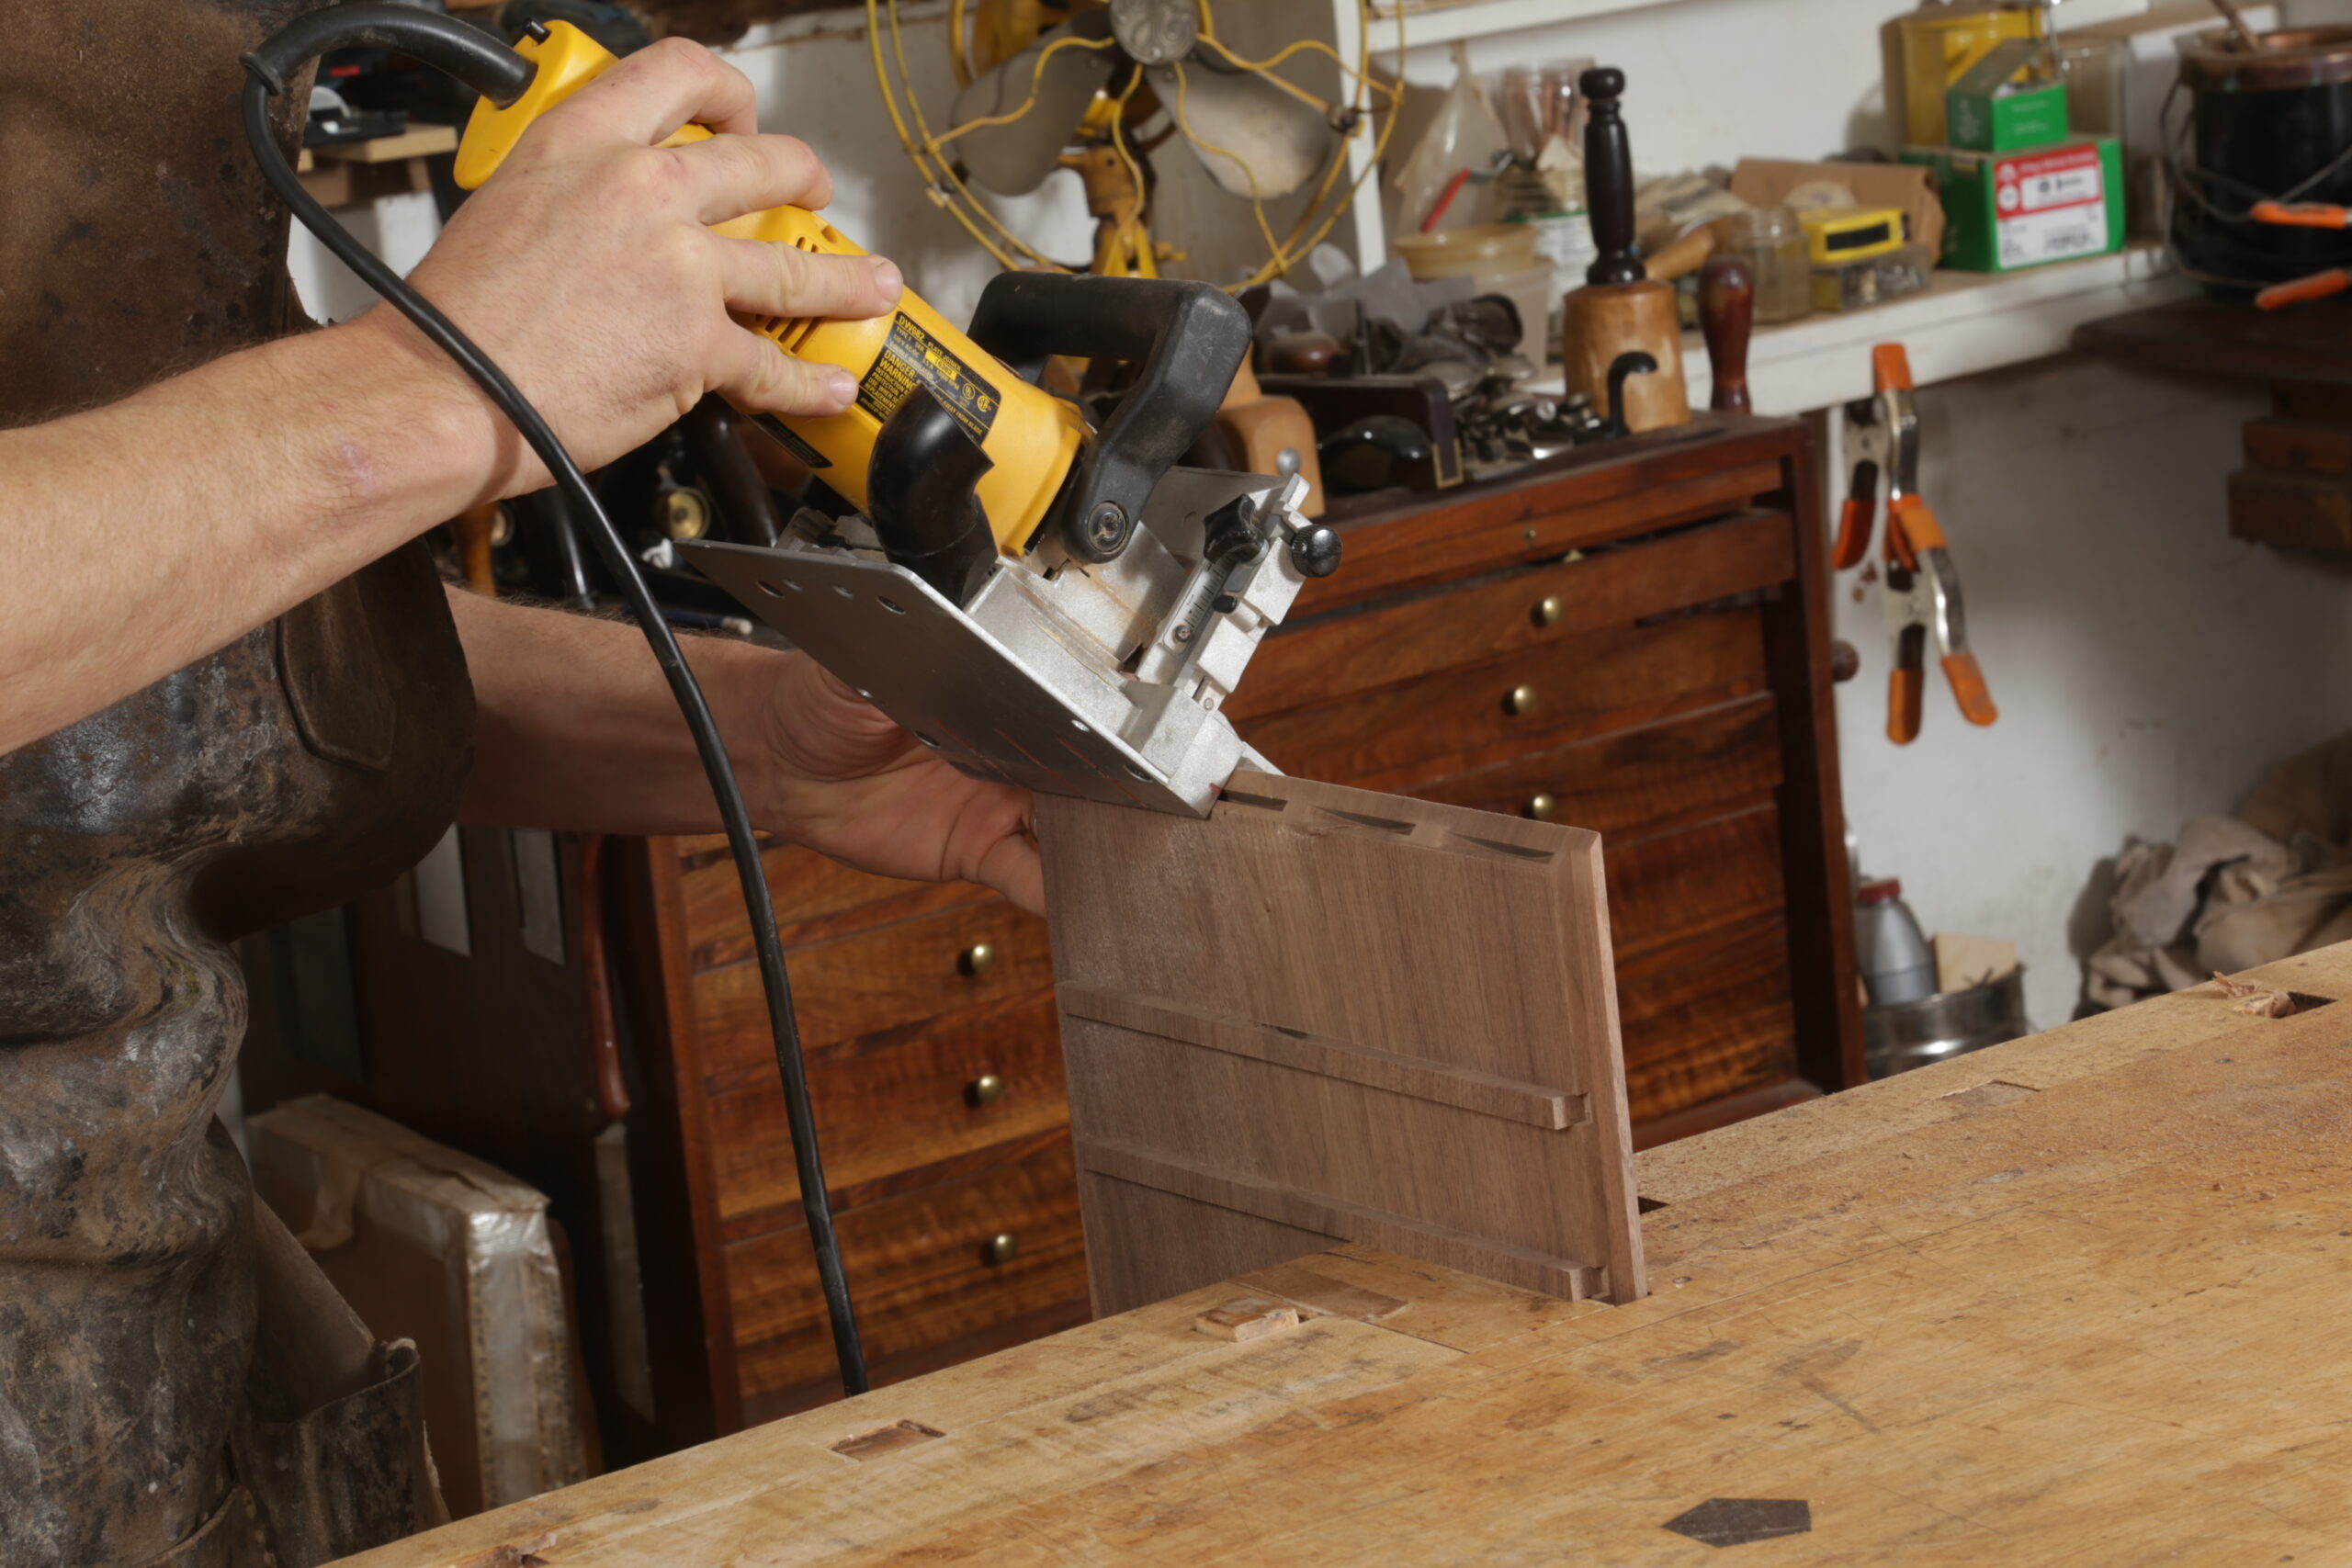
    I biscuit the sides, cutting four slots for #0 biscuits in each miter. Every time I use this tool, I give a big thanks to my late teacher Alex Krutsky, who showed me there’s no shame in using biscuits. They simplify construction, and are plenty strong in this application.

    At the workbench, the author is putting the third biscuit into its slot. Two are already in place, and one is on the bench. The board is face-down on the bench. There is white glue on the mitered ends, the biscuits, and in the biscuit slots.

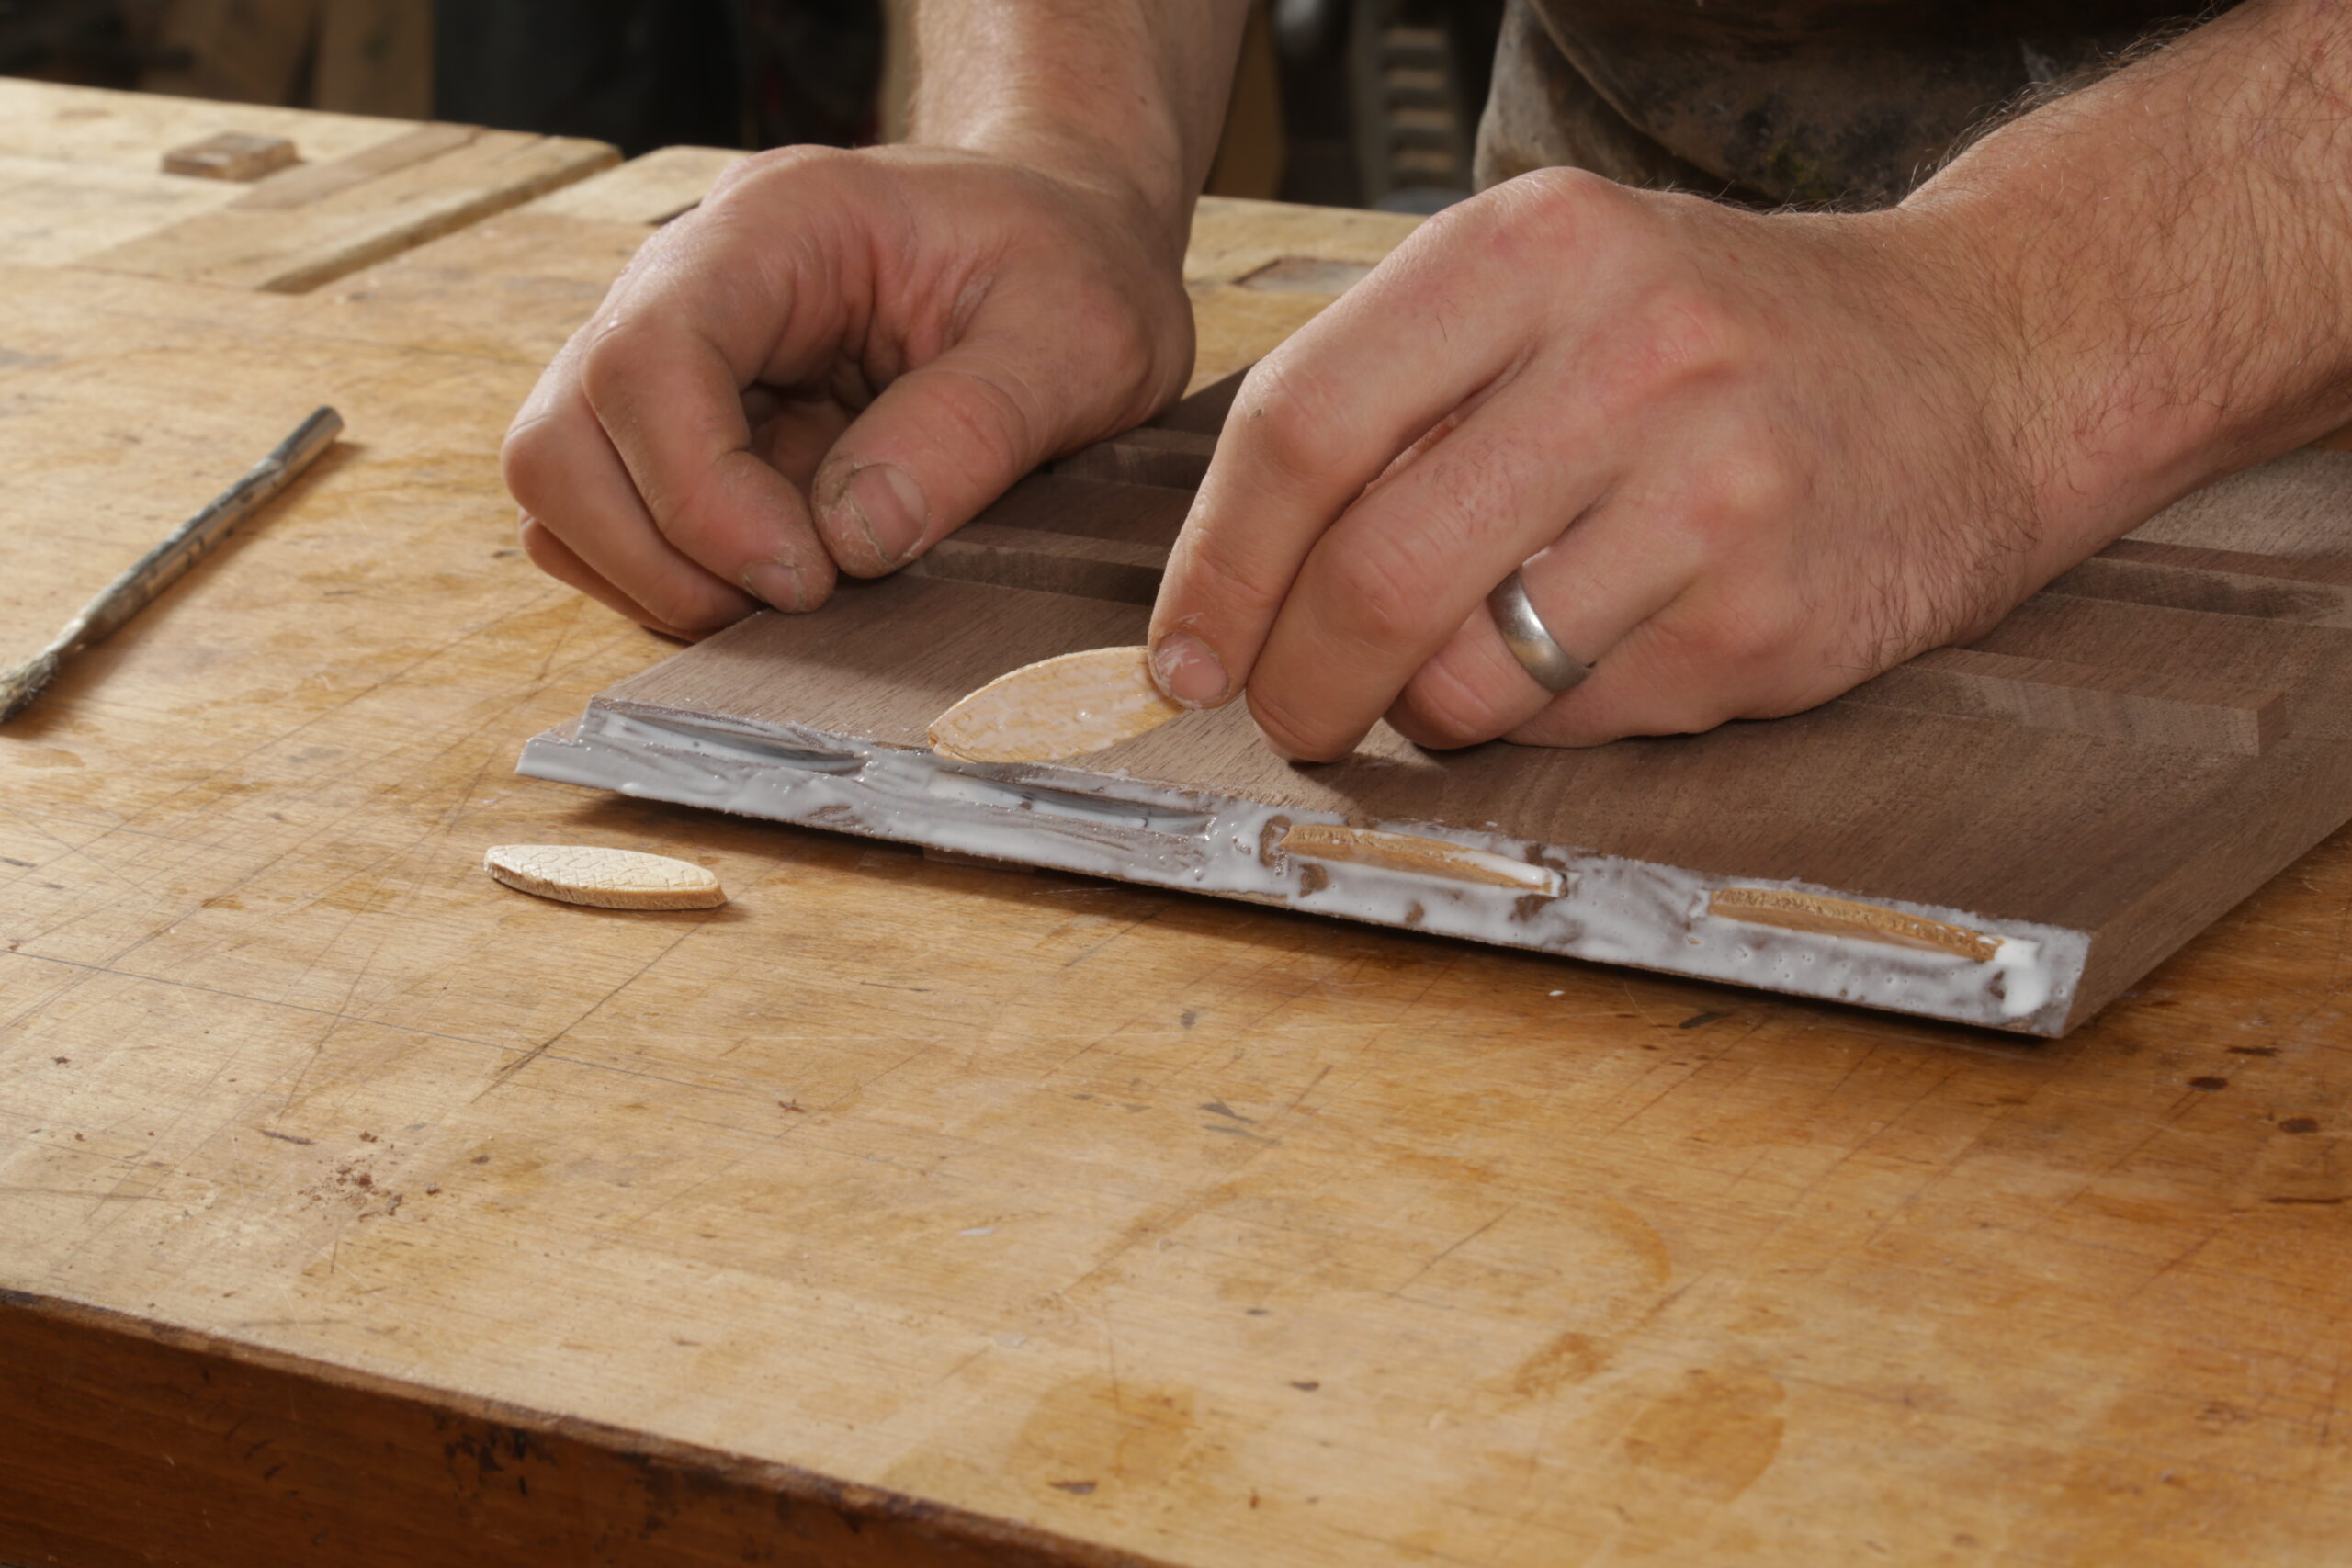
    When assembling these corners, I use plenty of glue. I don’t want to make a mess with squeeze-out, but I also want to make sure the miters stay closed forever. So I add glue to both the biscuits, the biscuit slots, and the miters’ end grain.

    The box carcass is assembled, and the author is clamping it up. He is using two orange ratchet clamps and one red one to apply clamping pressure. At each of the box's corners are two strips of wood between the box and the straps.

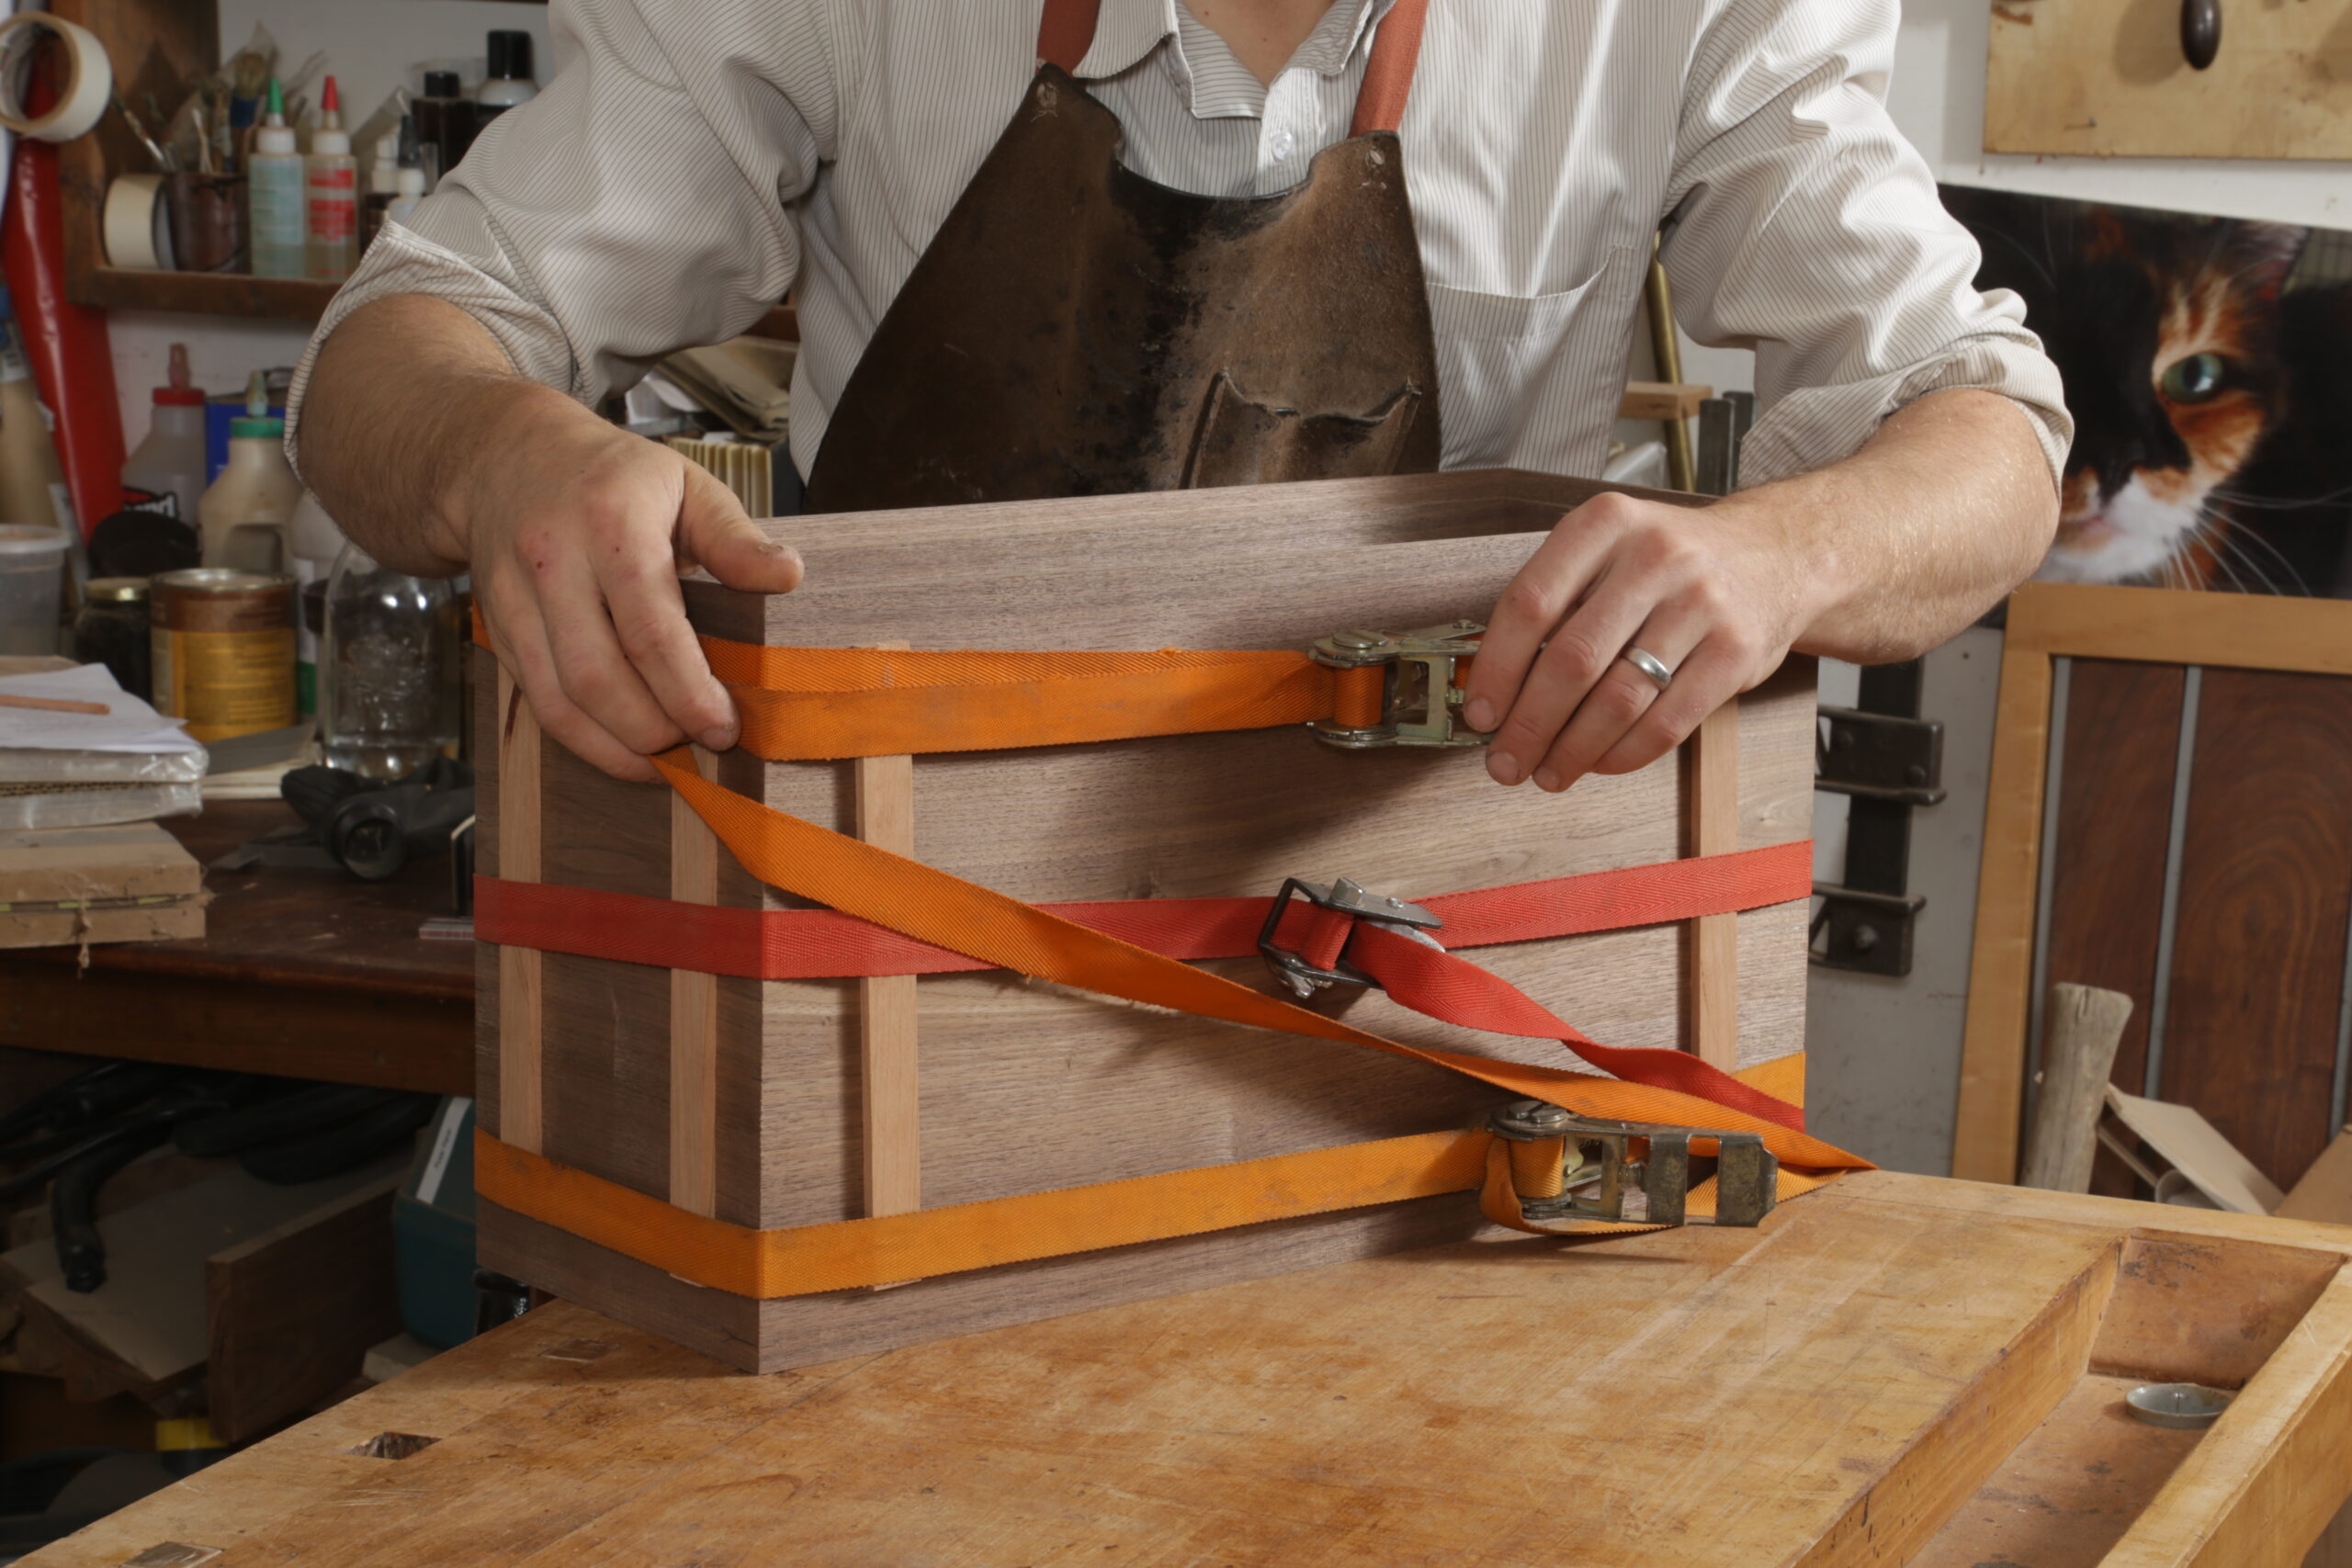
    Miters can be tricky to clamp well, but I have a low-tech solution that works great. All you need are ratchet straps and thin strips of wood to distribute pressure. The biscuits help keep parts aligned.

    First, tighten the straps a bit, slide the strips in place close to the ends, and tighten the straps some more. You should see the joints begin to close up.

    After tightening the ratchet straps, the author is pinching two strips of wood toward a corner of the box.

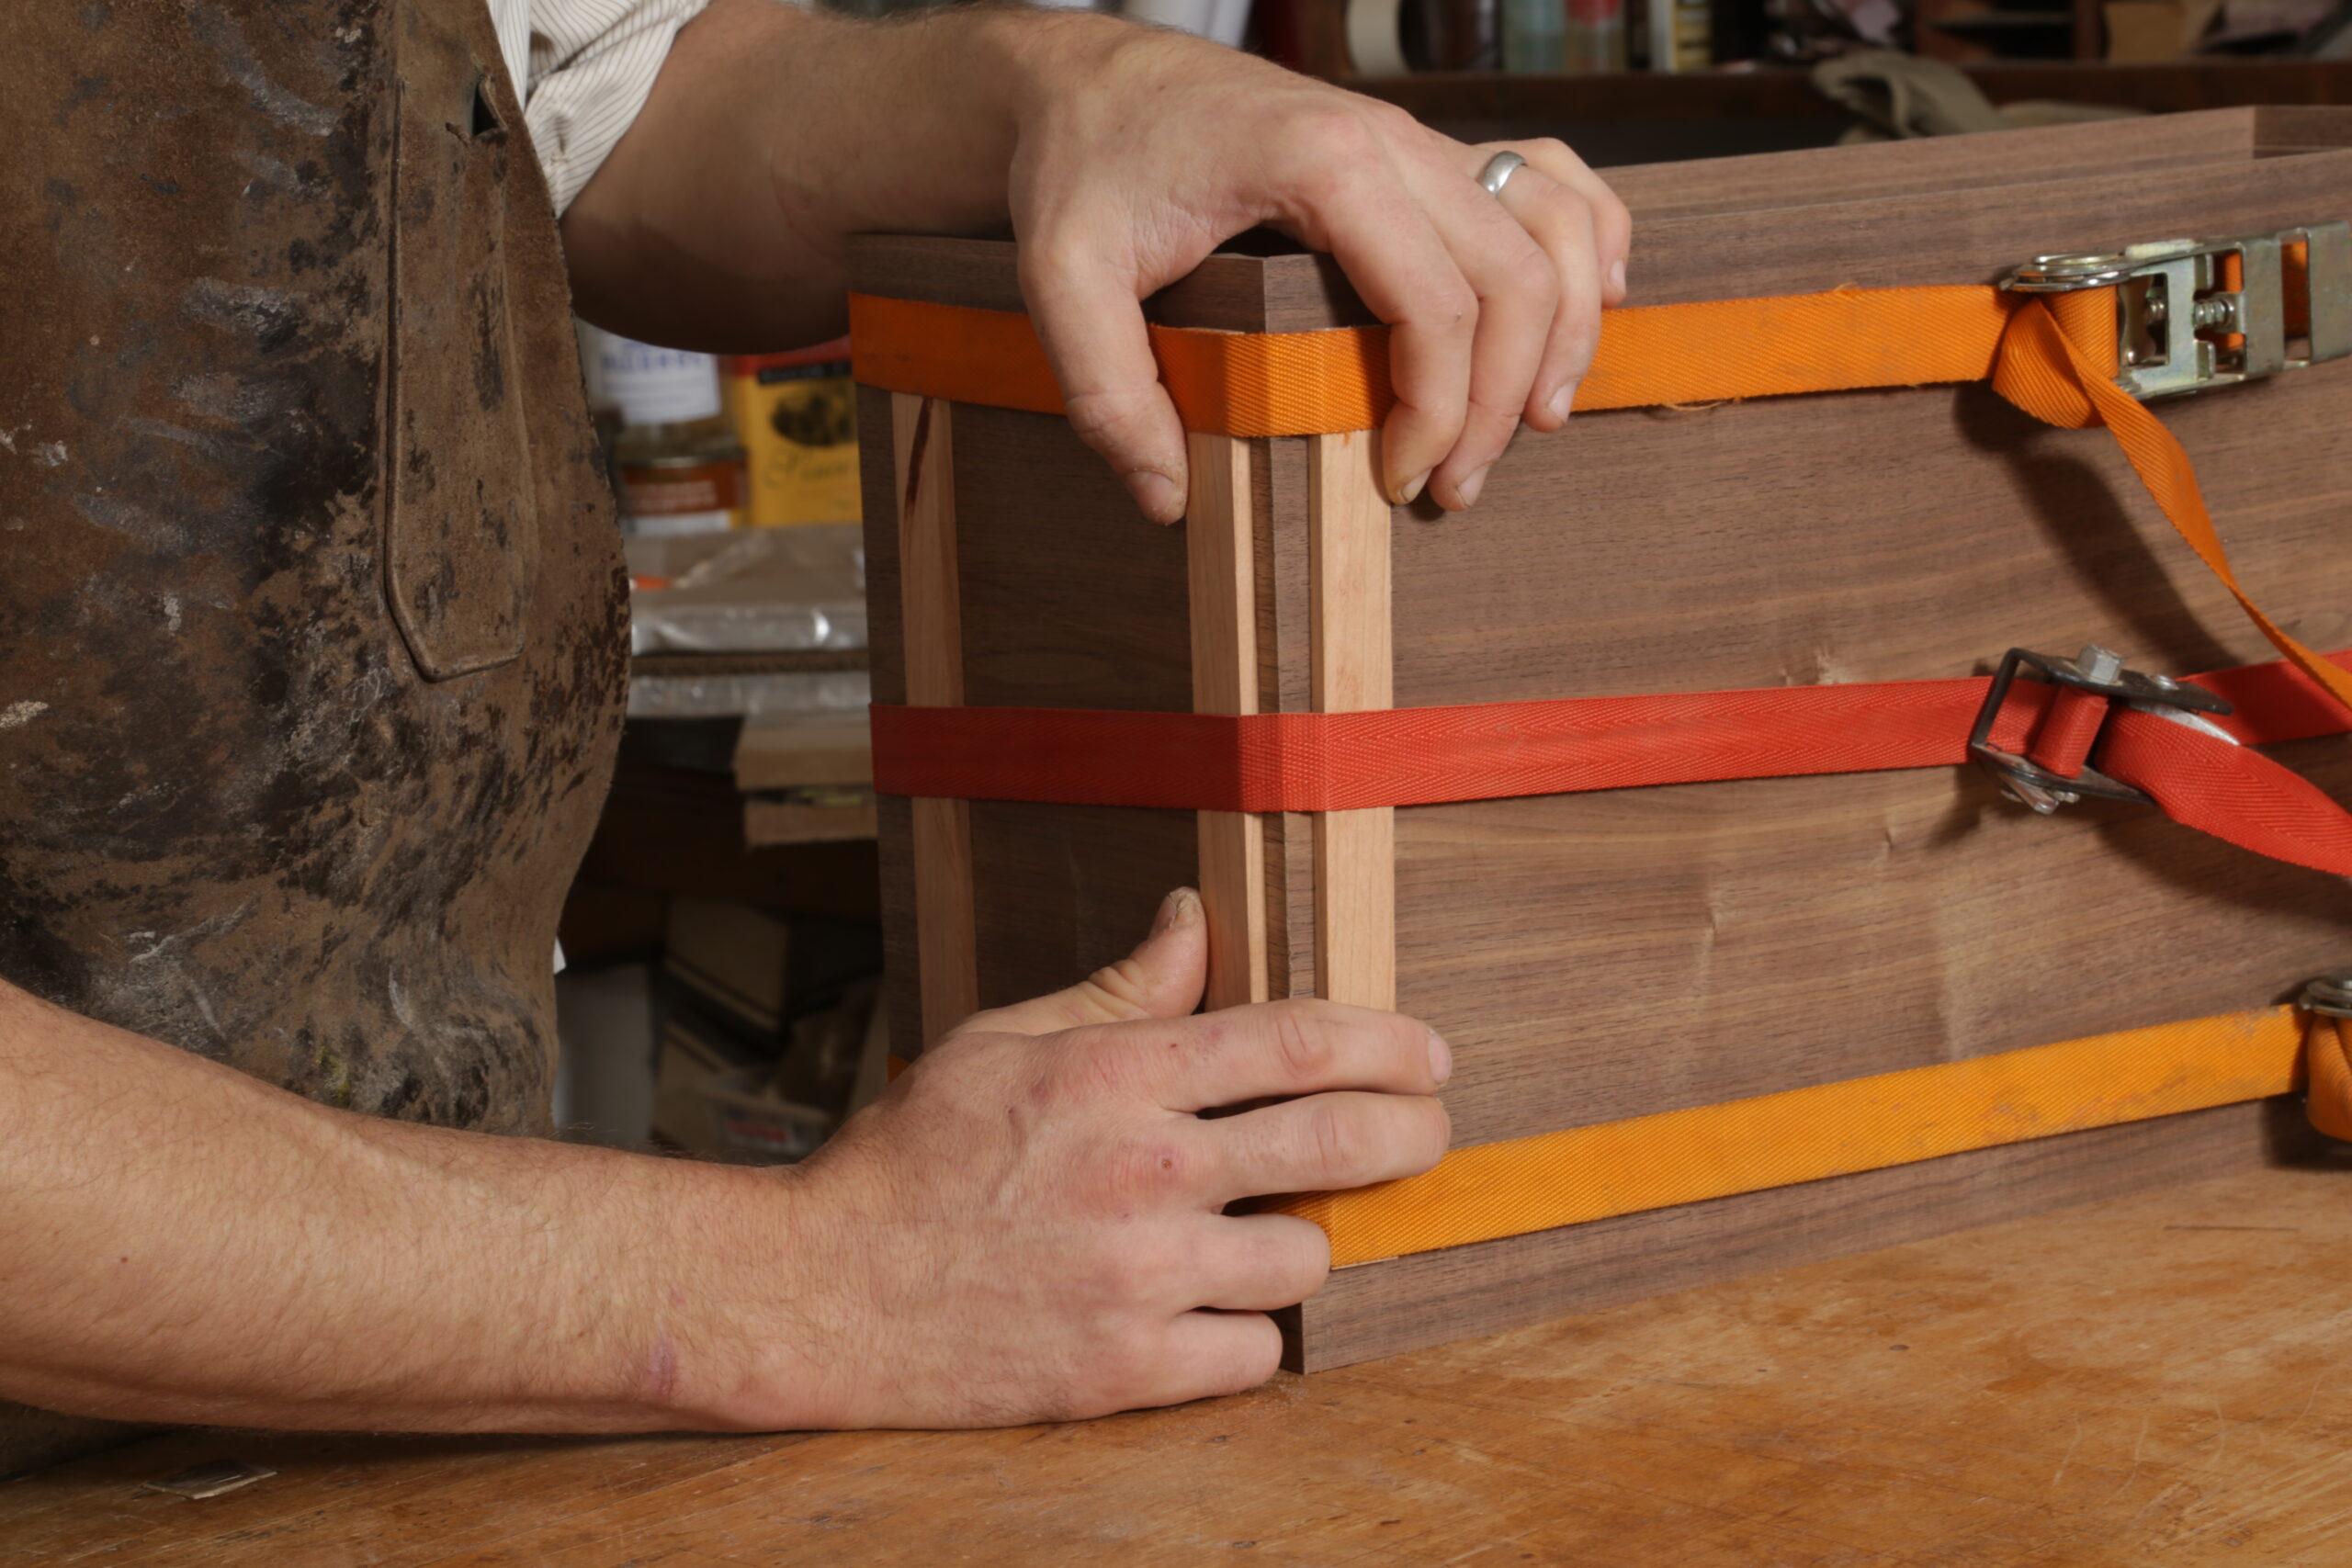
    To finish closing the joint, slide two strips toward each corner. Try to slide them together evenly to keep the clamping pressure consistent.

    Sign up for eletters today and get the latest techniques and how-to from Fine Woodworking, plus special offers.

    Sign Up

    Get woodworking tips, expert advice and special offers in your inbox

    Sign Up
    ×
    X
    X
    Previous: A Tried-and-True Finish for a Mitered Box Next: Build a Lift-Lid Box, Part 1

    Guide

    Boxes

    Chapter

    Mitered Boxes

    Log in or create an account to post a comment.

    Sign up Log in

    Boxes

    Boxes

    These small projects are packed with woodworking lessons.

    View Project Guide

    View All Project Guides »

    Become a member and get unlimited site access, including the Boxes Project Guide.

    Start Free Trial

    Box-Making Fundamentals
    • Box-Making Basics
    • Designing Boxes
    • Hardware and Hinges
    • Simple Projects
    Mitered Boxes
    • Mitered-Box Techniques
    • Mitered-Box Projects
    Dovetailed Boxes
    • Dovetailed Boxes
    Veneered Boxes
    • Veneered Projects
    Bandsawn Boxes
    • Bandsawn Boxes

    Get the latest from Fine Woodworking Magazine

    • #292-NOV/DEC 2021

      • Kerf-bent wall cabinet
      • Online extras from FWW issue #292
      • How to tame curved parts with patterns
    • #291-Sep/Oct 2021

      • Build a modern coffee table
      • Online Extras from FWW Issue #291
      • Editor's Letter: Something old, something new
    • #290-July/Aug 2021

      • Build a Shaker chest of drawers
      • Online Extras from FWW Issue #290
      • From the editor: What we make matters
    • #289-May/June 2021

      • Arts & Crafts Coffee Table with Story-Book Charm
      • Links from Fine Woodworking issue #289
      • Step-by-Step Guide to Tuning Your Block Plane
    • #288-Mar/Apr 2021

      • Phil Lowe: A craftsman and gentleman
      • Online Extras from FWW Issue #288
      • Phil Lowe: craftsman, teacher, friend

    UNLIMITED membership - Get access to it all

    Start Free Trial Upgrade Membership

    Fine WoodWorking

    Follow

    Newsletter

    Get woodworking tips, expert advice and special offers in your inbox

    Sign Up

    Membership & Magazine

    • Members
    • Digital Libraries
    • Join Unlimited
    • Magazine Subscription
    • Magazine Renewal
    • Gift a Subscription
    • Customer Support
    • Manage Preferences

    Taunton Network

    • Fine Homebuilding
    • Green Building Advisor
    • Fine Gardening
    • Threads
    • About
    • Contact
    • Advertise
    • Privacy Policy
    • Careers
    • Copyright
    • Terms of Use
    • Accessibility
    • California Privacy Rights
    • Site Map

    © 2021 The Taunton Press, Inc. All rights reserved.

    Get step-by-step instructions, woodworking tips, expert advice and special offers in your inbox. Sign Up Now!

      Main Menu

    • Projects and Plans
    • How-To
    • Shop Tips
    • Tools & Materials
    • Videos
    • Gallery
    • Magazine
    • Video Workshops
    • Members
    • Forum

      Popular Topics

    • Design
    • Small Projects
    • Beds
    • Chairs, Benches And Stools
    • Built-ins
    • Storage And Shelves
    • Cabinets
    • Carving
    • Casework
    • Desks
    • Tables
    • Shop Storage And Furniture
    • Woodturning Projects
    • Workbenches
    • Surface Prep

      More

    • TV
    • Forum
    • Blogs
    • Webinars
    • Podcasts
    • Customer Support

      Account

    • Log In
    • Join

      Magazine

    • Current Issue
    • Past Issues
    • Digital Libraries
    • Magazine Index
    • Subscribe

      Membership

    • Member Home
    • Start Free Trial
    • Gift Unlimited
    • Log In

      Shop the Store

    • Books
    • DVDs
    • Taunton Workshops

      Events

    • Fine Woodworking Live
    • Fine Woodworking HANDS ON

      Account

    • Log In
    • Sign Up

    Newsletter

    Get woodworking tips, offers, and expert advice in your inbox

    Sign Up

    Follow

    UNLIMITED

    Become an UNLIMITED member and get it all: searchable online archive of every issue, how-to videos, Complete Illustrated Guide to Woodworking digital series, print magazine, e-newsletter, and more.

    Start Your Free Trial

    Upgrade Membership