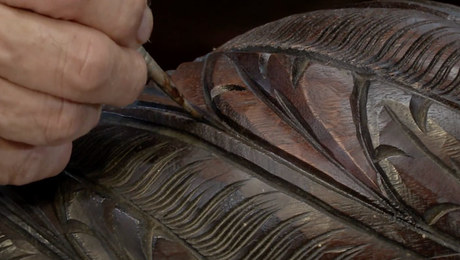
French Polishing: How to Build Up the Finish
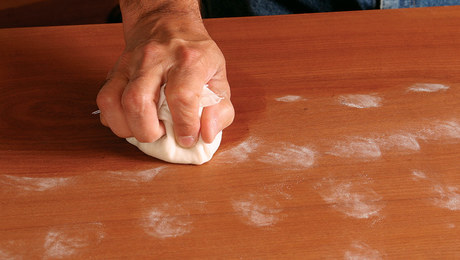
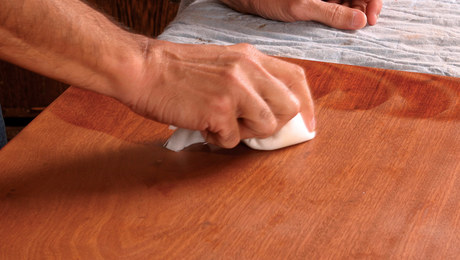
The final step of the French polish is call the second polish. The process involves filling the grain, and then bodying, or building up a thin film of finish to achieve a classic high-gloss look.
Nov 26, 2019
Start your 14-day FREE trial to watch this video
Plus, access more than 500 video workshop episodes when you become a member
Links John mentions in this video:
 | A True French PolishBy George Frank
|
Kremer PigmentsThis is John’s source for the pigments and pumice he uses in his french polishing. |
Videos in the Series
-

What is French Polishing?
November 12, 2019
-
French Polishing: Filling the Pores, Part 1
November 19, 2019
-
French Polishing: Filling the Pores, Part 2
November 19, 2019
-
French Polishing: Filling the Pores, Part 3
November 19, 2019
-
French Polishing: How to Build Up the Finish
November 26, 2019
-
French Polishing: How to Tackle Carved Details
December 4, 2019


Previous:
French Polishing: Filling the Pores, Part 3
Next:
French Polishing: How to Tackle Carved Details


Comments
Excellent description of the processes and procedures to apply a true French Polish. If Mr. Coffey would like to, he could assemble kits (shellac, linen, cotton, alcohol, pumice and colorants) to accompany boards for tabletops, such as the beautiful walnut board his wife laid claim to for a tabletop.
Do you respect wood? :)
Great videos. Thanks!
Ben,
Over all this is a great series, I like hearing him describe his process while he is doing it, and Ben is a great interviewer/audience. He asks the questions that I want to ask as I'm watching.
My frustration is that John goes to such length to explain that the lighting is key, to have his work light at an acute angle on the opposite side of the work piece, but we never see that. All of the closeup shots are from across the table, so we are always seeing it parallel to the light source. So we never see what John is seeing. The closest we ever get is 36 minutes into this the 5th episode, when he turns the panel on the table and we see it in the reflection of the work light behind him, not the primary work light. So all the times he is talking about minor streaks, and swirls, none of that shows up on our screen.
I understand that you need to shoot from across the table so we can watch John work, and for the camera to not be in the way, but I wish that for some of the close ups you had moved around to John's side of the table, so we could see what he sees.
What that board of walnut ultimately became is shown below. GoldenRectangle has a valid criticism. We did in fact discuss how to shoot it and hoped the light behind me would give the same effect which it probably didn't. I went to great lengths to describe what I was seeing but having a better light and a longer closeup while working would have helped.
Thanks John, we all live and learn, I hope these comments will help to make even better videos in the future. Over all it is a great series, as all of the videos from FWW have been. I learn so much just watching, and they inspire me to get into the shop and do stuff. Keep up the good work.
I just loved this man! John Coffey sounded exactly like Larry David and every time he talked about Kramer I just cracked.
I hope this doesn't sound disrespectful though...
Anyway, learned a lot and had a lot of fun watching! Great video series!
What a fabulous video. I give high marks to Ben Strano for finding such a passionate and detailed instructor for a now little-used high-end technique. John Coffee clearly has deep knowledge and long experience in addition to highly honed teaching skills. Putting the video together in 30 minute segments is perfect: not only does that break it into accessible chunks, more than that and I would find it hard to assimilate all the detail being transferred.
I can see why varnishes, lacquers and polyurethanes were developed. While a french polish may be the epitome of wood finishing, it is clearly a labor of love that is fraught with traps and snares for the innocent finisher. This is the video series to watch three times before you start your first french polish project and then have it running on a loop while you do the work.
One request for a follow-up series. I would love to start out by trying my luck bringing back the finish on some old pieces that sit dully around the house. How to identify antique french polish and how to rejuvenate such finishes with a couple of examples could be an excellent and well-received follow up. Maybe it would even be possible to see how John might repair some of the defects in the veneer and chipped edges of the drawer front you guys were filming before bringing back the finish?
Excellent series in keeping with the high standards of Fine Woodworking!
Much thanks.
Agree with comment about close ups and light, which I feel is critical to the learning. Other than that the instruction and information was excellent.
Early on you said that maple and cherry do not need the first polishing to fill the grain. 2 questions: 1) how would the process be modified for regular maple or cherry, 2) what do you dow with highly figured maple (that may have a touch of tear-out)?
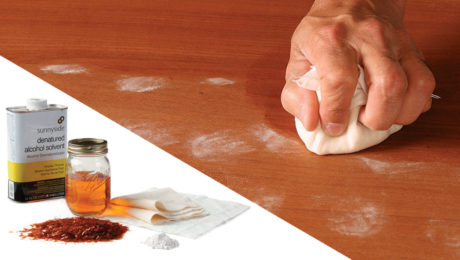
To finish cherry, maple, or any fine grained wood, skip the filling stage and go to the bodying up stage where you will no longer be using pumice. The pad is recharged with a 2lb cut periodically during polishing so a film starts to build. I think the end of the Build a Finish segment covers it.
Tear out will not be filled during this process. I deal with imperfections AFTER I have established a film, not before. Putting on the filler before getting finish on the wood will stain the wood around the imperfection leaving a ghost. Also, having a finish on the wood will give me a better idea of what color to make the fill. I have many fillers from which to choose: shellac stick, bulked epoxy, Elmers woodfiller, colored beeswax, EVA. It depends on the size of the fill and where I am in the finishing process. Usually I try to get a finish on and, that day, try to take care of the imperfections. Level out the fill and then polish again. Once you've established a film you can then do a little wet-dry sanding (600 gt. paper or higher). With cherry and maple I probably can get it finished completely in two days, maybe three. As with the filling stage, each day gets easier.
Log in or become a member to post a comment.
Sign up Log in