Skip to content
Fine Woodworking
Main Menu
Subscribe
GET THE MAGAZINE & MORE
Magazine Cover
  • Save 69% off the cover price
  • Or, get everything with UNLIMITED, including 40+ years of the online archive.
Subscribe Now!
Subscribe
  • Projects & Plans
  • How-To
  • Shop Tips
  • Tools & Materials
  • Videos
  • Magazine
  • Video Workshops
  • Members
  • Forum
  • Gallery
  • Blogs
  • More
    • Log In
    • Join
    Fine Woodworking Main Menu Subscribe
    Blog

    Using a dowel plate to peg a Shaker cat table

    One chonk of a cat, one bedside table, and a great lesson in reinforcement and dowels.

    Author Headshot By Megan Fitzpatrick Sep 28, 2021
    Article Image

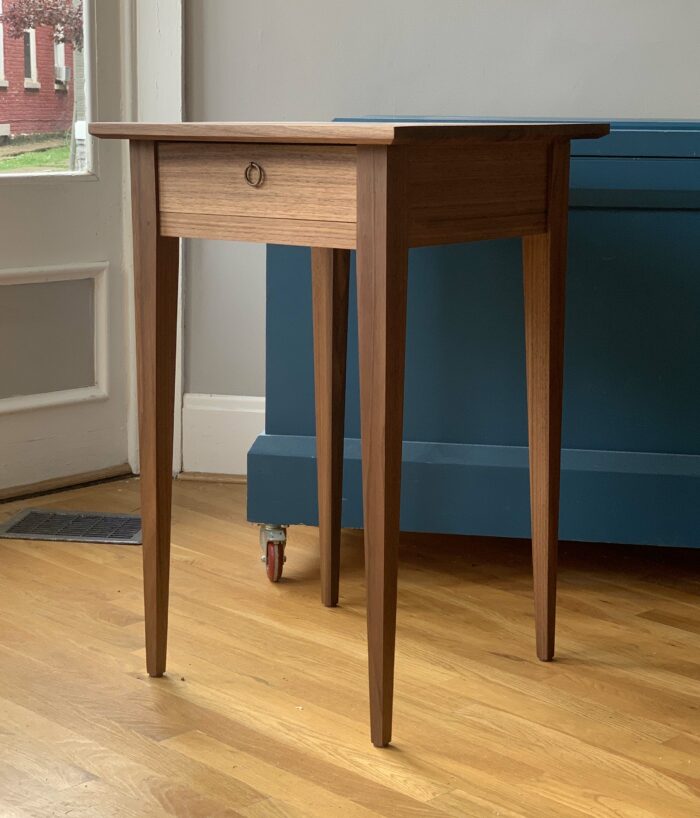
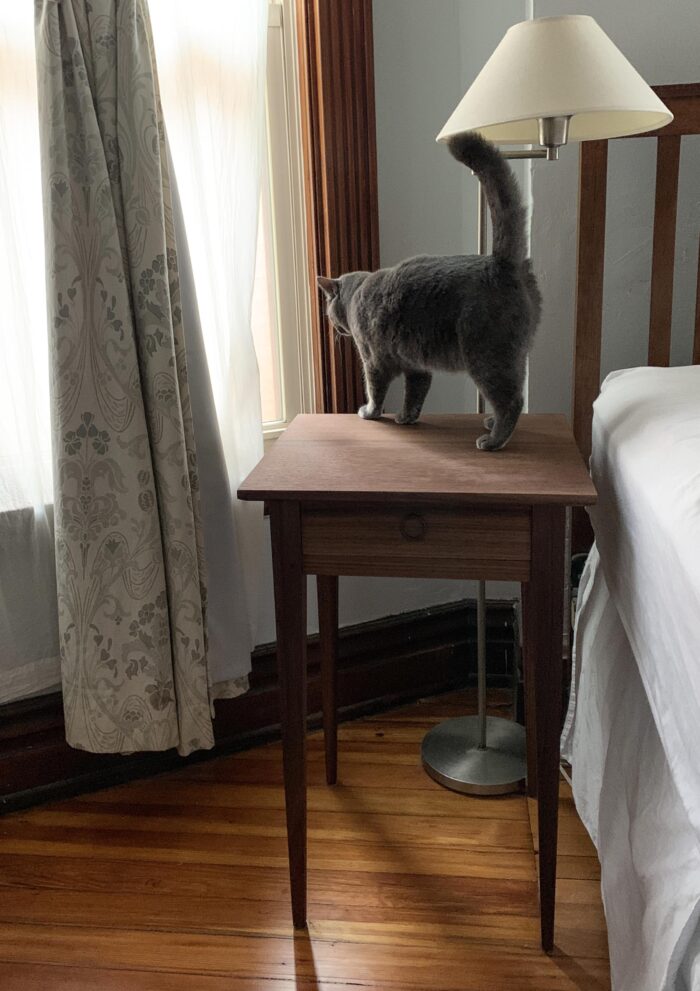
    Once in a while, I like to build something other than tool chests. So a few months ago, I made my cat, Olivia, a table out of some nice walnut. Because she lands like a two-ton hippopotamus, she needed something sturdy; my wobbly old antique bedside table didn’t suffice. Plus, I wanted a table a little taller than typical: window height so Olivia can comfortably lounge while watching the squirrels while I’m away at the shop (my bed is pretty tall, so it works out on both counts). I also needed a drawer in which to store my glasses at night, because someone thinks they’re a toy.

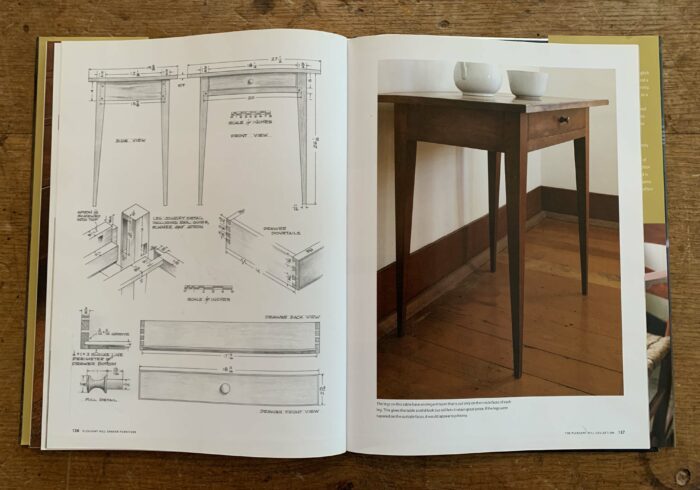
    My inspiration was a side table from Shaker Village at Pleasant Hill, in central Kentucky, as shown by Kerry Pierce in Pleasant Hill Shaker Furniture (2007, Popular Woodworking Books) – but with chonky legs (for my pile driver of a cat) and a slight underbevel on the tabletop. (I guess in the end mine looks more modern than Shaker…or like a well-fed Shaker.)

    page from Pleasant Hill Shaker Furniture
    This cherry side table was in the basement dining room of the Centre Family Dwelling at Pleasant Hill in 2007.

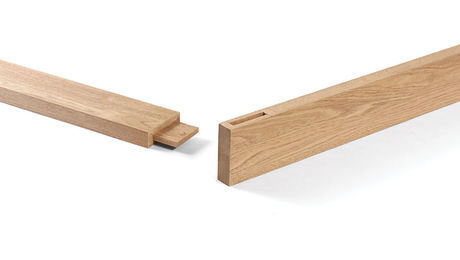
    The key thing to notice about the table is that there is no rail above the drawer; the underside of the top acts as its kicker. Therefore, the piece that primarily serves to keep the table together and square across the front is the narrow rail that runs underneath the drawer. (Yes, the top helps, too, but it’s attached with wiggle room for expansion and contraction.) So I used a belt (tenons) and suspenders (pegs) for the joint at either end to make sure the thing would outlast Olivia.

    But you can’t just walk into the home center and buy straight-grained walnut dowels with no runout that perfectly match the walnut for the rest of the table (if you can, I wish I lived near your home center), so I always find it best to make my own peg stock. It’s fast and easy.

    Look through your offcuts and grab the straightest-grained stuff you can find. In my case, that was a 3/4-in.-thick piece from the table aprons.

    splitting walnut
    Walnut is easy to split.

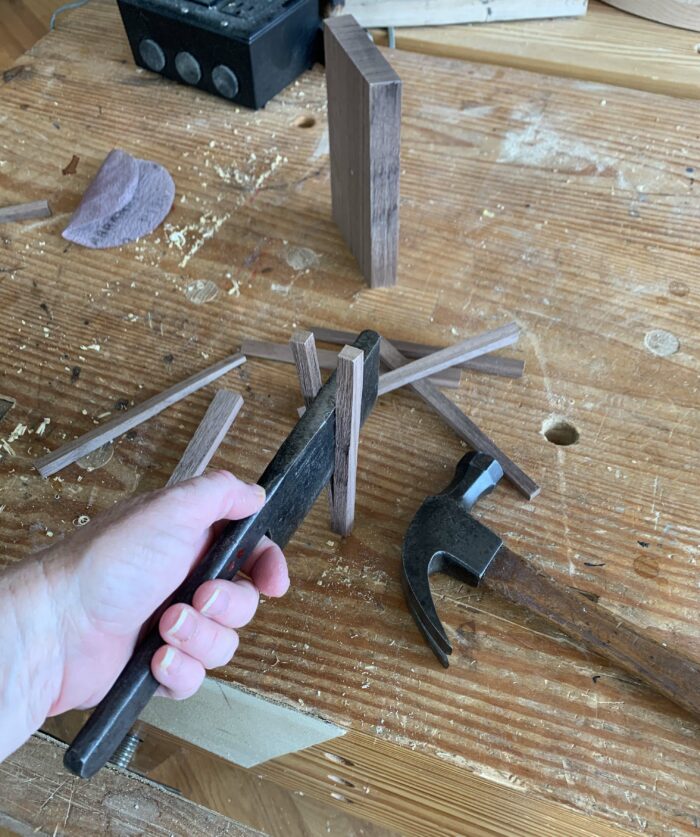
    It’s best to split the pieces off if possible, because wood will break along the grain lines, thereby ensuring you have a straight piece with no runout. I first split a piece off the 3/4-in.-wide piece, then split that piece in two. You can see in the picture above that I started the split with the hacking knife in the center of the stock, but at the bottom, the split ran off to the left, following the grain. That’s exactly what you want, because the straighter the grain, the stronger the peg (also known as a trenail or trunnel).

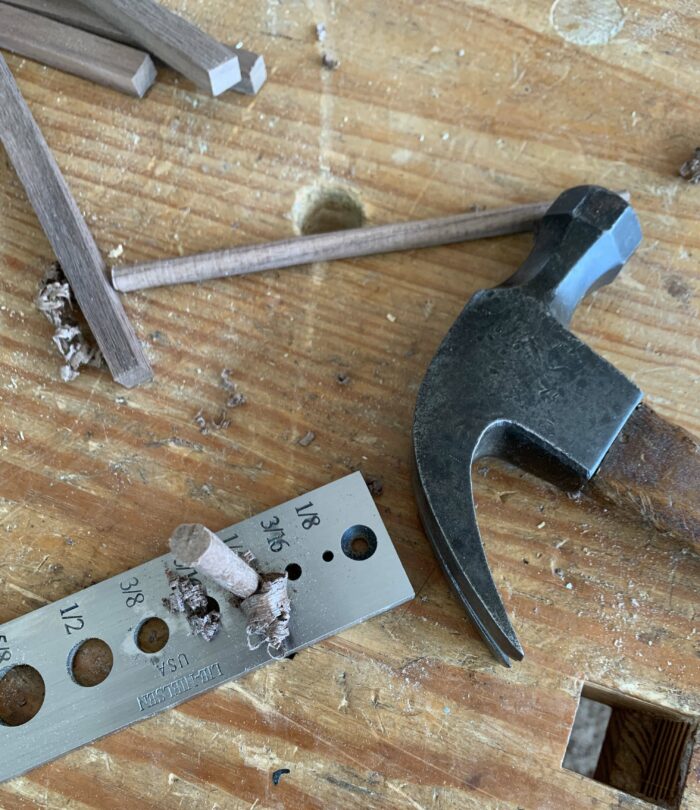
    I try to split the pieces small enough so that they fit into the hole no more than two or three sizes larger than what will be my finished peg size. (As fun as it is to bash sticks through the dowel-plate holes, I shoot for efficient use of time.) Then I point the end of each before moving on to the dowel plate.

    3/8 dowel plate pass
    The first pass peels off the corners to make an octagon.

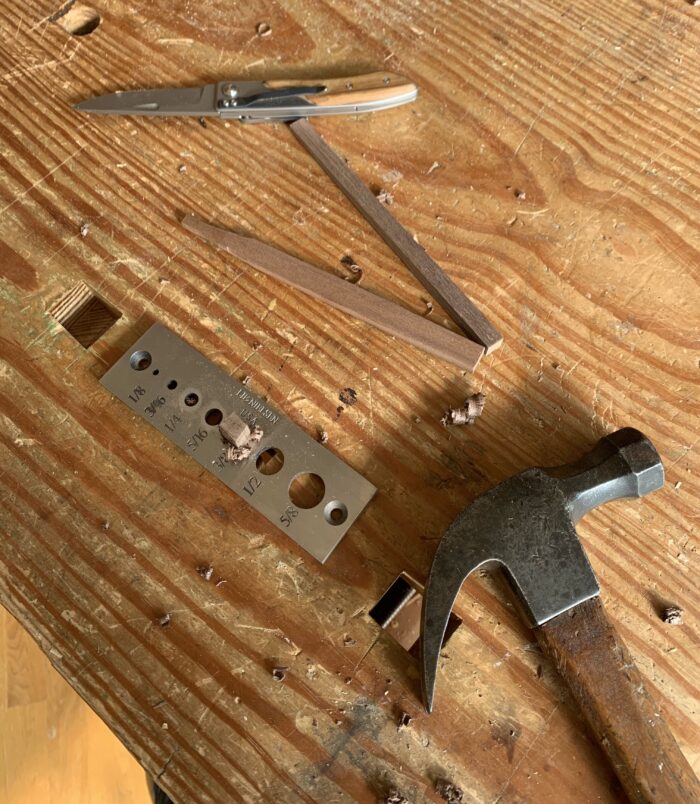
    My first pass through the plate in this case was in the 3/8-in. hole, which basically created an octagon as it peeled off the square edges. The 5/16-in. hole added four more facets. The final pass, through the 1/4-in. hole, rounded things up. I needed only two 2-in.-long pegs; I could have easily gotten those from one of my approximately 5-in.-long blanks. But you never know what’s going to happen when you hit things with a hammer, so I always make a few extra. Plus you need some for tests.

    dowel plate
    A good dowel plate is, in my opinion, an essential tool.

    It’s also imperative to try the fit of your pegs in a test hole – drilled in the same material and in the same orientation as the workpiece – before getting out the glue and going to town on the actual work. If the hole is too small, you can split the work. And if the hole is too big, enough glue might keep the peg in place, but it will look kinda crappy (you don’t want your cat to be ashamed of you, do you?). I like to drill a hole 1/64 in. smaller than the peg (this is one of the few times in my work that I find calipers a must) and try that out. I whittle the edges off the peg, them drive it home with a hammer. If I can whack it into the hole without splitting the work, great. If it splits the work, drill a bigger hole; repeat. If the hole is too large, drill a smaller hole; repeat.

    test fit a peg
    That’ll do. You can see that the end I whacked with the hammer is a bit mushroomed; the straight grain of the peg helped to keep it from breaking.

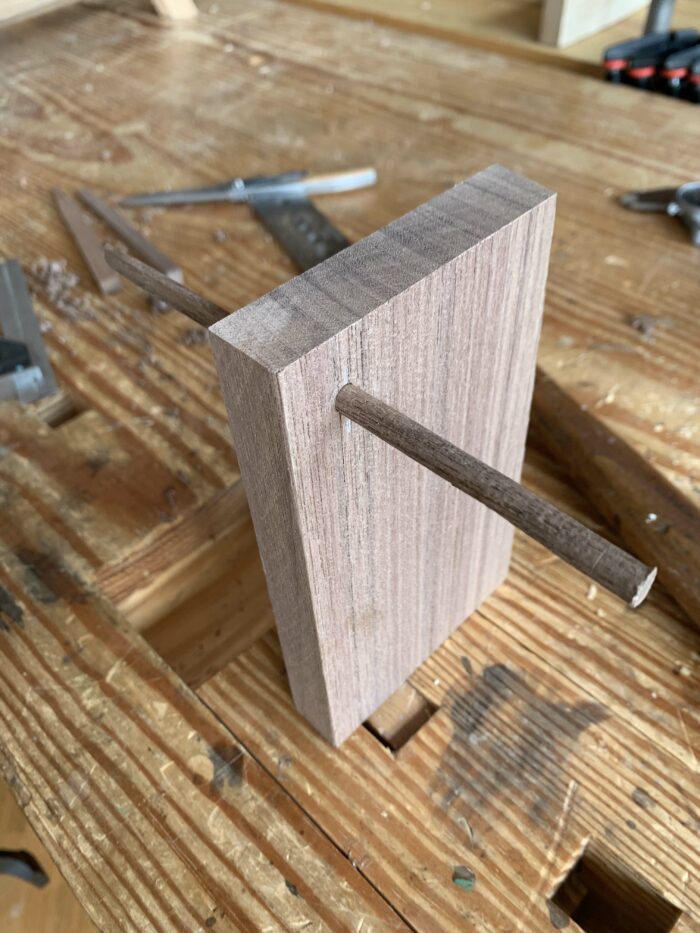
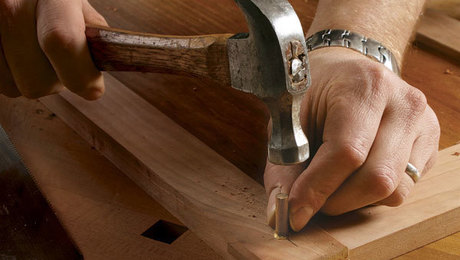
    When you’re sure everything will fit nicely, drill your holes in the work, point the pegs (or just take off the sharp edges with a knife) so they’re easy to get started, put a little glue on them, then drive them home with a hammer. Stop hitting one whack before it breaks. (You’ll hear the sound change when it’s all the way home.) After the glue dries, flush the pegs to the work surface, then sand as needed before finishing.

    Here’s the happy customer. (I wish I could have shot the opener here…but I didn’t think Olivia would sit still while I dug out my lighting kit.)

    All About Dowels and Biscuits

    Relatively speaking, dowels and biscuits are modern innovations in joinery that have come about with the invention of power tools and jigs.

    The Pegged Joint, Exposed

    Showcase and strengthen mortise-and-tenon joints

    11 Mortise and Tenon Variations

    The tried-and-true mortise and tenon comes in many forms

    Sign up for eletters today and get the latest techniques and how-to from Fine Woodworking, plus special offers.

    Sign Up

    Get woodworking tips, expert advice and special offers in your inbox

    Sign Up
    ×
    X
    X

    New Feature

    Fine Woodworking Forums

    Ask questions, offer advice, and share your work

    Get It All!

    UNLIMITED Membership is like taking a master class in woodworking for less than $10 a month.

    Start Your Free Trial

    Subscribe to Fine Woodworking

    Save up to 69%

    Subscribe

    Comments

    1. hryc111 | Sep 28, 2021 11:20pm | #1

      Really nice article. So helpful to hear the details of how Megan goes about fitting the pegs. Rare to read so clearly what to do to arrive at exactly the right tolerances. Especially helpful is the idea that this is the one place she uses calipers. Puts this measurement in context. Pro tip. Thank you.

    2. user-6201585 | Oct 02, 2021 05:08pm | #2

      Great article, I have a dowel plate now I know how to use it correctly, one trick I have used if the dowel is slightly over size, is to put it in the microwave and give it a few short bursts which dries it out and shrinks it slightly allowing it to be put into a slightly under sized hole with ease. Once the dowel absorbs the moisture from the glue it fits the hole perfectly. Hopefully after reading this article my dowels will be in better shape and shrinking won't be necessary. Thanks again.

    Log in or create an account to post a comment.

    Sign up Log in

    Up Next

    Featured Workshop

    a diagram of a round Shaker stand and an image or a round Shaker stand

    Shaker candle stand with Christian Beckvoort

    He’s built dozens of round Shaker stands over four decades, so there is no one more qualified than Christian Becksvoort to demonstrate making this classic. In this seven-part video series,…

    Featured Projects & Plans

    Build a Contemporary Sideboard

    Chris Gochnour's sideboard combines usefulness, strength, and beauty in a contemporary case piece

    Related Stories

    • Japanese joinery in practice

    • 5 spectacular Japanese joints

    • Geeky woodworking tests

    • Let's talk about the end-grain glue joint video

    Discussion Forum

    Recent Posts and Replies

    • |
    • |
    • |
    • |
    • |
    • |
    View More Create Post

    Member Exclusives

    More Member Exclusives
    • How to make a rule joint

      This joint links drop leaves to the tabletop and looks good with the leaves up or down.

    • How to make a knuckle joint

      Steve Latta demonstrates how to create a knuckle joint, the heart of a period drop leaf table.

    • How to Make a Tabletop Float

      Simple and sturdy joinery allows the top of this table to float without overshadowing the rest of the design or blocking the flow of light between base and top.

    • Simple Dovetailed Box

      How to Lay Out and Cut Dovetails for a Box

      A box is the perfect project to learn how to cut dovetails by hand.

    Highlights

    • Shape Your Skills

      when you sign up for our emails

      Plus tips, advice, and special offers from Fine Woodworking.

      Sign Up
    • Shop Talk Live Podcast

      Shop Talk Live Podcast

      Our biweekly podcast allows editors, authors, and special guests to answer your woodworking questions and connect with the online woodworking community.

    • Woodpecker Sweepstakes

      Woodpeckers Shop Upgrade Giveaway

      Enter now for your chance to win more than $2,000 worth of woodworking equipment from Woodpeckers. Click for full details.

    • Staff Picks Blog

      Our favorite articles and videos

      We have created these special content collections organized to give you a deep dive into a range of topics that matter.

    Joinery

    View All
    • Japanese joinery in practice

      Japanese joinery in practice

    • 5 spectacular Japanese joints

    • Geeky woodworking tests

    • a glued up board on a press breaking along the glue line

      Let's talk about the end-grain glue joint video

    View All

    From the Store

    View More
    • Tool Guide 2022

      Buy Now
    • Complete Illustrated Guide to Woodworking USB

      Buy Now
    • Foundations of Woodworking

      Buy Now
    • The Why & How of Woodworking

      Buy Now
    View More

    Get the latest from Fine Woodworking Magazine

    • #292-NOV/DEC 2021

      • Kerf-bent wall cabinet
      • Online extras from FWW issue #292
      • How to tame curved parts with patterns
    • #291-Sep/Oct 2021

      • Build a modern coffee table
      • Online Extras from FWW Issue #291
      • Editor's Letter: Something old, something new
    • #290-July/Aug 2021

      • Build a Shaker chest of drawers
      • Online Extras from FWW Issue #290
      • From the editor: What we make matters
    • #289-May/June 2021

      • Arts & Crafts Coffee Table with Story-Book Charm
      • Links from Fine Woodworking issue #289
      • Step-by-Step Guide to Tuning Your Block Plane
    • #288-Mar/Apr 2021

      • Phil Lowe: A craftsman and gentleman
      • Online Extras from FWW Issue #288
      • Phil Lowe: craftsman, teacher, friend

    UNLIMITED membership - Get access to it all

    Start Free Trial Upgrade Membership

    Fine WoodWorking

    Follow

    Newsletter

    Get woodworking tips, expert advice and special offers in your inbox

    Sign Up

    Membership & Magazine

    • Members
    • Digital Libraries
    • Join Unlimited
    • Magazine Subscription
    • Magazine Renewal
    • Gift a Subscription
    • Customer Support
    • Manage Preferences

    Taunton Network

    • Fine Homebuilding
    • Green Building Advisor
    • Fine Gardening
    • Threads
    • About
    • Contact
    • Advertise
    • Privacy Policy
    • Careers
    • Copyright
    • Terms of Use
    • Accessibility
    • California Privacy Rights
    • Site Map

    © 2021 The Taunton Press, Inc. All rights reserved.

    Get step-by-step instructions, woodworking tips, expert advice and special offers in your inbox. Sign Up Now!

      Main Menu

    • Projects and Plans
    • How-To
    • Shop Tips
    • Tools & Materials
    • Videos
    • Gallery
    • Magazine
    • Video Workshops
    • Members
    • Forum

      Popular Topics

    • Design
    • Small Projects
    • Beds
    • Chairs, Benches And Stools
    • Built-ins
    • Storage And Shelves
    • Cabinets
    • Carving
    • Casework
    • Desks
    • Tables
    • Shop Storage And Furniture
    • Woodturning Projects
    • Workbenches
    • Surface Prep

      More

    • TV
    • Forum
    • Blogs
    • Webinars
    • Podcasts
    • Customer Support

      Account

    • Log In
    • Join

      Magazine

    • Current Issue
    • Past Issues
    • Digital Libraries
    • Magazine Index
    • Subscribe

      Membership

    • Member Home
    • Start Free Trial
    • Gift Unlimited
    • Log In

      Shop the Store

    • Books
    • DVDs
    • Taunton Workshops

      Events

    • Fine Woodworking Live
    • Fine Woodworking HANDS ON

      Account

    • Log In
    • Sign Up

    Newsletter

    Get woodworking tips, offers, and expert advice in your inbox

    Sign Up

    Follow

    UNLIMITED

    Become an UNLIMITED member and get it all: searchable online archive of every issue, how-to videos, Complete Illustrated Guide to Woodworking digital series, print magazine, e-newsletter, and more.

    Start Your Free Trial

    Upgrade Membership