Video
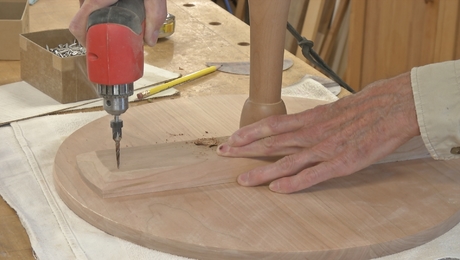
Shaker Candle Stand: An Oil and Varnish Finish
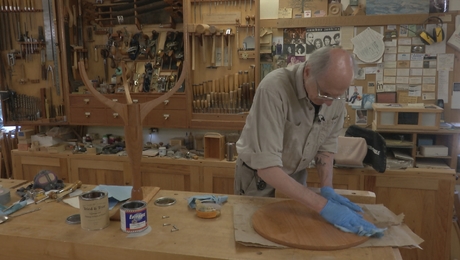
To complete the project, add a beautiful hand-rubbed finish with oil and varnish.
 Nov 05, 2020
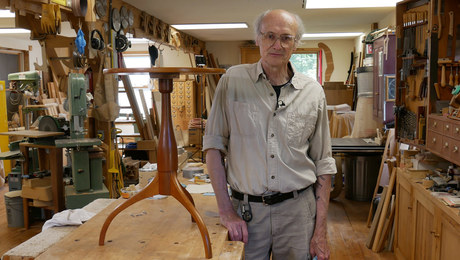
Christian Becksvoort has built dozens of round Shaker stands over four decades, so there is no one more qualified to demonstrate making this classic.
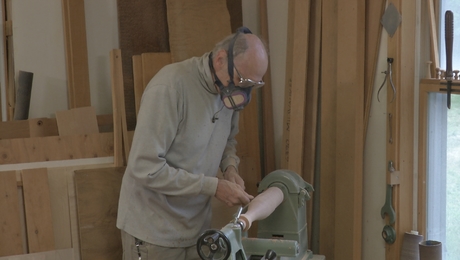
In the conclusion of this series, Chris finishes the candle stand with his favorite finish for cherry, an oil and varnish finish.
Videos in the Series
-
Shaker Candle Stand: Introduction
September 24, 2020
-
Shaker Candle Stand: Turning a Table Post
September 24, 2020
-

Shaker Candle Stand: Shaping the Legs
October 1, 2020
-

Shaker Candle Stand: Hand-Cut Dovetail Sockets
October 8, 2020
-

Shaker Candle Stand: Gluing Up the Legs
October 15, 2020
-

Shaker Candle Stand: Making the Round Top
October 26, 2020
-

Shaker Candle Stand: Final Assembly
October 29, 2020
-
Shaker Candle Stand: An Oil and Varnish Finish
November 5, 2020


Comments
I thoroughly enjoyed this series of videos by Chris Becksvoort. I especially liked that he included his finishing routine. He really is a master of his craft. By the way he also wrote an article on building a similar shaker (round) candle stand in Fine woodworking Mag issue #110 beginning on page 70. The article includes template drawings for the post and legs which I found helpful.
So I just had an ad pop up before this video… Is that a new thing?
You should never be served an ad on member-only videos, however mistakes happen. If you you find it happens again, let me know with an email link to the video in question... [email protected]
OK. Just making sure. (And wanted to make sure it was brought to your attention too).
Thanks Ben!
It was a great series!!
Truly appreciated watching this.
Thank you for the finishing tip about the blotchiness. I learn something new every time I see one of these video workshops. Nice job.
This was an excellent video series! Chris is an inspiring craftsman. He shared so many little tricks and tip too. I learned a lot but plan to watch it again to pick up things I may have missed. This alone was worth the price of FWW membership. Please keep these coming. — Jim
Nice to see the wipe-on, wipe-off sequence. It seems "wasteful" to remove varnish from your piece, and throwing out so much of it in the rags, but it's better than having to sand drips and puddles, as I currently am with my ongoing project.
In this piece, the author is going for a discreet matte varnish. Would repeating many wipe on/off coats build up a glass or plastic-like layer?
It seems like the finishing process can go on for so long compared to making the actual piece... Does anyone hate finishing as much as I do? That's why I use shellac except on a table that will live outside...
Nice series. About the only thing "Missing", if you will, from this finishing video is a cautionary word or three about safely disposing of the oil-soaked rags afterwards, as they do have a tendency to spontaneously combust if they are not. [Yes, "The Voice of Experience", from many decades ago, here. And, yes, "Oops" is still not our favorite word.]
Chris noted the dramatic difference between the piece he had just finished and the "aged" sample that he had to show. I'm curious about that difference in color. (a) did the cherry appear similar to the freshly finished sample? (b) what duration has past to develop the color of the second piece?
I'm about to embark on a cherry desk and the finishing process frightens me! As Chris is an accomplished worker in cherry his opinions carry a lot of weight.
Thanks in advance,
In the finishing video he comments that blotchy cherry is really figured cherry that just hasn't been sanded properly, but he doesn't go on to explain what the proper way to sand it actually is. Is there some other video where that is discussed? Thank you.
In the link below Mike Pekovich shows his finishing technique on his cherry chimney cupboard and mentions blotch and figure in process. I think the finishing technique Chris Becksvoort describes is what he uses to prevent blotch. Sand to 500 grit and finish with 0000 steel wool. Here's video link to Mike's video: https://www.finewoodworking.com/2012/08/07/finishing
The volume of this video is very low compared to others. Quality control seems to be an issue with a lot of these videos.
The question I have now for Mr. Becksvoort regarding his finishing technique is why does he need to cut the oil with the varnish when Tried & True makes an oil varnish product? Is it due to the manufacturer using a different ratio?
You can use Tried & True Varnish oil on its own, but it dries very, very slowly. In my own experience, it takes about 30 days to fully dry, and that's per coat (I use at least two and sometimes three coats). The chemical driers in the spar varnish speed this up quite a bit. (In fact, I think that's probably the primary contribution of the spar varnish.)
So, if you have the time, Tried & True works well, but don't expect instant gratification.
Thanks @saschafer, that's a big help. We only have so long on this bluey-green ball and I don't know anybody that has 30 days to wait between coats! Naturally Mr. Becksvoort had a reason and I was interested in trying new products.
Cheers!
I accessed this video last week and bookmarked it to watch this week. When I click on the play button, it just loops and redisplays the same page.
thanks
Mr. Corrales,
I did the very same thing and just replayed it now this morning on my "Ancient" [in computer years] iMac w/o any problem whatsoever. Could it be you're having a browser or provider problem?
I got a response and a link that worked. Thanks
can you please tell me what is the green tape Mr. B uses? thank you [email protected]
He mentions "Frog tape" in the video, which you can get at home centers, etc.
3M also makes a green tape that's specifically designed for clamping. It's called "binding tape," and you can get it from Lee Valley. I've used it, and it has enough stretch to exert a reasonable amount of force.
thank you
Log in or create an account to post a comment.
Sign up Log in