Choosing the right wall anchors
Mario Rodriguez has gathered a range of wall anchors from toggles, to screws, to butterfly anchors and talks about how they work, where they are best used, and how to install them in drywall, plaster, and masonry.

Synopsis: Lacking conveniently placed studs in every wall, your option when hanging a cabinet, mirror, or picture may well be wall anchors. There is a wide variety of anchors out there, and the best one for the job will depend on many factors, including the composition of the wall, weight of the piece, and more. Mario Rodriguez has gathered a range of wall anchors from toggles, to screws, to butterfly anchors and talks about how they work, where they are best used, and how to install them.
You’ve finished building your cabinet, mirror, picture frame, or shelf. Now you just need to hang it. If you can hit studs with every screw, you’re in good shape. But if not, you’ll need wall anchors, those little devices you set into the wall to receive screws or bolts. There’s a plethora of anchors out there. Which type is best in your case? That will depend on the size and weight of the piece you’re hanging and the composition of the wall you’re hanging it on. I’ve gathered a wide range of anchors, and I’ll describe how they work, what situations and wall types they’re suited for, and how to install them.
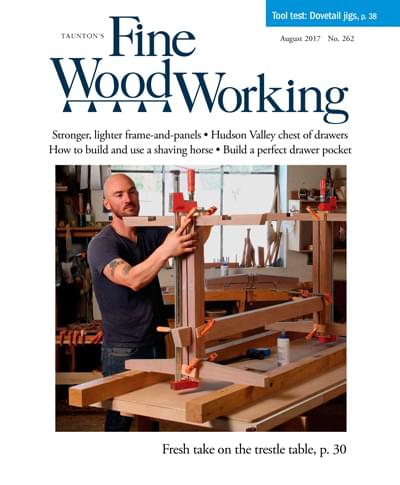
One note before you get to the point of selecting anchors: Be sure to build in some means to easily install or hang your piece. For a cabinet that will carry a lot of weight or see heavy use, you might consider using a thicker back panel, or you could incorporate an inset top rail to keep the piece square and to better support your fasteners. Using a French cleat (see the photo on this page) adds some time to your build but provides solid attachment, makes the cabinet easily removable, and keeps you from having to drive screws through the cabinet from inside. If you’re hanging a stock cabinet (obtained from a box store or cabinet wholesaler), inspect its construction and, if need be, add any cleats, rails, or corner blocks that will strengthen the piece and ensure an easier installation.
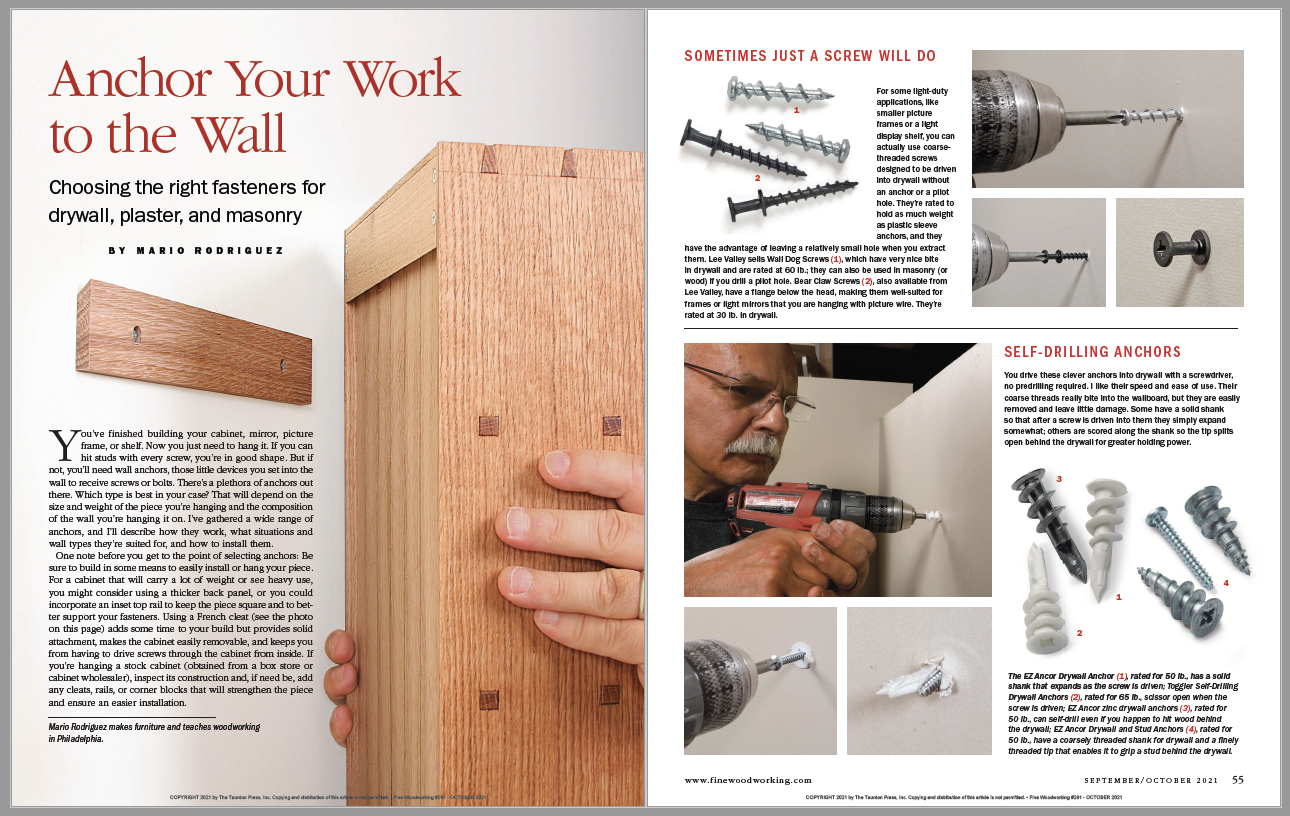
Sometimes just a screw will do
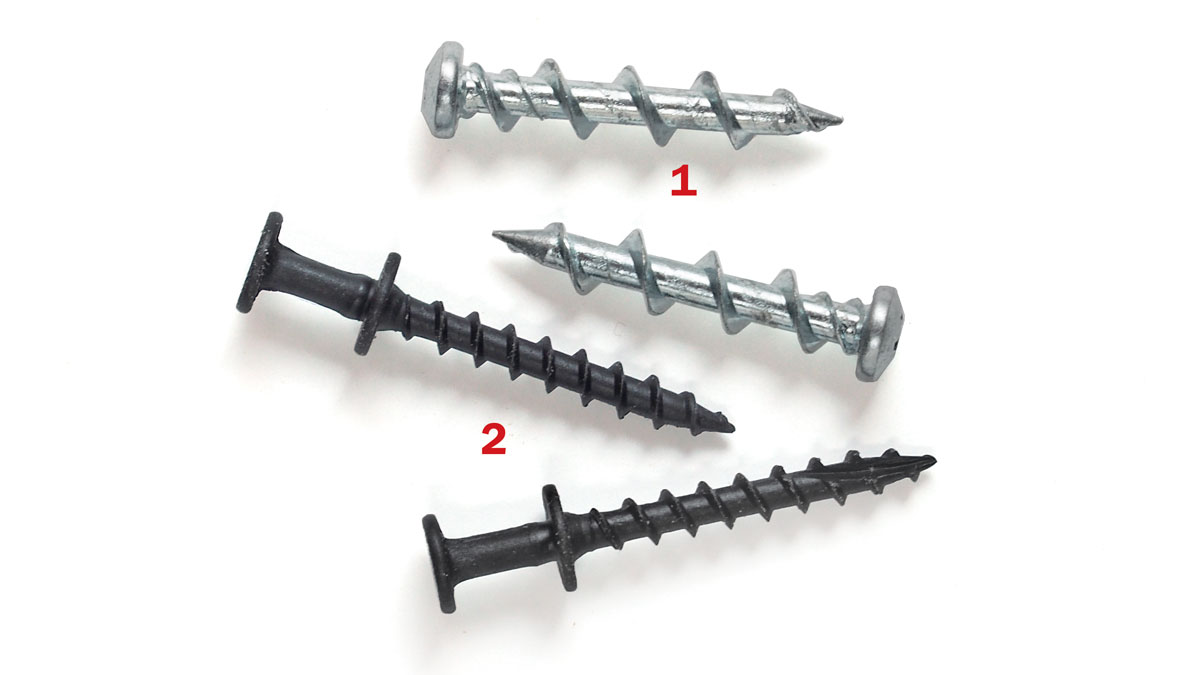
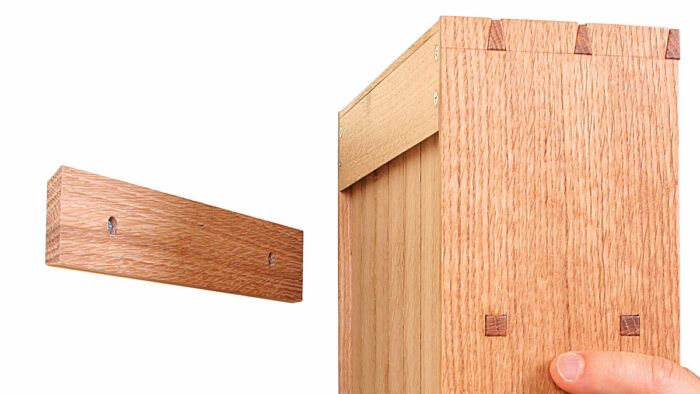
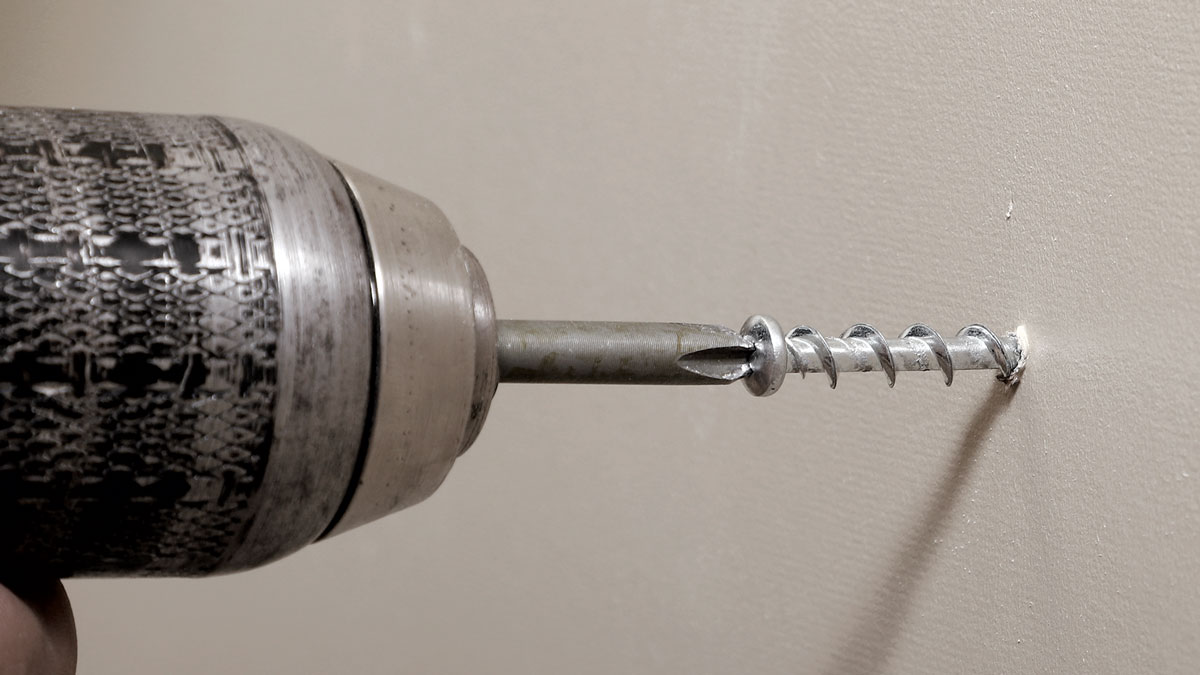
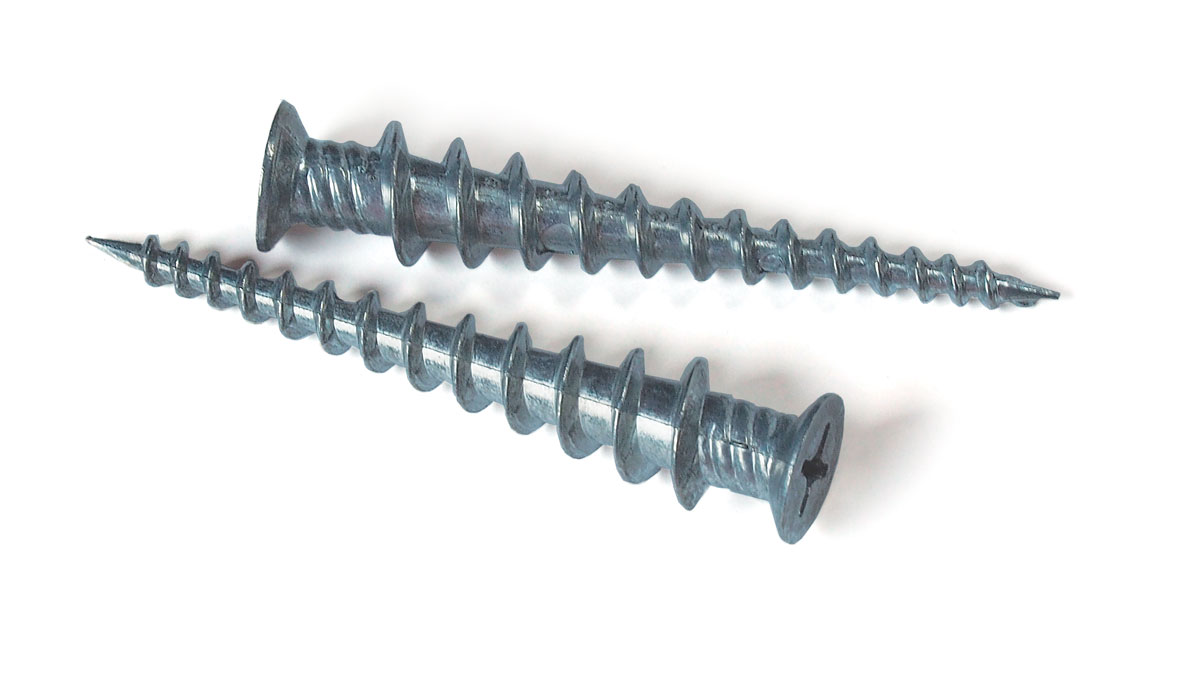
For some light-duty applications, like smaller picture frames or a light display shelf, you can actually use coarse-threaded screws designed to be driven into drywall without an anchor or a pilot hole. They’re rated to hold as much weight as plastic sleeve anchors, and they have the advantage of leaving a relatively small hole when you extract them. Lee Valley sells Wall Dog Screws (1), which have very nice bite in drywall and are rated at 60 lb.; they can also be used in masonry (or wood) if you drill a pilot hole. Bear Claw Screws (2), also available from Lee Valley, have a flange below the head, making them well-suited for frames or light mirrors that you are hanging with picture wire. They’re rated at 30 lb. in drywall.
 |
 |
How to Hang a Cabinet on the Wall
A closer look at the cleats and hangers you
can use to hold cabinets and shelves on the wall.
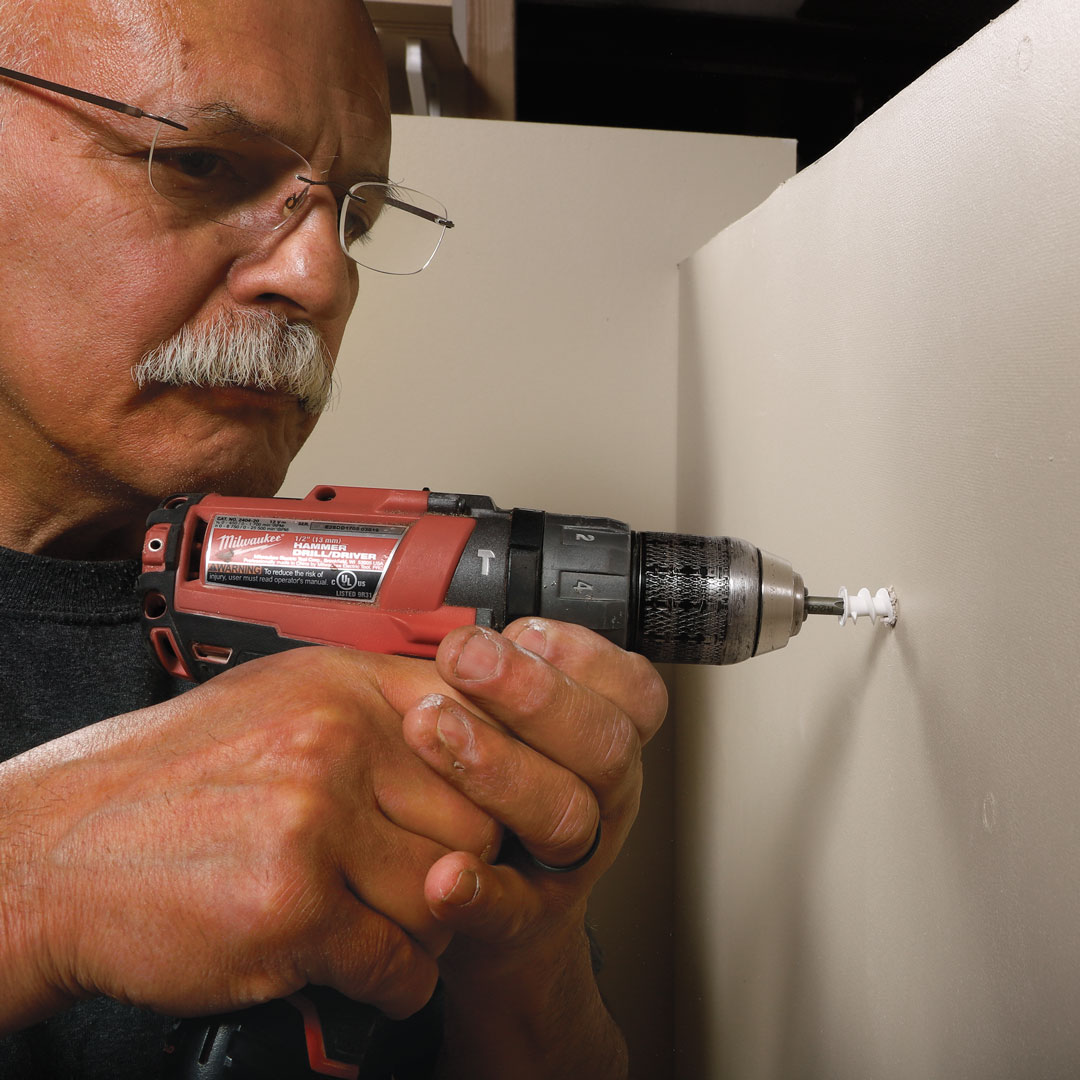
Self-Drilling Anchors
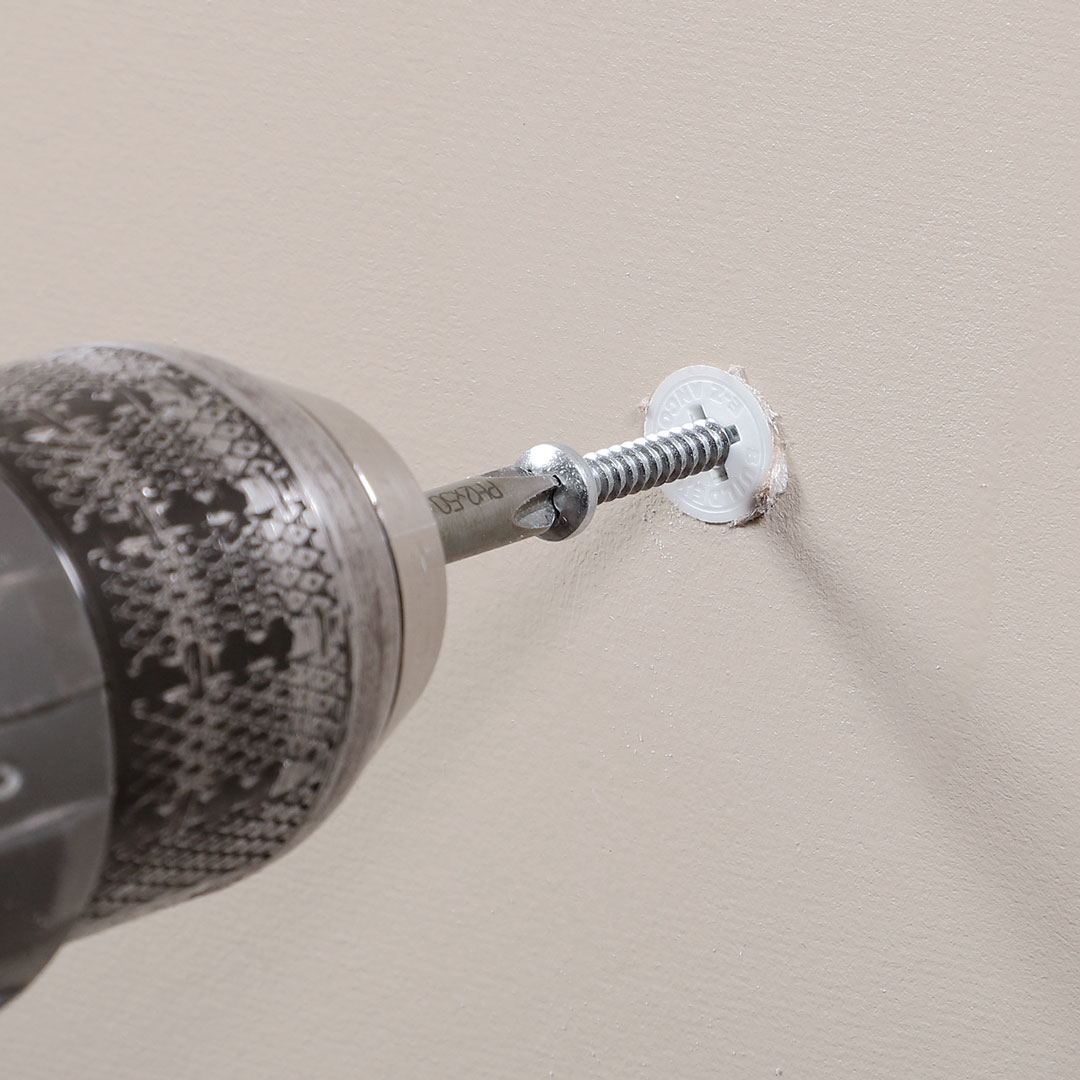
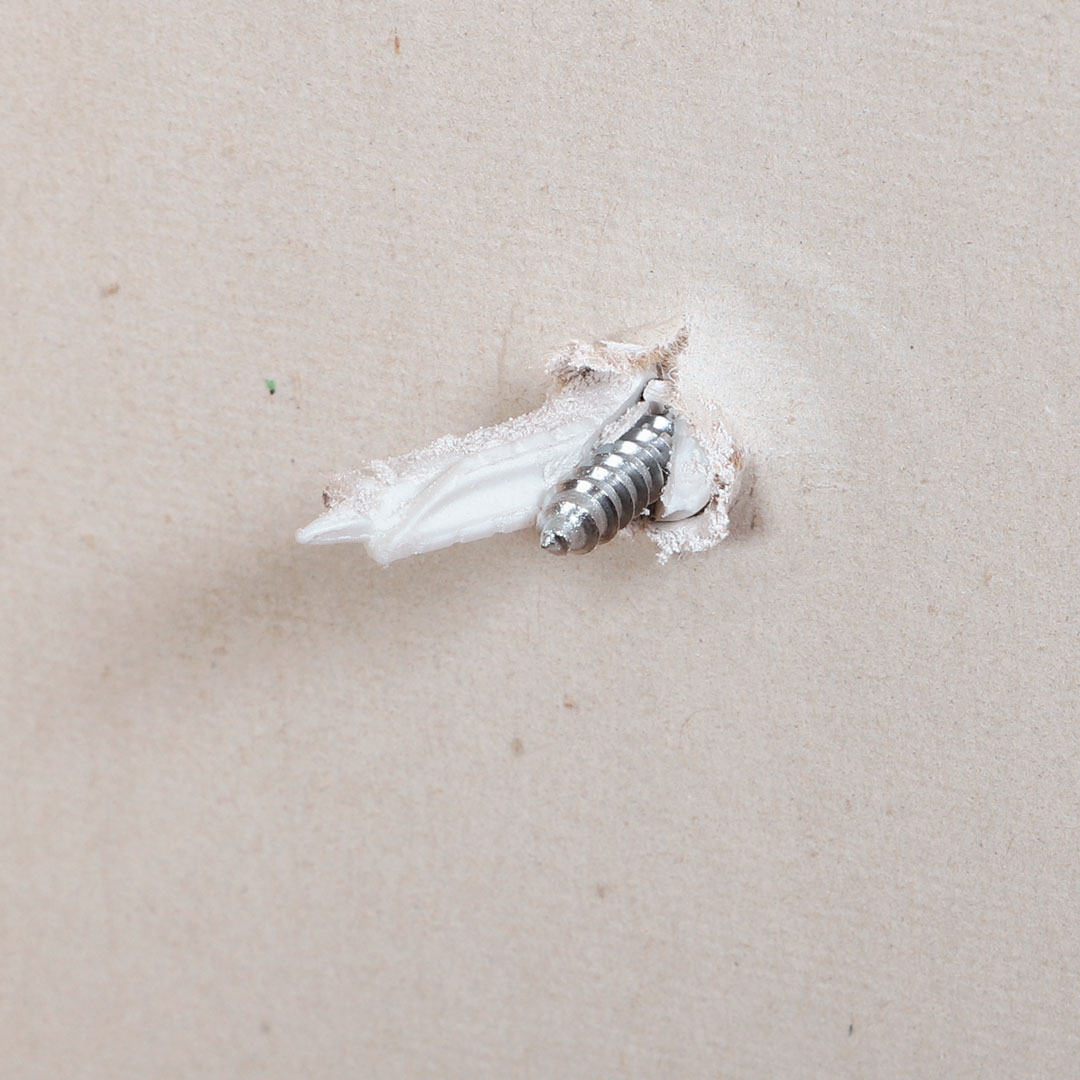
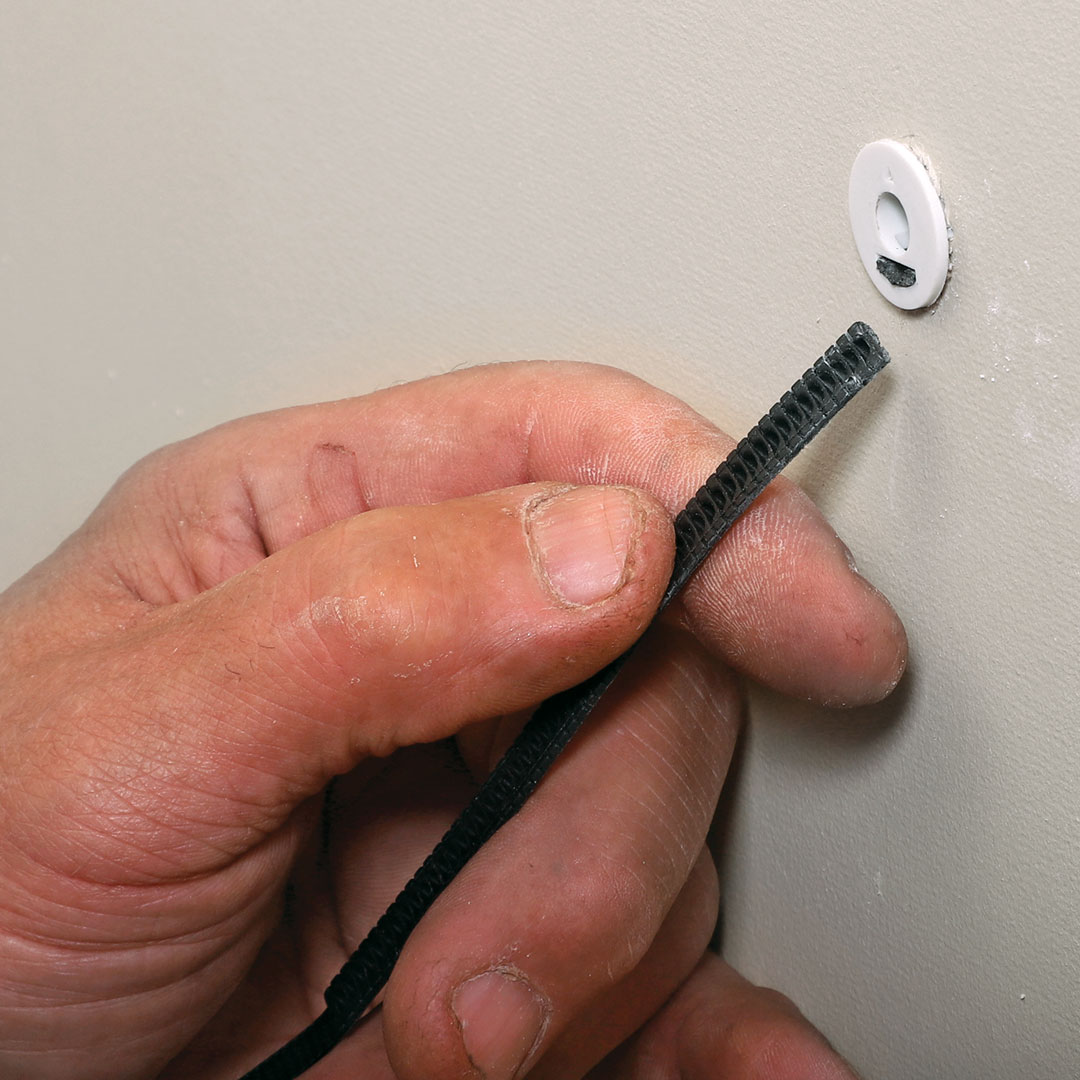
You drive these clever anchors into drywall with a screwdriver, no predrilling required. I like their speed and ease of use. Their coarse threads really bite into the wallboard, but they are easily removed and leave little damage. Some have a solid shank so that after a screw is driven into them they simply expand somewhat; others are scored along the shank so the tip splits open behind the drywall for greater holding power.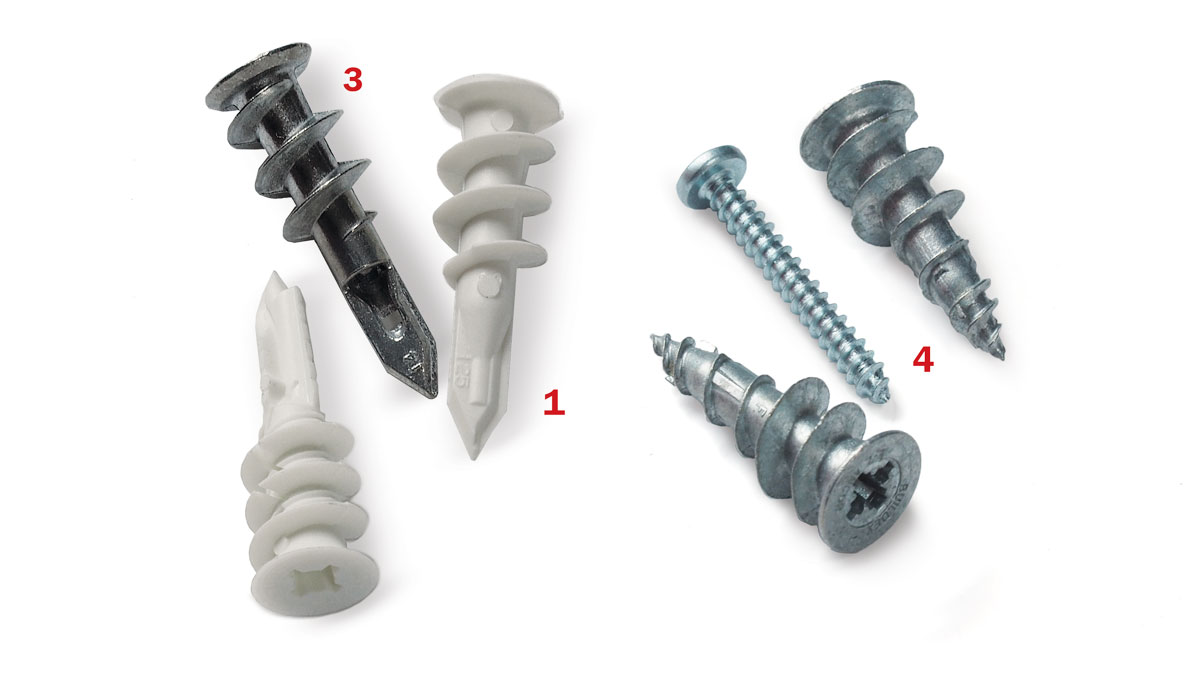
The EZ Ancor Drywall Anchor (1), rated for 50 lb., has a solid shank that expands as the screw is driven; Toggler Self-Drilling Drywall Anchors (2), rated for 65 lb., scissor open when the screw is driven; EZ Ancor zinc drywall anchors (3), rated for 50 lb., can self-drill even if you happen to hit wood behind the drywall; EZ Ancor Drywall and Stud Anchors (4), rated for 50 lb., have a coarsely threaded shank for drywall and a finely threaded tip that enables it to grip a stud behind the drywall.
 |
 |
 |
Expanding anchors
Plastic sleeve anchors
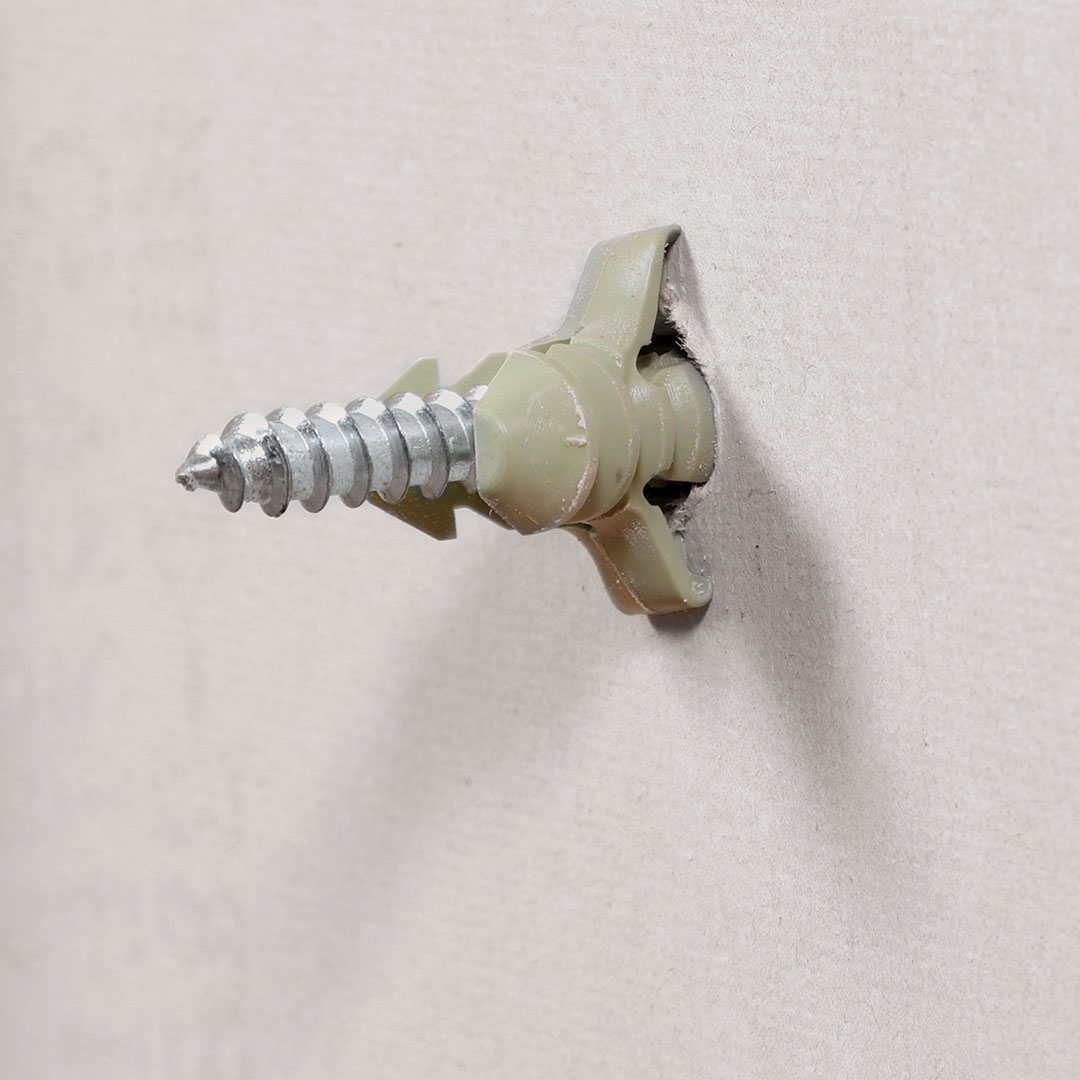
These anchors are suitable for light-duty tasks like hanging pictures, curtain rods, small shelves, towel rods, and paper holders. You predrill for them, and they work in plaster-and-lath walls and masonry as well as in drywall. Some merely expand when the screw is driven in; others, like the Cobra Triple Grip, have wings that will flip out behind the drywall. Some of the smaller ones require only a small predrilled hole and therefore very little repair when they’re removed. Removing the ones with wings can be a chore, and sometimes I just drive them farther into the wall and spackle over the hole.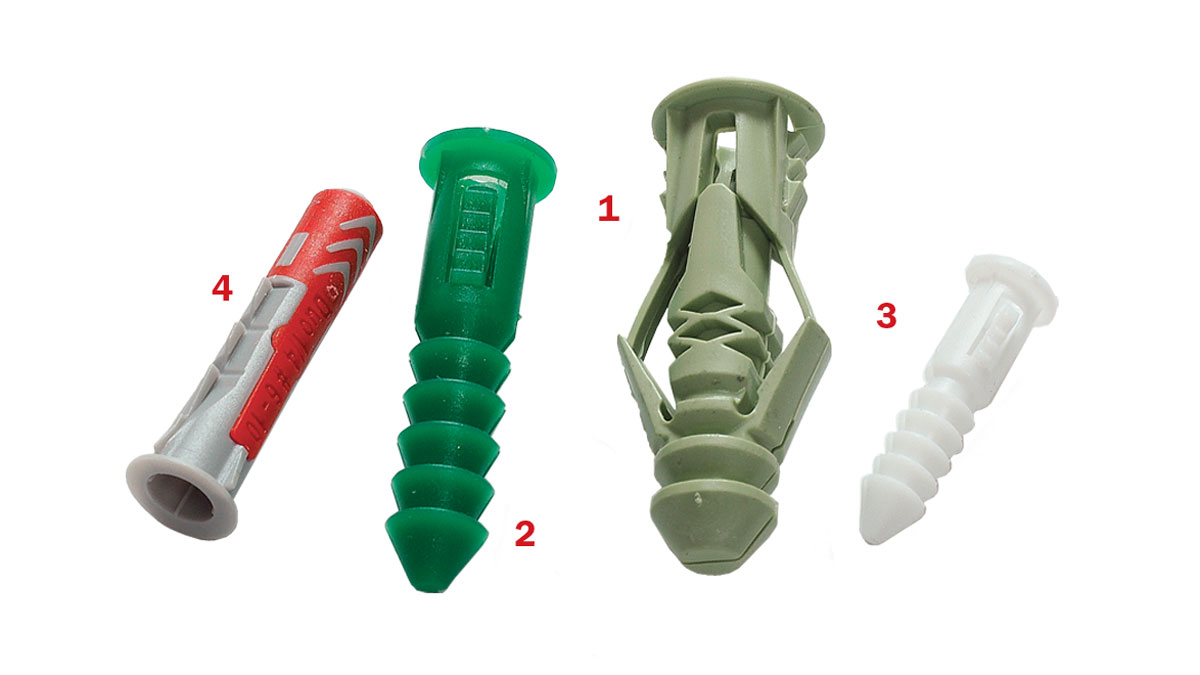
The Cobra Triple Grip (1), intended for all wall types, is rated for 46–61 lb. in drywall, 200–225 lb. in masonry; Everbilt Ribbed Plastic Anchors (2 and 3), which come in kits of assorted sizes, are rated for 20–25 lb. in drywall, 155–435 lb. in concrete; Duo Power plastic anchors (4) elbow open and are rated for 45 lb.
 |
 |
 |
 |
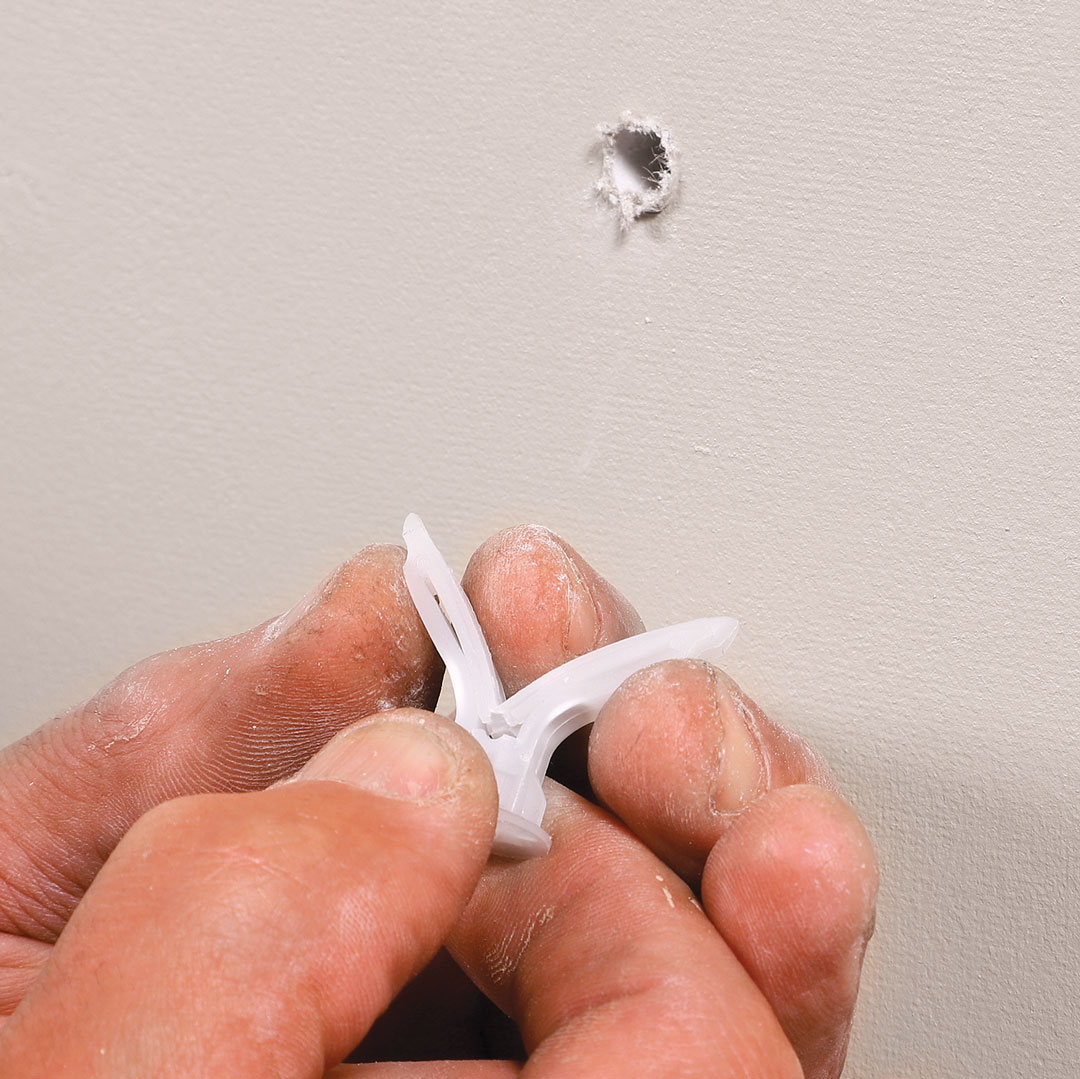
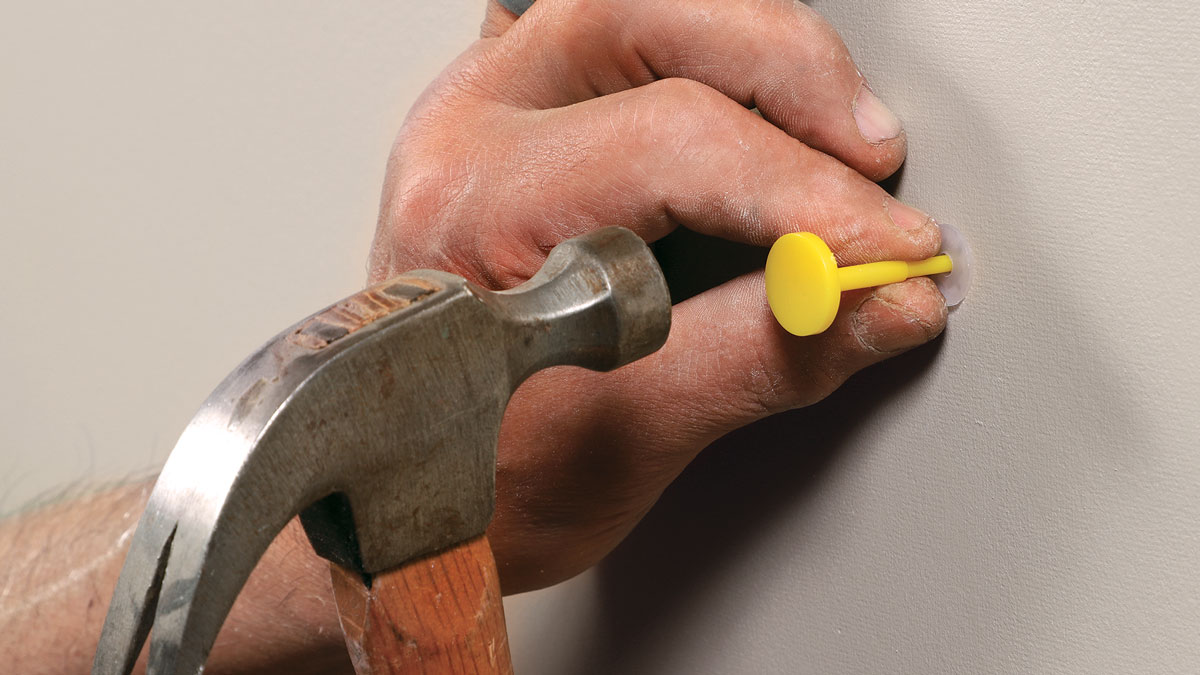
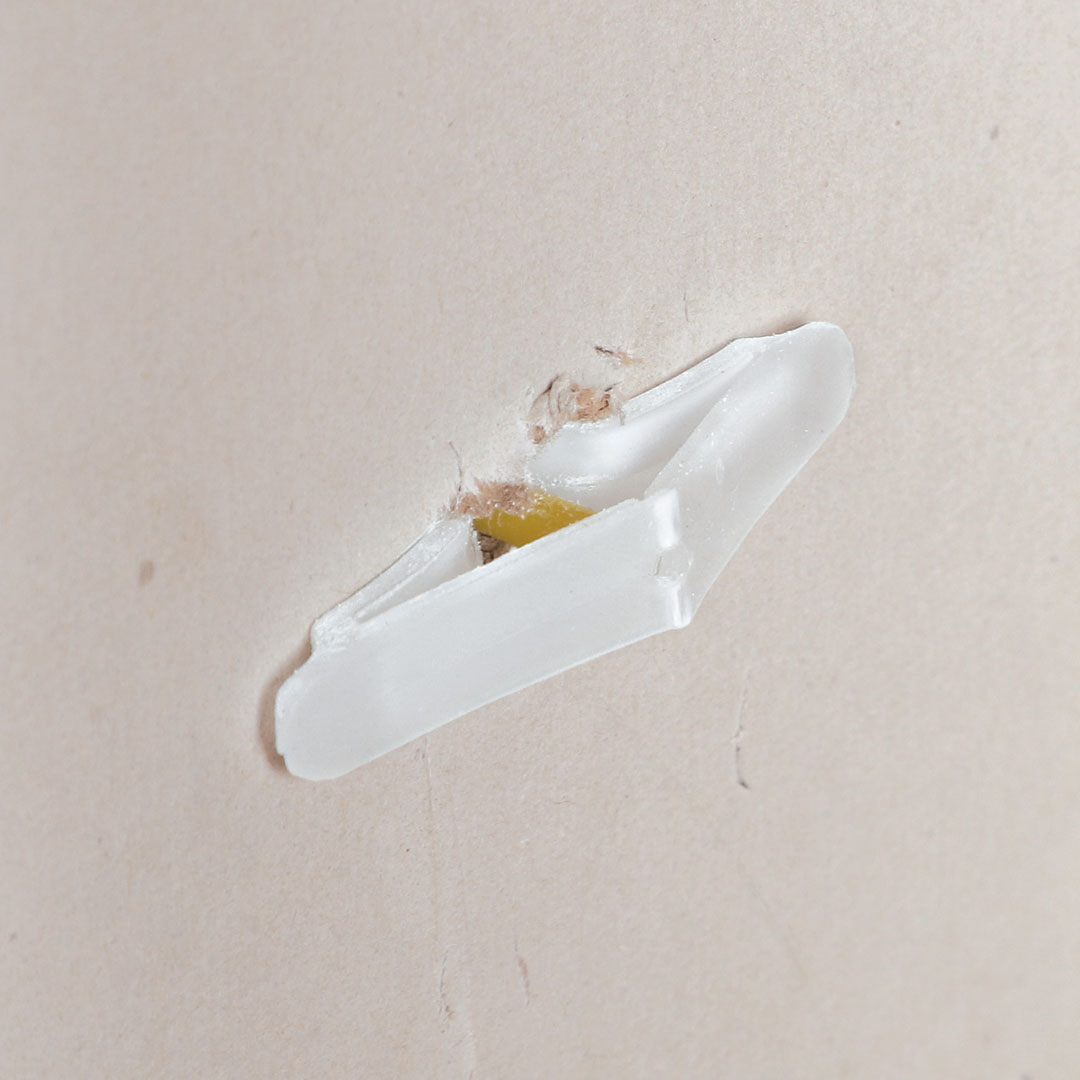
Butterfly anchors

Butterfly anchors have wings that spread open behind a sheetrock wall. They come in different sizes to suit drywall of various thicknesses. The standard type, like the Hillman Pop Toggle (1), rated for 80 lb., is only suitable with drywall. It requires a large predrilled hole and won’t hold well if the wings don’t deploy behind the wall. But the Toggler Alligator Concrete and Drywall Anchor (2), while it has wings that will open behind drywall, has a slimmer shank that will expand or scissor open in a predrilled hole, making it suitable for use in masonry walls as well. They are rated for 70 lb. in drywall and 675 lb. in concrete.
 |
 |
 |
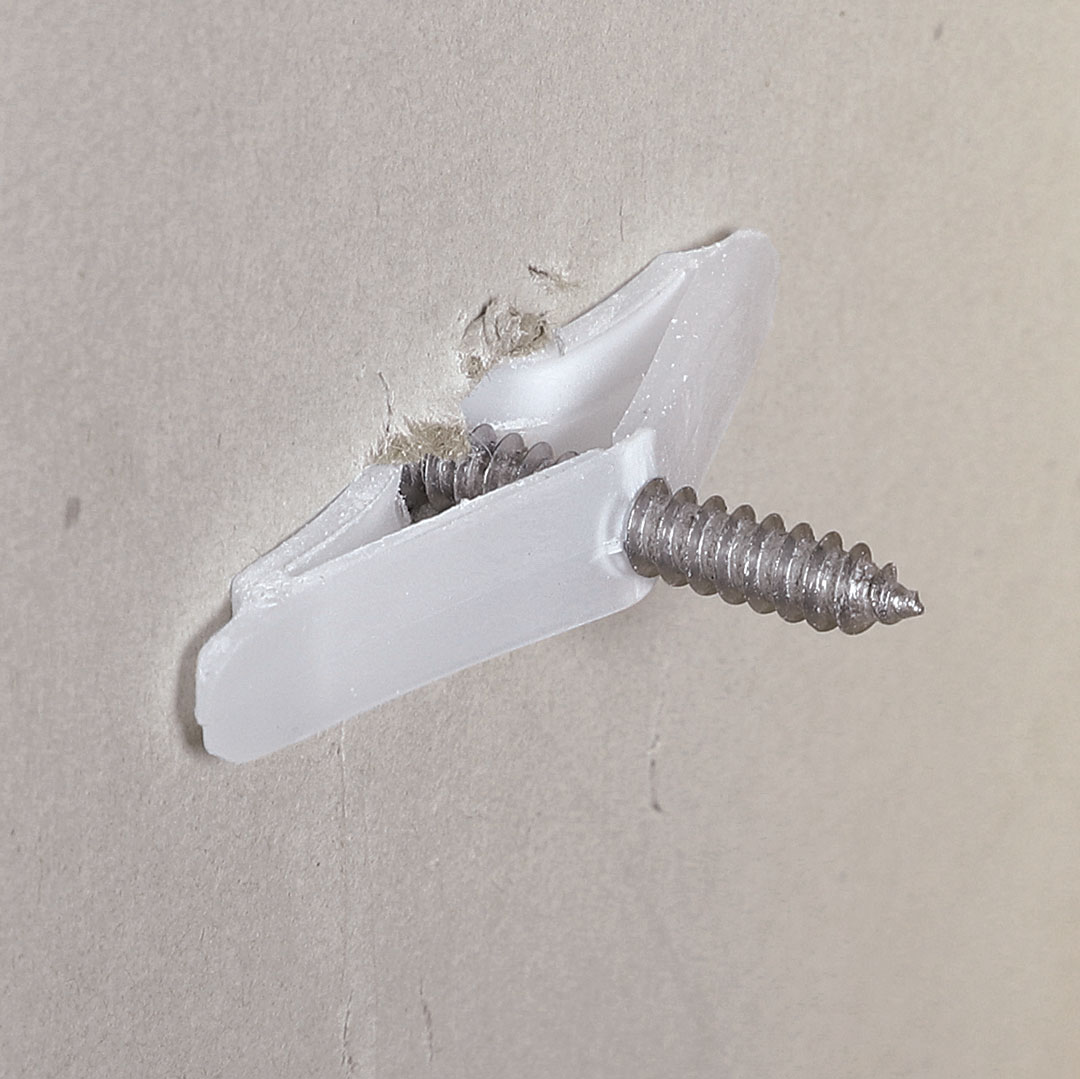 |
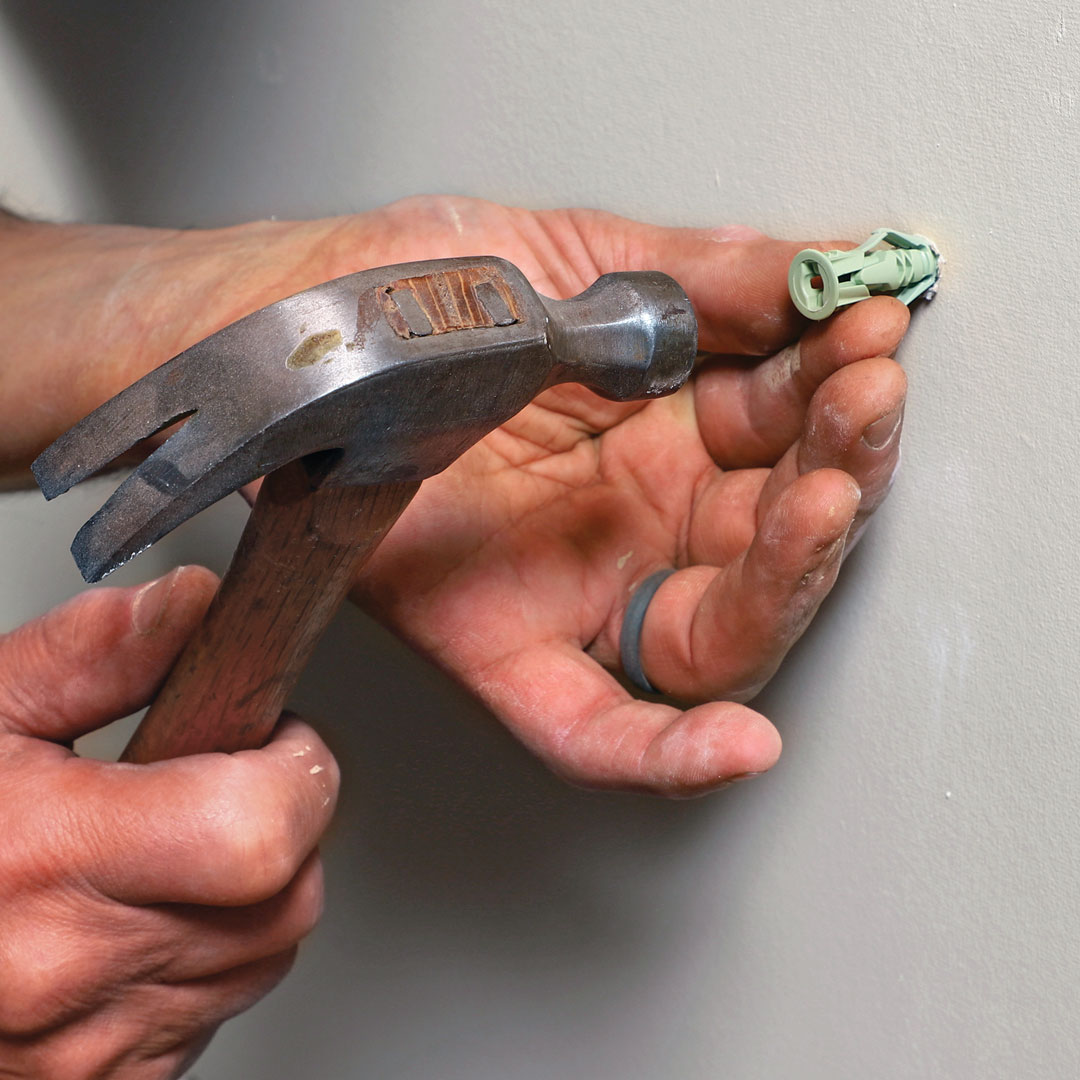
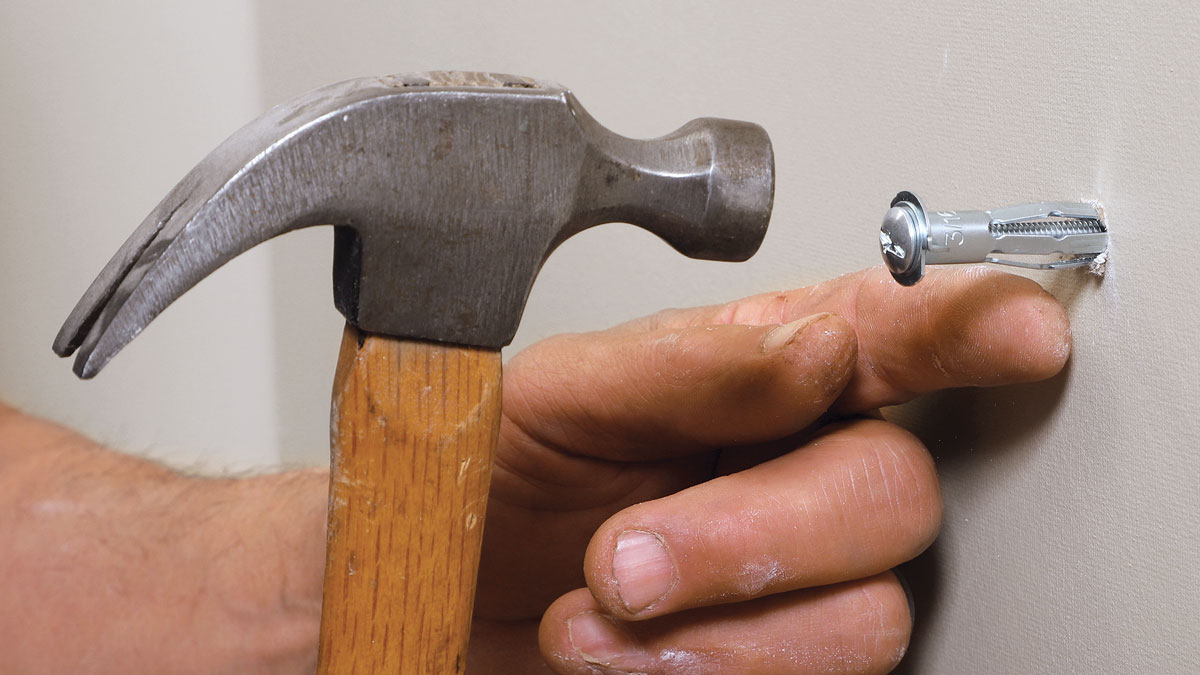
Squeeze the wings and hammer the anchor home. After predrilling, fold the anchor’s wings together and push it into the hole, then tap it home with a hammer until the flange is flush with the wall surface. With the anchor in place, use the supplied plastic pusher to pop open the wings. Then drive the screw.
Molly bolts
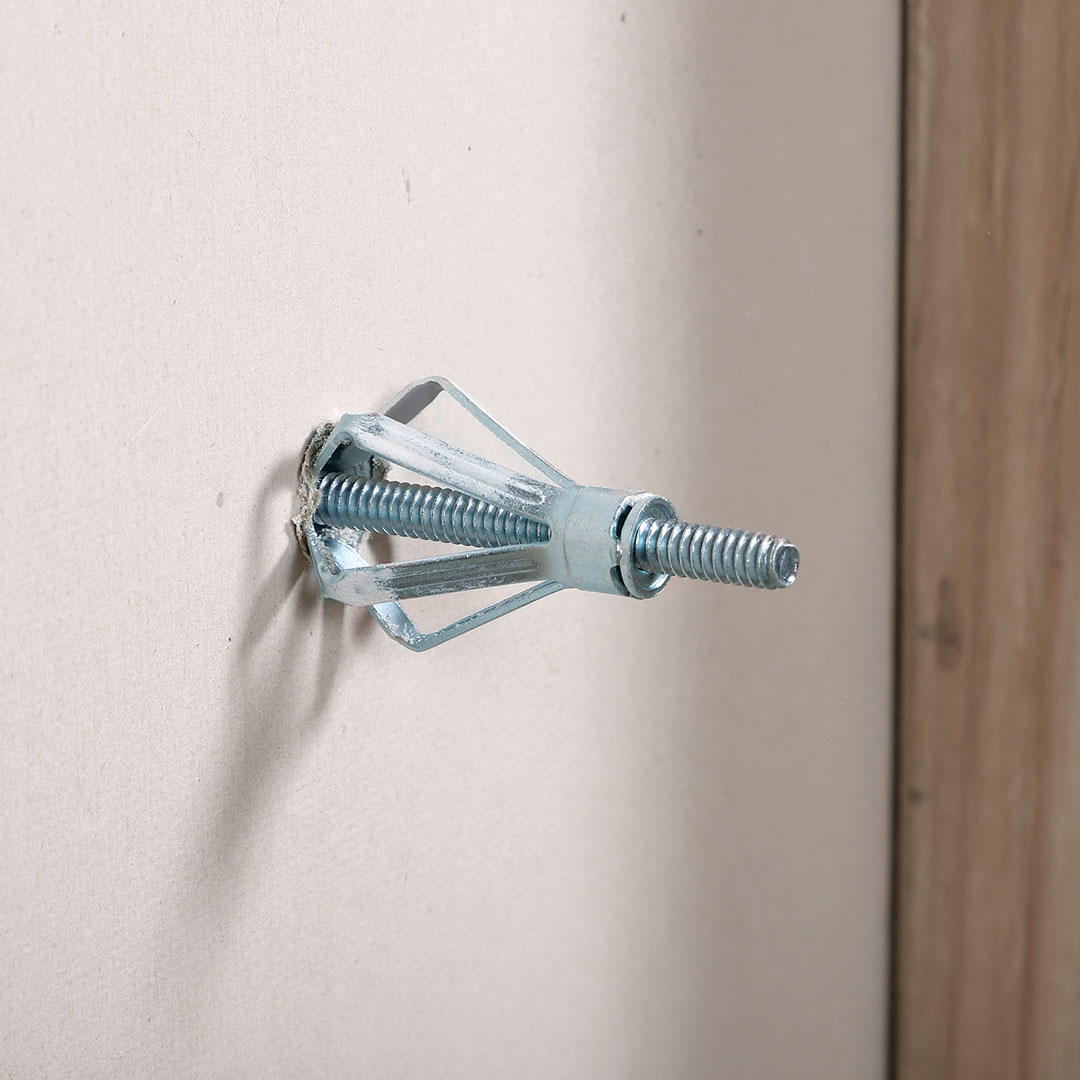
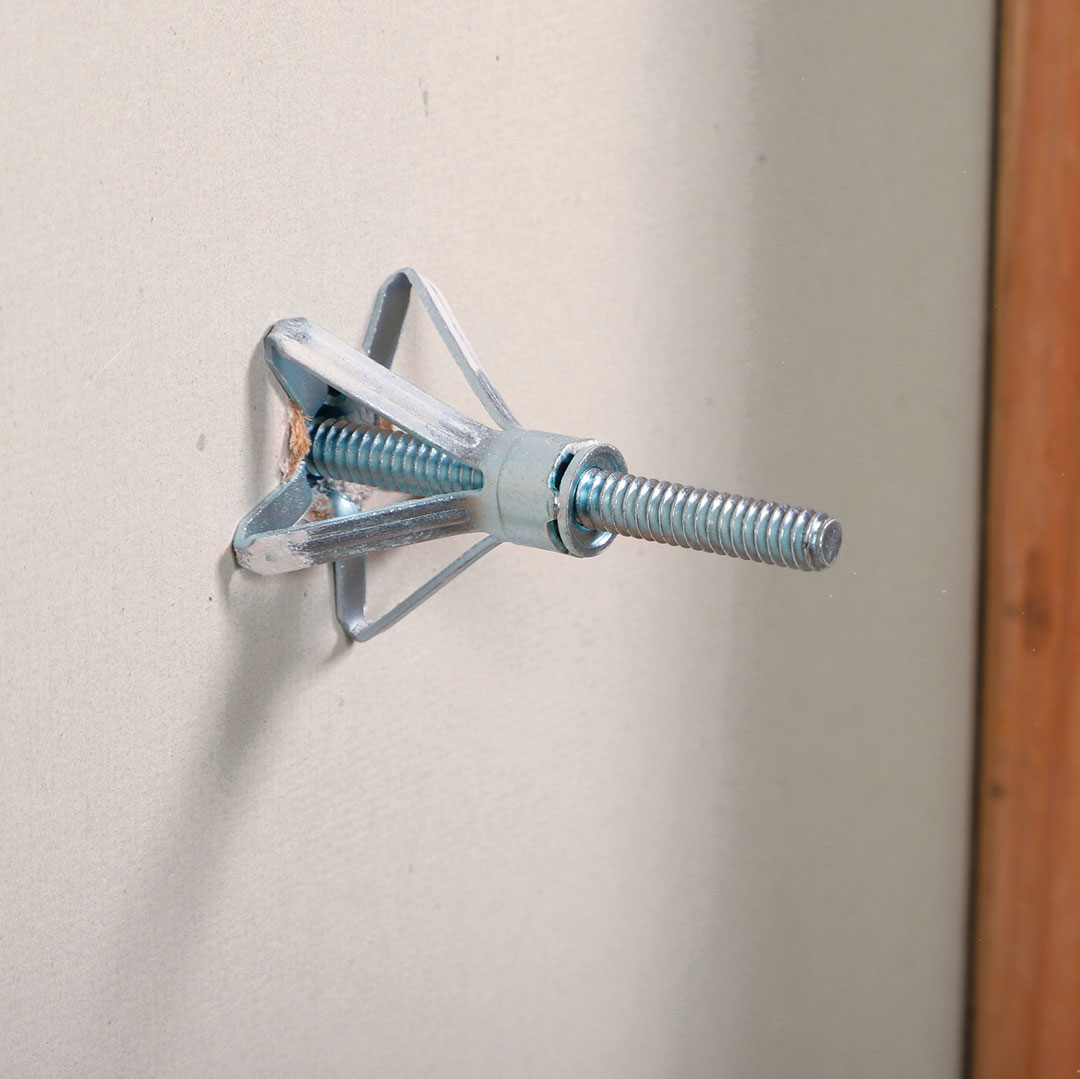
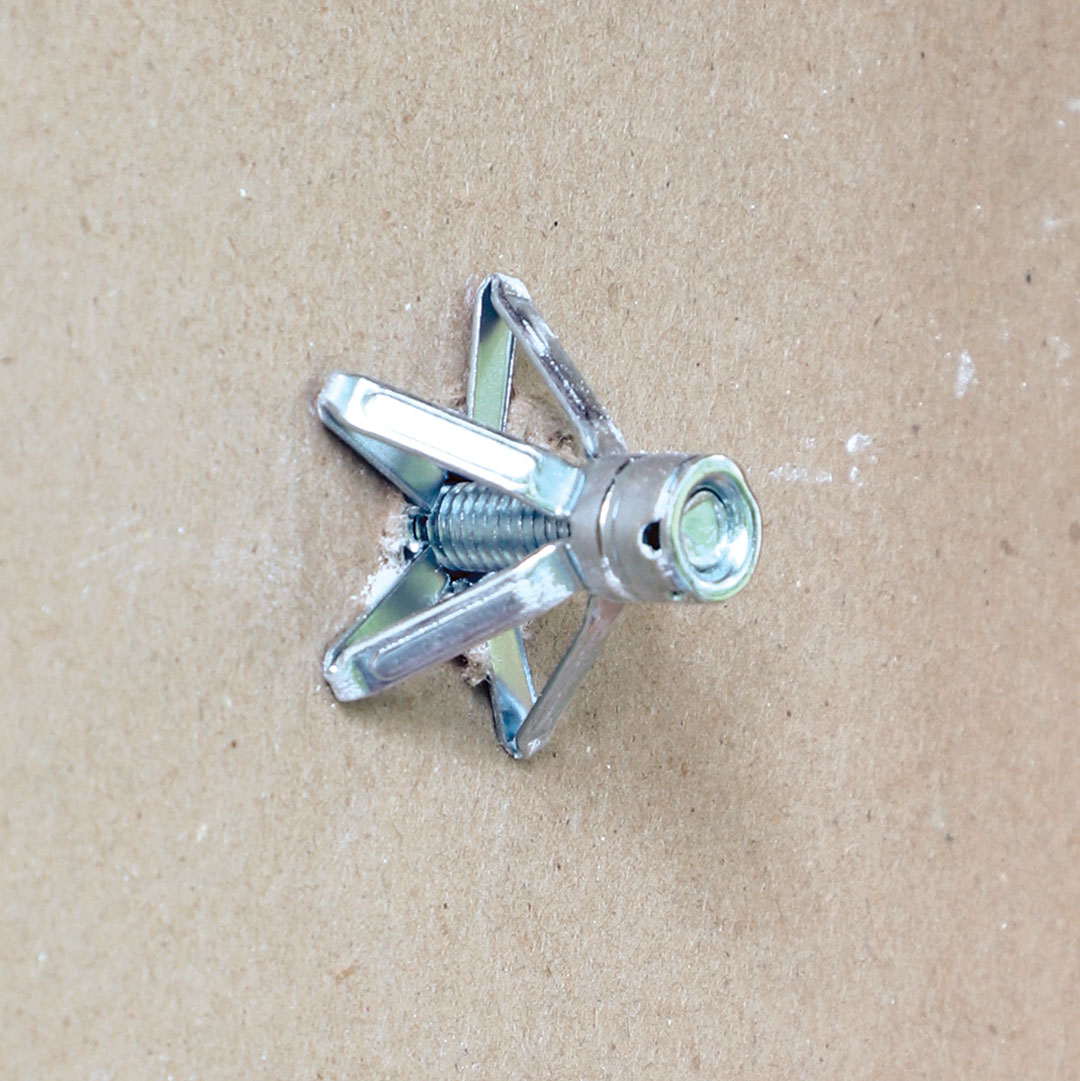
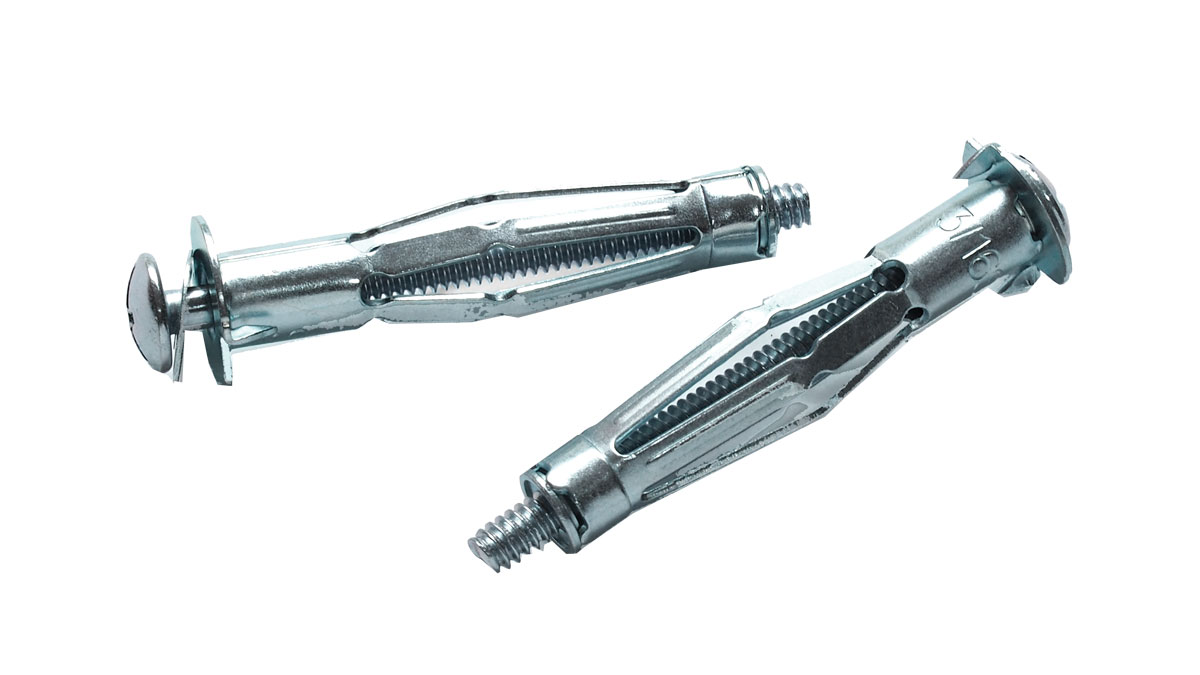 Molly bolts have a slotted sleeve that will spread open behind a hollow wall when you tighten the machine-threaded screw, creating powerful purchase. They work best with drywall but can also be used in a plaster-and-lath wall. After you predrill and insert the anchor, tapping the sleeve’s flange tight to the wall, you begin driving the screw. Small spurs beneath the flange prevent the anchor from spinning in the hole before the sleeve expands. These Midwest Hollow Wall Anchors are rated for 100 lb.
 |
 |
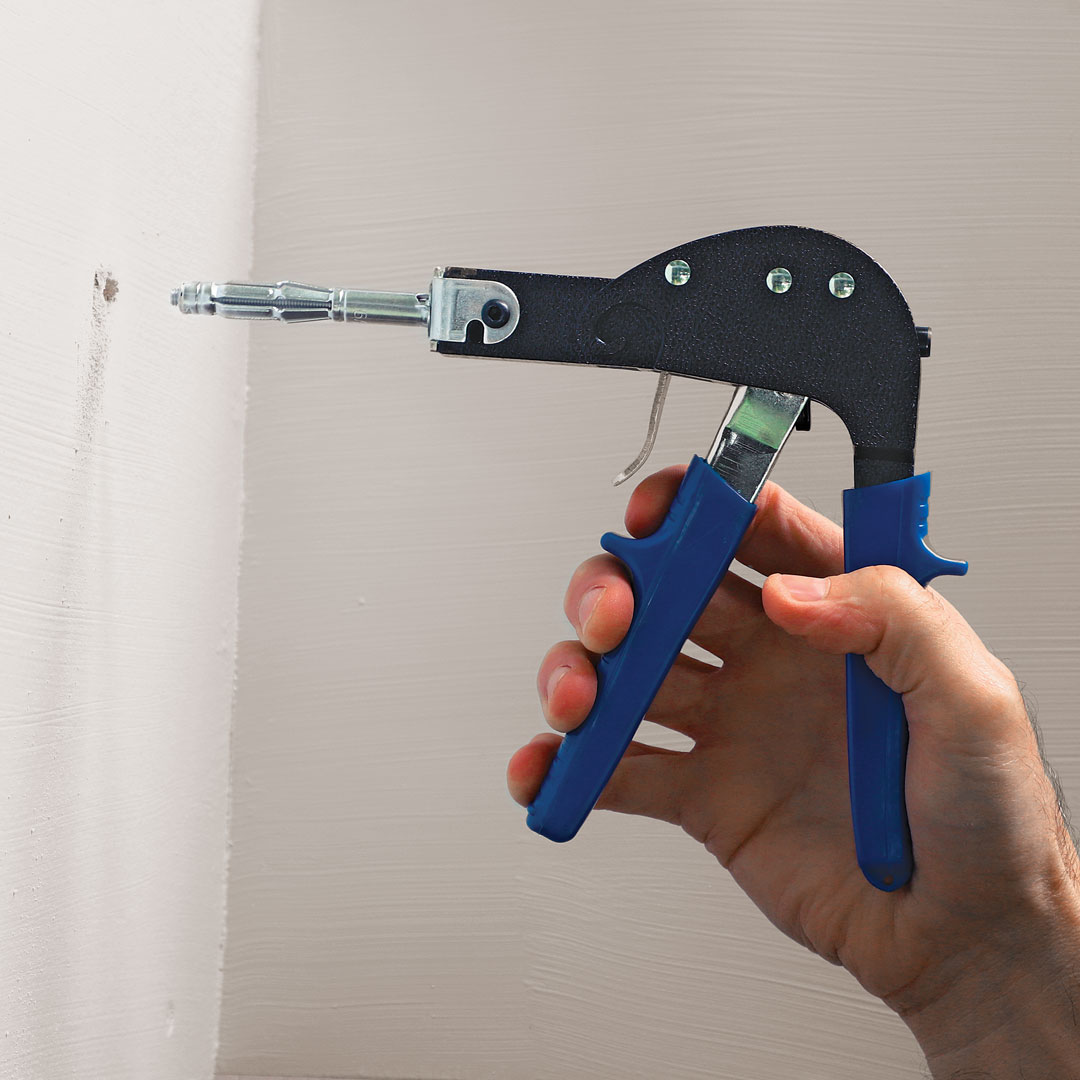
Setting tool for molly bolts. The old-style molly has a newfangled partner. Slip the bolt into the gun’s tip and the anchor into the clearance hole. Pull the trigger and the anchor’s legs expand, locking it tight. Very handy for setting a lot of mollys.
 |
 |
Toggle anchors
Toggle bolts
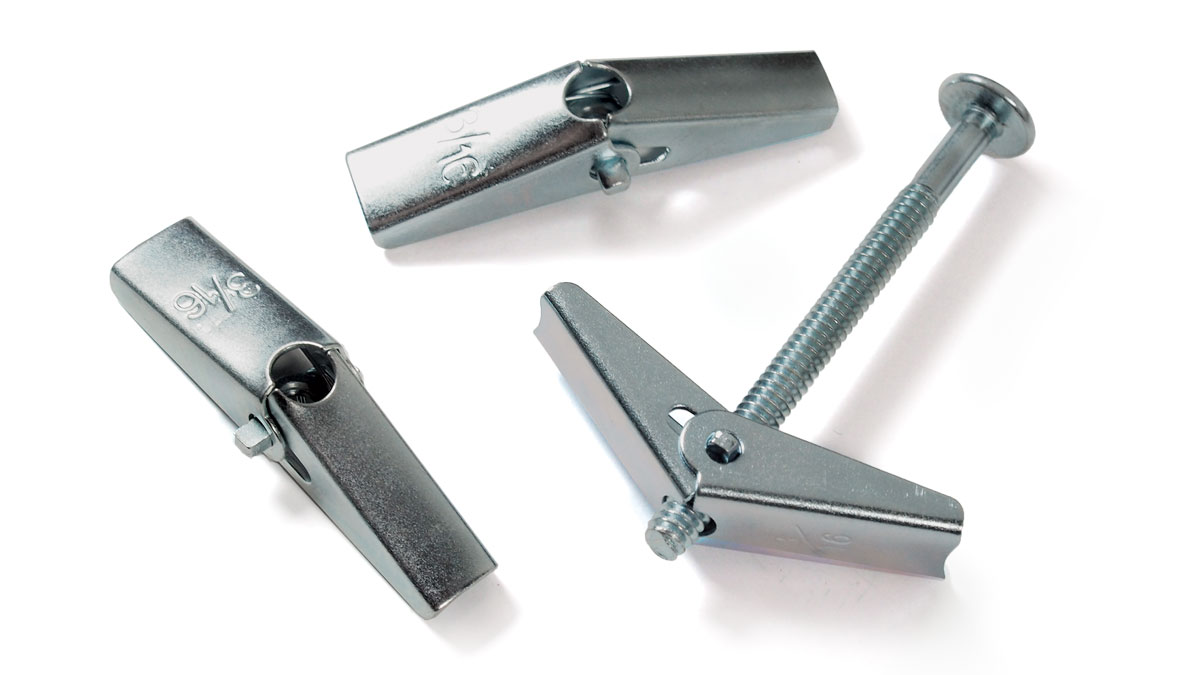
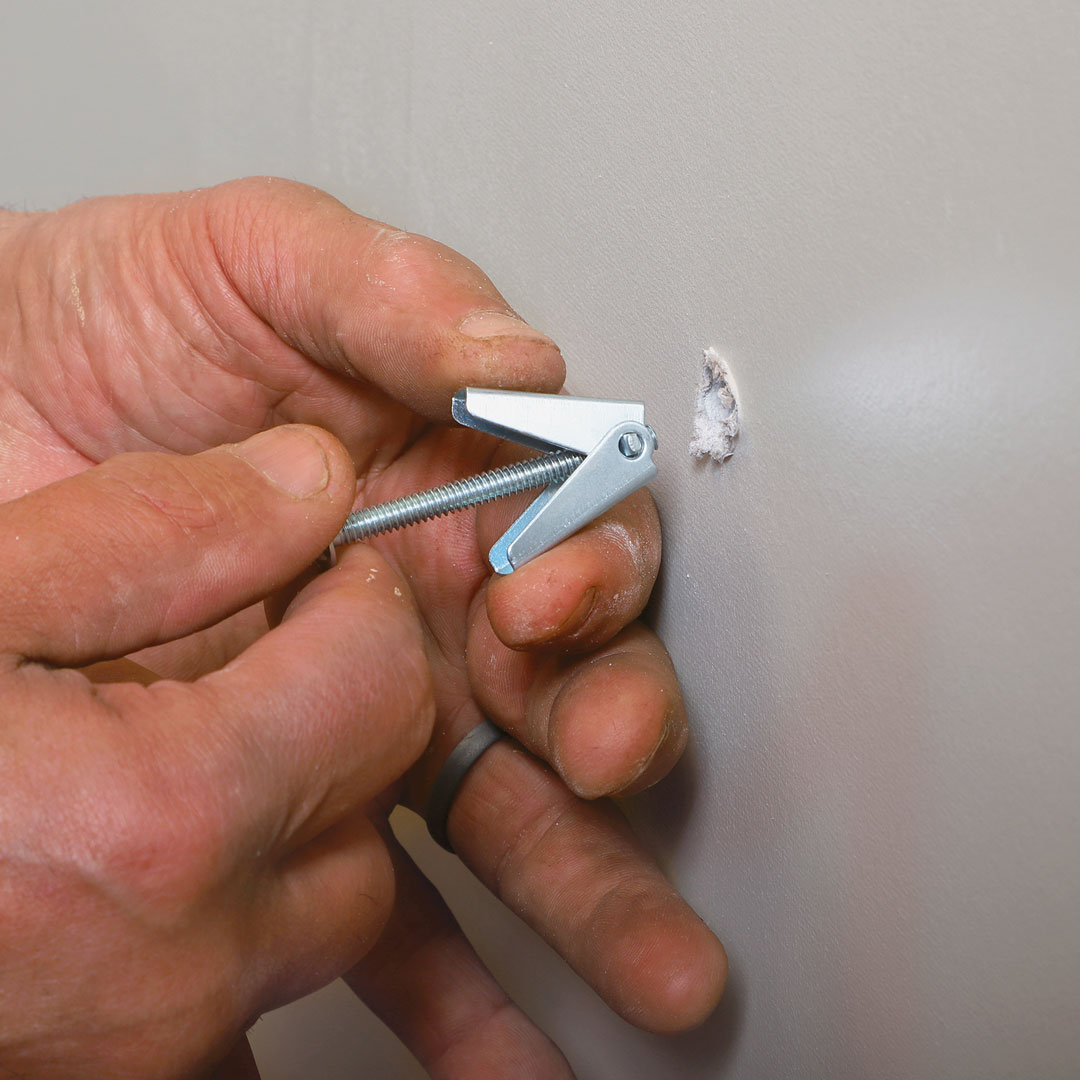
When I need to secure larger cabinets or other wooden pieces to a drywall or plaster wall and there is no stud accessible, toggle bolts are the anchors I most often turn to. Composed of a bolt and a threaded, spring-loaded toggle, they’re simple and dependable. They need a hollow space behind the wall, so they won’t work in brick, but they do fine with concrete block. Their long screws make them very adjustable, so they’re great for plaster-and-lath walls where wall thickness can be inconsistent and hard to determine, often varying significantly on the same wall.
 |
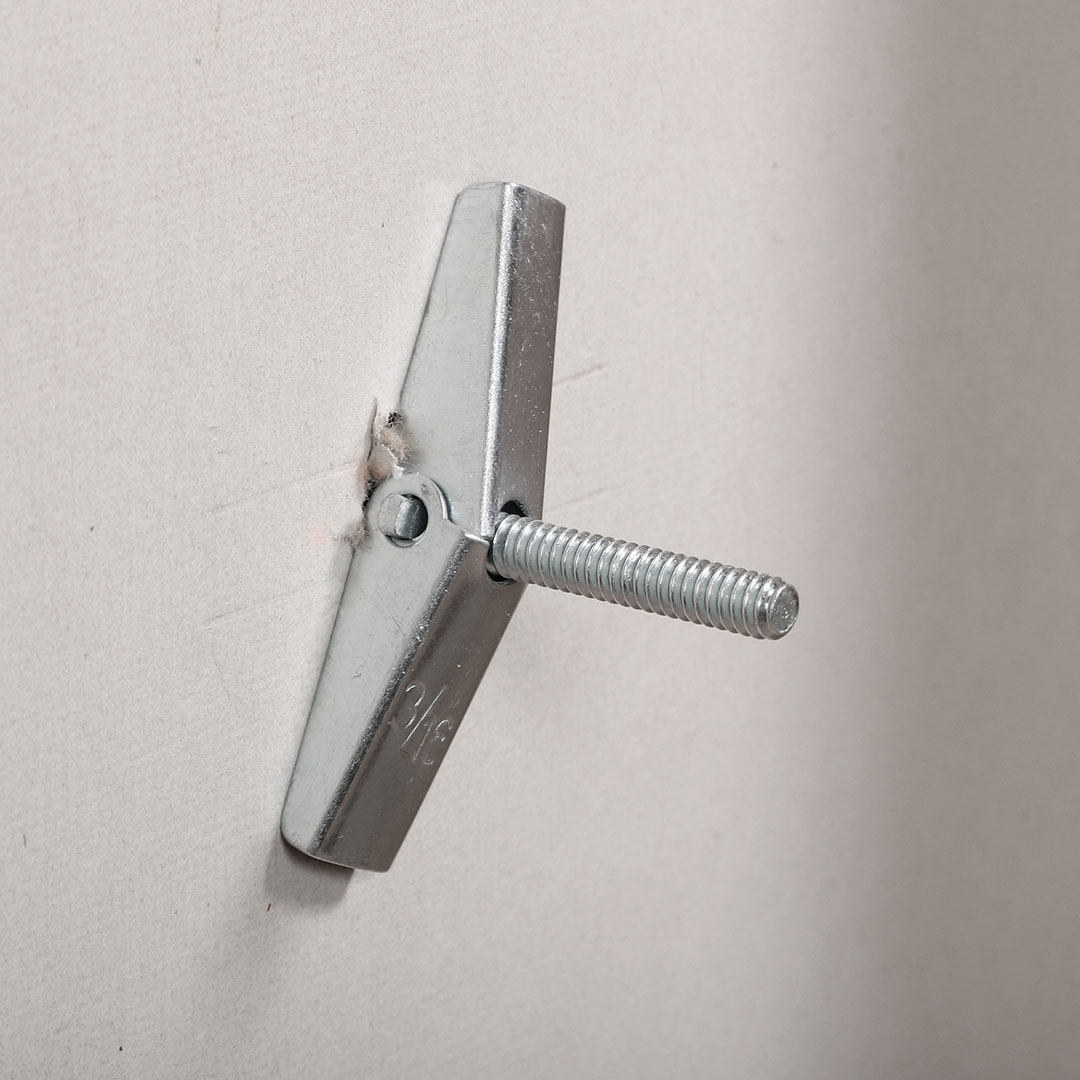 |
After you’ve drilled through the wall, the inserted toggle must clear the wall material far enough to spring open; they won’t work otherwise, so make sure to use a long enough screw to get the toggle clear of the wall. Properly installed, these anchors have a very positive feel. Once the screws are tightened, there is little doubt that the cabinet they are holding is secure and strong. The Everbilt toggle bolt above is rated for 95 lb. in drywall, 90 lb. in hollow block.
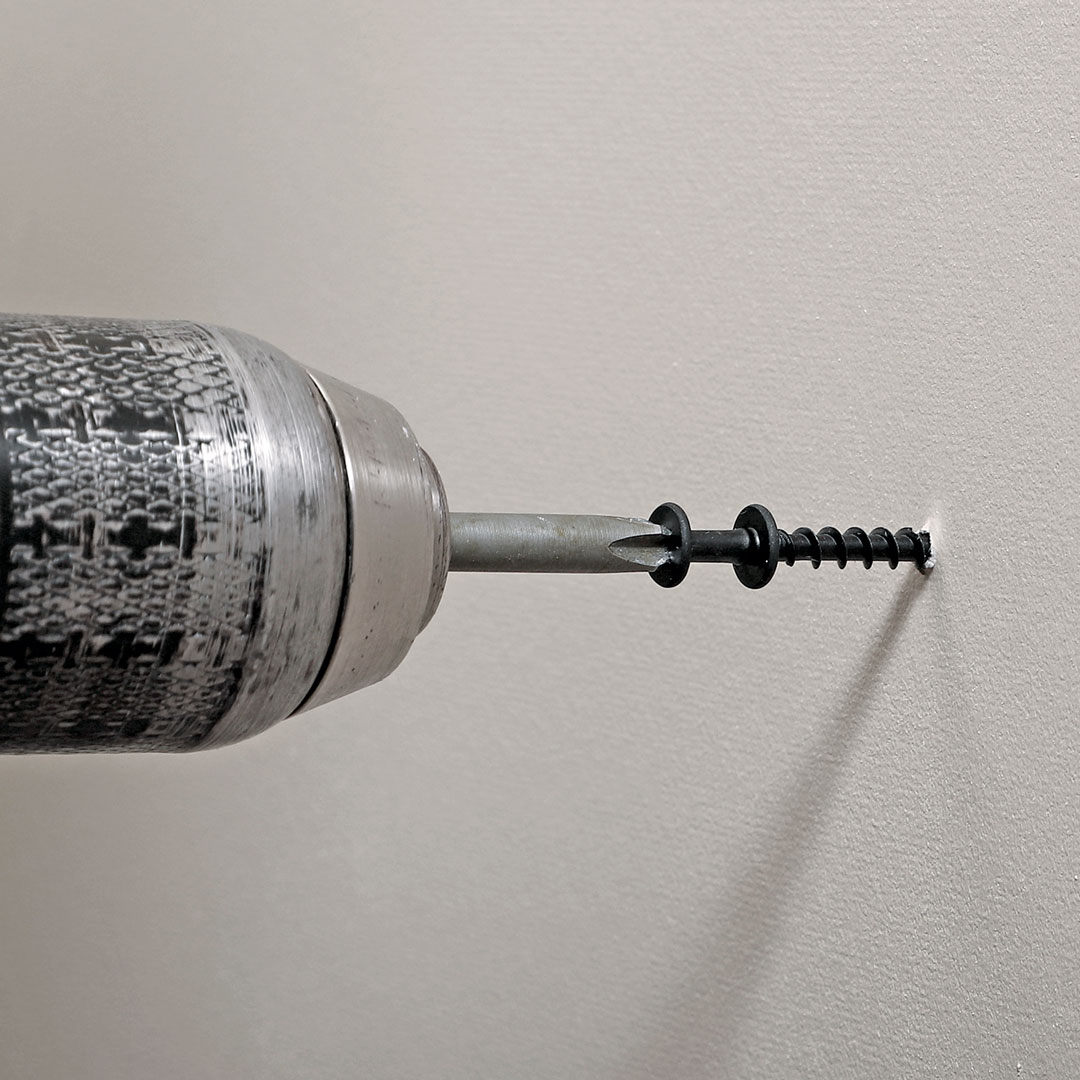
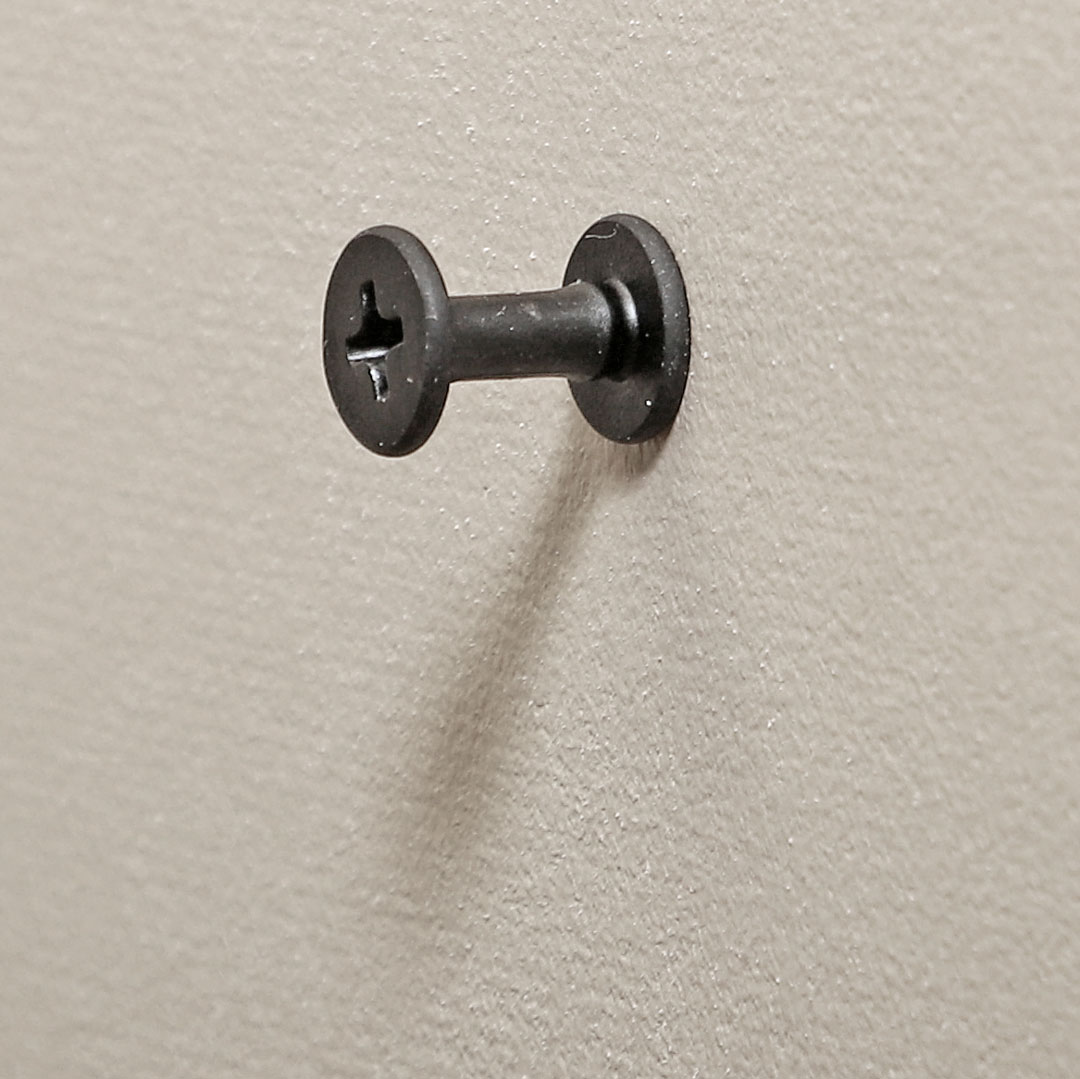
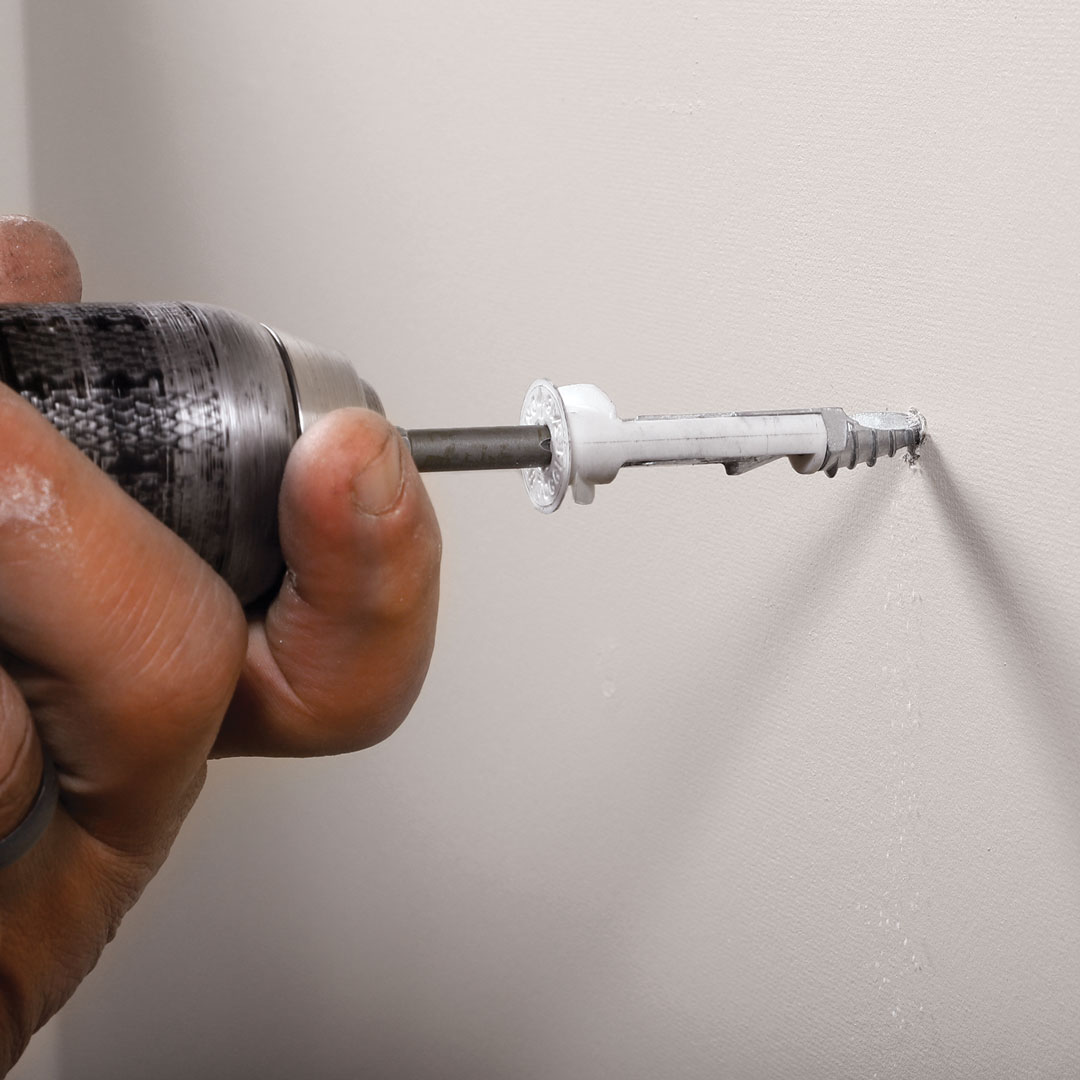
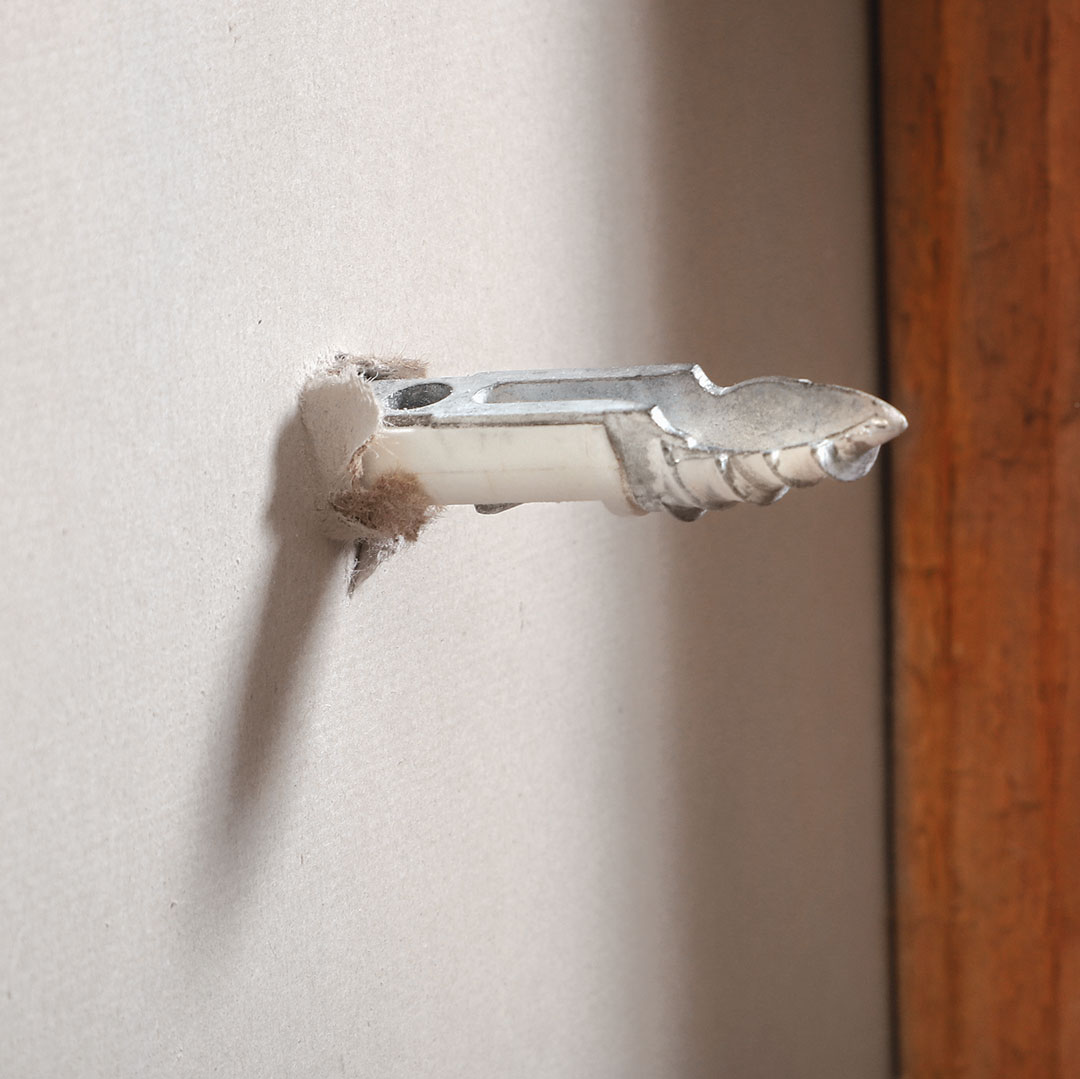
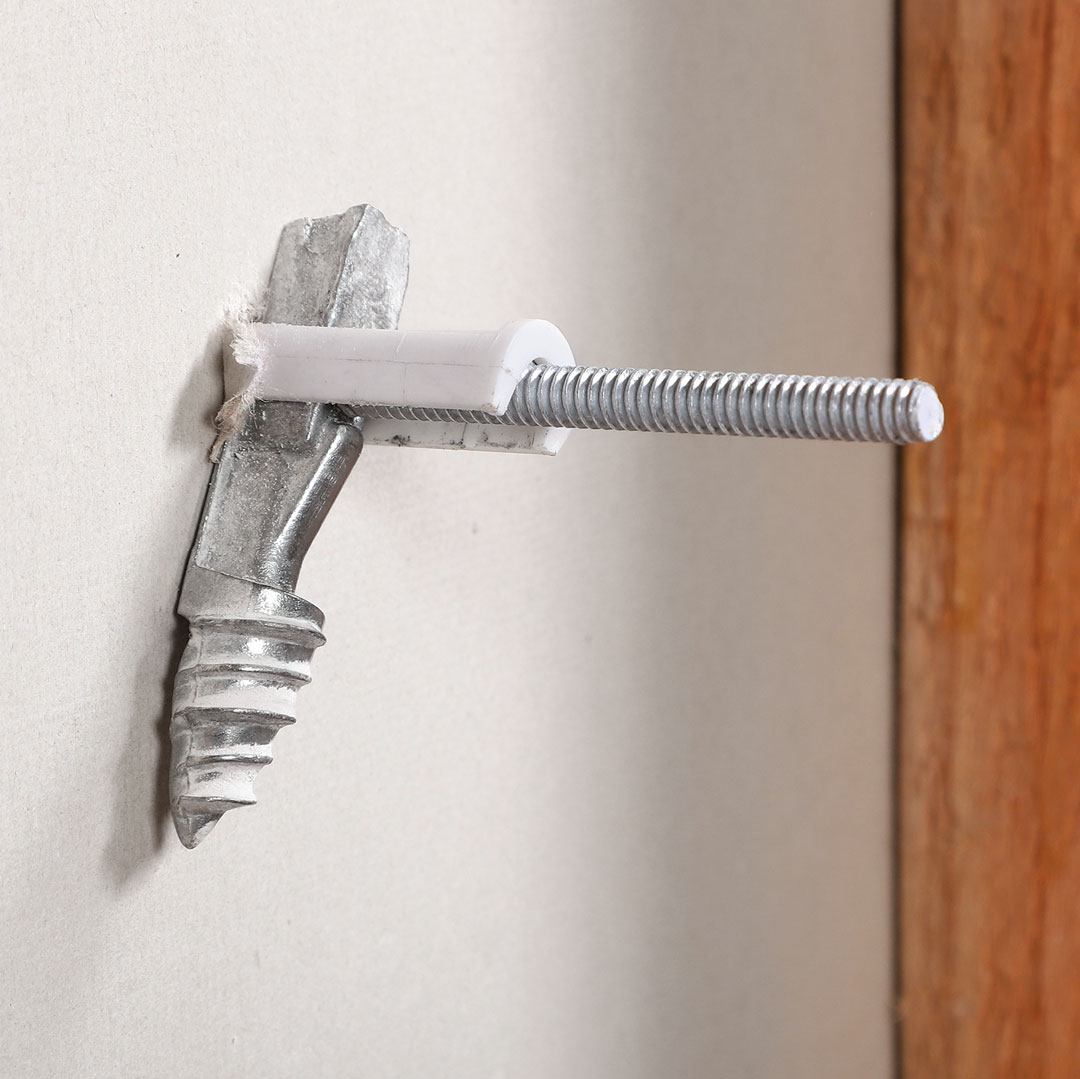
Self-drilling toggle
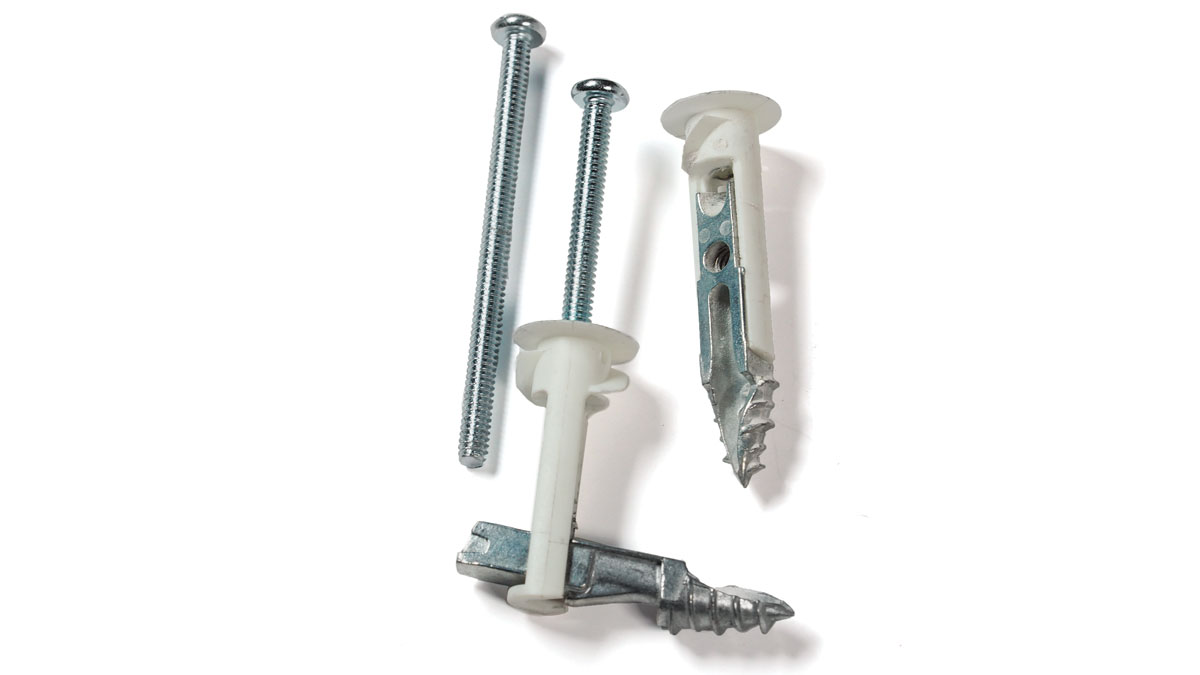
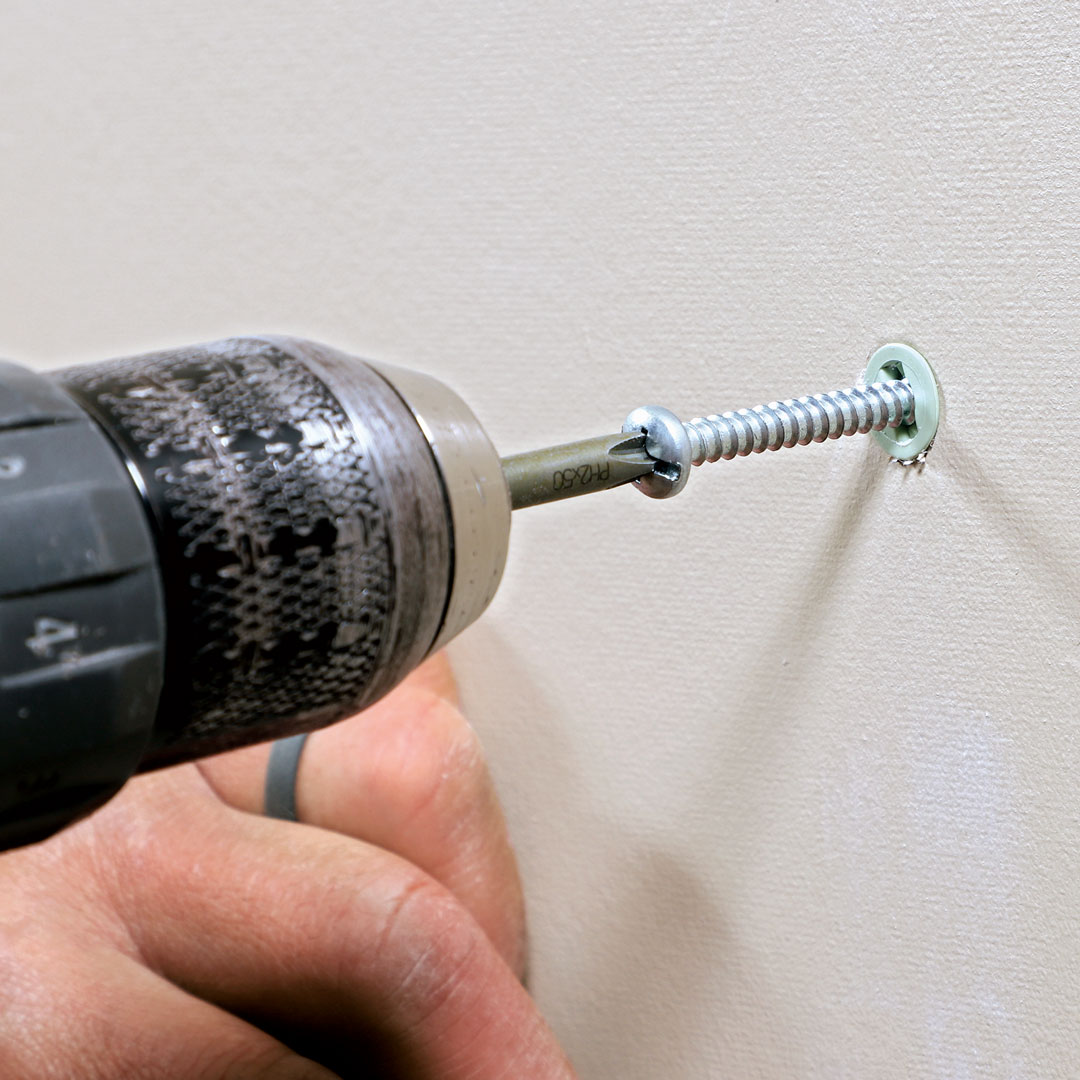
The Cobra Driller Toggle is a very clever hybrid anchor, marrying self-drilling capability with toggle action. The metal toggle, which is hinged to a split plastic shaft, is threaded at the tip. Using a screwdriver, you drive this anchor in without predrilling; when the head nears the wall, two short wings on the plastic shaft pull it flush to the surface. Next you insert the machine screw. As you do, the screw pushes the toggle sideways until the threads on the screw engage the threads on the toggle. Then you tighten the screw until the toggle is firmly drawn to the back of the drywall. This anchor is rated for 100 lb. in drywall.
 |
 |
 |
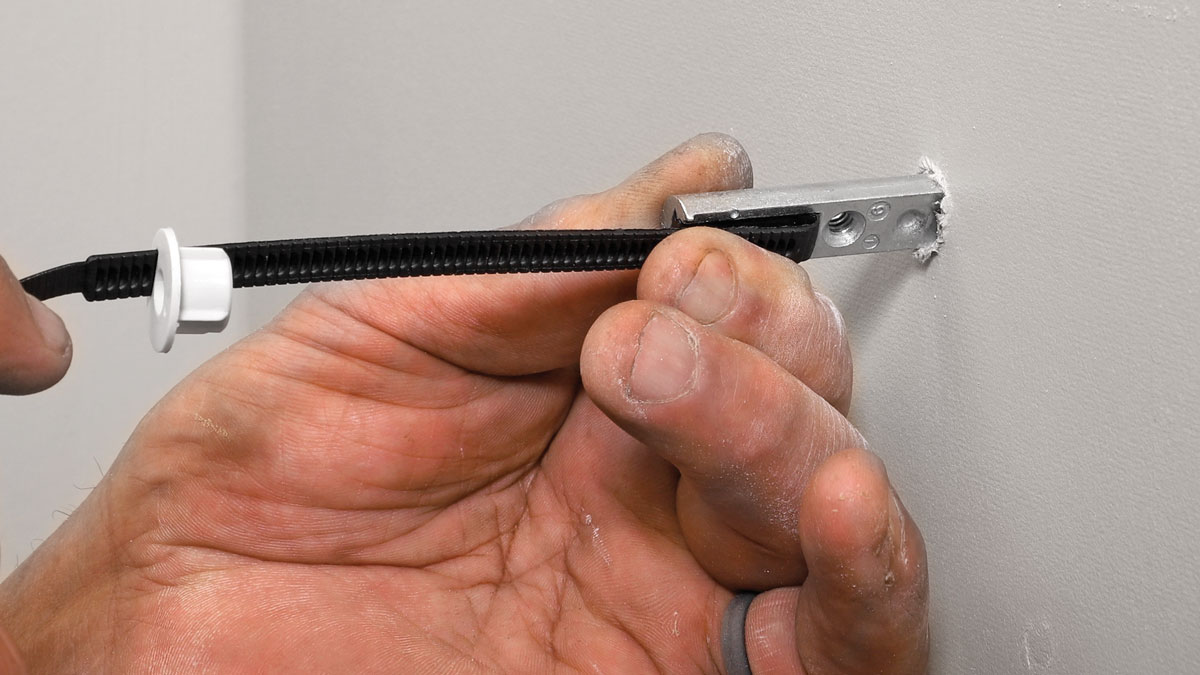
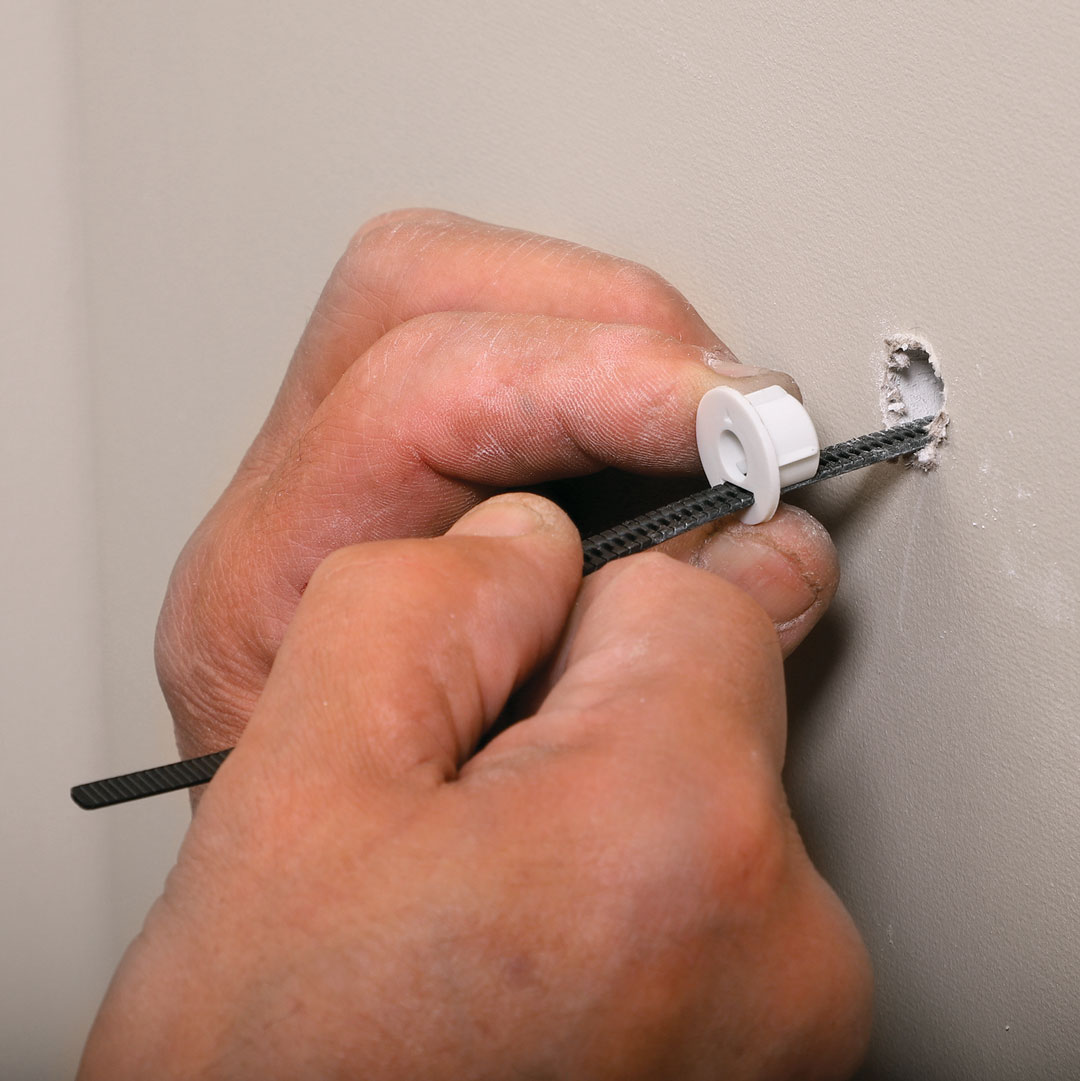
Pull toggles
These are a new breed of toggle anchors that link a metal toggle with one or two ribbed plastic pull strips. After drilling a hole in a hollow wall, you insert the toggle and push it all the way through until it clears the hole. Next you pull on the strips until the toggle is crosswise and tight to the inside of the wall. Then, to keep the toggle in place, you slide a threaded plastic nut along the pull strip until it plugs into the hole you drilled. With the strips pulled tight, you bend them back and forth until they snap off flush with the nut. Now you can insert the machine screw; as the screw is tightened the toggle is pulled ever more firmly to the inside of the wall. These toggles will work with any hollow wall, from drywall and plaster to cinderblock.
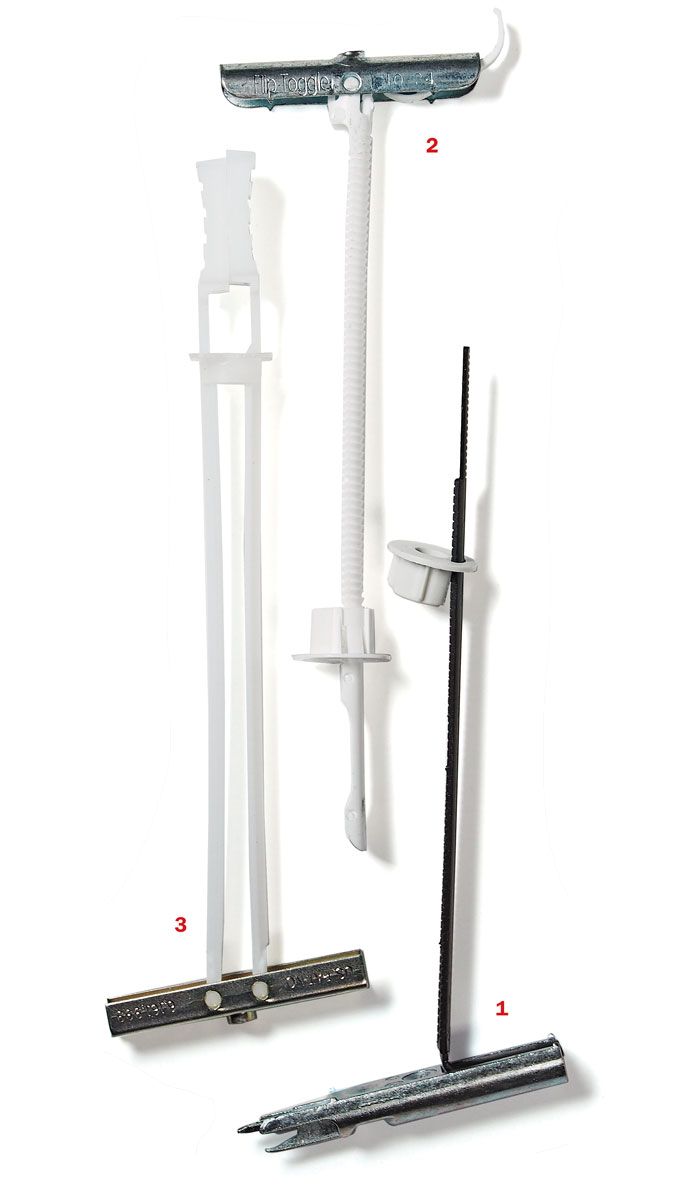
The Hillman Pull Toggle (1), with a spiked, solid metal toggle and a single pull strip, is rated for 120 lb. in drywall and 620 lb. in concrete block; the Cobra Flip Toggle (2), with a formed sheet metal toggle, is rated for 105 lb. in drywall and 435 lb. in block; the Toggler Snaptoggle (3) has two pull strips, both hinged to the toggle, and once you have inserted it you can use the strips to swivel the toggle so it is parallel to the back of the wall; it is rated 240 lb. in drywall and 800 lb. in concrete block.
 |
 |
 |
Beyond drywall
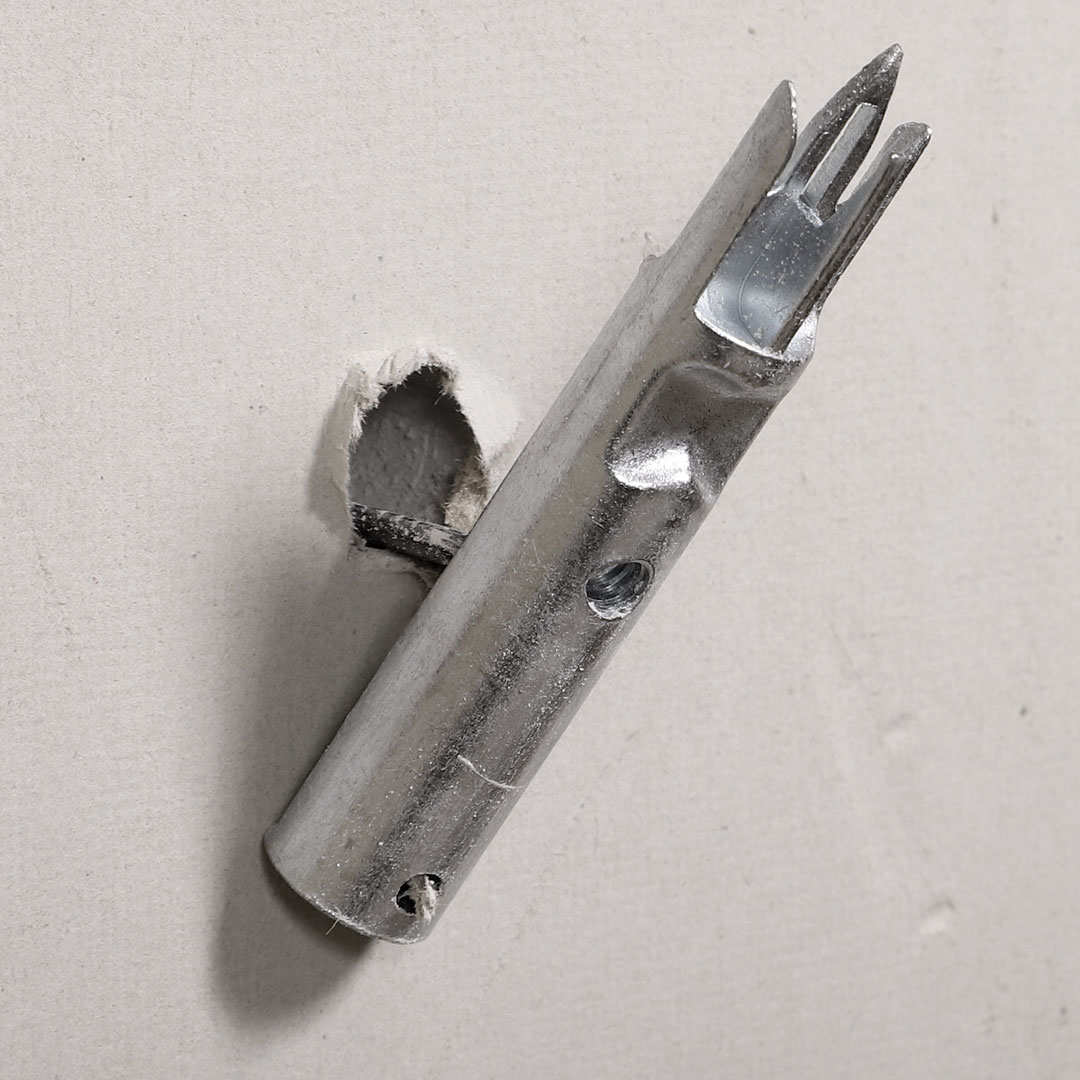
Screws for Metal Studs
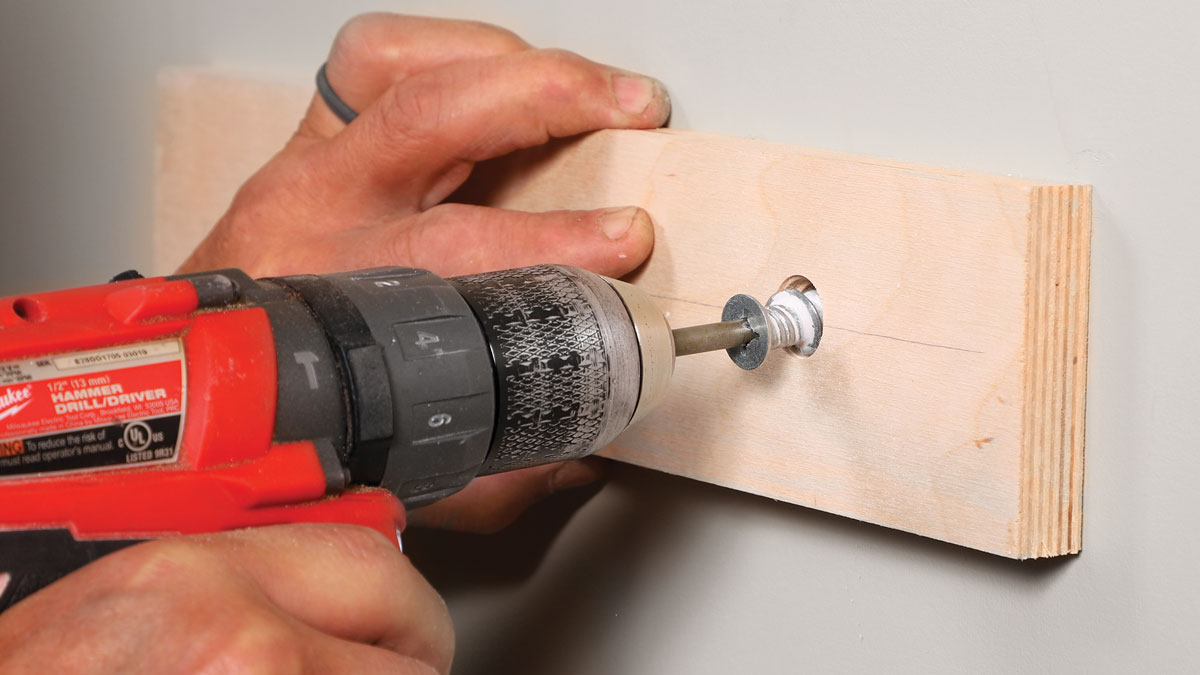
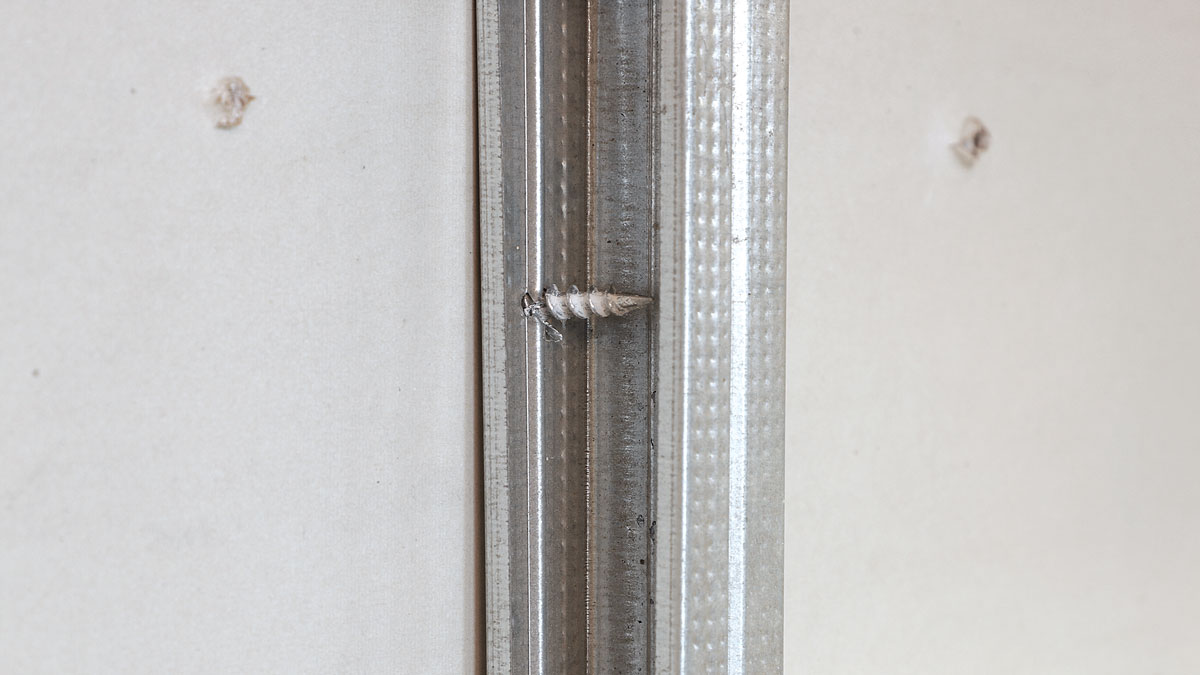
Attaching woodwork to a sheetrock wall that has metal studs is not much different than doing so on a wall with wood studs. Any of the drywall anchors mentioned here will work between the studs. And if the stud is in the right place, you can drive a long, heavy screw directly into it. But if you want to create a particularly strong anchor point right on the steel studs themselves, you could try 1Shot steel stud anchors, which are rated for 300 lb. when driven into a steel stud. You can use them like a giant screw to attach a workpiece to the wall, or you can use them like an anchor, driving them flush to the drywall and hanging the workpiece using a #8 screw driven into the hollow shank of the 1Shot.
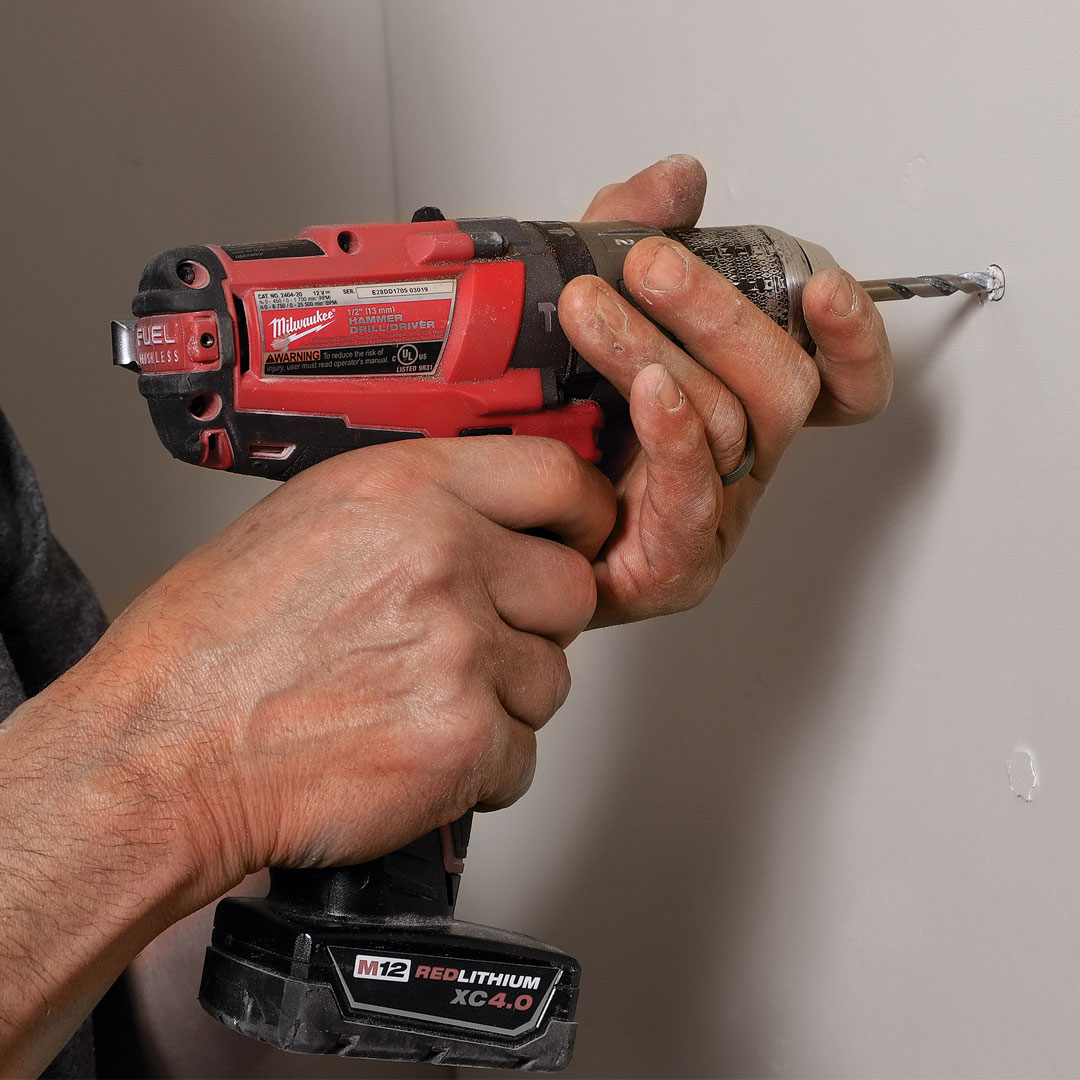
Screws for Masonry
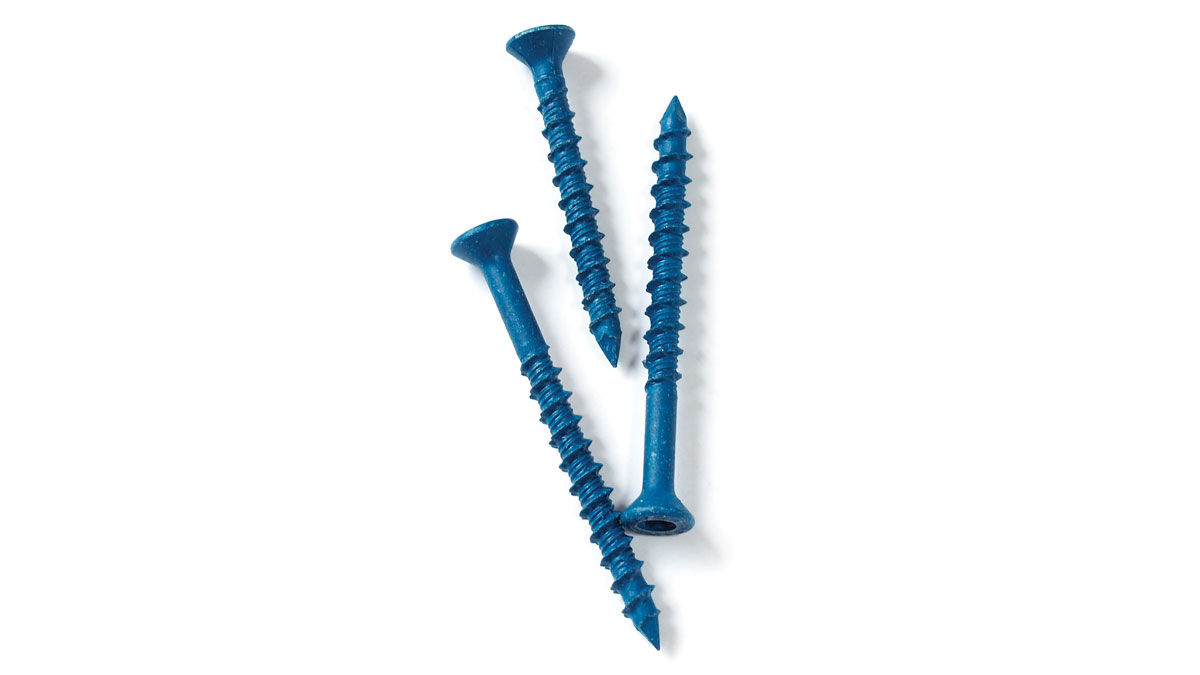
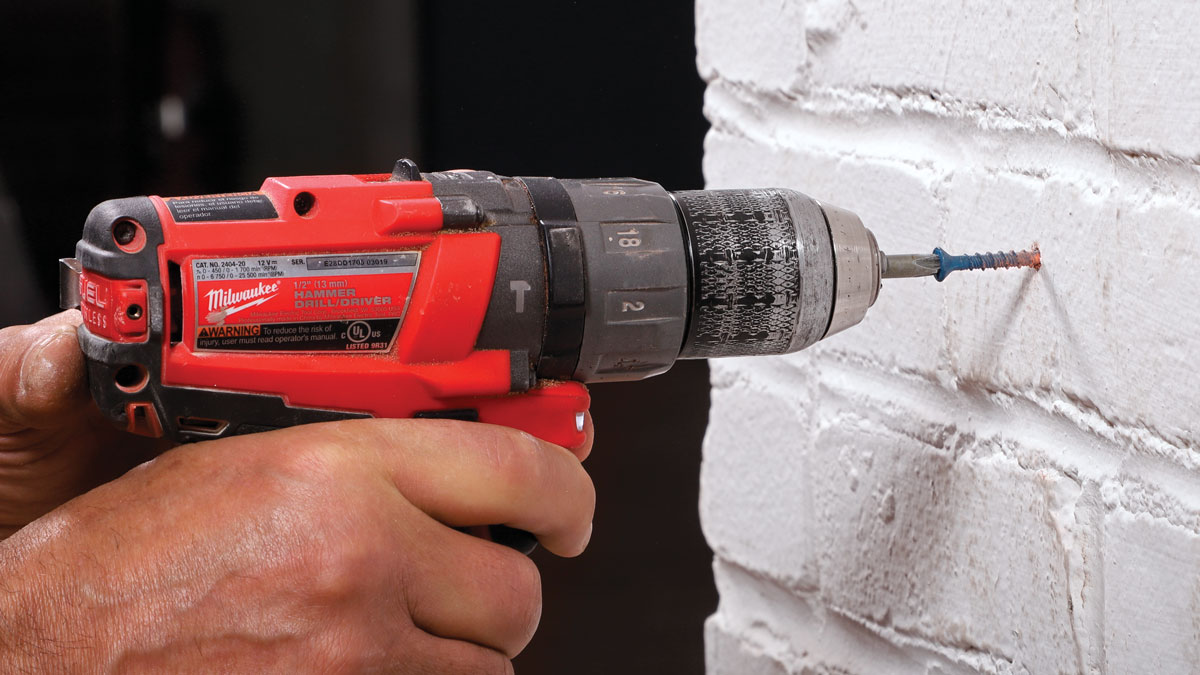
Tapcon screws, or blue screws, have become a dependable favorite of mine for installing woodwork on a concrete or masonry wall. They let you skip masonry anchors and the big holes they require. These screws need only a small pilot hole (made with a masonry bit and a hammer drill) before being driven into place. With their unique double-threading, they possess the ability to tap their own threads in concrete or brick, so they hold fast. I live in an old house that still has brick behind plaster-on-lath party walls. In the correct length, Tapcon screws allow me to go right past the plaster and lath and into solid brick. I’ve never had a blue screw strip or had its head snap off.
You can buy Buildex Tapcon Concrete Anchors in star drive or Phillips-head versions and they’re available as a kit that comes with the correctly sized masonry bit.
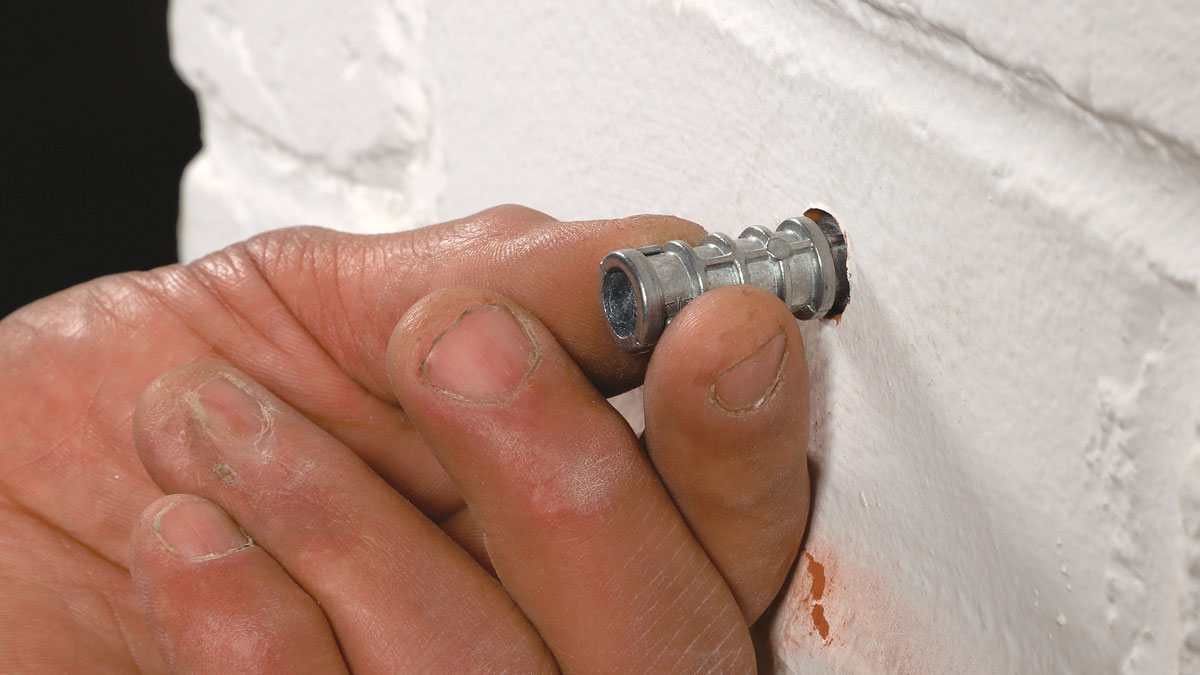
Expanding Masonry Anchors
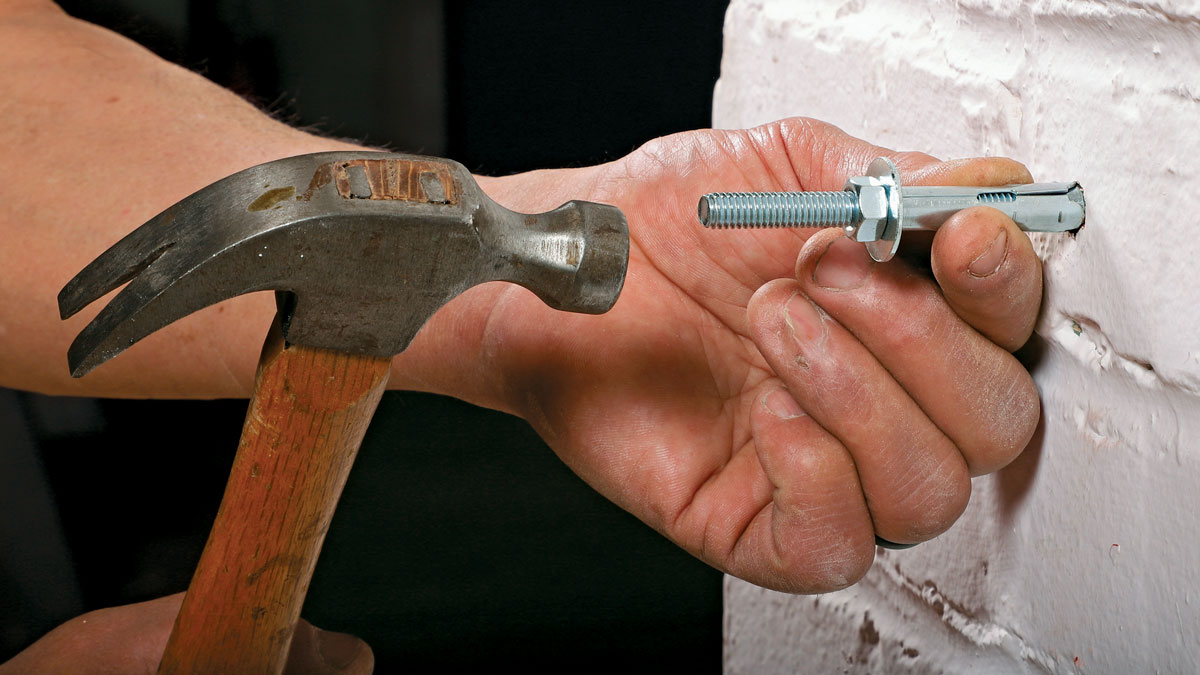
Red Head Sleeve Anchors (1) have a threaded bolt in a metal sleeve. One end of the bolt is flared, so that when a nut is tightened on the other end the wedge expands the sleeve, locking it in the hole. Wedge anchors require a hole drilled slightly deeper than the length of the anchor. After you drill the hole with a masonry bit and hammer drill, be sure to vacuum out the brick or cinder dust. Then slide the anchor into the hole. Once it’s seated, the threaded portion of the anchor, extending from the wall, receives a washer and nut to secure the woodwork to the wall. They’re a little unsightly, but very strong. Once the anchor is fixed into the masonry, the woodwork can be easily attached, adjusted, or removed without compromising the seated anchor.
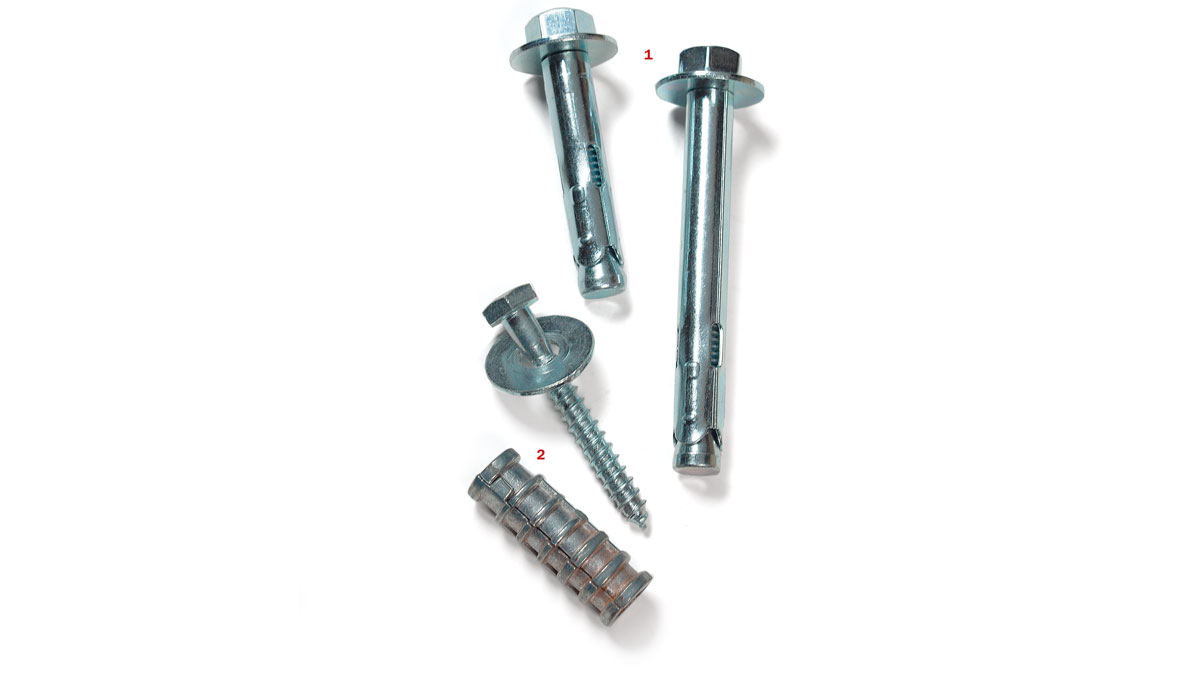
When you want to attach with screws or lag screws, use lead sleeve anchors. These old-style Everbilt soft lead lag sleeves (2) are studded with projections and built in two loosely connected halves, allowing them to expand and shift in shape to conform to a predrilled hole when the screw is driven home.

Mario Rodriguez makes furniture and teaches woodworking in Philadelphia.
 From Fine Woodworking #291
To read the entire article, please click the View PDF button below.


Log in or create an account to post a comment.
Sign up Log in