
The Language of Finishing: Part 1
From aniline to witness line, grasp the lingo and you'll soon be a fluent finisher.


Synopsis: Do you know the difference between chatoyance and figure? Between sanding swirls and pigtails? Read this first installment of a two-part guide to the language of finishing, and learn to talk about finishing like a master. This part covers surface preparation and the range of finishes available.
One reason many woodworkers find finishing difficult may be because the language is so confusing. If your finish is bleeding, does it need time to cure? If it is blushing, should you be distressed (or perhaps you should be fuming)? Do you call the mob if you need a finish rubbed out?
What follows is the first in a two-part guide to the language of finishing. each installment will explain some of the more common but cryptic words and phrases. We’ll start by covering surface preparation and the range of finishes available. In Part 2, we’ll discuss different methods of applying and polishing a finish.
Surface prep: the foundation of finishing
Surface preparation is the process of using handplanes, scrapers, and sandpaper (powered by machine or hand) to remove surface blemishes left by machines. A handplane and card scraper is the fastest method; sandpaper is typically the last step. Almost all sandpaper now uses the European FEPA scale (a metric system for measuring the coarseness of the abrasive granules), denoted by a P before the number. The older CAMI scale is now mostly confined to grits higher than 600 in wet-or-dry paper used for sanding finishes.

Most random-orbit sanding disks (and some rolls of abrasive) come with a hook-and-loop backing (aka velcro) that can be pricey but lets you remove and reuse the disks. Sanding swirls and pigtails are visible scratches caused by pressing down too hard on a random-orbit sander. The sander’s weight alone is enough to let the disk do its job and yet spin randomly, leaving an evenly distributed scratch pattern.
For a penetrating oil finish (see below), you should sand up to P220-grit on most hardwoods, but on cherry or other woods that tend to absorb oil unevenly, I would go to P320- or even P400-grit to burnish the surface. For a thicker film finish, you can stop at P180-grit, but make sure the surface is flat and smooth. check your progress with a spotlight or desk light just above the surface of the wood, shining across it. This is known as a raking light.

Finish sanding using a sanding block. This can be either solid cork, or wood faced with 1 /8-in.-thick cork or rubber sheet (a cork floor tile works well). If you are applying a water-based dye or a waterborne clear finish to the bare wood, wet the wood with a damp cloth to raise the grain, causing the surface fibers to swell. Let the surface dry, and then hand-sand. This prevents the dye or clear finish from raising the grain and leaving a rough surface.
While you are hand-sanding, you’ll want to break the edges of the piece. This involves very slightly rounding or chamfering the sharp corners. This makes the edge feel better to the touch, helps resist dents, and is more forgiving under a film finish. breaking the edge lets the finish flow around the corner, giving the whole surface an even coat.

When you’ve finished sanding, remove the dust with a vacuum cleaner, blow out any remaining dust in the wood’s pores with compressed air, and then wipe the surface with a cloth dampened with denatured alcohol or with a tack cloth. This is a cheesecloth impregnated with a kind of sticky varnish to pick up any fine dust remaining on the surface. Unfold the cloth, then lightly bundle it and wipe the surface, applying minimal pressure. Pressing down hard can leave sticky residue on the surface that may interfere with waterborne finishes.

Types of Finishes
Oil-based finishes
Oil and oil-based clear finishes are the finishes that most FWW readers use, but their complexity and range of variations also make them the most complicated to understand.

The simplest are pure oil finishes, which contain no resins or solvents. These are applied thinly and rubbed into the wood, eventually revealing any luster or chatoyance deep in the wood. Over time, pure oil finishes start to look dull but are easily cleaned and renewed.
The most common pure oil finish is boiled linseed oil, which is derived from the seeds of the flax plant. It is not actually boiled but has chemicals known as metallic driers added to speed up the absorption of oxygen, which is how an oil finish cures. Raw linseed oil contains no driers, will take far longer to dry, and will not cure as hard as boiled linseed oil.
Like boiled linseed oil, pure tung oil is another drying oil, meaning that it will dry to a hard finish and will not remain greasy or sticky.

The range of oil-based finishes is immense, but they all share three components. The first is a binder, also known as a resin, which when dry forms a film attached to the wood’s surface. Binders in oil-based finishes include acrylic, phenolic, alkyd, and urethane. The second component is a carrier to help the binder flow out. The most common are linseed, tung, and soybean oils. Finally, you need a thinner (a solvent) to achieve a workable viscosity. Commercial finishes use mostly mineral spirits, but shopmade oil-based finishes can be made with some naphtha for faster drying, or turpentine for slower drying (and a nicer smell).

Varying the ratio of these three components creates different finishes. You’ll sometimes hear a finish described as short oil or long oil as if it were a commodities trader. A short-oil finish will have a higher percentage of binder and will form highly protective indoor finishes such as varnish or polyurethane. Thinned with solvent, it becomes a wiping varnish, meaning it can be applied with a clean cotton cloth. A long-oil varnish, also known as spar varnish, has more oil to give it a more elastic consistency that can cope with the increased wood movement outdoors. A higher-quality spar varnish is a marine-grade varnish, which should contain ultra-violet absorbers or inhibitors to slow damage to the finish from sunlight. A diluted long-oil finish is known as Danish oil. It is poured on the surface and allowed to penetrate the wood, and then the surplus is wiped off.

Gel varnish, gel polyurethane, or simply gel finish are all oil-based finishes with a thickening agent. This makes them much less messy to wipe on and off.
The many types of shellac
|
|
|
|
|
|
|
|
|
|

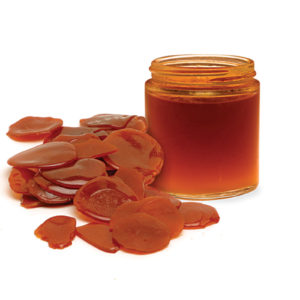
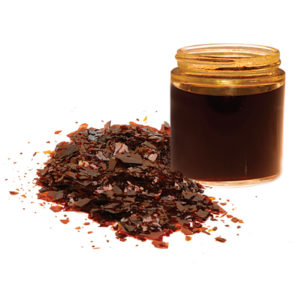
Derived from the protective casing of a type of insect larvae in southern Asia, this ancient finish has been refined into various grades and sold in flake or granule form. Among the least refined is seedlac, a reddish-orange granule mostly used in matching antique finishes.
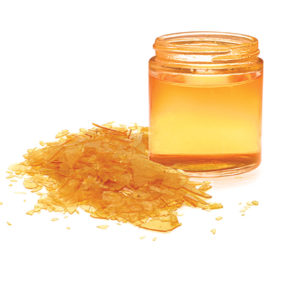
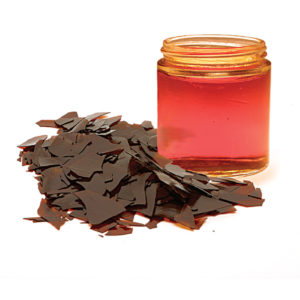
Buttonlac comes in small coin-sized disks. Like seedlac, it contains about 5% wax, giving it a cloudy appearance. This makes it good for an antique look but less durable than grades of shellac that have been dewaxed. Dewaxed grades of shellac come in flakes and are described by their color, from a dark garnet through ruby, orange, and lemon to a very pale blond.
Shellac is an evaporative finish, where one coat melts into the prior one. Its viscosity is measured by its cut. When you dissolve 3 lb. of dry shellac in 1 gal. of denatured alcohol (ethanol with some methanol added to make it non-drinkable), you get a 3-lb. cut. To thin this to a more easily brushed 2-lb. cut, add one part alcohol to two parts liquid shellac by volume.
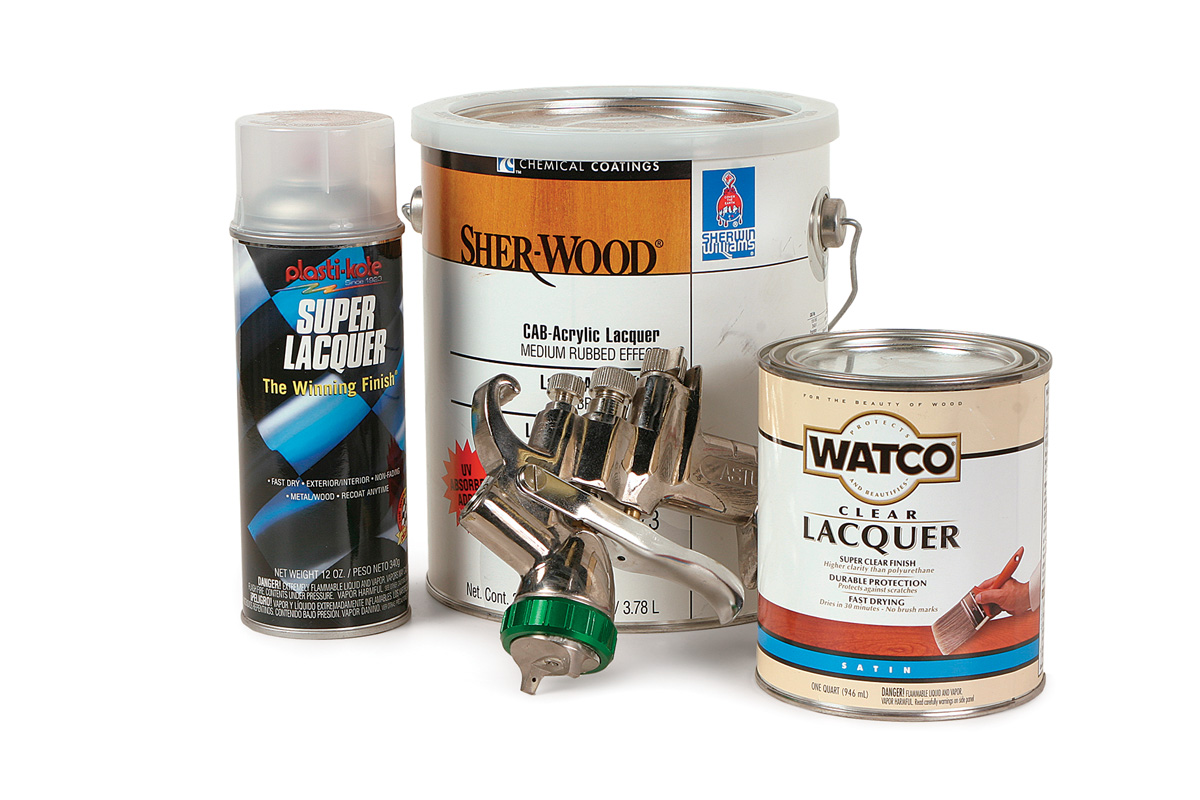
Solvent-based lacquer
Lacquer is another evaporative finish. Lacquer thinner is made from several solvents blended in different combinations. Faster-evaporating thinner is used when spraying lacquer, but slower blends allow you to brush this finish.
The most commonly sprayed lacquer outside commercial operations is nitrocellulose lacquer, made from cotton cellulose, nitric acid, and other acids. It dries fast and offers great clarity and depth, but its high solvent content is highly air polluting. It also has a strong yellow color, which increases as the finish ages. For a non-yellowing lacquer, go with CAB-acrylic lacquer, which is made with clear acrylic resin.
Waterborne finishes
Often incorrectly called water-based finishes (a true water-based finish would dissolve in water), waterborne finishes consist of acrylic and polyurethane resins mixed with glycol ether solvent and water. As the water evaporates, the solvent makes the resins sticky so that they come together in a continuous film, the definition of a coalescing finish.
Waterborne finishes have names like lacquer, polyurethane, and varnish, but are nothing like their solvent-based namesakes. Instead they all have a white, milky appearance in the can, they dry almost colorless, and they clean up with water.

Mark Schofield is Fine Woodworking’s managing editor and resident finishing expert.

From Fine Woodworking #229
To view the entire article, please click the View PDF button below.


Log in or create an account to post a comment.
Sign up Log in