
The Finishing Environment
You'll need a space that is clean, well lighted, and ventilated...and, depending where you live, heated in winter.
 Mar 02, 2021
Whether you work in a production shop or in your home basement, it’s important that your finishing area be clean, ventilated, and well lighted. It’s also critical that you’re able to heat the area in cold weather. If you work with flammable or hazardous materials, you’ll need to provide mechanical ventilation to exhaust fumes and overspray. You’ll also want cabinets or shelves to store finishing materials, as well as devices to hold your projects in process.
A Space to Finish
Ideally, you should finish in a dedicated space separate from your machining area. If this isn’t practical, at least keep the finishing space as far away as possible. Weather permitting, you may be able to finish outdoors. Here are a few suggestions for working indoors or outside.
Indoors
In a cramped shop, you may find that the only place to finish is on top of a bench or tablesaw. If so, protect your saw or bench with drop cloths. Plan your work sequence to allow at least 12 hours for the dust to settle after sanding and machining. Using an ambient air cleaner will significantly shorten this time. In mild weather, you can use fans to evacuate the dust outdoors. In cold weather, you may want to avoid this, as your shop heat goes out the window too. When you’re forced to finish in your general shop area, it’s best to use fast-drying finishes like shellac or oils and varnishes that wipe on. These finishes don’t attract dust that ends up creating pimples in the finished surface.
Outdoors
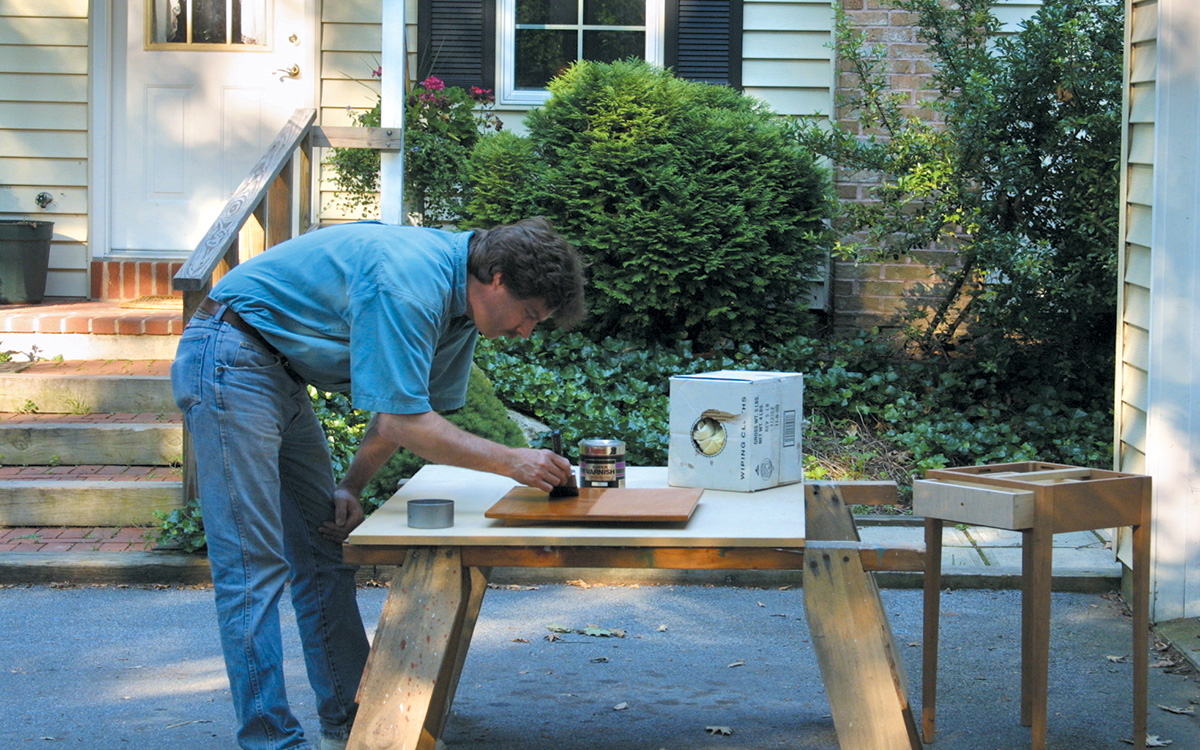
Another option when working in a cramped shop is to finish outdoors, where you’ve got plenty of good lighting and natural ventilation. Of course, weather conditions have to cooperate, as you need to avoid cold or extremely hot and humid days. But when the weather is nice, finishing outdoors on a couple of sawhorses is fine. Just work in a shaded area entirely out of direct sunlight. If shade is scarce and you’re feeling industrious, you can construct a tent top of canvas or plastic sheeting. For protection against a breeze, you can set up a plywood windbreak against the side of a garage or other structure. When you do finish outdoors, always bring your work inside to dry. Never leave finished items out all night.
Temperature and Humidity
Temperature and humidity are the two hardest things to control in the shop. Finishing products cure best at temperatures ranging from 65°F to 80°F, with a relative humidity of 50% or less. Temperatures below 50°F will retard or prevent many finishes from curing. Although heat alone doesn’t necessarily make for bad finishing conditions, the humidity that often accompanies it can pose a real problem.
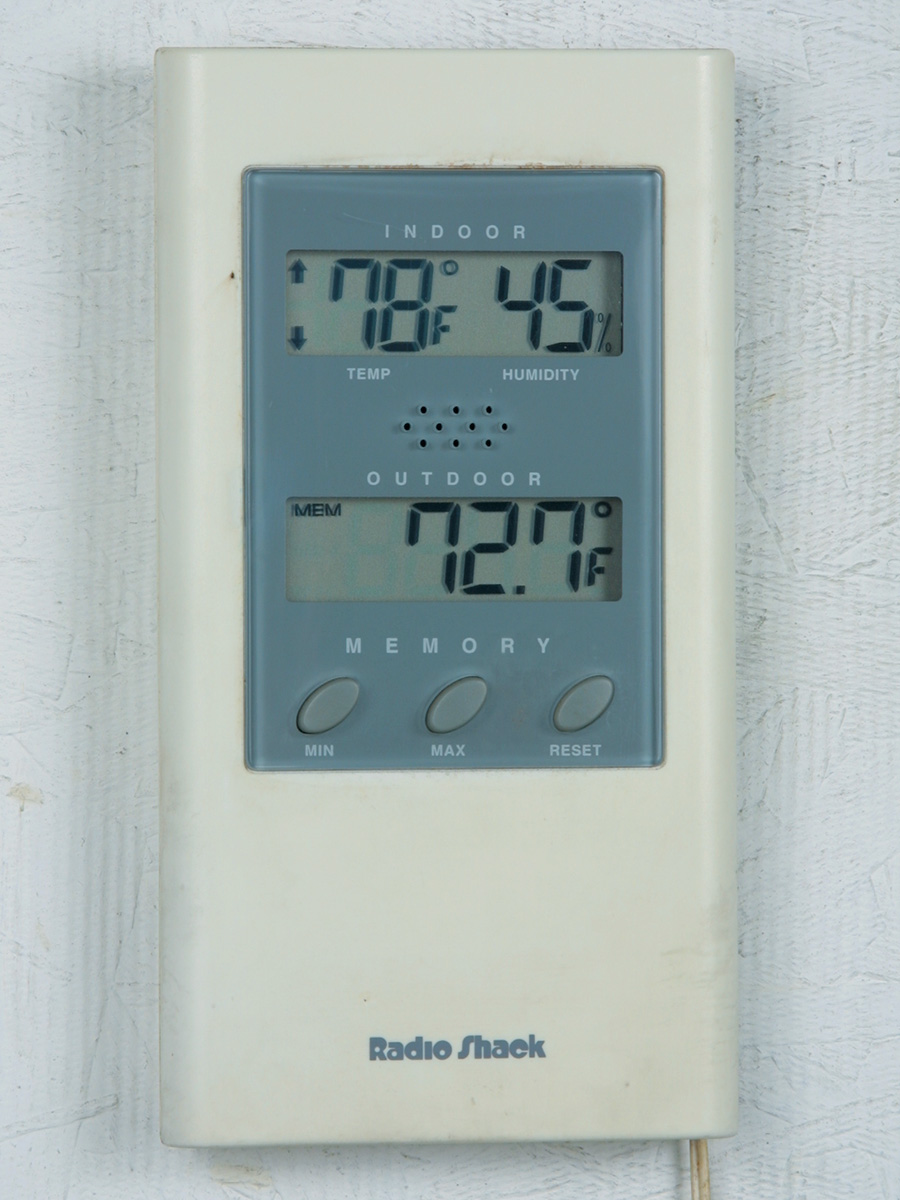
To help you gauge temperature and humidity, I suggest investing in an inexpensive digital thermometer/hygrometer available for about $25. Avoid finishing when the relative humidity is over 85% unless you can provide good air circulation using fans, which help somewhat—particularly when using water-based finishes. With some finishes, additives are available to improve flow and cure time in extreme humidity.
Don’t forget about the moisture content of the wood itself, which should range between 5% and 8% for furniture making. To accurately detect moisture content in lumber, use a wood moisture meter (available from woodworking tool suppliers). If you don’t have a moisture meter, a good rule of thumb is to bring seasoned lumber indoors to acclimate for at least two months before machining and finishing.
Lighting
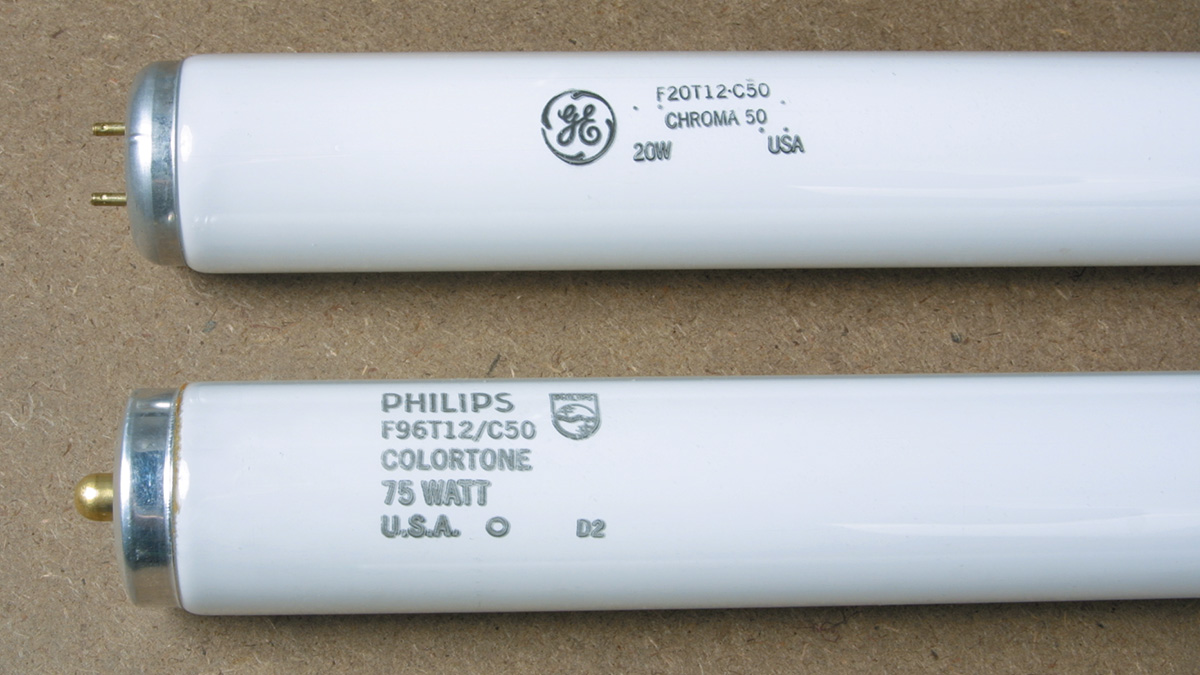
Natural lighting is ideal for finishing. Its full color spectrum allows you to view the true color of your finish. However, if you don’t have a lot of windows in your shop, you’ll have to make do with fluorescent and incandescent lighting. I prefer fluorescent lights because they are available in different “color temperatures,” rated in Kelvin (K) and with different “color rendering index” (CRI) ratings. A low color temperature of around 3000 K is considered warm and inviting, like candlelight. Higher color temperatures of around 5000 K are considered “cool,” but mimic the full spectrum of color found in natural sunlight. For matching colors, a CRI rating of about 90 with a Kelvin rating of 5000 is considered standard. These bulbs are pricey and consume more energy than standard bulbs, so you should only use them in color-critical areas such as a spray booth or staining area. Unfortunately, the Kelvin and CRI ratings aren’t always indicated on bulb packaging, so you may have to purchase your lights from a knowledgeable lighting dealer.
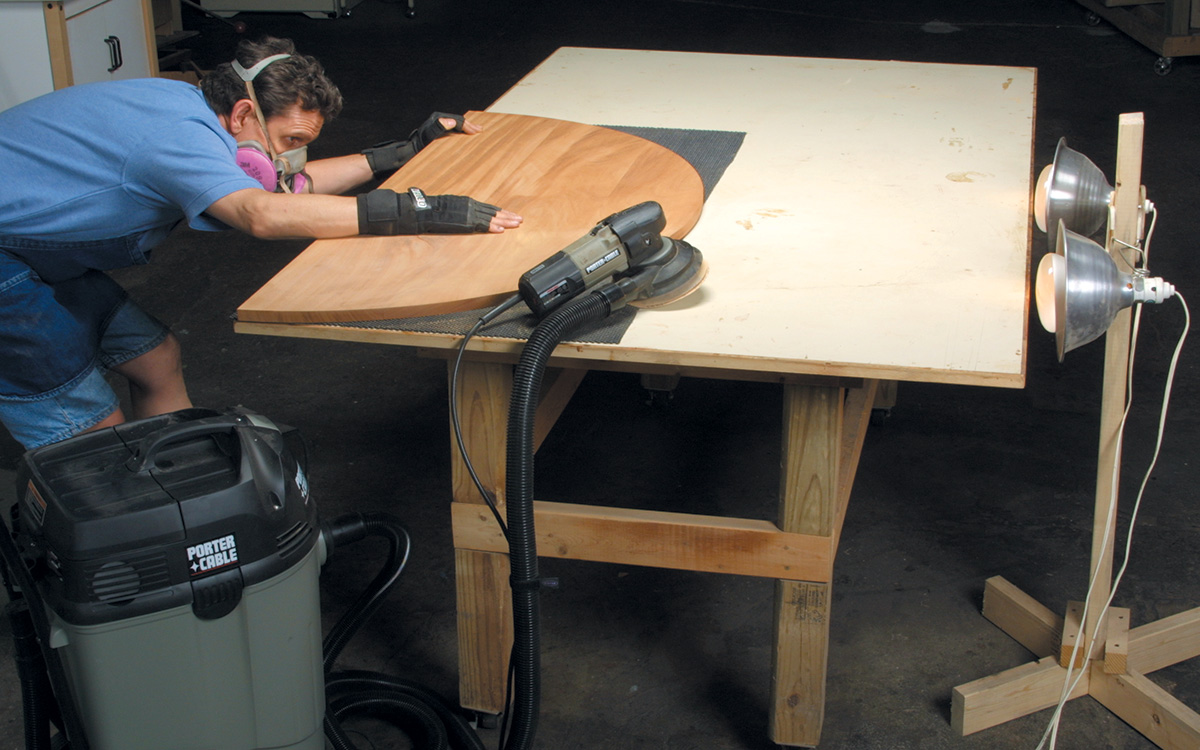
To help ambient shop lighting, paint the ceiling flat white and mount overhead strip fixtures for your fluorescent lights. If the ceiling is a dark color, or if you have to suspend the fixtures, use strip fixtures with reflectors to help distribute the light. For task lighting at benches and workstations, I use incandescent lights. When I sand at my bench, I use 65-watt portable floodlights placed so the light rakes across the work surface at a low angle to expose defects.
Heating
Finishing during the cold season requires heating your shop. Finishes are best applied at room temperatures of 70°F to 80°F, although you can sometimes get by in temperatures as low as 60°F or as high as 90°F. How you heat your shop is a matter of preference and availability of appliances and utilities. Gas, electric, or wood-burning stoves can all be used, though wood-burning stoves and other appliances with an open flame or glowing heat element pose a hazard around flammable finishing products.
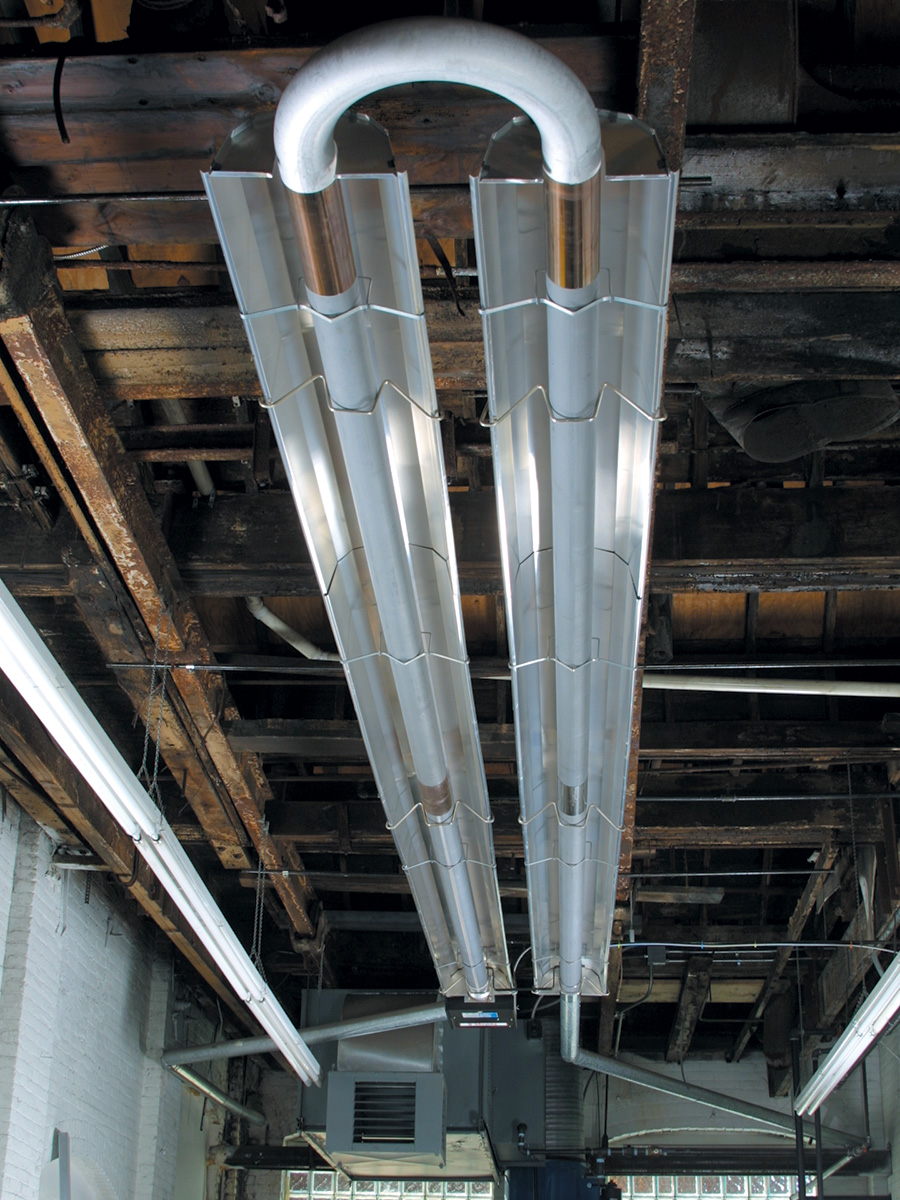
In a commercial shop, you should check local codes to see what heating regulations apply to locations where flammable products are being used. My local code required the use of a totally enclosed system with no open flame. As a result, I opted for a gas-powered infrared tube-type heating system that draws air from the outside, heats it in a totally enclosed chamber, forces it through a tube that radiates the heat downward, then discharges the exhaust outside. It’s clean, produces no dirt or soot, and is energy-saving to boot. Totally enclosed gas- or propane-powered heaters that vent to the outside are also a safe alternative.
Ventilation
Almost all finishing products release some type of hazardous solvent into the air during application and curing. The best way to protect your health—besides wearing safety equipment—is to finish in a well-ventilated area. Ideally, you should have cross-ventilation, working near a window fan that is pulling the vapors away from you and the workpiece to the outside. To determine the size of the fan you need, calculate the cubic feet in the room (length times width times height), then buy a fan with a cubic foot per minute (cfm) rating to match that figure. This means the fan will be capable of exchanging the room air every minute, which is fine for eliminating vapors from hand application (although not over-spray from spraying). Remember that for this arrangement to work properly, you also need inlets to bring in the fresh replacement air.
Tip: Whenever you use fans to exhaust vapors from the shop, open a window to allow replacement air to come into the shop.

Unfortunately, this system doesn’t work well during the winter, as it exhausts heated air from the building. You have several alternatives, though, assuming you are hand-applying the finishing products. First of all, consider using water-based finishes, which are nonflammable. When using solvent-based finishes, work in as large an area as possible to avoid concentrating the fumes and wear an organic vapor respirator. Stay well away from any stoves or heaters that produce flames. Once the finish is applied, you can then open the doors or windows to let in fresh air and turn on a fan to exhaust the room. Afterward, close up the shop and heat it again for drying the finished piece.


Log in or create an account to post a comment.
Sign up Log in