
Side-Rail Box Hinges: Looks, Performance, and Easy Installation
Clean, minimal look and built-in lid stops make the hinges a favorite of Craig Thibodeau.
 Oct 02, 2020

I install high-quality side-rail hinges in every box I make these days. I’m using them here on a veneered box, but they work just as wonderfully on solid-wood boxes. I prefer this type of hinge because of its clean, minimal look and built-in lid stop.
There are a number of high-quality side-rail hinges on the market. My favorite ones are the SmartHinges from Andrew Crawford (smartboxmaker.com). The lid stop is machined into the hinge barrel, making it invisible, and the hinge barrel is rounded on its back end, the only side-rail hinge with that elegant touch. The ends of the hinge leaves are also rounded, which makes mortising super easy on the router table.
By the way, if your box design incorporates a lock, Crawford’s SmartLock hardware is easy to install and matches the design of the hinges.
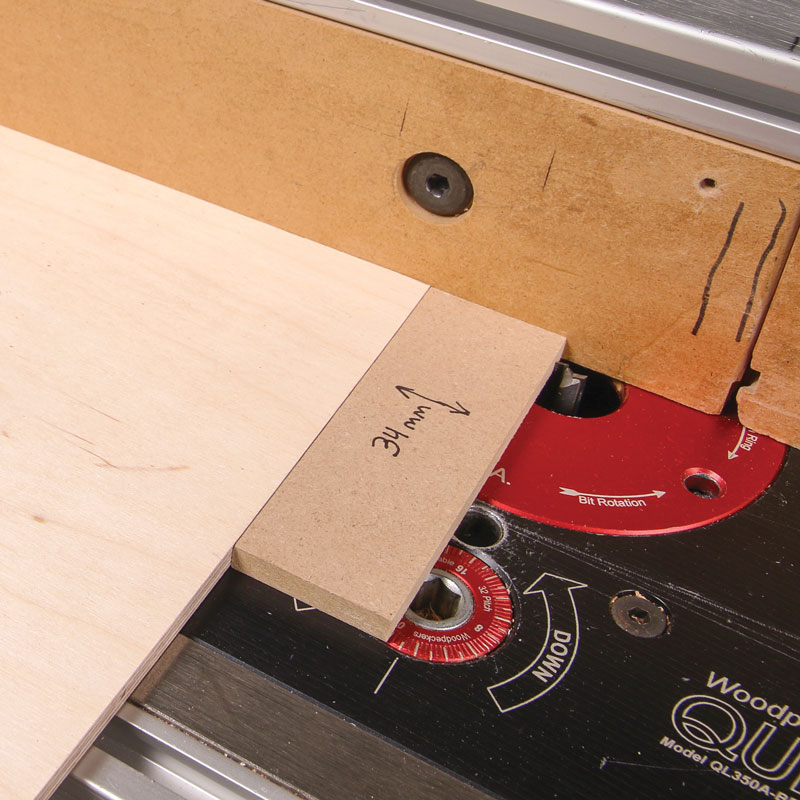
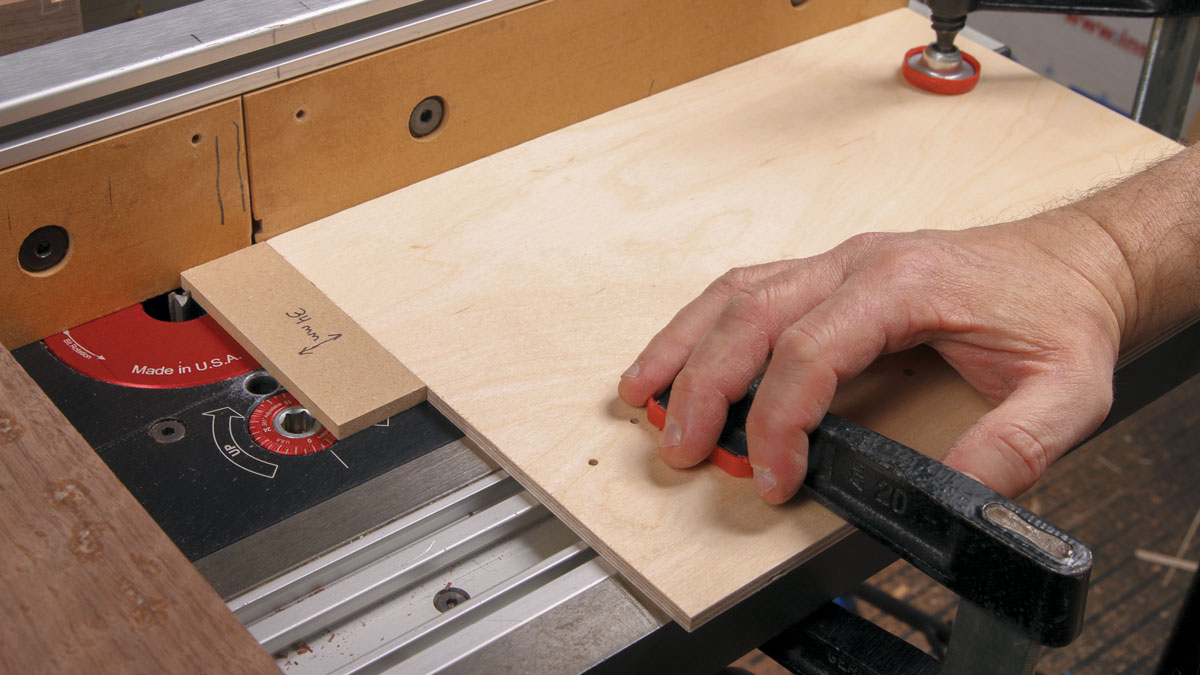
SmartHinges only require two router-table setups, using either an 8mm or 5⁄16-in.-dia. router bit (both work) and a small shopmade spacer, which dials in the distance between the bit and a stop panel clamped to the table. For SmartHinges the spacer should be 34mm wide.
Set your bit height to exactly the thickness of one hinge leaf, and set the fence to locate the bit in the center of your box sides. Use the spacer to position your stop block on the left side of the cutter.
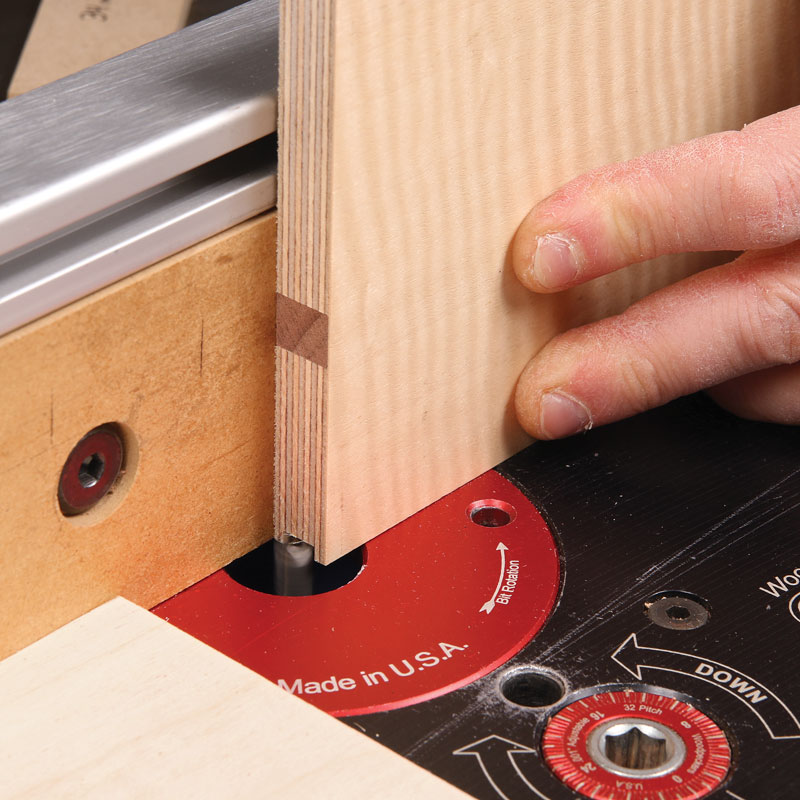
To test the setup, you’ll need a sample box side, veneered the same way as the real thing. Make a test cut, sliding the sample along the fence until it hits the stop block and then pulling it back until it clears the bit. Keep the piece pressed against the fence.
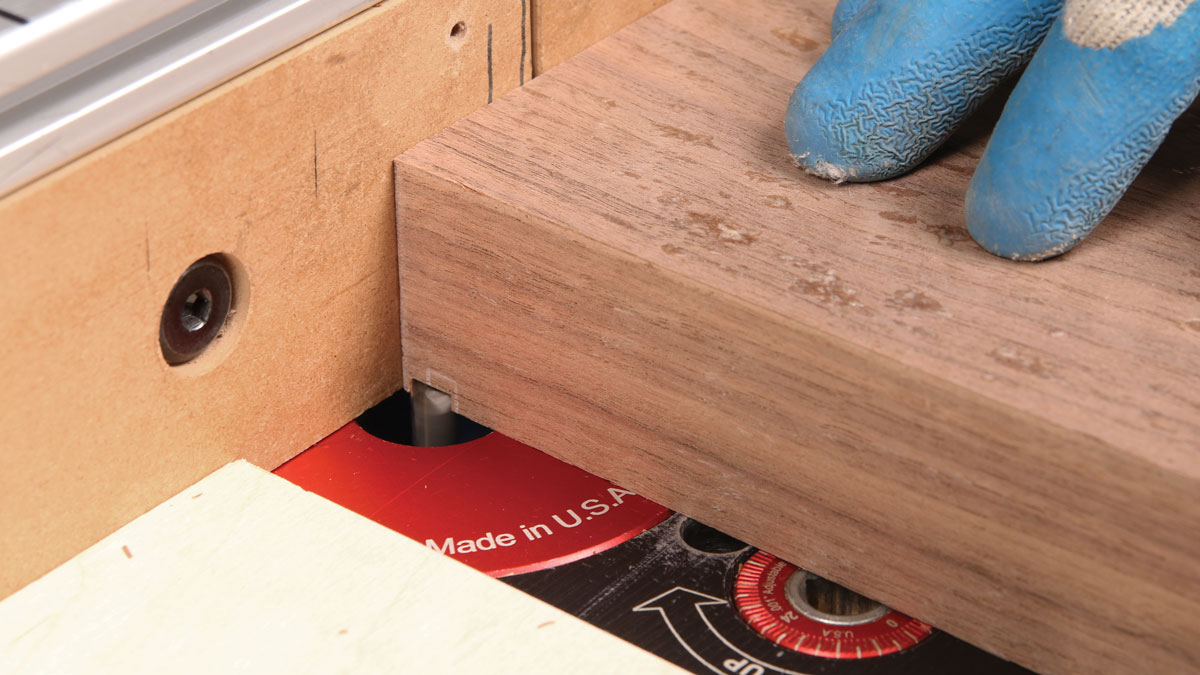
Test-fit a hinge leaf to check your setup. If you need to make an adjustment, just make a test cut on another edge of your sample part. Use this setup to cut the top-right and the bottom-left hinge mortises, as shown. Then move the stop block to the right side of the bit, using the 34mm spacer as before. Just to be sure, test the setup on the sample piece again. Now you can cut the top-left and bottom-right hinge mortises.
To install the hinges cleanly and accurately, push each leaf into place and use a centering bit to line the pilot holes up with the holes in the hinges. It helps to angle the holes very slightly toward the front of the box in order to pull the hinge leaves tightly into their mortises.
1. Set up your router table
Each mortise is cut in a single pass on the router table, approaching the bit from one side or the other, depending on the part of the box being mortised.

 |
 |
Add a stop block and make a test cut. Thibodeau positions a stop block with the help of a 34mm spacer. Make sure the cutting edge of the router bit is at its outermost point. Set the fence to center the bit on the thickness of the sides. Use a sample piece, veneered like the real box sides, to check the setup (far right).

Test the fit. The hinge leaf should be flush on top, with the barrel centered on the back edge.
2. Rout the hinge mortises
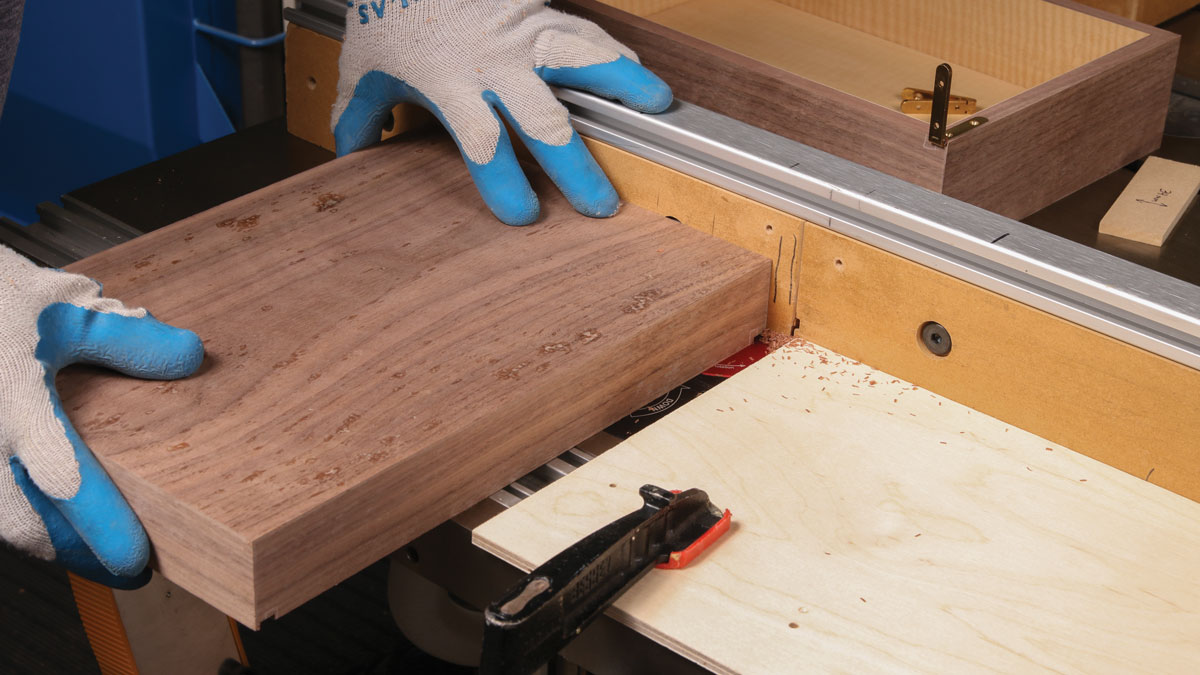
Now the real thing. Be sure to hold the box snug against the fence all the way up to the stop block and all the way back out of the cut. Note how Thibodeau marked the hinge locations in chalk to keep track of these critical cuts. You’ll be able to cut two of the four mortises with this first setup.
Now the real thing. Be sure to hold the box snug against the fence all the way up to the stop block and all the way back out of the cut. Note how Thibodeau marked the hinge locations in chalk to keep track of these critical cuts. You’ll be able to cut two of the four mortises with this first setup.
 |
 |
Switch sides. To cut the two remaining mortises, move the stop block to the other side of the bit, using the same spacer to position it. Once again, keep the box or lid snug against the fence throughout the cut.
 |
 |
Check the alignment. Insert the hinge leaves fully in their mortises, and then check the alignment of the lid at the front edge (above). If the alignment is off, you can add a shim to align the parts. Use the hinge leaf to press a small piece of veneer into the back of each mortise, taping the hinge there until the glue dries.
From Craig Thibodeau’s article Veneered Boxes Made Easy in Fine Woodworking #283
 |
|
 |
|
 |


Log in or create an account to post a comment.
Sign up Log in