
Make an Heirloom Lift-Lid Box
Shape the sides with a molding cutter to add interest to a mitered box.
 Mar 25, 2021

One relatively easy way to make a box more interesting is to shape its sides using a molding cutter in the router table. Boxes with molded sides can be made in a variety of sizes, though it can be a challenge to decide which molding cutter to use for various box sizes. The molding cutter used on this box is intended to duplicate common antique molding plane patterns, but it would take several different planes and a great deal of steady labor to achieve the results that a router can get in minutes. Best of all, it is just the right size to make a lovely tiny box.
Because of the small size of this box, glued miter joints are sufficient to hold the parts together for generations. The Baltic birch bottom panel, glued into grooves in the box sides, gives additional strength and longevity to the box. And a simple lift lid provides ready access to whatever treasures you keep inside.

Make the Molding
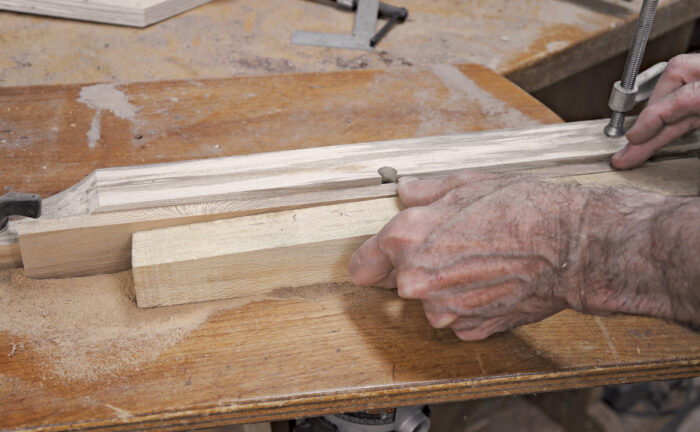
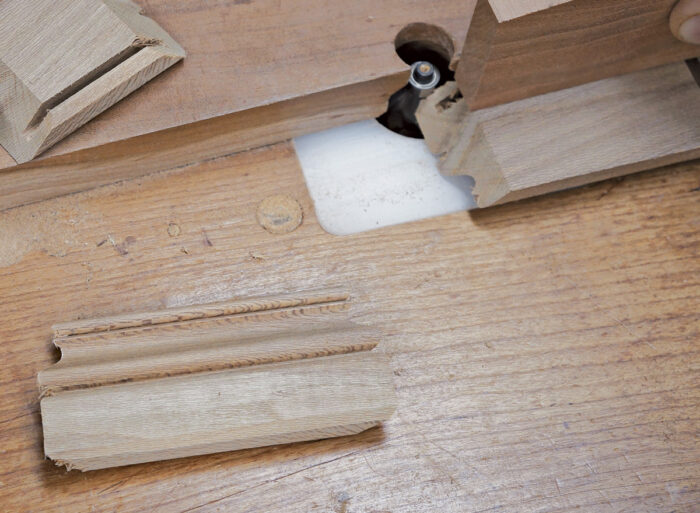
I make the molding for the sides of this box on the router table using a close-fitting pivot fence that you can easily make in your own shop (see “Making a Molding Fence for the Router Table”). The close fit of the router bit in the fence keeps long strands of fiber from being torn off from the stock. I work with a long piece of stock for the front, back, and ends and cut it to length in a later step.
1. The molding for this box is formed with the stock in an upside-down position and the height of the router bit set so that a round bead is formed on what will be the top edge of the body of the box. I make the molding in a two-step process. First cut with the bearing of the router bit set about 1/16 in. inside the fence. Normally the guide bearing on a router bit should be set flush with the fence, but doing this operation in two steps gives cleaner results. Make your first pass, with the bearing set in slightly from the surface of the fence, using a push block to safely apply pressure against the fence and guide the molding stock through the cut. A
2. Bring the bearing flush to the fence for the second pass. This will give a cleaner cut than trying to remove all the stock at the same time. B Note how the push block is long enough to support nearly the full length of the stock, so that it can be held tightly against the fence throughout its length.
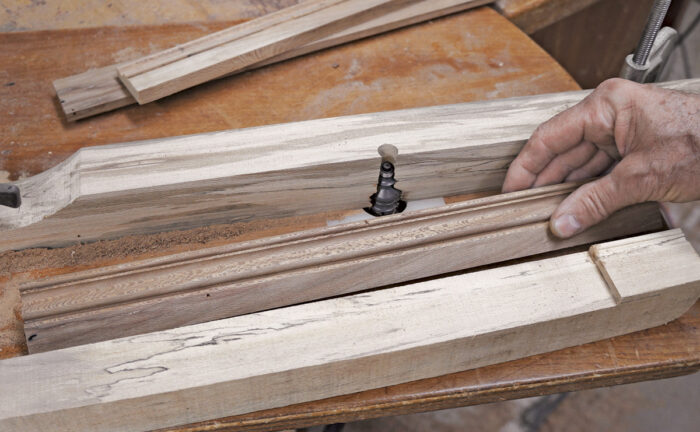
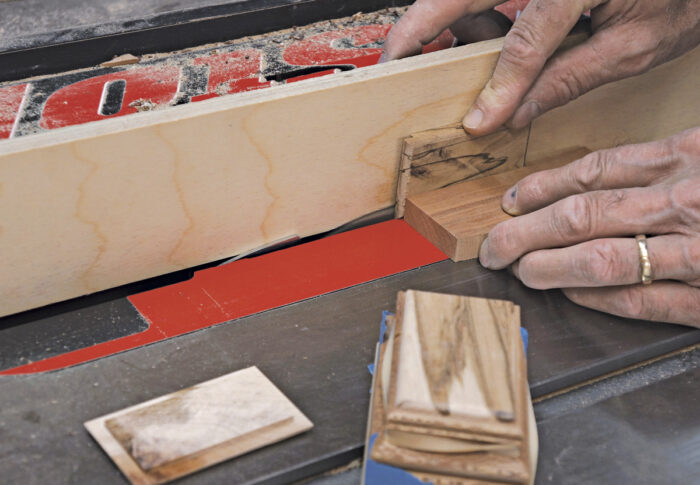
3. Use the tablesaw to make a cut down the length of the stock to fit the bottom panel. I set the blade height at 1/4 in. and set the fence so that the Baltic birch bottom panel will fit 1/8 in. from the bottom of the box. C
| A
|
B
|
C
|
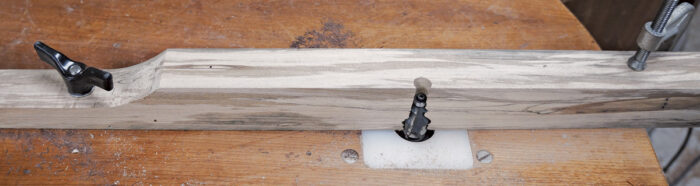
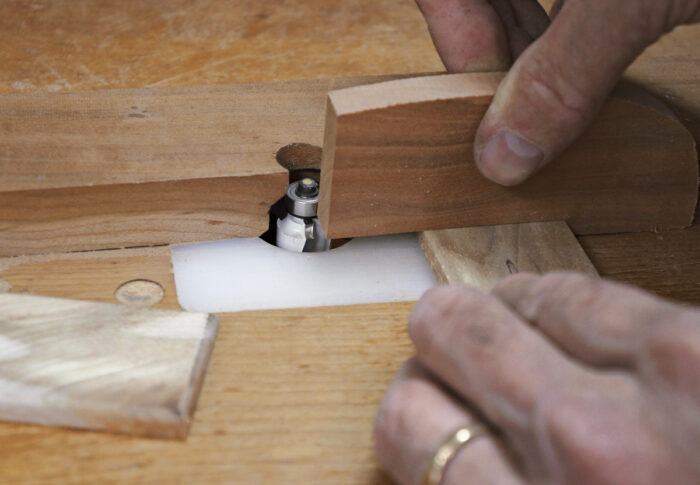
Making a Molding Fence for the Router TableWhereas many craftsmen spend big bucks on large router tables, or spend many hours making one, my simple router table was quick to make and has lasted over 25 years despite regular use. It’s nothing more than a piece of plywood with a router base mounted to the underside that can be clamped to any workbench and put away when the routing operation is complete. 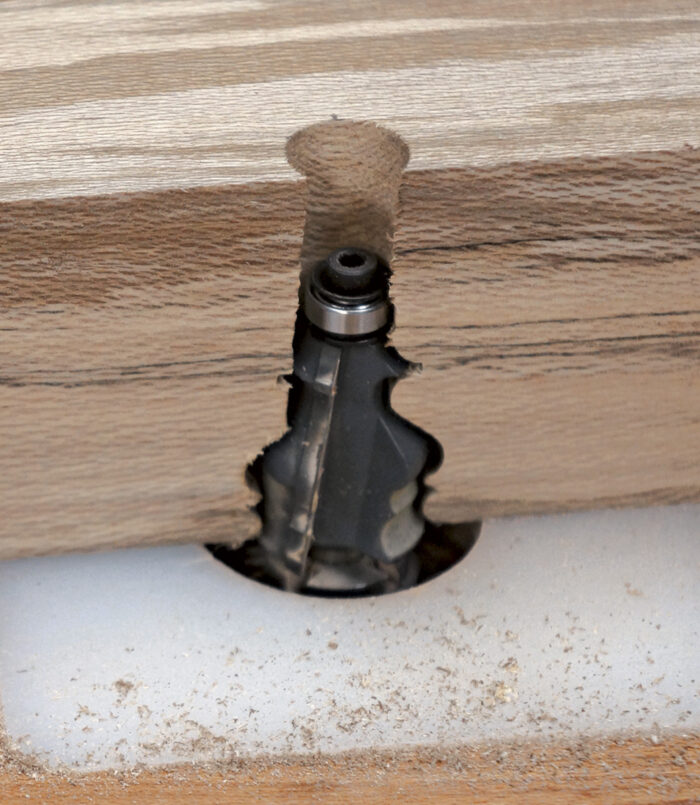 Part of what makes this router table so useful is its equally simple pivot fence. Or to be more precise, I should say, “pivot fences,” for I’ve made many of them. The pivot fence is mounted to the top of the router table by a 3/8-in. carriage bolt and a plastic knob at the pivoting end, and is held in place by a C-clamp at the other. This simple approach allows me to make fences in even less time than the router table took in the first place and leaves me much more time for boxmaking. To make the molding fence, I first drilled a 3/8-in. hole in the piece of 2-in.-square hardwood I’m using to make my fence in order to attach it to the router table top with a carriage bolt. After carefully measuring the distance from the carriage bolt to the center of the router bit, I marked that same distance on the stock for the fence and drilled a 1/2-in. hole with a Forstner bit along one edge. The hole does not need to be drilled all the way through but does need to be drilled deep enough that when the fence is pivoted into the spinning router bit the bit can cut its own profile into the side, as shown above. This hole is needed to allow the bearing to be flush with the surface of the fence. Use a clamp at one corner to secure the router table to the workbench and a C-clamp to secure the fence to the router table. An additional advantage of this router table is that you can add a zero-clearance feature to each change of router bit. This will reduce the size of the opening in the router table to correspond perfectly to the size of the router bit being used. Simply drill a 3/8-in. hole in a piece of 1/8-in. Baltic birch and clamp it down under the router table fence. When the router bit cuts into it, it provides zero clearance on the cut.
|
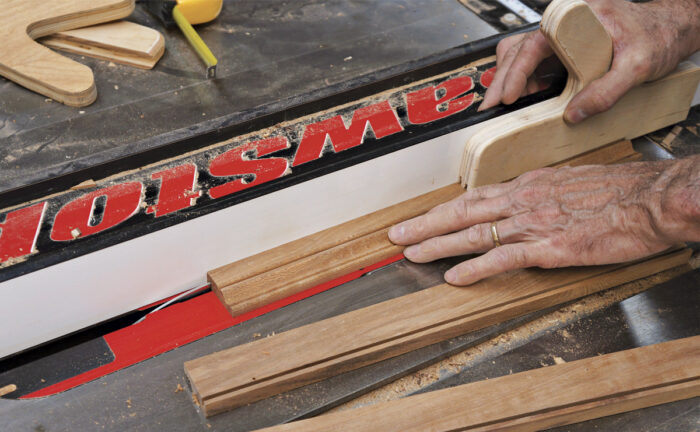
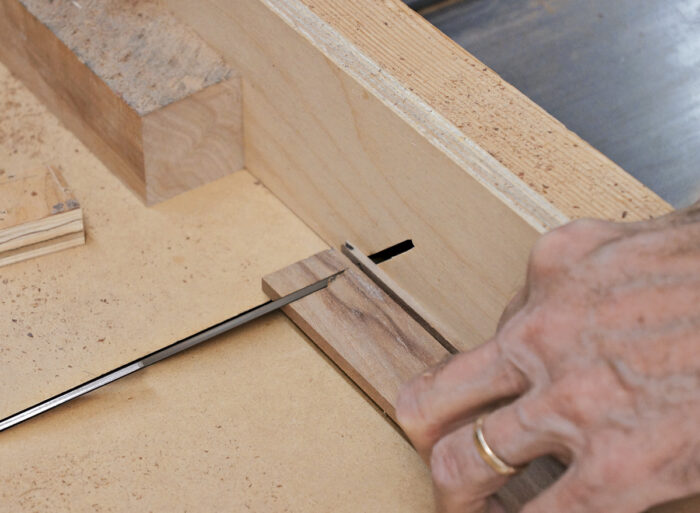
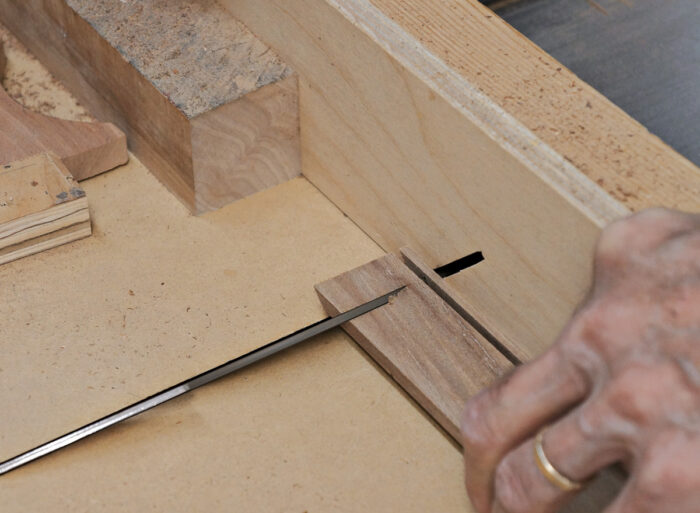
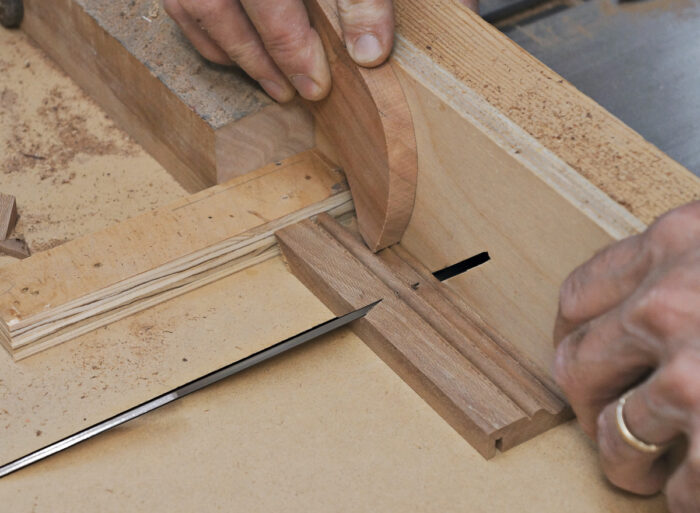
Cut the Miters
You can miter the corners and cut the box sides to length using the tablesaw.
1. I use a 45-degree sled because it is one of the safest and most accurate ways to cut miters at the ends of box parts. Make a trim cut at 45 degrees at one end of the stock. A
2. Flip the stock over against the stop block to cut the miter at the other end and to cut the part to the correct length. The stop block should be set so that the long parts of the box front and back will be 3-1/2 in. long. In order to cut the ends of the box shorter, I also use a spacer block cut 1-1/4 in. wide to offset the difference in length between the two parts. Photo B shows two important things. One, the stop block clamped to the sled is wide enough to match the full width of the molding stock and touch at the longest point. Two, I use a hold-down stick to hold the stock while keeping my fingers a safe distance from the blade.
3. To cut the next adjoining part, trim the miter at one end, as in step 1. C
4. Use a spacer block between the stop block and workpiece to cut a shorter piece for the box end. D Make a box with matching corners by moving back and forth, using the spacer block between alternating parts.
| A
|
B
|
| C
|
D
|

Work SmartEven the small width of a pencil line can make the difference between sloppy work and perfectly fitted joints. By using guides, sleds, and stop blocks you can alleviate the errors easily. Rather than risk inaccuracies from marking on stock with a pencil or knife and then aligning it with the sawblade, simply measure from the edge of the sawblade to the stop block. |
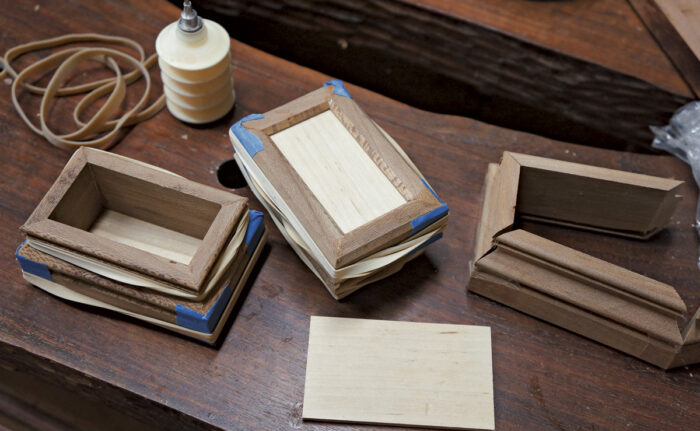
Assemble the Box
1. After the miters have been cut, use a 45-degree chamfering bit in the router table to soften the bottom inside and outside edges of the box. This routing will give the box a more finished look. A
2. Cut the bottom panel to fit.
3. Sand all the inside surfaces that cannot be sanded after the box is assembled. These include the top and bottom sides of the Baltic birch bottom, the inside surfaces of all the box sides, and the chamfers on the inside edges of each part.
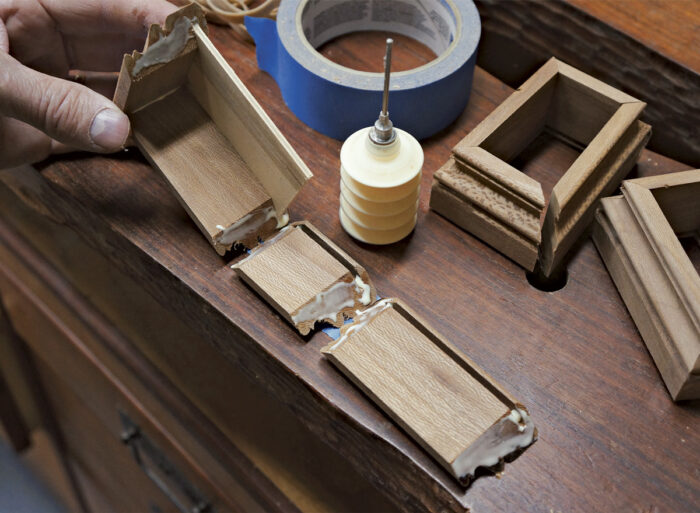
4. Tape the parts together flat on a work surface, spread glue on their miters and a bit in the grooves at each corner, and then roll the parts around the bottom into the form of the finished box. B
5. Use rubber bands to hold the box together as the glue sets. C Several layers of rubber bands can be used to build up clamping pressure.
| A
|
B
|
C
Make and Fit a Lift Lid
Make a lid for your box from 1/4-in.-thick figured wood. I selected spalted maple to contrast with the sycamore used for the body of this box.
1. Cut the lid to width using the tablesaw. You can use the materials list for this step or measure directly from the box. The profile of the lid should roll up directly from the profile at the top of the sides, so I determined the length and width of the lid on my box by measuring between the routed profiles on each side.
2. To cut the lid to length, use either the 90-degree crosscut sled on the tablesaw or the compound miter saw set at 90 degrees.
3. Use a 1/8-in. roundover bit in the router table to shape the top edges of the lid. Use a push block to keep the stock under control and your fingers a safe distance from the router bit. This is generally a safe operation because the bit is buried in the fence with very little of the cutting edge exposed. But the push block provides a margin of safety and greater control by keeping the stock from edging into the space between the bearing and the fence. A
4. Form a rabbet on the edge of the lid to fit the top of the box. The push block you made for the last operation will also work here to guide the lid along the tablesaw fence. Bury the blade slightly in a sacrificial fence clamped to the tablesaw fence. Then raise the blade to a sufficient height to make the cut. B For me, this is a trial-and-error operation. I set the blade just shy of the required height, make a test cut, and then raise the blade until I get a perfect fit. It’s best to rabbet the ends of the lid first and then the sides so that any tearout caused by cutting the ends will be removed when the side rabbets are cut.
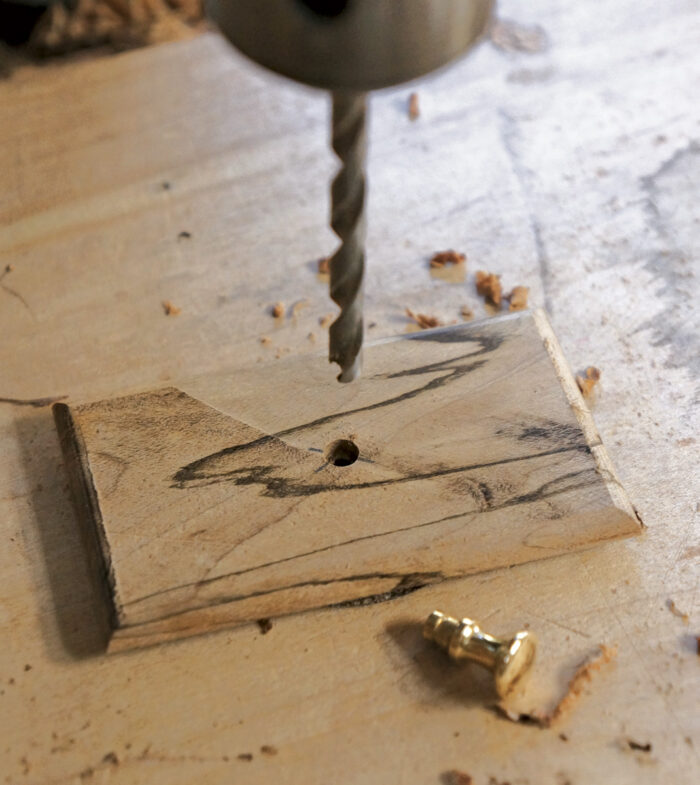
5. Mark the center of the lid and drill a 3/16-in.-dia. hole 3/16 in. deep for the brass pull, or make your own turned knob on the lathe from walnut or another contrasting hardwood. C
A
B
C
 Excerpted from Doug Stowe’s book, Tiny Boxes.
Browse the Taunton Store for more books and plans for making boxes.


Log in or create an account to post a comment.
Sign up Log in