
Making a Bracelet Box, Part 1
Use a miter sled and a hidden spline jig to cut the joinery for this mitered walnut and maple box.
 Apr 06, 2021
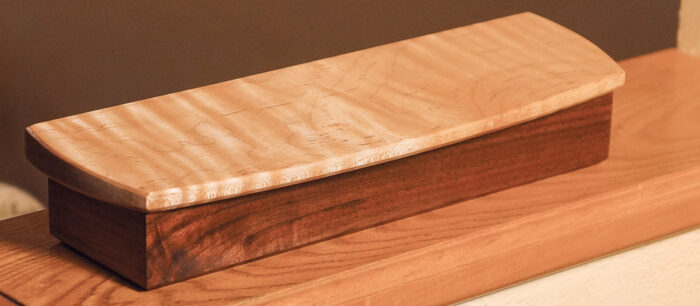
Every box offers the opportunity to explore new designs, and one of the objectives of good design is rhythm. In fact, rhythm is both an objective of good design and also a design tool that can be applied to make a box more interesting and beautiful. This bracelet box is made with walnut and contrasting maple, and the maple offers an example of how the patterns inherent in beautiful wood can create a sense of rhythm. This particular piece of maple would be described as curly, in that the grain has a gentle, undulating visual effect.
Rhythm can be established in other ways and in a more deliberate fashion than simply through the selection of wood. The use of visible keys in contrasting woods, the natural patterns left by the process of milling lumber, and texturing tools can all be used to establish rhythm. This project, however, can’t explore all the possibilities in the use of rhythm, leaving many for you to discover on your own.
The box featured here can be used as a gift box for a bracelet or watch, but I’ve also made similarly sized boxes for pens and pencils and for handcrafted knives. It can be easily resized for a variety of other uses.

Miter the Corners
To simplify the joinery process in making this box, I actually build two boxes at the same time and cut them apart after assembly.
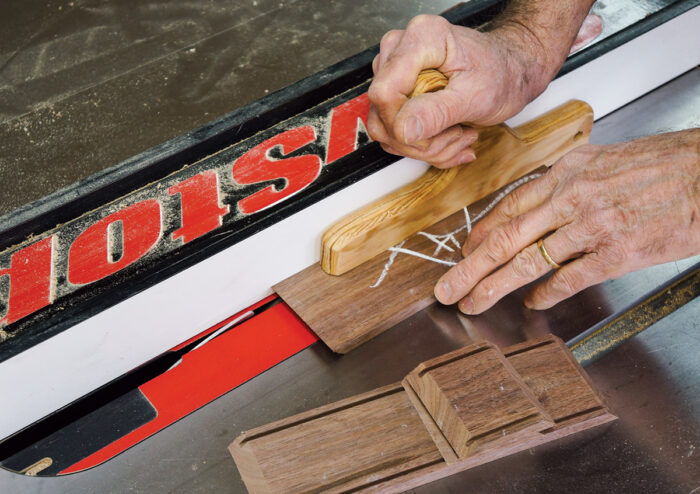
1. After planing the material to thickness and ripping it to width, use a miter sled and stop block (see the sidebar) to cut the front, back, and ends to length. I use a spacer block 6-1/2 in. long between cuts, so while the first part is cut to 9 in. long, the second will be only 2-1/2 in. long. It is very easy to change the proportions of this box simply by changing the length of the spacer block. A
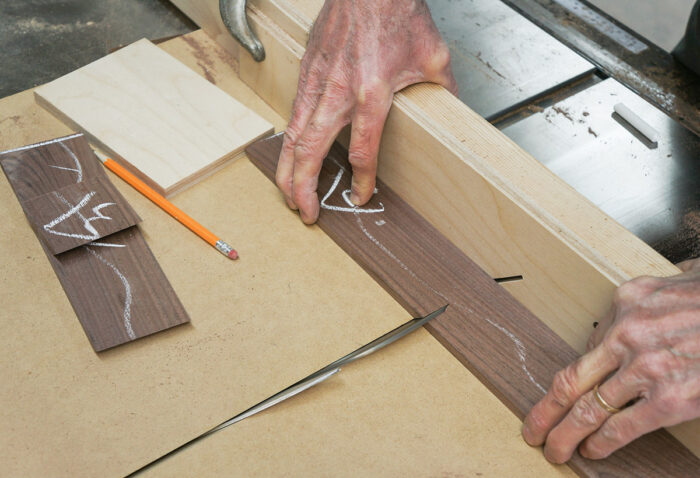
Work SmartSmaller pieces can be a challenge to cut safely, so I use the eraser end of a pencil to keep the parts nested tightly against the stop block and my fingers a safe distance from the blade. |
2. Remove and replace the spacer block between parts and mark them as they come off the saw so that they can be arranged in order with grain matches at each corner. B
| A
|

| B
|
Making a Miter SledSleds make boxmaking easy, safe, and accurate. Once you have set up a sled with a stop block to cut parts to a uniform length, you can make the same cut again and again all day long without any loss of accuracy. A sled also makes your boxmaking safer. It provides places to put your hands out of range of the cut, and, as you pull it back from a cut, offcuts are pulled back away from the blade so they can be removed without getting your hands close to the danger zone. I routinely use both miter and straight-cut sleds, and both are made in the same manner.
I prefer to use plywood as the base of my sleds; the proportions of the sled shown below will serve well in the making of sleds for any standard-size tablesaw and for making boxes of all sizes. |
| 1. Plane material for the runners to a thickness that fits into the miter gauge slots on the surface of the tablesaw. A perfect fit with straight stock is desired, and it should slide easily in the slot, but with no motion side to side. | 4. With the first runner square to the base, attach the second runner from the top side while both runners are positioned in the guide slots. Apply paste wax to the runners for smooth operation. |
| 2. Rip that stock into two pieces equal in thickness to the depth of the miter gauge slots. | 5. After the runners are in place and the sled is sliding smoothly on the saw, add the front strip and hardwood fence using screws driven flush to the surface of the plywood from the underside. |
| 3. The secret I’ve learned to making sleds quickly and easily has to do with the order in which the runners are attached to the base and the direction the screws are driven into place. Attach the first runner on the underside of the base with a single screw, then use a carpenter’s square to align the runner square to the edge of the plywood. Hold it tightly in position as you countersink and drive a second screw at the other end of the runner, securing it in place. I’ve found that two or three screws are usually sufficient for each runner. | 6. When making the first saw cut into a new fence, carefully check the tablesaw to make sure that the blade is at the correct angle, 90 degrees for a common crosscut sled or 45 degrees for a miter sled.
While most tablesaws have blades that tilt to the left, sleds can also be made for saws whose blades tilt to the right. To make one for miter cuts on a right-tilt saw, position the longer part of the fence to the left rather than to the right and simply make your first cuts on the right side and keep the stop block on the left.
|
 |
Groove the Sides to Fit the Bottom
1. Set the blade height at 3/16 in. and set the fence so that there is about 3/16 in. between the blade and fence. Then make a cut on the top and bottom inside edge of the front, back, and sides. (Remember that you’re making two boxes and will cut them apart after assembly.) Use a push stick to guide the wood safely through the cut. A
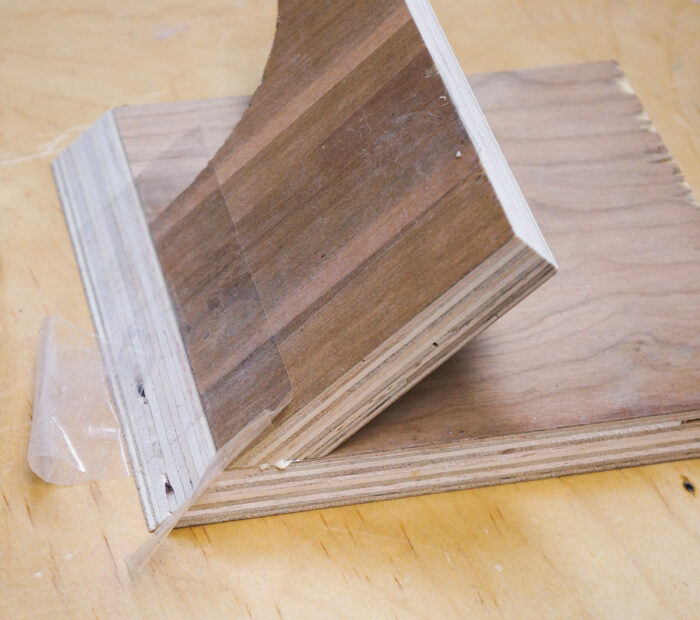
2. Cutting the hidden spline slots at the ends of the miters requires a special jig (see the sidebar) to hold the stock at a 45-degree angle as it travels over the bit in the router table. This simple, easy-to-make device allows the workpiece to be clamped tightly in place as the jig slides between stops, creating a groove for a spline to fit that is invisible on the outside of the box. Here, we are making two boxes at the same time; the wider stock offers more surface area for clamping and for riding flush with the surface of the router table. (Not only is it a nice thing to make two boxes at the same time, but it can also ease the process.)
Making a Hidden Spline JigTo rout grooves to fit hidden splines I use a simple jig to guide the parts of a box across the router table. This technique provides for a very strong, but hidden joint—hidden that is until the lid is opened and your secret craftsmanship is revealed. Using this technique allows carefully matched grain to wrap undisturbed around a box’s mitered corners.
A cutout on the front side of the base allows for a clamp to be more easily affixed when routing the ends of small parts. I made my jig from one piece of scrap 3/4-in. plywood 8 in. wide by 12 in. long. As an alternate material try MDF. |
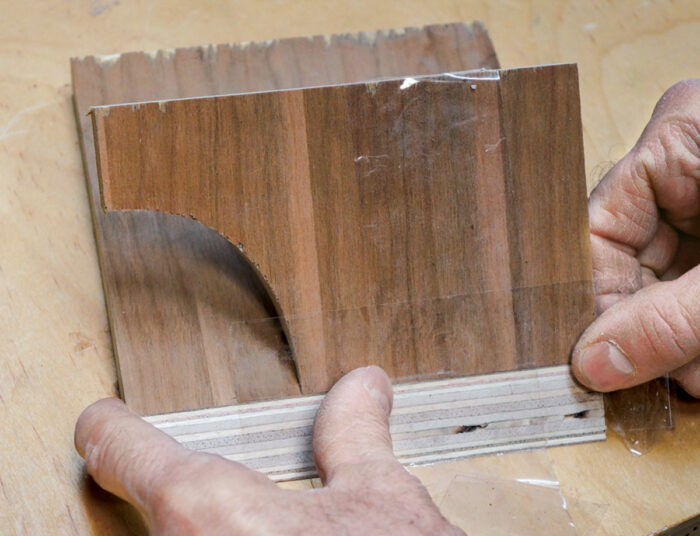
| 1. Use the miter sled to cut the plywood into two parts at a 45-degree angle, and then use the bandsaw to cut away the space for a C-clamp to fit. | 4. Allow gravity and a bit of additional tape to hold the parts together as the glue sets. After 45 minutes or so, use screws, brads, or pins to strengthen the connection between the two parts. C |
| 2. Carefully align the two parts and use tape to hold them in position. A | 5. Finally, add a guide strip to the edge of the jig to help to position the parts for routing. |
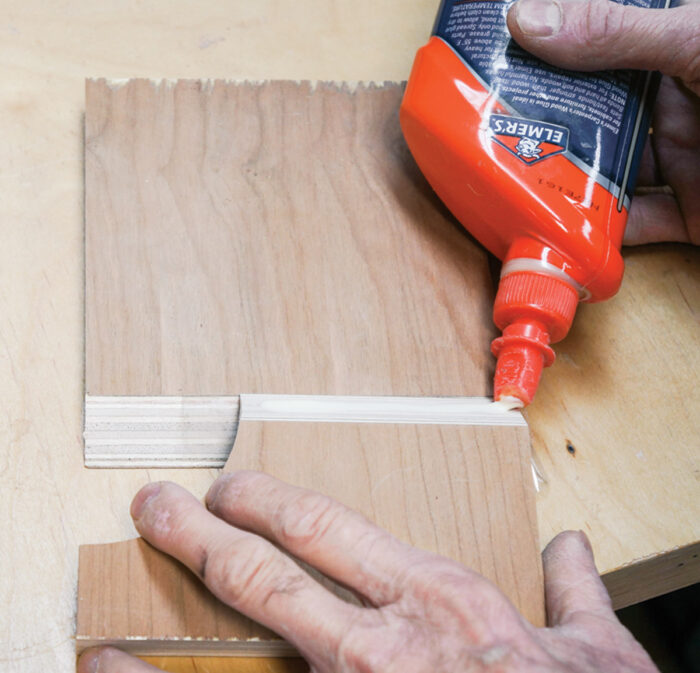
| 3. Fold back the taped joint and apply glue. B | 6. To use the jig, simply align the part to be routed so that its edge is perfectly flush with the bottom edge of the jig. Clamp the part in place and move the body of the jig between stops on the router table. |
| A
|
B
|
C
|
 |
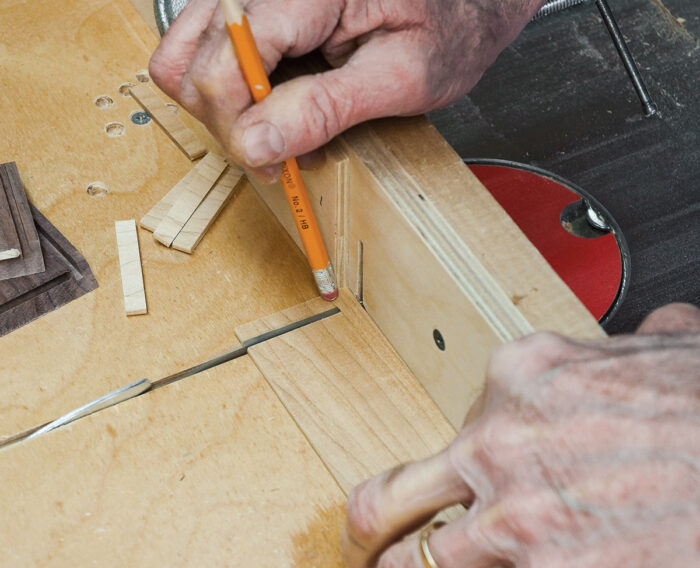
3. Put a workpiece in the jig inside out (i.e., backward) so you can observe the relationship between the grooves and the stop and start points as the jig travels along the fence. The 1/8-in. spiral cutter should be raised to a height of about 5/32 in. Adjust the stop blocks so that the groove is an equal distance from each edge and does not interfere with the grooves cut for the box bottoms. B
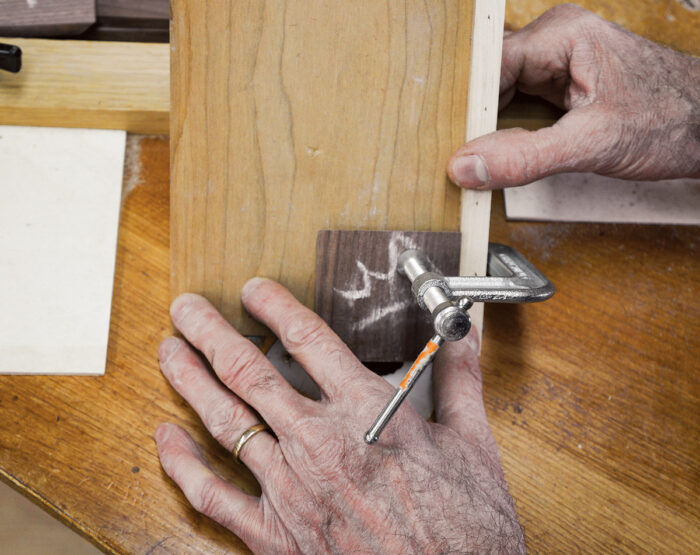
4. Mounting the workpiece in the jig requires great care to make certain that the grooves are cut precisely for perfect alignment at the corners. I put the jig down on a hard, flat surface like the surface of the router table or work bench, and hold both the workpiece and the jig tight to that same surface as I put the clamp in place and apply pressure. Check carefully after clamping to make certain that the edge of the workpiece and the bottom edge of the jig are perfectly flush. If they are not, the corners of the box may be misaligned.
5. With the workpiece clamped with the inside surface against the body of the jig, place the jig against the router table fence and hard against the stop block on the right, and lower it into the cut. C
6. Move the jig from right to left and back while holding it tight against the fence. D
The photo shows the finished groove. Note that it is offset toward the inside of the box, which actually centers it in the mitered joint. E
| A
|
| B
|

| C
|

| D
|
| E
|

Cut the splines
1. To make the hidden splines, plane the hardwood material down to a thickness to fit. I resaw stock about 3/16 in. thick and then pass it through the planer to get it to fit in the groove. Rip that stock so that the final width is slightly less than the length of the groove in the mitered ends of the box. This allows for discrepancies in the distance from the end of the grooves to the edge of the box. Use a 1/16-in.-radius roundover bit to round the edges of the hidden spline stock or simply sand the edges round with a sanding block.
2. Cut the splines to length using the crosscut sled and stop block. F Getting the length of these splines exact is important. If they are too long, they will hold the box corners apart. If they are too short, a small gap may be visible on the inside of the box. A test fit of the spline in a box corner before assembly will help to ensure that the spines are being cut the right length and prevent problems when you are ready to glue the box together.
3. Measure the insides of the grooves cut for the bottoms to fit, and then cut the bottoms to those dimensions.
4. Sand the bottoms and the inside surfaces of the box sides before assembly as you will not be able to do these things afterwards. I also use a 45-degree chamfering bit in the router table to shape the inside edge of each part (again, this is a task that cannot be done after assembly).
 Excerpted from Doug Stowe’s book, Beautiful Boxes.
Browse the Taunton Store for more books and plans for making boxes.


Log in or create an account to post a comment.
Sign up Log in