
Make a Mitered Box with a Kumiko Lid
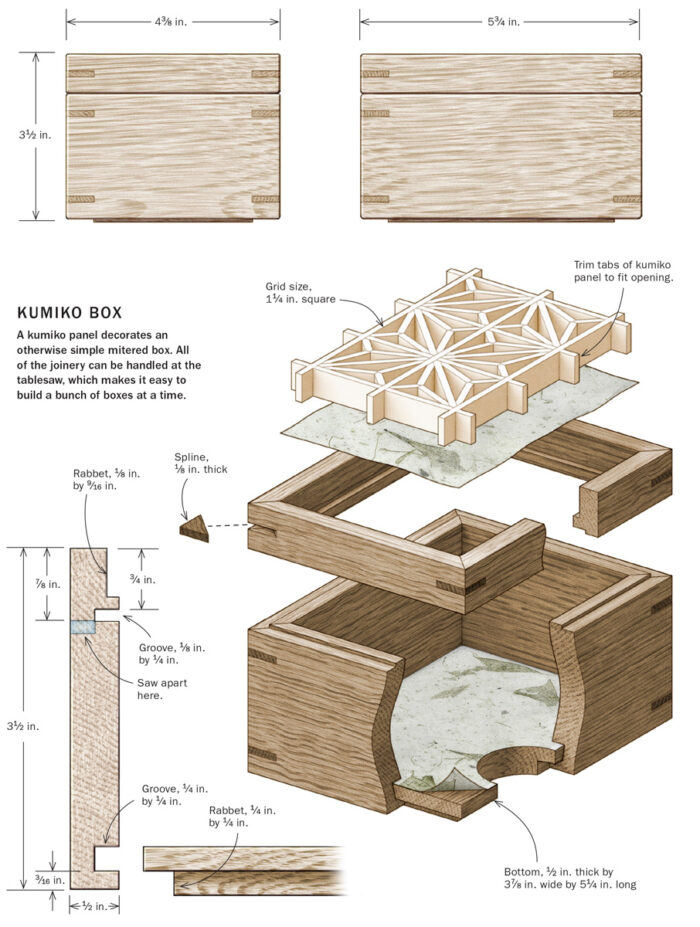
A kumiko panel decorates an otherwise simple mitered box.
 Apr 06, 2021

I’ve probably made more mitered boxes than all the other pieces I’ve made combined. One year, my wife, Rachel, was sewing some napkins and aprons to sell at holiday craft fairs. She asked if I could come up with a wood “something” to sell along with them. Trying to make anything of quality out of wood that can be sold at a relatively low price is a really hard thing to do. Dovetails were definitely out of the question, but a cutting board glued up from strips of wood or a mitered box that I could make with tablesaw joinery might get me in the ballpark. But just because it was something that I could set up to produce in quantity didn’t necessarily mean that I could knock it out without any thought. The exercise was actually a good learning experience, and it offered a valuable insight into making clean, precise work.
While my initial focus was on cranking out something fast to sell cheaply, I realized that making the boxes provided an opportunity to reach people who admire handmade work but couldn’t otherwise afford a larger piece. With that understanding, I made sure that I didn’t put in any less of an effort to do my best work on the boxes than I would on bigger projects. That said, when faced with a run of 20 or 30 boxes at a time, my focus was definitely on efficiency. I milled extra stock, and if there were any defects in a part, it went in the scrap pile without hesitation. I also focused on an economy of actions, because a savings of a few seconds per part at each stage of the process added up to a significant impact on my earnings per hour.
If I had thought about it beforehand, I would have said that such a focus would result in a consistent though not necessarily high quality of workmanship. The opposite actually turned out to be the case. Because of the repetition and the willingness to throw out anything less than perfect, the little boxes that I thought I was just banging out were incredibly clean and precise and had the level of workmanship that I would wish on all of my work. One warning though: Once you start to make boxes like these and sell them, you will have unending requests to make more. Every friend and family member that owns a box and is looking for a special gift or house-warming present will give you a call. Don’t even get me started on cutting boards….

The notion that because boxes are small they’re a good way to use up scraps falls flat when you’re faced with making them in quantity. Stock prep is incredibly important for the rest of the process to go smoothly. Even if you’re making only a box or two, it pays to mill up a bunch of stock for the box sides. Once you have, you can knock out a box at another time pretty quickly. Remember those last-minute gift requests?
The good thing about a mitered box is that all of the machining can be done prior to cutting the miters, so the work goes fast. To cut the miters, I made a simple sled for the tablesaw equipped with a pair of hinged stop blocks (see “Grooves, then Miters” below). This allowed me to cut the sides and ends in sequence—long, short, long, short—so that the grain continued uninterrupted from side to side. Dialing in the miter is crucial, and the best way to do it is to miter four pieces, run a strip of tape across the backs, and wrap them together to see if the final joint closes. Take your time to get it right before cutting into your good stock.

The style of box I make and teach now has a kumiko panel that drops into a rabbet along the top edge of the box. It also has a built-in lip so the top and bottom register to one another when closed. I create the lip by cutting a groove halfway through the stock on the inside face before mitering and glue-up. When sawing off the lid, I again set the blade to cut halfway and adjust the fence so the groove on the outside is offset lower than the groove on the inside face. Once the lid is sawn off, the lips are created automatically.
Before cutting off the lid, however, I cut slots on the corners of the box for splines. The splines reinforce the miter joints and add a little interest to the box. I use a simple jig that holds the box at 45° to cut the slots at the tablesaw. A flat-top blade leaves a square bottom for the spline to fit into.
The bottom of the box is rabbeted to fit into a groove in the sides. A nice touch is to line the bottom with handmade paper before gluing it in place. I also place paper into the rabbet in the lid before dropping the kumiko panel in place.
Cut the Grooves, then the Miters
The great thing about making a mitered box is that you can run grooves and rabbets and such while the parts are still long. For this box, there’s a groove for the bottom, a rabbet for the kumiko panel, and a second groove that will create a lip once the lid is cut off. 1 I use a simple jig that screws to my miter gauge to cut the miters. It has a hold-down and a pair of hinged stops that allow me to cut all four sides of the box without having to reposition the stops. Every time I use the jig, I slide it over just a little so that the blade cuts a fresh edge. Start by mitering one end of the stock. 2 Then position the mitered end against a stop and miter the opposite end. 3
1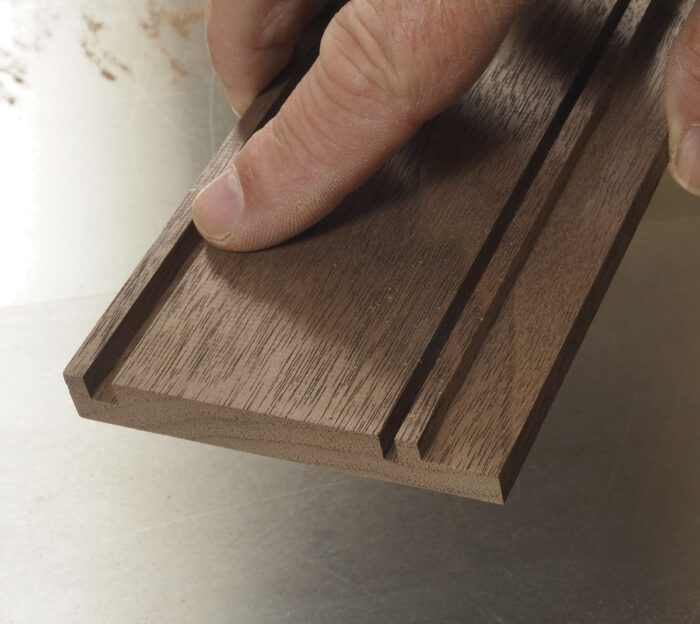 |
2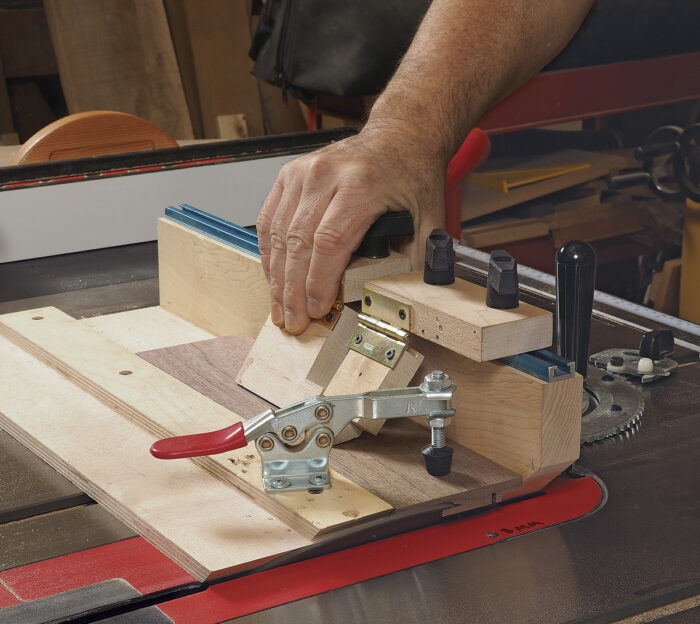 |
3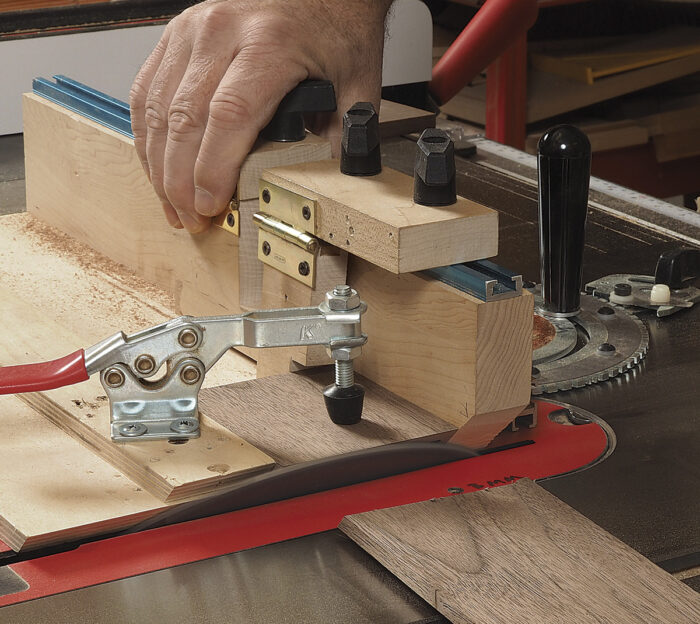 |

Glue and Spline the Box
I like to line the bottom of the box with handmade paper. You can find a variety of colors at most art supply stores. It’s easiest to spray the box bottom with a light mist of adhesive, drop it onto the paper, and trim around it. 1 The next step is to glue up the box with the bottom in place. Wipe a thin coat of shellac on the inside faces to prevent glue squeeze-out from sticking. Arrange the sides in order on the bench and stretch tape across them. Flip them over and roll everything up with the bottom in place to make sure it fits. 2 Unroll the sides and glue the miters for final assembly. Be sure to pull the tape tight to avoid gaps at the last corner. 3
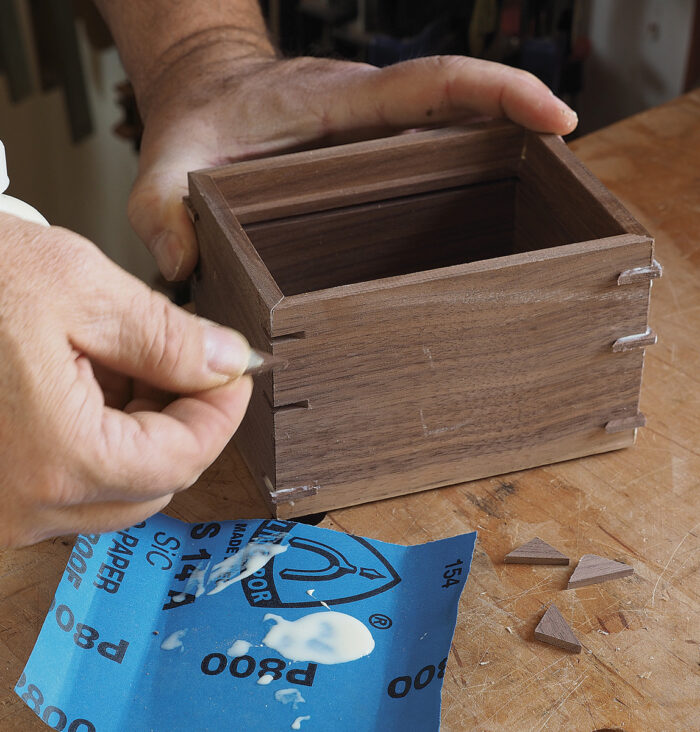
Once the glue is dry, I use a jig that supports the box at 45° to cut slots for splines at the tablesaw. 4 The blade height will determine the length of the slots on the box sides. Be sure not to cut through to the inside of the box when cutting the slots. Then glue splines into the slots. 5 When the glue is dry, I use a stationary belt sander to sand everything flush.
1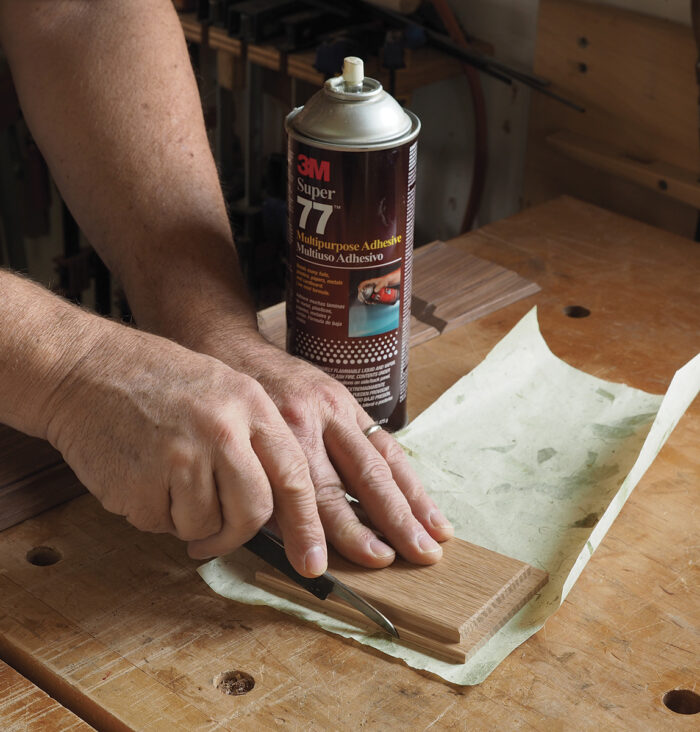 |
2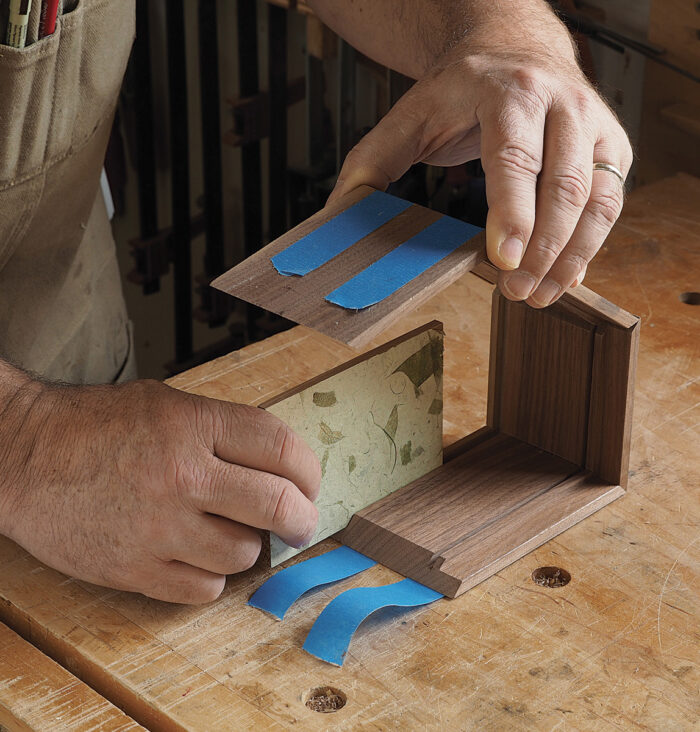 |
3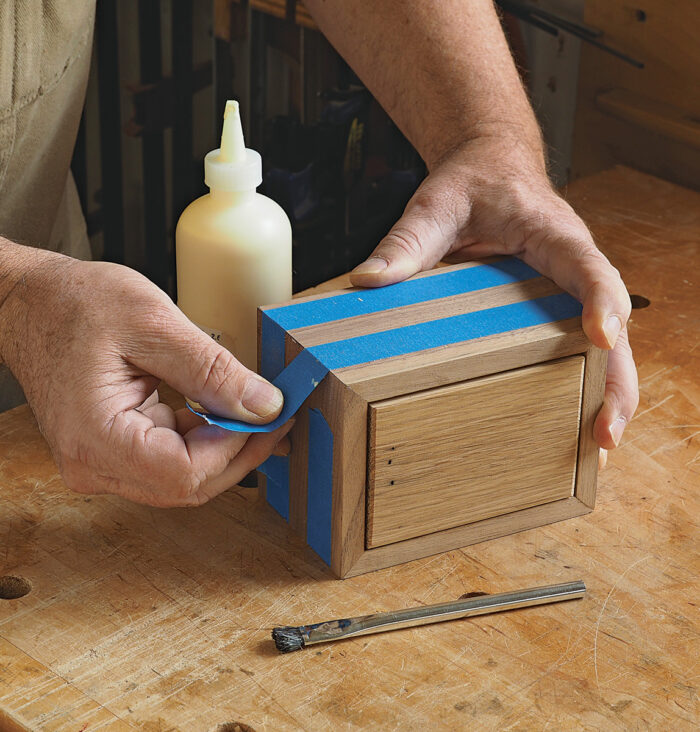 |
4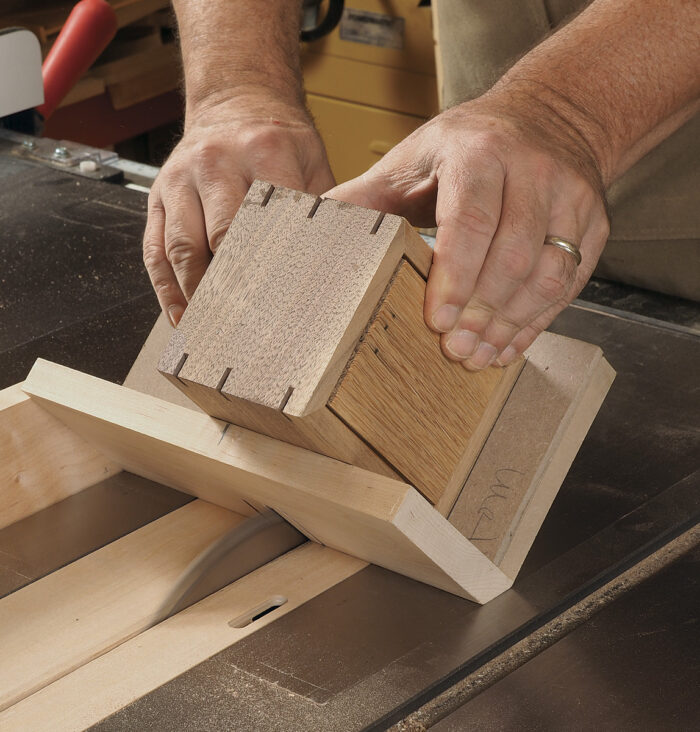 |
| 5
|
Saw Off the Lid and Add the Panel
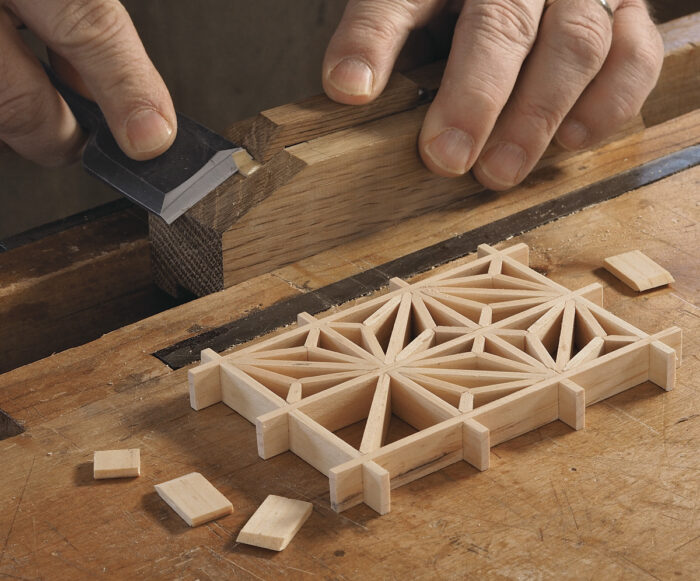
To saw off the lid, set the blade to half the thickness of the stock and offset it a blade’s width down from the slot on the inside of the box. Save an offcut to help with setup. Start with the ends when cutting, making sure to keep the box against the fence. 1 The joint will need a little cleanup, but the saw will give you a good head start. 2 I like to drop paper onto the rabbet before installing the panel. 3 Trim the ends of the kumiko panel to fit the rabbet. 4 I like a snug fit, but if it’s a little loose, a drop of glue at each tab will hold it in place.
1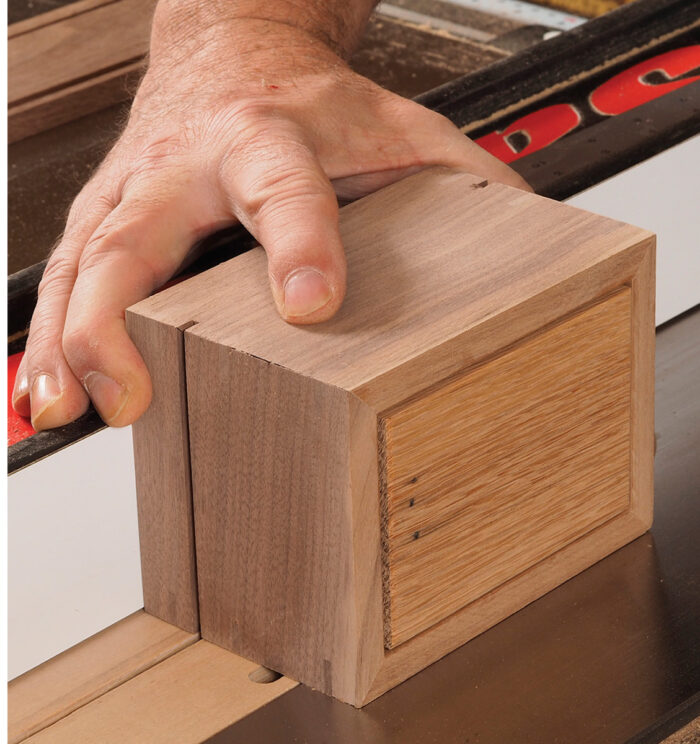 |
2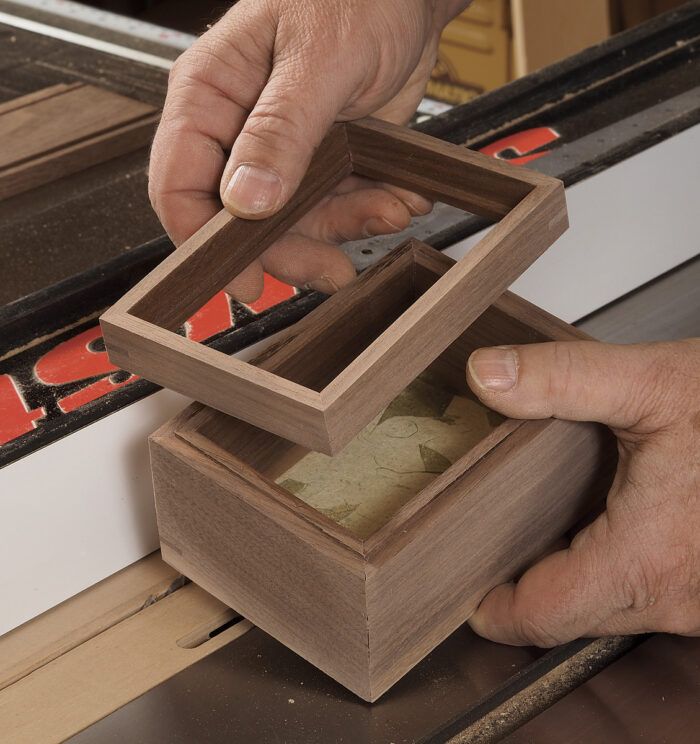 |
3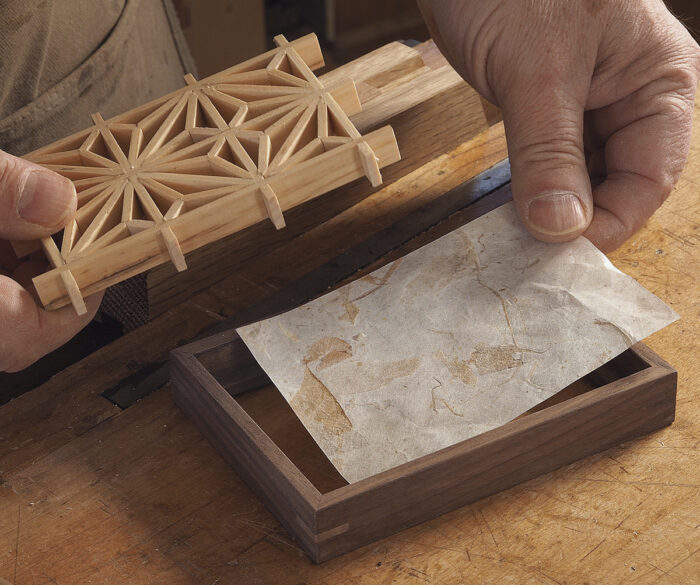 |
4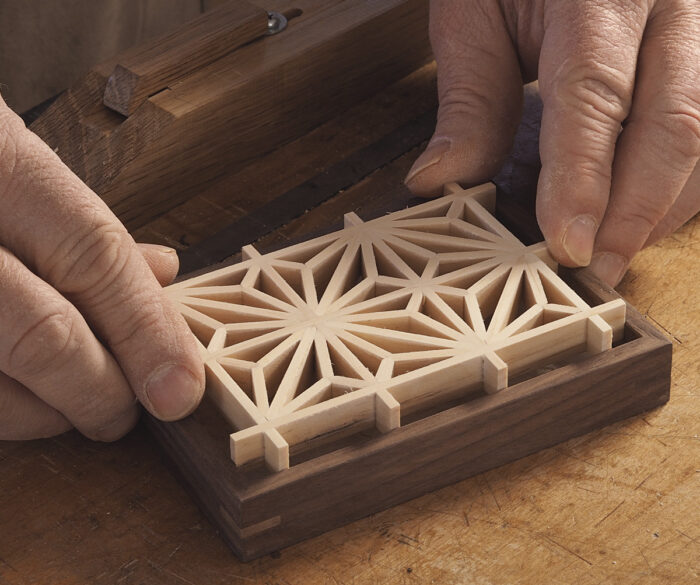 |
 Excerpted from Michael Pekovich’s book, The Why & How of Woodworking.
Browse the Taunton Store for more books and plans for making boxes.


Log in or create an account to post a comment.
Sign up Log in