
Little Box with a Leather Lid
This unique rustic treasure box is a fun weekend project.
 Apr 06, 2021

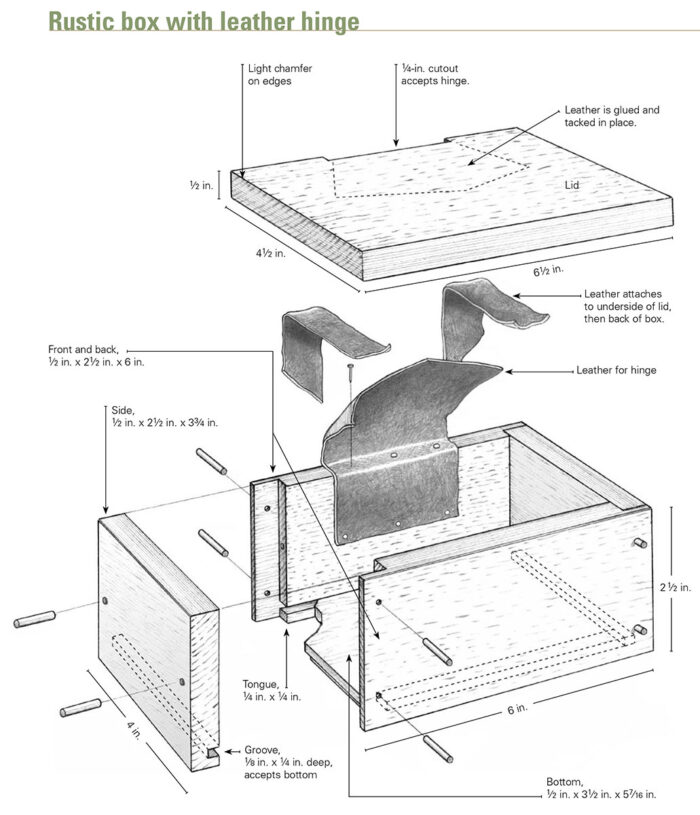
Rabbeted corners make this box easy to assemble, and the floating bottom panel all but assures that the box will go together square. Reinforcing the rabbeted corners with dowels strengthens the joinery—you can expect this box to be around for generations. But perhaps my favorite part of this box is the leather hinge. The leather hinge on this box is perfectly in keeping with its rustic character, and its design is based on the type of intertwined hinge that is used in making a once-common child’s toy, the “Jacob’s Ladder.”
Made of white oak, this rustic box is held together using simple rabbet joints that are reinforced with small dowels. The leather hinge is made from three interlocking pieces of scrap leather that are cut, glued, and nailed in place. The hinge also provides a built-in stop at 90°.

Cut the Parts to Size
The most important thing in cutting the parts to size is that opposite sides of the box match in length. To achieve this level of precision, use a crosscut sled with a stop block clamped in place. If you don’t already have a crosscut sled, it’s worth investing the small amount of time it takes to make one.
1. At the tablesaw, use a crosscut sled to square one end of each piece of stock. Even if the stock was cut square prior to planing and jointing, these simple operations may have altered the stock enough to require squaring the end again. A little insurance never hurts.
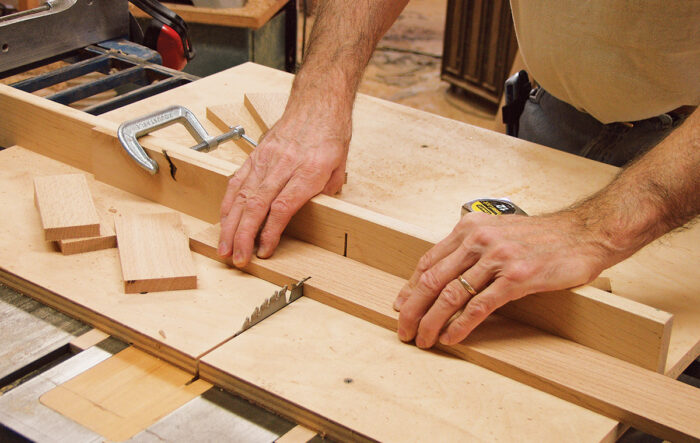
2. Measure and mark the length of the long sides (the front and back) on your crosscut sled, then clamp a stop block in place at that mark. Though you cut the front and back one at a time, using a stop block assures that both cuts will match perfectly. A
3. After cutting the front and back, change the location of the stop block to cut the shorter ends.
| A
|
Cut the Corner Joints
Cutting the rabbeted joint requires only two steps on the tablesaw. The first cut is made with the stock laying flat on the sled, and the second cut is made with the stock standing on end with one face against the fence.
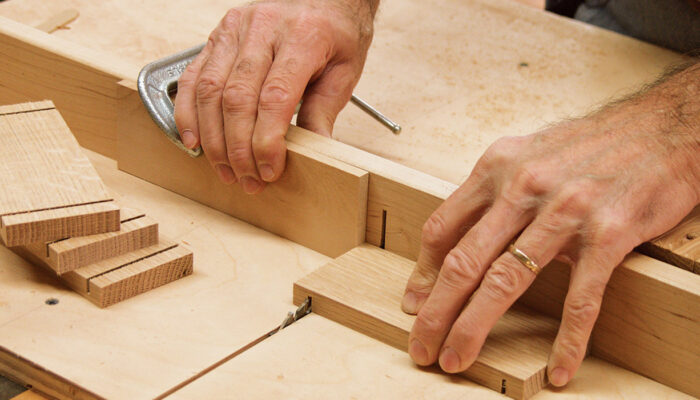
1. Raise the blade on the tablesaw 3/8 in. above the base of the sled. Because your stock is 1/2 in. thick, this will leave 1/8 in. of the stock uncut. If you’ve got scrap of the same thickness, it’s a good idea to make a test cut.
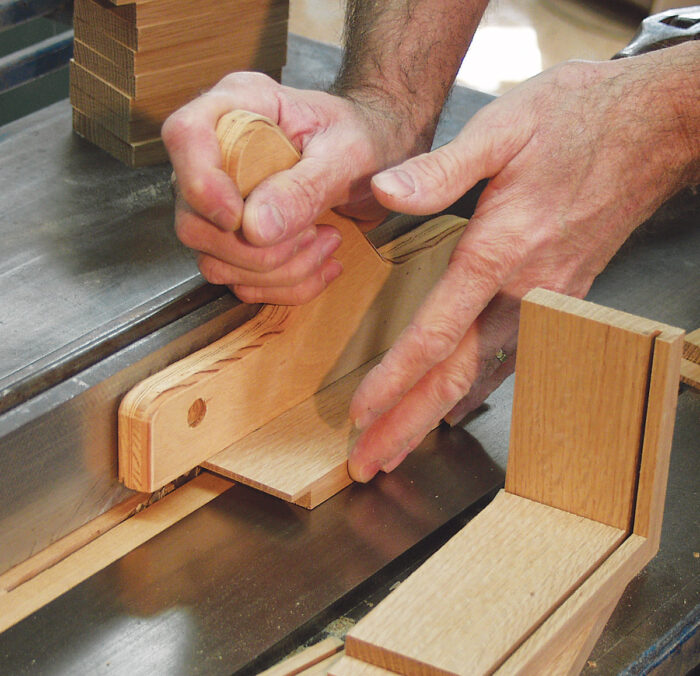
2. Adjust the stop block on the sled so that the distance from the stop block to the far side of the blade is a hair thicker than the stock you’re cutting. This will provide for a small lip to be sanded away after assembly. Once you’re satisfied with the results on your test piece, cut both the front and back of the box with the stock laying flat on the sled. A
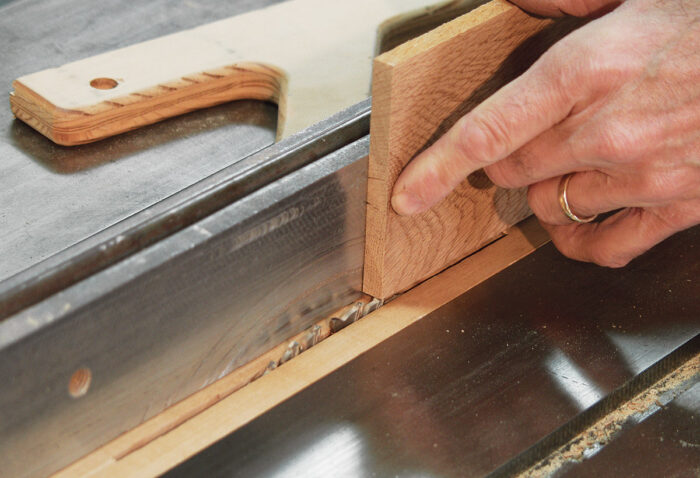
3. To finish forming the rabbet, start by removing the sled, setting the blade height to 1/2 in., and adjusting the space between the blade and fence to 1/8 in. Once the settings are dialed in, guide your stock—on edge and against the fence—through the blade. For safety, be sure you have a zero-clearance insert in place on your tablesaw.
| A
|
Make and Fit the Bottom
Unlike plywood, solid wood expands and contracts with seasonal changes in humidity. Beginning woodworkers often try to deny this fact, but you’ll be better off once you learn to accept it and then design around it. The floating bottom of this box is designed to expand and contract freely without breaking open the corner joints of the box. Tongues cut on the edges of the bottom fit into the grooves on the sides of the box, and the bottom is sized to allow for a small amount of expansion.
1. Set the saw fence so that the distance between the fence and the outside of the blade is equal to the thickness of the box bottom. For results that are more precise than you’ll get from a ruler or tape measure, hold the bottom on edge and against the fence. Align the edge of the stock with the outside of the blade, then lock the fence in position. For safety, be sure to install a zero clearance insert. A
2. Lower the blade height to cut only a hair over 1/4 in. above the surface of the tablesaw. With the stock laying flat on the saw, cut a groove in the front, back, and ends of the box. Once the box is assembled, the groove that houses the bottom panel will be hidden from view by the overlap for the rabbet joint at the corners of the box. B
3. Check the actual dimensions of the interior of the box, then rip and crosscut the bottom to size. When calculating the dimensions of the bottom, don’t forget to add the depth of the grooves on each side. To allow for wood expansion during humid conditions, cut the bottom panel about 1/64 in. shorter in length and about 1/32 in. narrower than the actual measurements. I rip the stock to width using the rip fence, then use a sled outfitted with a stop block to cut the length. C
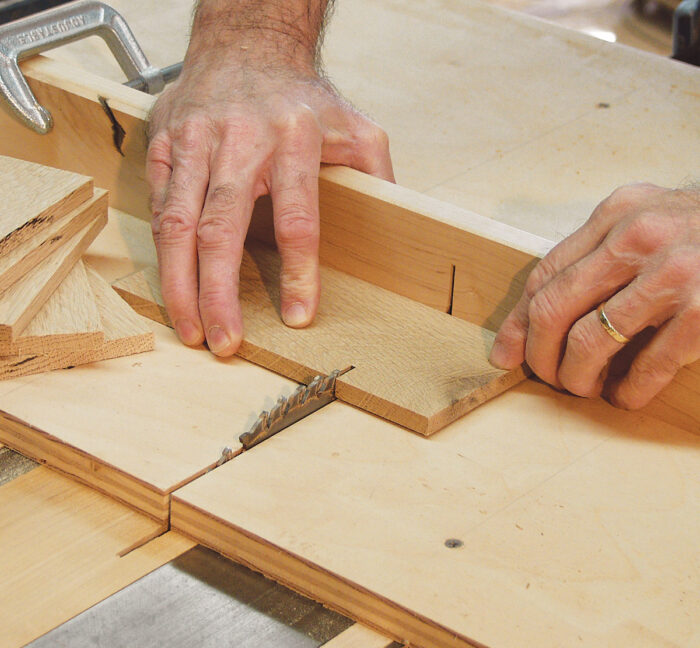
4. To cut the tongue on the bottom, install a dado blade set to 1/4 in. wide. Raise the blade to 1/4 in. and cut the tongues with the stock held flat against the table. Cut the end grain first. Cutting across end grain usually results in tearout, so cutting the side grain last will clean up the cut.
| A
|
| B
|
| C
|
Assemble the Box
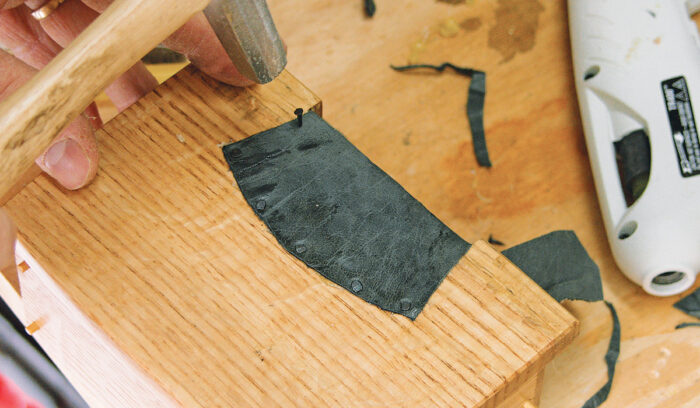
It is much easier to sand the interior surfaces of the box before you put it together. Prior to assembly, you’ll also need to attach the leather hinge to the inner face at the back of the box. The leather hinge consists of three parts: A large center piece attaches to the inside of the back and stretches over the back of the lid and onto the top, and two side strips stretch from the inside of the lid to the back of the box. At this point, you only need to attach the center piece to the inside back of the box. The side strips will be added later. There are no exact requirements for the shape of the leather except that the edges where it passes through the back of the box need to be straight. Refer to the drawing (“Rustic bx with leather hinge”) for details, then cut the leather using scissors. Center the leather on the inside of the back of the box. Once the hinge is in place, you’re ready to assemble the box. Start by gluing up the box, then add reinforcing dowels to the corner joints after the glue has cured.
1. Spread hot-melt glue on the leather and then use tacks to hold it securely in place. If you use copper tacks, which bend easily, you’ll find it helpful to predrill before driving the tacks in place. Regular steel tacks are much easier to drive into most hardwoods. A
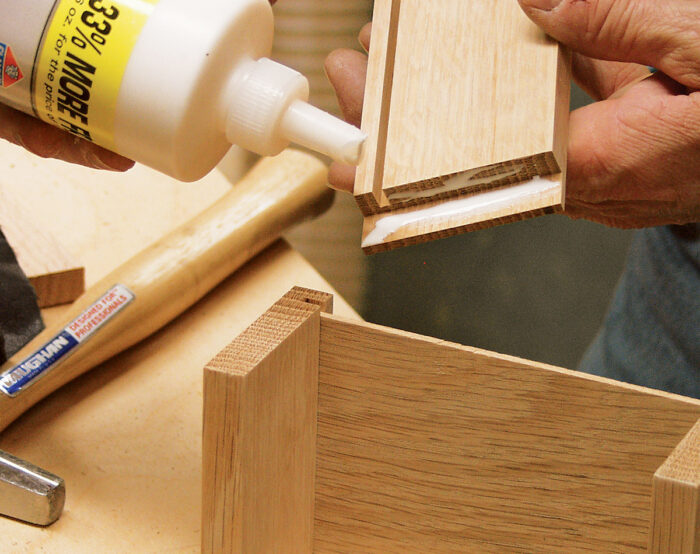
2. The box should go together easily. Begin by spreading yellow glue in each of the four rabbets. Use a little extra glue on the end grain. No glue is required on the bottom, as it should be allowed to float freely in response to changes in humidity. If you wish, a dab of glue at the center on each end of the panel can be used to keep the bottom centered in the box. Glue one end to one long side, slip the bottom in place, and then add the other end and side. B
3. Use rubber bands to hold the box together as the glue dries. Apply enough rubber bands to make sure the joints all close up across their length. You really can’t use too many rubber bands—additional bands only add to the clamping pressure. Before the glue sets, be sure to check to see that the box is square: Measure corner to corner across both diagonals and make adjustments until the measurements are the same. To make adjustments, simply give the box a squeeze across the long diagonal and check again. C
| A
|
| B
|
| C
|
Add a Lid
The lid of this box is cut from a solid piece of quartersawn stock. Quartersawn material is much less prone to warping because its expansion and contraction tends to be uniform across the grain. For this reason, quartersawn material is almost always the best choice for solid wood lids. By making the lid large enough to overhang all four sides of the box, the lid has a positive stop in the open position. A shallow relief cut across the back allows clearance for attaching the hinge.
1. Place the lid in position on the box, then mark the location of the leather hinge on the rear edge of the lid.
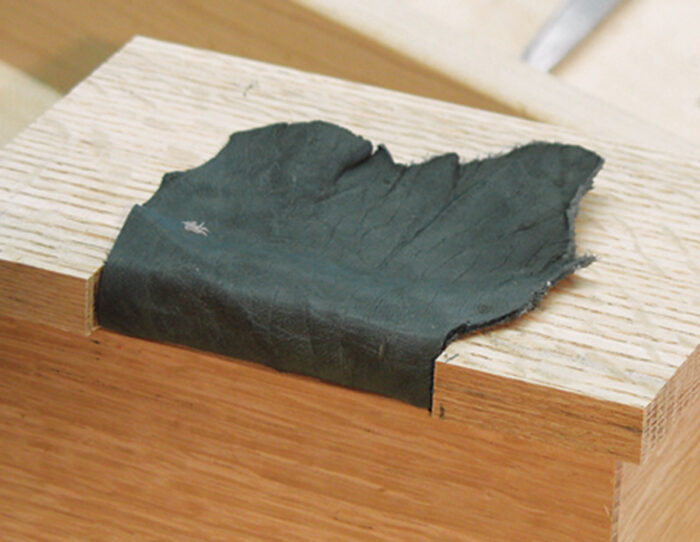
2. Raise the tablesaw blade to cut 1/4 in. above the surface of the sled, then make a series of cuts through the edge of the lid stock where the hinge will sit. A Aim for a flat cut across the back of the box. Note in photo B how the leather fits snugly in the relief cut into the back of the lid.
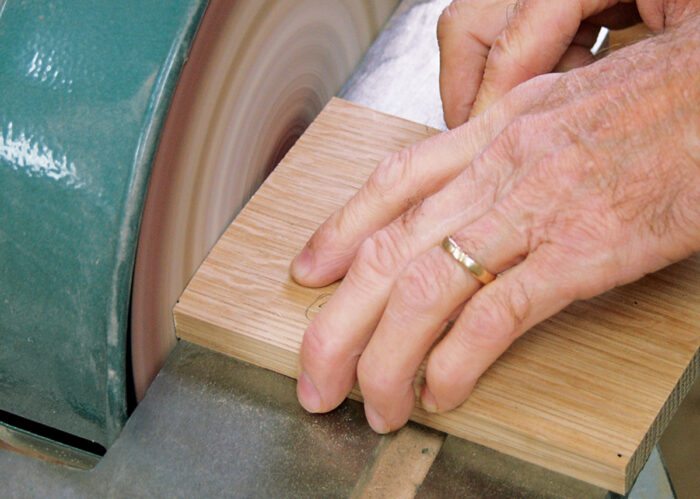
3. Gently shape the front edge of the lid using a sanding disk. Mark a guide point 1/8 in. in from each of the front corners and sand lightly from the center to the guide points. C This will give the treasure box a subtle curve that is in keeping with the curves inherent in the leather.
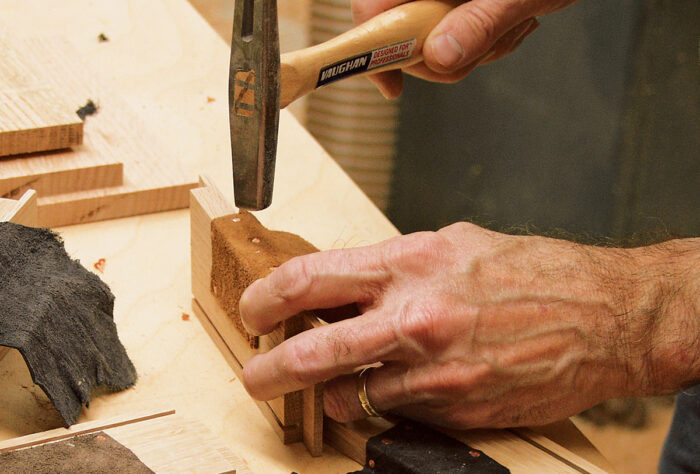
Work SmartIt is difficult to hold very small parts with adult fingers. Use needle-nose pliers to hold small parts in position, then tap them into place. If you’re concerned that you’ll damage the part, use a short dowel to cushion the hammer blows as you drive it into place. |
| A
|

| B
|
| C
|
Prepare for Final Assembly
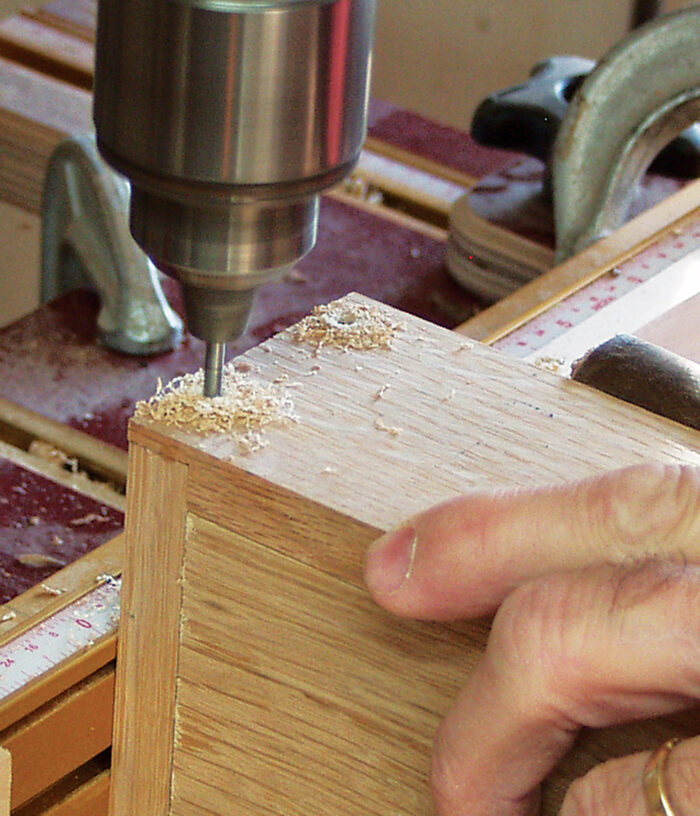
Use the drill press to predrill holes for the dowels used to strengthen the corners. Drill into the ends of the box first, then adjust the table on the drill press to drill into the fronts and backs of the rabbeted corners. Drill to a depth of about 3/4 in. If you’re careful in setting the depth, you’ll be able to cut all the dowels to a uniform length. A
1. Chamfer the bottom of the box using a 45-degree chamfering bit on the router table. Rout a light chamfer on the upper and lower edges of the lid as well.
2. Sand the lid and the outside of the box. Using an inverted orbital sander saves time and muscles, but hand-sanding will work as well. B
3. Cut the dowels to length and lightly sand their ends. Use light taps to hammer the dowels into the holes you drilled at the box corners. If the dowels fit well, there is no need to glue them in place.
4. It’s easiest to finish this box before the hinge is installed on the lid. I apply two or three coats of Danish oil, rubbing the finish out between coats and building to a very slight gloss.
| A
|
| B
|

Attach the Hinge
Use scissors to cut leather strips to fit the underside of the lid. Trim the portion of the hinge you already attached to the inside of the box, or leave it free-form for an even more rustic look.
1. To attach the hinge straps that pass from under the lid to the back of the box, use clear construction adhesive and clamps or hot-melt glue. Hot-melt glue is my preference. If the hot-melt glue cools too quickly, use an iron to give the glue additional spread. Then use tacks to secure the straps to the inside of the box lid. A
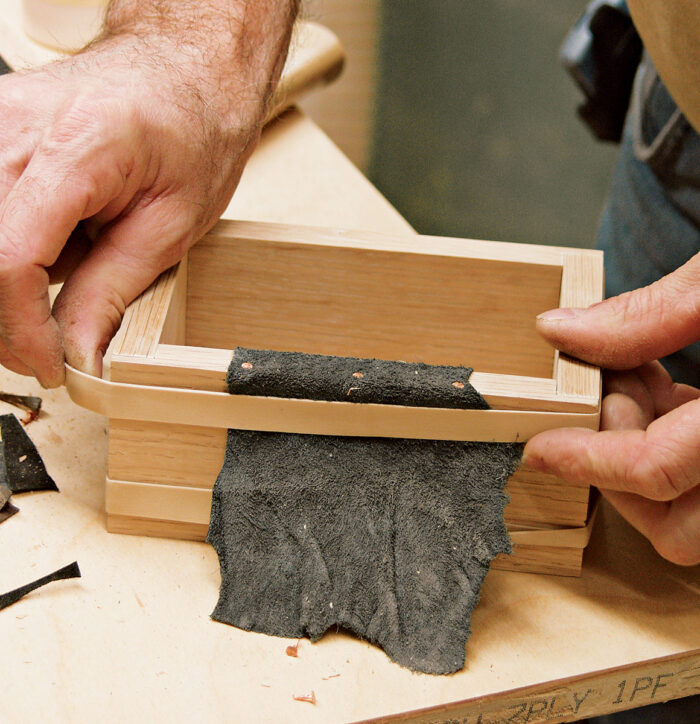
2. Pull the leather tight into position from inside the box and glue it to the top of the lid. Then use tacks to secure it in place. B
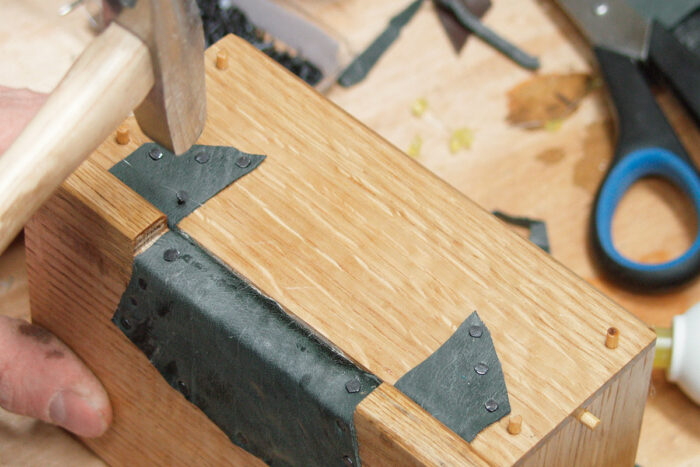
3. Pull the leather strips from the underside of the lid to the back of the box. Trim the leather straps at the back of the box to an interesting shape, then pull them tight and glue and tack them in place. C
4. For a little insurance, add tacks across the back edge of the lid. Be neat in your arrangement of the tacks so that their placement looks both intentional and decorative. A well-applied leather hinge not only looks good, but will also last a long time. Because the back of the lid overhangs the back of the box, the lid also has a built-in 90-degree stop.
| A
|

| B
|
| C
|
 Excerpted from Doug Stowe’s book, Basic Box Making.
Browse the Taunton Store for more books and plans for making boxes.


Log in or create an account to post a comment.
Sign up Log in