Skip to content
Fine Woodworking
Main Menu
Subscribe
GET THE MAGAZINE & MORE
Magazine Cover
  • Save 69% off the cover price
  • Or, get everything with UNLIMITED, including 40+ years of the online archive.
Subscribe Now!
Subscribe
  • Projects & Plans
  • How-To
  • Shop Tips
  • Tools & Materials
  • Videos
  • Magazine
  • Video Workshops
  • Members
  • Forum
  • Gallery
  • Blogs
  • More
    • Log In
    • Join
    Fine Woodworking Main Menu Subscribe
    How-To

    How to chainsaw a bowl blank from a tree

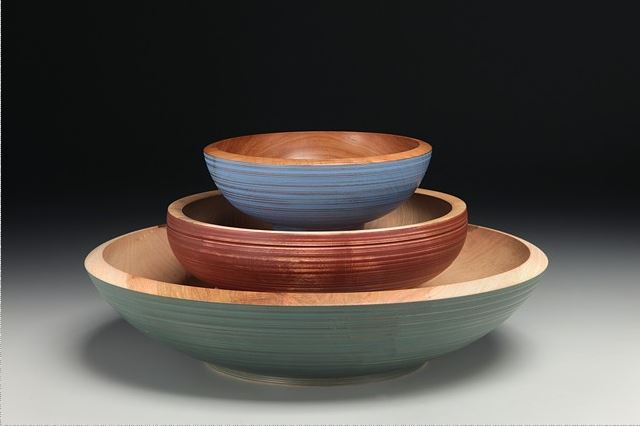
    Mark Gardner's lathe-turned bowls begin with a green log and finesse with a chainsaw.

    Oct 26, 2020
    Article Image

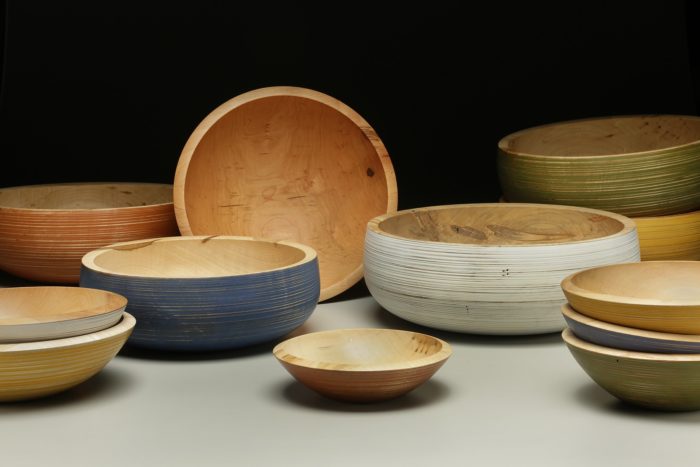
    “A chainsaw is a crude tool,” Mark Gardner says, yet his elegant turned bowls begin with chainsaw work, and his finesse with a chainsaw nearly matches his mastery on the lathe. This photo essay illustrates his well-thought-out method for sawing blanks for large bowls from a green log.


    Local logs. Gardner, who lives in the small town of Saluda in western North Carolina, buys hardwood logs in local species like maple, cherry, and ash. He looks for logs that are relatively straight and clear of limbs. When he finds a good log, his first move is to square up one end. He’ll cut a 3-in. slice off the end of the log to produce a fresh face. If the end still shows surface checks, he’ll keep taking slices until he has a clean face.


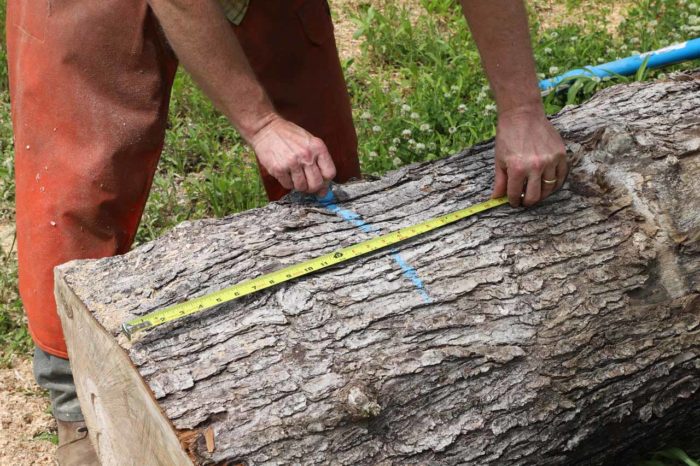
    Chalk it to length. Planning here to make bowls that are 14 in. dia., Gardner gives himself an extra inch, marking the billet at 15 in. He makes the mark with sidewalk chalk, which he pilfered from his children years ago and would never give back—it’s too good for drawing lines on logs. It produces a bold line without crumbling. The blue, especially, shows up beautifully. Sorry, kids.


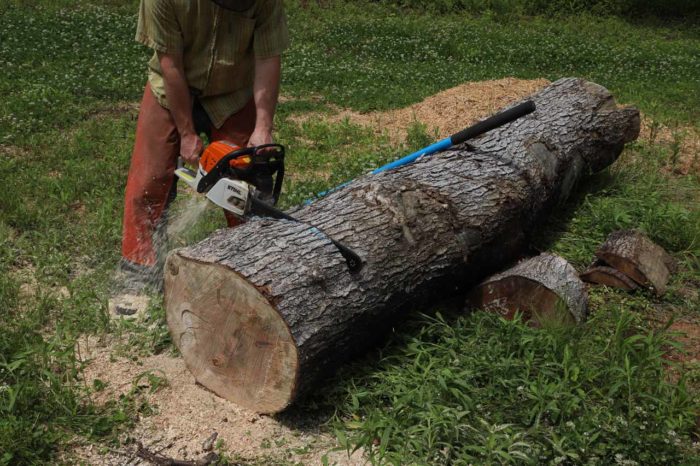
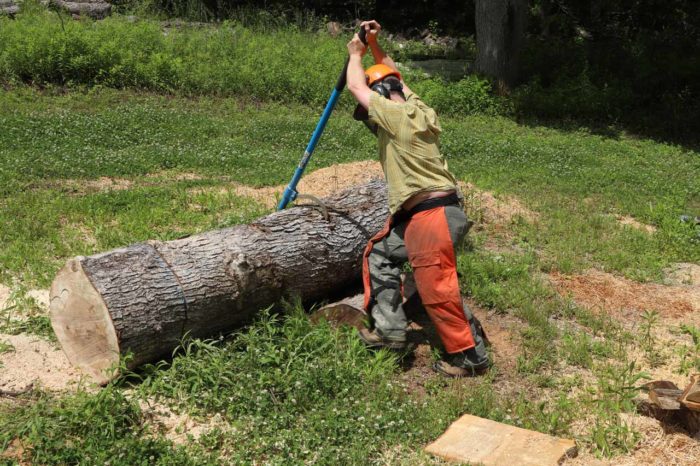
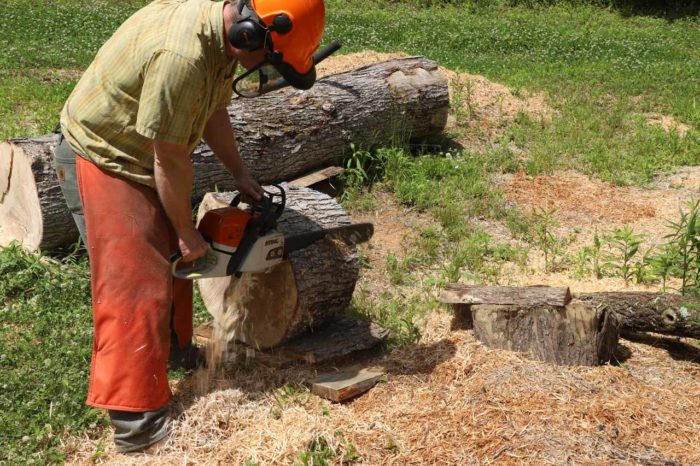
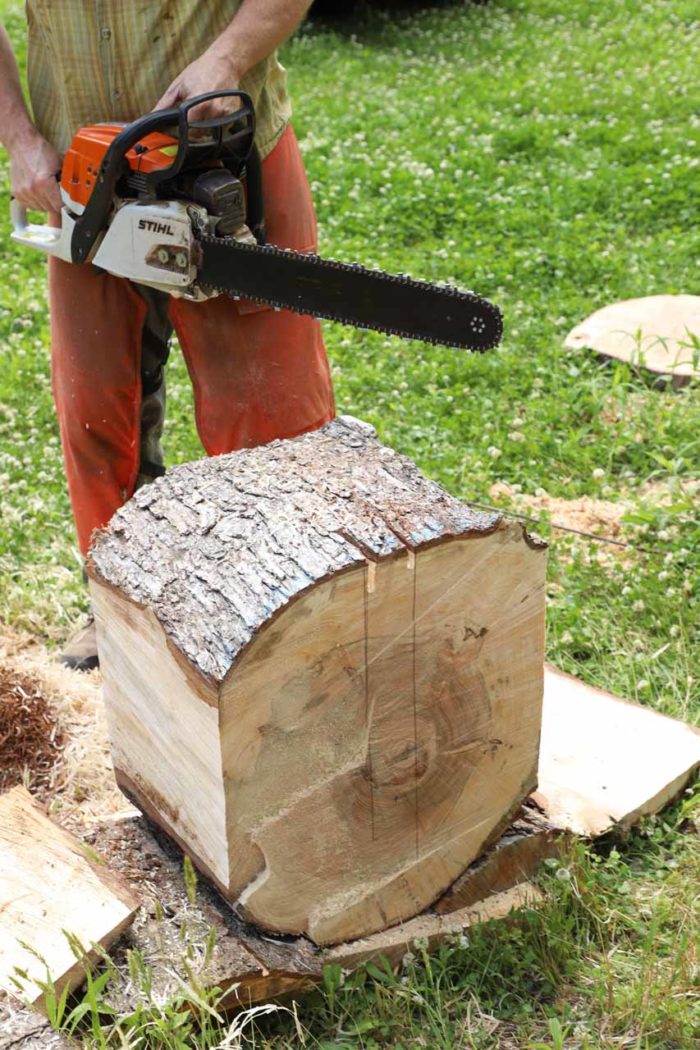
    Beginning the billet. Using a saw with a 20-in. bar, Gardner starts the crosscut at the top and carries it about halfway through the log.


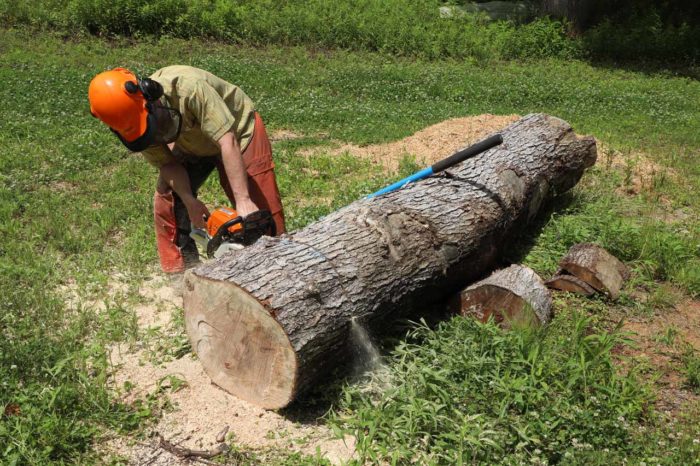
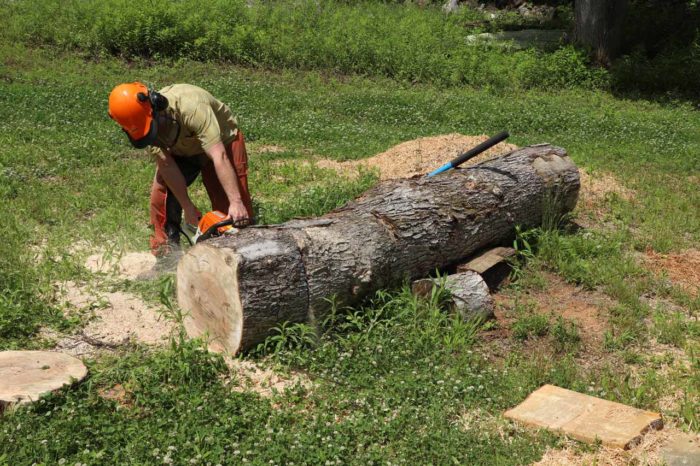
    Straight and safe. To achieve a nice flat crosscut, Gardner embeds the saw’s bumper spikes into the bark and cuts with a pivoting action rather than keeping the bar horizontal while cutting downward. For safety, in addition to a hard hat with ear protectors and a screen-style face shield, Gardner wears protective chainsawing chaps and steel-toed boots.


    Rotate and repeat. To complete the crosscut, Gardner rolls the log over with a cant hook. When he has it where he wants it, he kicks a cutoff underneath as a chock to hold it in place. The cant hook is a very powerful tool; he’s rolled logs with it that measure up to 48 in. dia. and weigh thousands of pounds.


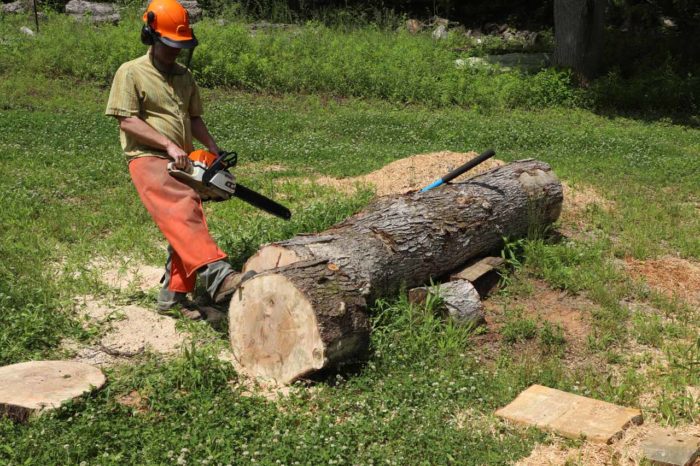
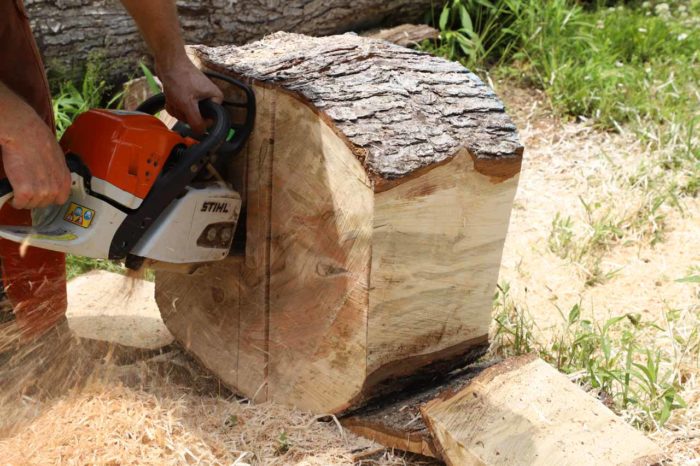
    Cutting upward. With the log rolled 180°, he inserts the bar into the kerf from the first half of the cut and saws upward to finish the cut. It’s a little more work to cut upward, without gravity helping exert pressure, but following the kerf makes for a clean and flat sawn surface. He could have skipped rolling the log and just cut straight through it from above, working from both sides of the log; but in that case he would wind up sawing into dirt, which quickly dulls all the teeth on the chain—it can actually be worse than hitting a nail or a rock, which only dulls a couple of teeth.


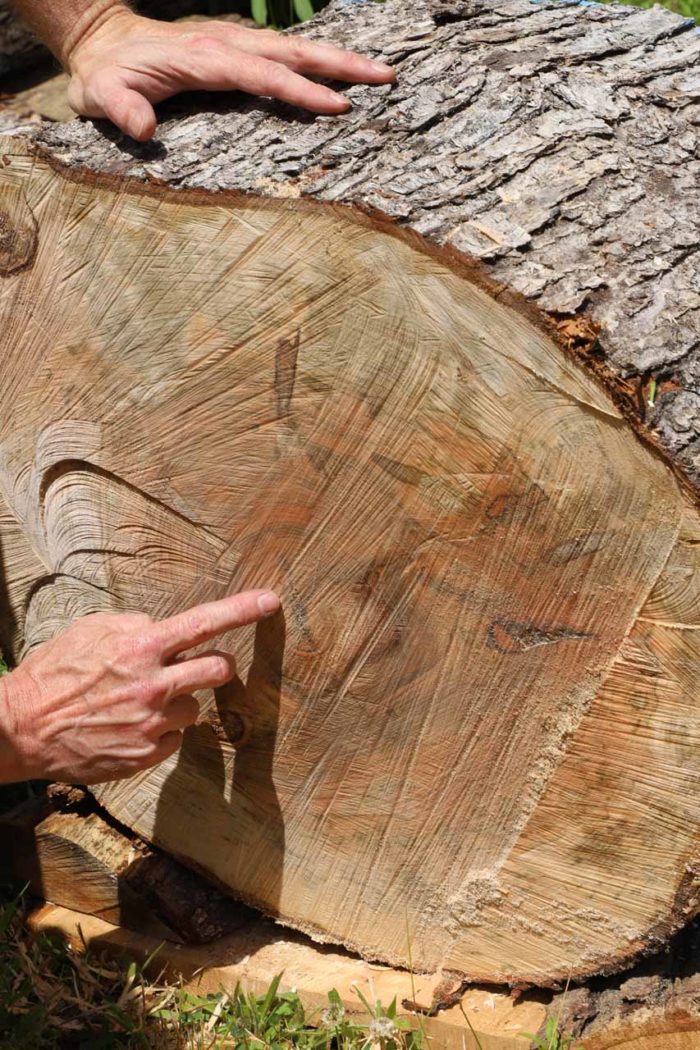
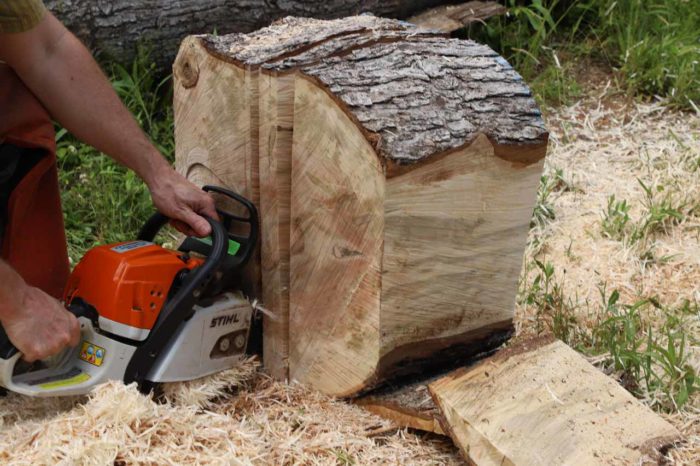
    Sussing out the main split. Most logs will have a check at the pith; Gardner takes note of just where it is on both ends of the billet and lays out his bowl blanks to avoid it. He elevates the billet on a short sacrificial plank that keeps the saw from cutting into the ground; and he chocks the billet with cutoffs to stabilize it.


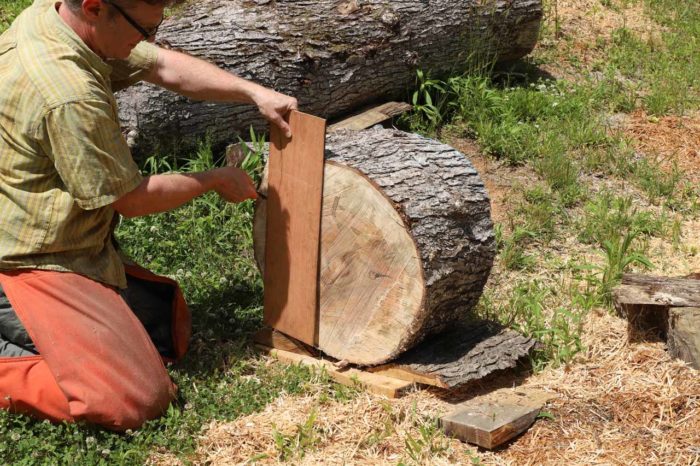
    A template on the trunk. A scrap of 1/4-in. plywood serves as a template for laying out the bowl blanks. Here, for some large calabash-style bowls, the template is 7 in. wide.


    Space out your blanks. It’s important to avoid the pith, which can be checked and punky, so Gardner lays out the blanks with several inches of waste between them. The layout lines nearest the pith represent the top of the bowl, and the outer lines represent the foot.


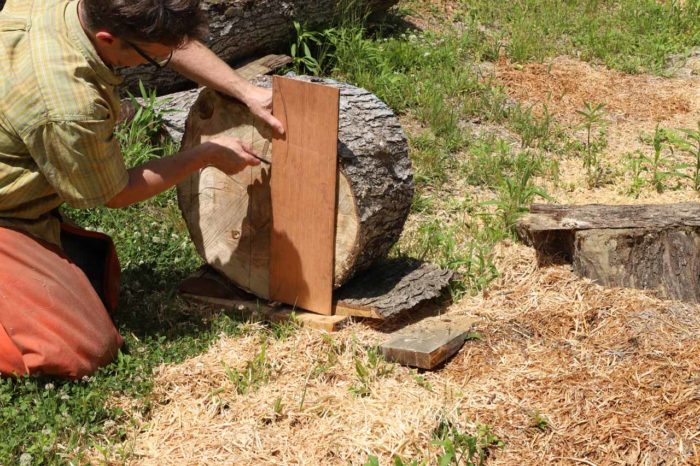
    Feet first. With both blanks laid out on the near face of the billet, Gardner cuts along the outer lines.

    Second layout. When he’s made both side cuts, he’ll transfer the blank layout to the opposite face of the billet by registering the template’s edge against the side cuts and drawing the center lines. It’s important to have the top and bottom faces of the blank parallel, and this step makes that easier to achieve.


    Guide cuts. Following his new layout lines, Gardner makes two short cuts on the far face of the billet. These help guide his cuts across the top of the billet and enable him to make parallel cuts for the top and bottom of the bowl blanks. Having the blanks’ top and bottom faces parallel will make it easier to bandsaw the blank to shape and easier to mount the blank so it’s well-balanced on the lathe.


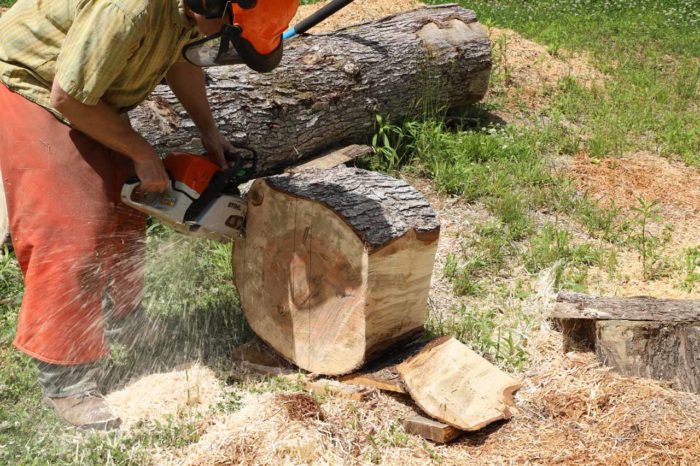
    Angled rip cuts. To make these smooth, clean cuts, it’s best to work in a see-saw fashion so the bar is angled alternately upward and downward. This will keep it from being engaged all the way across the billet, and will enable you to embed the bumper spikes and pivot the bar to gain leverage for greater power with less pressure and cut a smoother, flatter face.


    Shorten the shavings. Cutting with the bar parallel with the long-grain fibers generates long spaghetti-like shavings that can clog the exhaust port; angled cutting produces shorter shavings and less clogging action.


    Incomplete cuts down the middle. To maintain maximum stability while making both center cuts, Gardner leaves the first one an inch or so shy of finished, then makes the second cut.


    Like an open book.


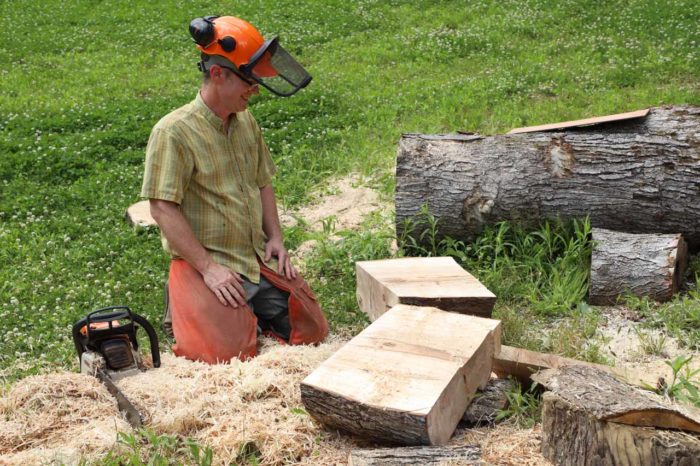
    Blanks for two bowls.


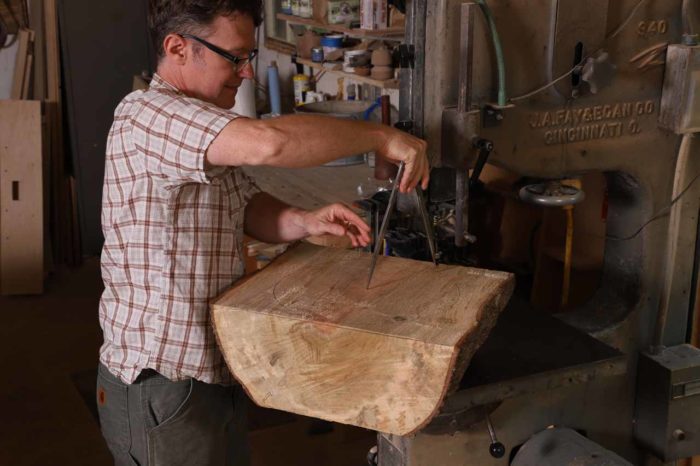
    From chainsaw to bandsaw. Once he has brought the blank inside, Gardner lays out the outer circumference with a compass.


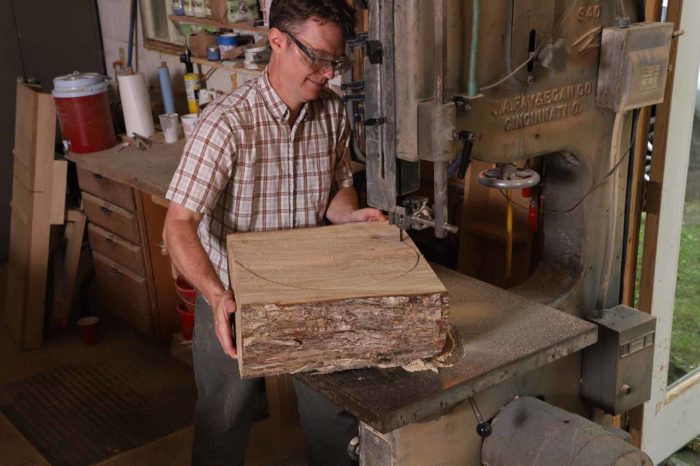
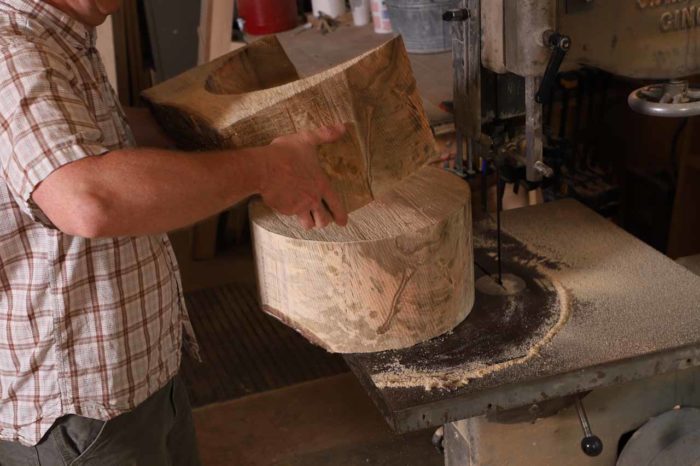
    A big blank on the bandsaw. To reduce friction from the heavy, wet blank, Gardner rubs the bandsaw table with carnauba wax. He uses a 1/2-in.-wide, 3-tooth-per-inch blade to cut the blank to a cylinder.


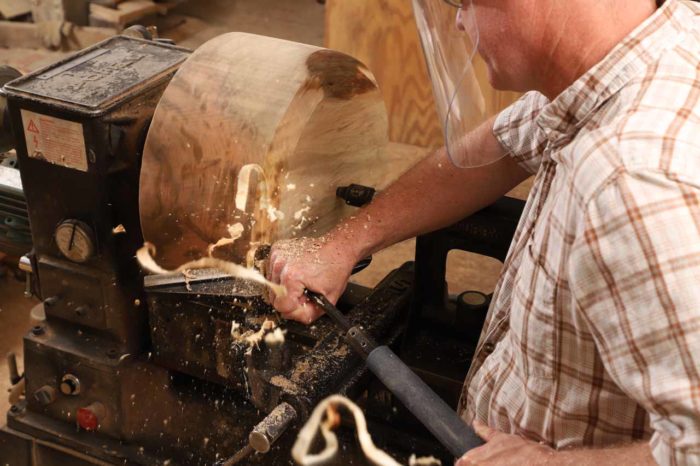
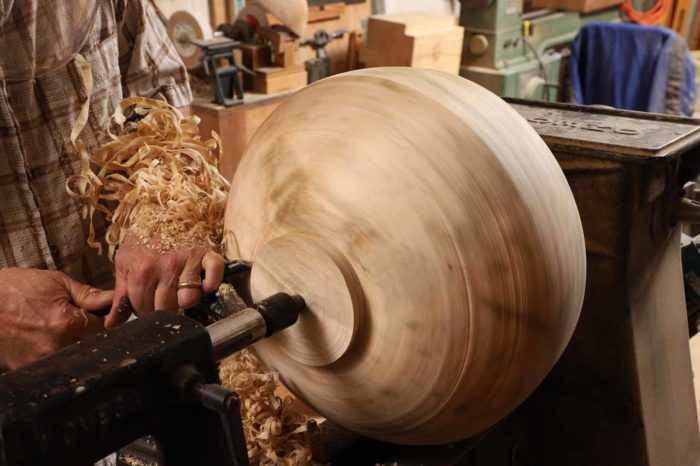
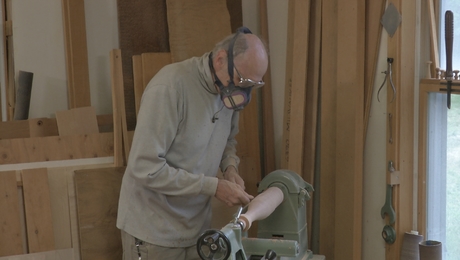
    The blank becomes a bowl. Working between centers, Gardner uses a 1/2-in. bowl gouge to shape the outside of the bowl. It’s vital that such a large, heavy workpiece be well balanced on the lathe, and Gardner will reposition it if need be.


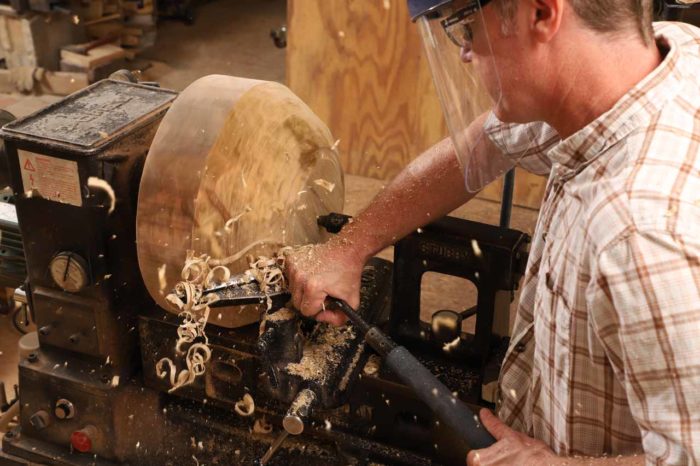
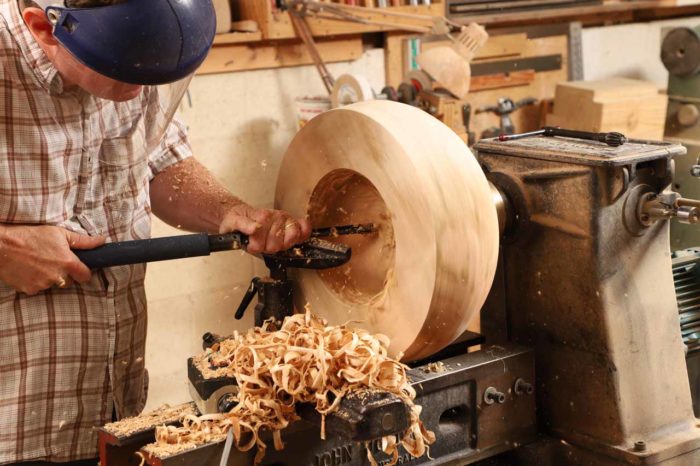
    Turn me a tenon. With the outside shape of the bowl nearly there, Gardner turns a tenon, which will fit into a four-jaw chuck so he can the excavate the bowl’s interior. He uses the same 1/2 in. bowl gouge to rough out the inside of the bowl.


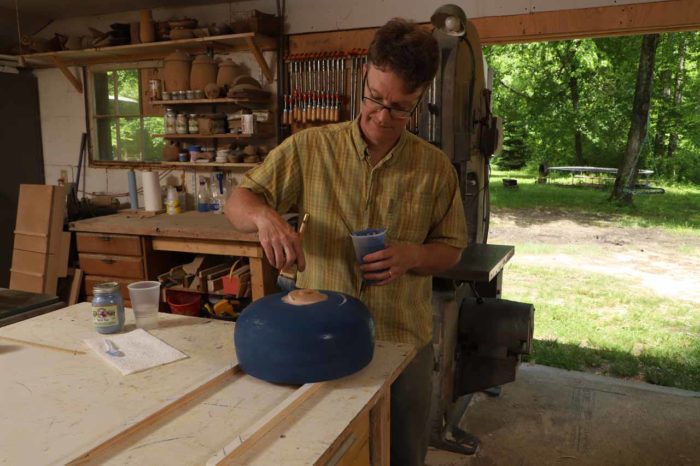
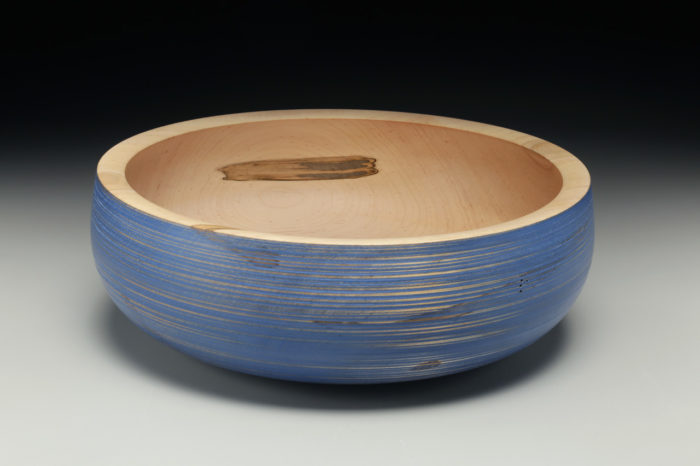
    Milk bath. Once the bowl has been rough turned and dried for several weeks in a kiln, then finish turned, Gardner sands it and applies milk paint to the exterior. He clear-finishes the interiors of his bowls.


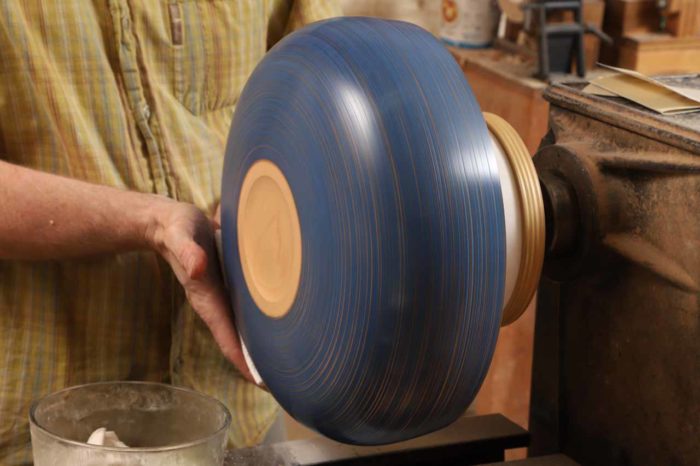
    Waxed. After applying the milk paint, Gardner lightly sands the surface to remove some paint from the high spots, then gives the bowl a coat of wax.

    For a complete explanation of how Mark Gardner turns his calabash bowls, see his article in issue 285.

    •  

      Add color and texture to a turned bowl

      Mark Gardner demonstrates the steps involved in making one of his colorful bowls, from cutting a log to the initial rough turning and drying, to the final finishing touches with milk paint and gouge work for the texturing.

    To see more of Mark’s work, explore www.markgardnerstudio.com


    Sign up for eletters today and get the latest techniques and how-to from Fine Woodworking, plus special offers.

    Sign Up

    Get woodworking tips, expert advice and special offers in your inbox

    Sign Up
    ×
    X
    X

    New Feature

    Fine Woodworking Forums

    Ask questions, offer advice, and share your work

    Get It All!

    UNLIMITED Membership is like taking a master class in woodworking for less than $10 a month.

    Start Your Free Trial

    Subscribe to Fine Woodworking

    Save up to 69%

    Subscribe

    Log in or create an account to post a comment.

    Sign up Log in

    Up Next

    Featured Workshop

    a diagram of a round Shaker stand and an image or a round Shaker stand

    Shaker candle stand with Christian Beckvoort

    He’s built dozens of round Shaker stands over four decades, so there is no one more qualified than Christian Becksvoort to demonstrate making this classic. In this seven-part video series,…

    Featured Projects & Plans

    Build a Contemporary Sideboard

    Chris Gochnour's sideboard combines usefulness, strength, and beauty in a contemporary case piece

    Related Stories

    • Shop Class: Offset Turning with Beth Ireland

    • Workshop tip: Door hinges are the key to this log-milling jig

    • Block plane meets the lathe

    • Floating display shelf

    Discussion Forum

    Recent Posts and Replies

    • |
    • |
    • |
    • |
    • |
    • |
    View More Create Post

    Member Exclusives

    More Member Exclusives
    • Floating display shelf

      Split turning techniques make a fun and functional shelf.

    • Video: Creating a split turning blank

      The wall shelf begins as four pieces glued together as a single turning blank using a paper joint; a centuries-old technique.

    • Video: Turning the wall shelf

      In this episode, Mark turns blank into a pod shape, and then splits it apart at the paper seems, revealing four turned shelves.

    • Shaker Candle Stand: Turning a Table Post

      The candle-stand project starts at the lathe, where Chris turns the post's familiar wine-bottle shape out of cherry.

    Highlights

    • Shape Your Skills

      when you sign up for our emails

      Plus tips, advice, and special offers from Fine Woodworking.

      Sign Up
    • Shop Talk Live Podcast

      Shop Talk Live Podcast

      Our biweekly podcast allows editors, authors, and special guests to answer your woodworking questions and connect with the online woodworking community.

    • Woodpecker Sweepstakes

      Woodpeckers Shop Upgrade Giveaway

      Enter now for your chance to win more than $2,000 worth of woodworking equipment from Woodpeckers. Click for full details.

    • Staff Picks Blog

      Our favorite articles and videos

      We have created these special content collections organized to give you a deep dive into a range of topics that matter.

    Turning

    View All
    • Shop Class: Offset Turning with Beth Ireland

    • Block plane meets the lathe

    • Make a shelf on the lathe

    • repair turned bowl

      Workshop Tip: Repair a bowl without taking it off the lathe

    View All

    From the Store

    View More
    • Tool Guide 2022

      Buy Now
    • Foundations of Woodworking

      Buy Now
    • Complete Illustrated Guide to Woodworking USB

      Buy Now
    • The Why & How of Woodworking

      Buy Now
    View More

    Get the latest from Fine Woodworking Magazine

    • #292-NOV/DEC 2021

      • Kerf-bent wall cabinet
      • Online extras from FWW issue #292
      • How to tame curved parts with patterns
    • #291-Sep/Oct 2021

      • Build a modern coffee table
      • Online Extras from FWW Issue #291
      • Editor's Letter: Something old, something new
    • #290-July/Aug 2021

      • Build a Shaker chest of drawers
      • Online Extras from FWW Issue #290
      • From the editor: What we make matters
    • #289-May/June 2021

      • Arts & Crafts Coffee Table with Story-Book Charm
      • Links from Fine Woodworking issue #289
      • Step-by-Step Guide to Tuning Your Block Plane
    • #288-Mar/Apr 2021

      • Phil Lowe: A craftsman and gentleman
      • Online Extras from FWW Issue #288
      • Phil Lowe: craftsman, teacher, friend

    UNLIMITED membership - Get access to it all

    Start Free Trial Upgrade Membership

    Fine WoodWorking

    Follow

    Newsletter

    Get woodworking tips, expert advice and special offers in your inbox

    Sign Up

    Membership & Magazine

    • Members
    • Digital Libraries
    • Join Unlimited
    • Magazine Subscription
    • Magazine Renewal
    • Gift a Subscription
    • Customer Support
    • Manage Preferences

    Taunton Network

    • Fine Homebuilding
    • Green Building Advisor
    • Fine Gardening
    • Threads
    • About
    • Contact
    • Advertise
    • Privacy Policy
    • Careers
    • Copyright
    • Terms of Use
    • Accessibility
    • California Privacy Rights
    • Site Map

    © 2021 The Taunton Press, Inc. All rights reserved.

    Get step-by-step instructions, woodworking tips, expert advice and special offers in your inbox. Sign Up Now!

      Main Menu

    • Projects and Plans
    • How-To
    • Shop Tips
    • Tools & Materials
    • Videos
    • Gallery
    • Magazine
    • Video Workshops
    • Members
    • Forum

      Popular Topics

    • Design
    • Small Projects
    • Beds
    • Chairs, Benches And Stools
    • Built-ins
    • Storage And Shelves
    • Cabinets
    • Carving
    • Casework
    • Desks
    • Tables
    • Shop Storage And Furniture
    • Woodturning Projects
    • Workbenches
    • Surface Prep

      More

    • TV
    • Forum
    • Blogs
    • Webinars
    • Podcasts
    • Customer Support

      Account

    • Log In
    • Join

      Magazine

    • Current Issue
    • Past Issues
    • Digital Libraries
    • Magazine Index
    • Subscribe

      Membership

    • Member Home
    • Start Free Trial
    • Gift Unlimited
    • Log In

      Shop the Store

    • Books
    • DVDs
    • Taunton Workshops

      Events

    • Fine Woodworking Live
    • Fine Woodworking HANDS ON

      Account

    • Log In
    • Sign Up

    Newsletter

    Get woodworking tips, offers, and expert advice in your inbox

    Sign Up

    Follow

    UNLIMITED

    Become an UNLIMITED member and get it all: searchable online archive of every issue, how-to videos, Complete Illustrated Guide to Woodworking digital series, print magazine, e-newsletter, and more.

    Start Your Free Trial

    Upgrade Membership