Skip to content
Fine Woodworking
Main Menu
Subscribe
GET THE MAGAZINE & MORE
Magazine Cover
  • Save 69% off the cover price
  • Or, get everything with UNLIMITED, including 40+ years of the online archive.
Subscribe Now!
Subscribe
  • Projects & Plans
  • How-To
  • Shop Tips
  • Tools & Materials
  • Videos
  • Magazine
  • Video Workshops
  • Members
  • Forum
  • Gallery
  • Blogs
  • More
    • Log In
    • Join
    Fine Woodworking Main Menu Subscribe
    Blog

    How to build hanging shelves with integrated lighting, Part 2: Installation

    Shelves like these require careful planning and measuring, then measuring again, then testing your measurements, then testing again.

    Author Headshot By Nancy R. Hiller Sep 09, 2020
    Article Image

    Part 1 of this series can be found here: How to build hanging shelves with integrated lighting-part 1

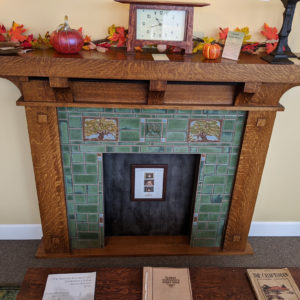
    The soapstone counters are in, the backsplash tile’s grouted, and our clients will officially move back into their kitchen this weekend. This set of shelves above the sink combines storage and display area with practical illumination while subtly defining the kitchen as its own space, relative to the living room and entry.

    It looks simple — and it is. But as is so often the case, achieving a serenely simple look took considerable effort and skill. Here’s how we handled the installation.

    1. Support and special equipment

    It’s extremely important to have adequate support at the ceiling. If you’re able to design your shelves to hang directly from ceiling joists (or roof rafters), great. If not, you’ll need to add blocking. (See “Better Cabinet Blocking” courtesy of Fine Homebuilding.) The general contractor on this job, Mark Longacre Construction, installed blocking for these shelves when the ceiling was opened up for insulation.

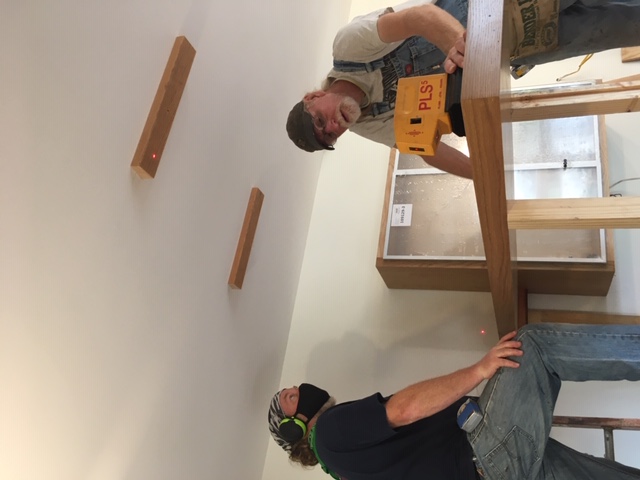
    A laser level is an asset for this type of installation, which relies on consistent and precise location of parts. You will also need a hole saw of the right diameter for the light fixtures you’re using.

    2. Method

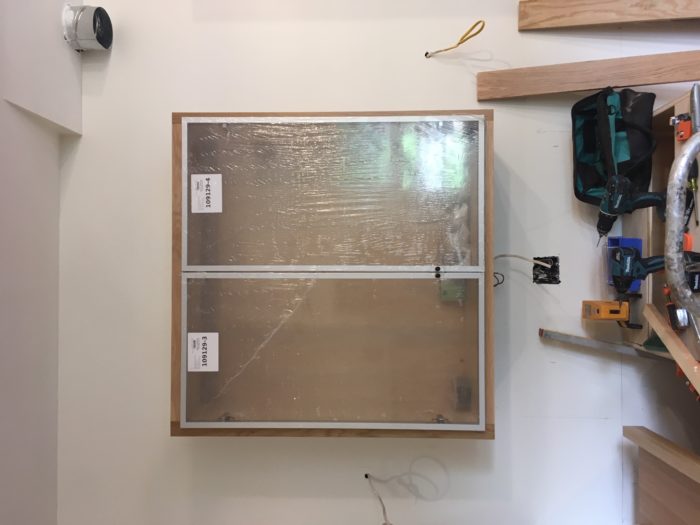
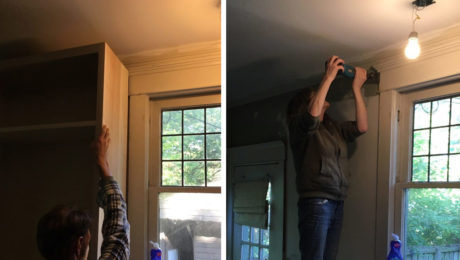
    The wire for the lamps in the lower shelf comes up from the basement through the wall. (See the wire poking out of the hole, left of the cabinet?) We had carefully determined the location for the wire before drywall installation. The kitchen side of both hanging shelves will be screwed against the side of the cabinet here, for extra support, so we began the installation by referencing off the cabinet.

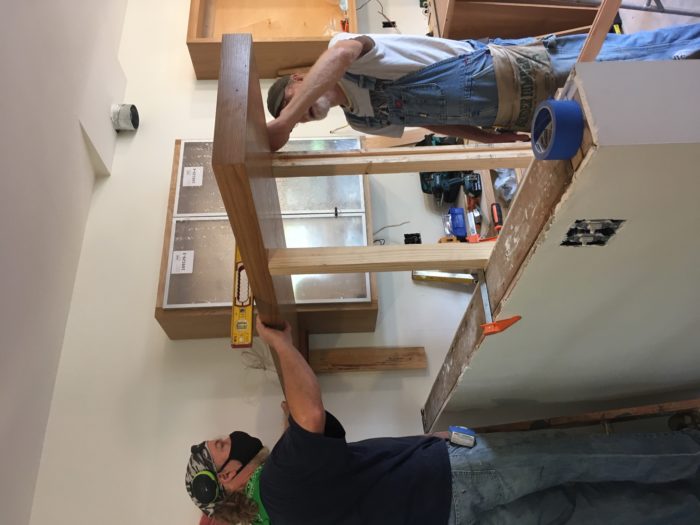
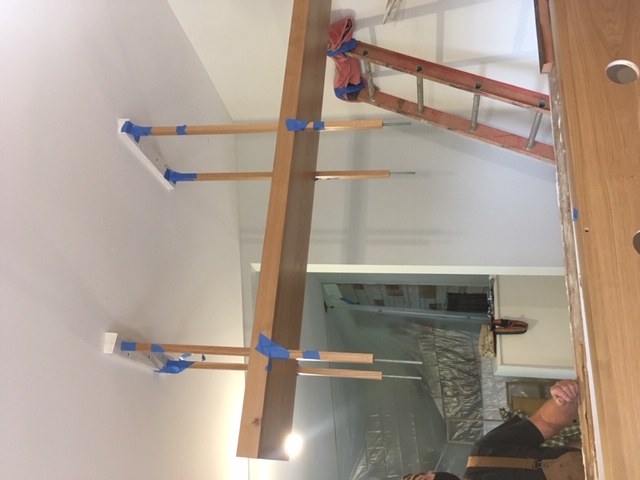
    To start, John and Mark cut support blocks to hold one of the shelves at the lower-shelf height. When determining the vertical position of hanging shelves, it’s important to bear in mind the heights of those who will be using the kitchen; you don’t want the shelf to be right at their eye level, blocking their view, but a little higher, affording an unobstructed view into the room beyond. Note that we clamped the supports to the wall to keep things steady and also screwed a temporary support of scrap wood to the wall to hold the shelf at the far end.

    Had we been installing to a flat ceiling, we would not have had to add angled supports. (An alternative would be to use gimballed nuts.) In this case, the sloped ceiling is just the rafters’ width from the roof.

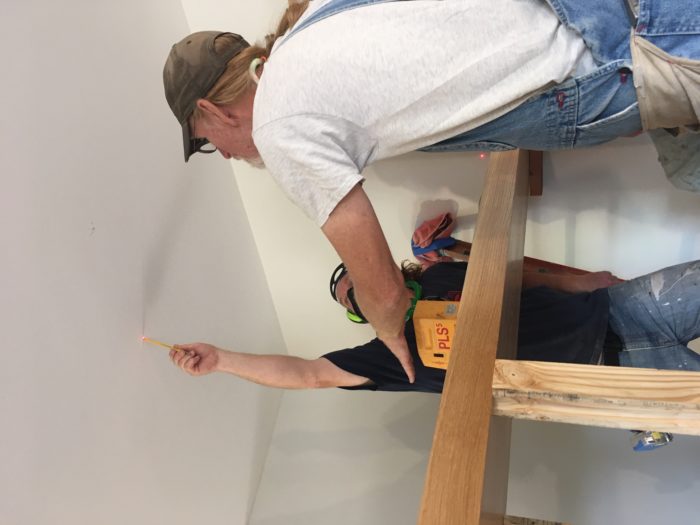
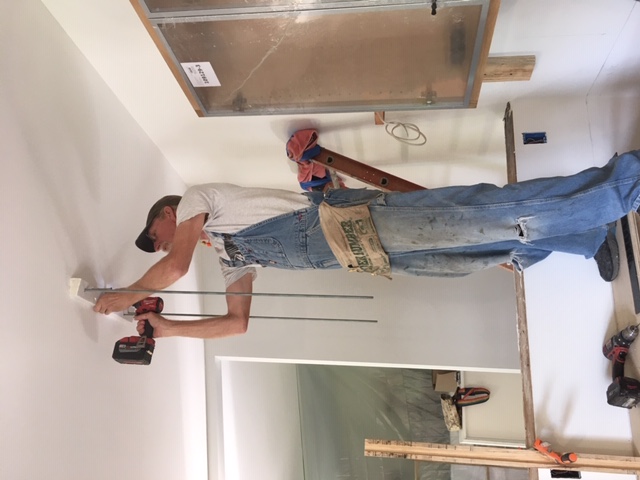
    For these shelves, which have an outside frame of solid oak that will bear the weight of the shelves and their contents, it was critical that we drill the holes for the rod in the center of the solid frames’ width. We used a laser level to mark the location of these holes at the ceiling, to guide the position of each ceiling cleat.

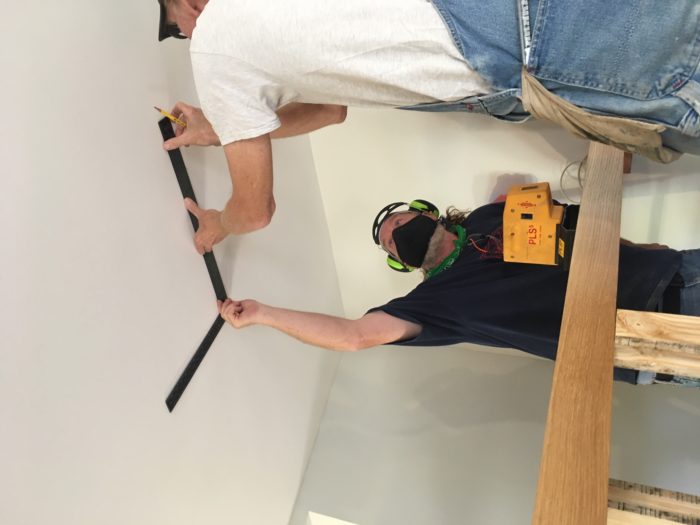
    With one hole marked on the ceiling, John and Mark used a roofing square to extend the location to the other side of the shelf.

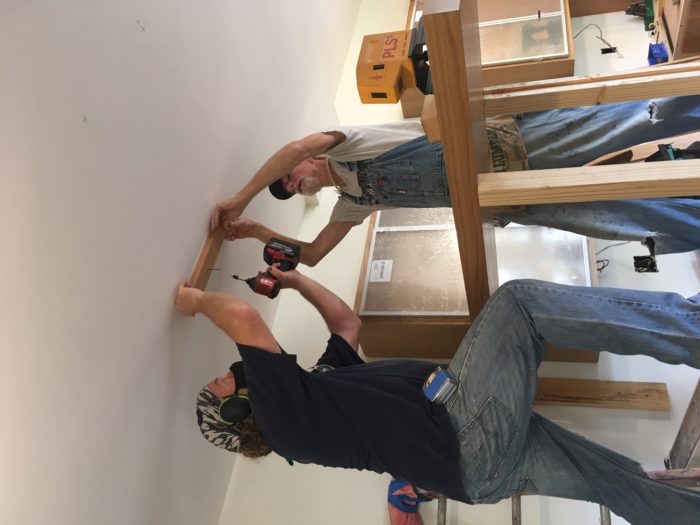
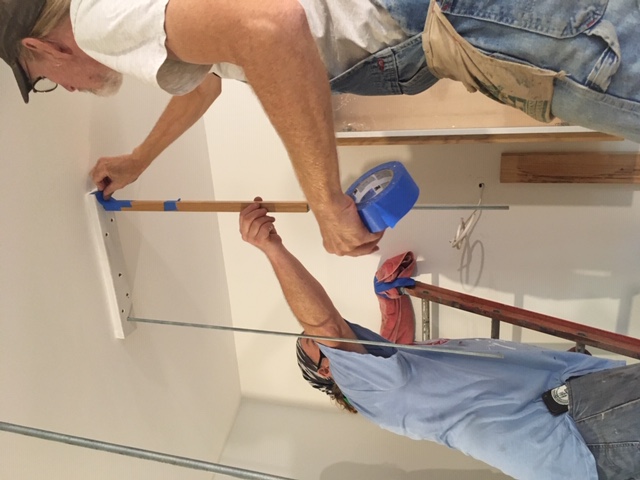
    They screwed the ceiling cleats in place temporarily.

    With the first shelf set firmly in place (here, against the wall and cabinet), use the laser level to locate the drilling for the threaded rod in the ceiling cleat and one of the shelves.

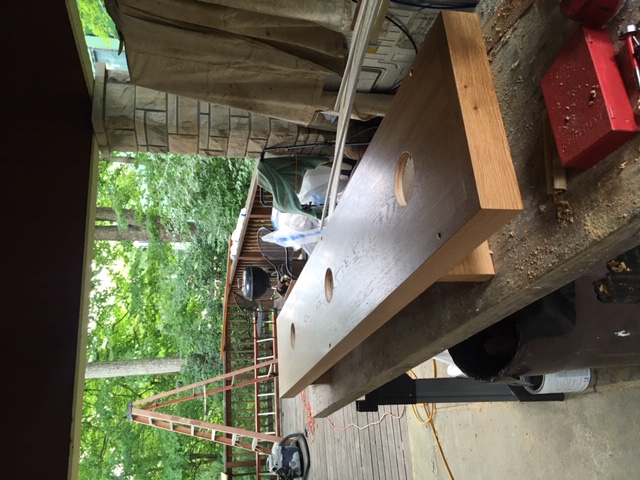
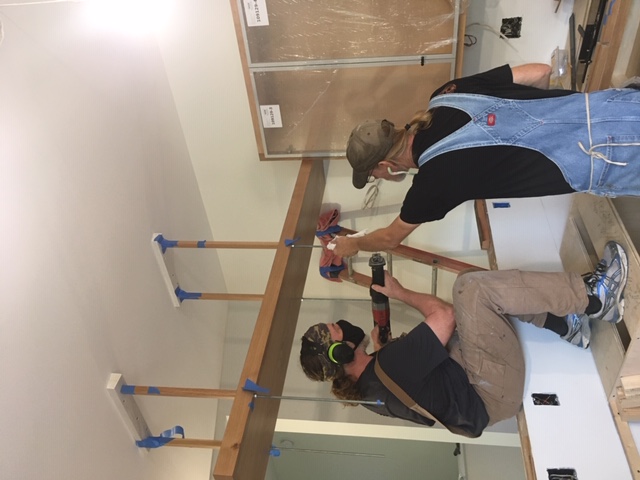
    Cut the holes for the lamps. We used a hole saw on a drill. (See next image.)

    The hole saw.

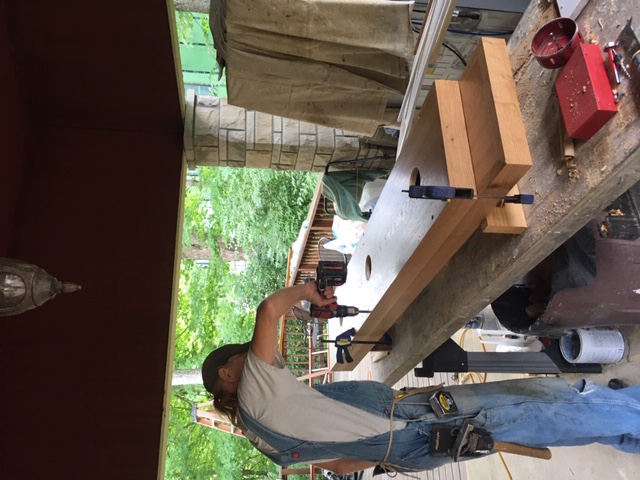
    It’s very important to drill the holes perpendicular to the shelves and in perfect alignment with each other, from the top shelf to the bottom. Mark clamped the shelves together with the wall end of each one flush (at the left end, above).

    John removed the cleats from the ceiling and Mark drilled them. First he counterbored a hole large enough to accept the nut at the top (when the rod was threaded in for the final time, we added thread locker to keep the rod from coming loose — not that that’s likely to happen, but still…). Then he drilled a hole just a tad larger than the diameter of the rod through the bottom face of the cleat.


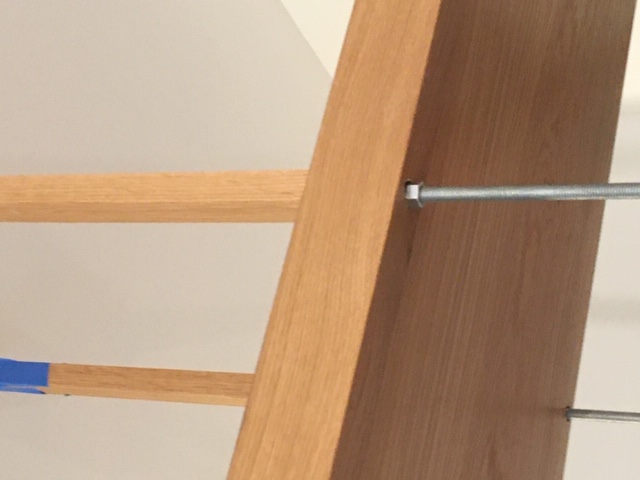
    After inserting the rods (still over-length) through the ceiling cleats so they bottomed out flush with the end of each nut, Mark screwed the cleats back in place temporarily.

    We set the top shelf in place, leveled it, and ran nuts up to its underside to hold it. Then we repeated this sequence with the lower shelf. This way we knew we would get accurate lengths for the oak tubing that would slide over the rod and hide it. (Note that the rod is still over-length. We didn’t want to cut it to length until we had the whole thing put together finally.)

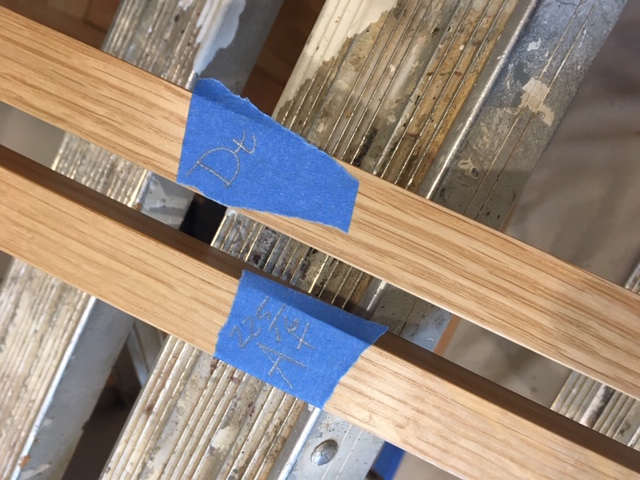
    Now it was time to cut the oak tubes to length. Because this ceiling is sloped, the upper sections of oak tubing were different lengths from one part of the shelf to the other. I marked each piece with an identifying letter (A and D here) and a “t” for top or “b” for bottom, to ensure we kept the grain continuous for each piece.

    We took the shelves back down and slid the oak tubing over each section for the top shelf, then taped each piece in place to hold it temporarily.

    With the top shelf in place, we threaded on the nuts and checked the shelf with a level, making micro-adjustments until everything hung just right. Once the nuts are under tension from the weight, they’re going nowhere.

    We slid the lower sections of oak tube over the rods and held them temporarily with tape. Then we put the lower shelf up temporarily one last time, just to check that everything was right. This also allowed us to mark the precise point at which to trim the rod to length.

    We used acorn nuts to hold the lower shelf in place — they’re a lot better looking than regular nuts. But they also have a finite capacity for the threaded rod, so we threaded a scrap of rod fully into one acorn nut, marked its top edge, then added that measurement (it was about 1/4 in.) below the mark we’d made on each rod for the underside of the shelf.

    We took the shelf down one last time (phew!), then John cut each rod to length with a battery-powered reciprocating saw. Mark held the rod to minimize the vibration.

    After electrician Isaiah Merriman installed the lamps, we realized that the cavity in the lower shelf wasn’t quite tall enough to accommodate the transformers. (I hadn’t had a transformer at the start of this odyssey; I only had the lamp.) We needed another 1/4 in. of height. I could have made a thinner shelf and shimmed up the support fillets (see part one of this series), but I’d already made and finished a nice white-oak-veneered shelf that was 3/4 in. Another option would have been to build up the fillets and add a veneered oak edge to the shelf to conceal the little bit that would protrude over the top edge of the solid oak frame. I didn’t want to do that, because I like knowing that objects placed on the shelves will be safer if the solid frame stands a little higher than the top face of the shelf.

    My solution was to measure for the position of each transformer and mark these locations on the underside of the shelf insert. I then took the shelf outside, lay the finished upper surface on a protective blanket, and used a router with a straight cutter to hog out a recess. I made each recess oversize, knowing from experience that if I didn’t, one or more would certainly not fit, and I’d have to wrestle the whole thing out again and re-rout it.

    Getting the removable shelf in place was a trick; it would only fit in through the far end, and I had to be careful to avoid damaging the cabinets on that wall. But in it went, and with a little jiggling, it settled right into place.

    The 3/16 in. or so lip of the oak frame will help keep objects from sliding or being pushed off the shelf — especially important, given that the counter below will be soapstone, which is easily chipped.

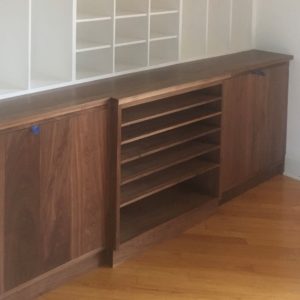
    The shelves with their lamps installed and the ceiling cleats painted white.

    -If you’re even thinking about remodeling a kitchen, you need to pick up a copy of Nancy’s new book Kitchen Think. It’s filled with the clever builds you’d expect from someone who has been creating beautiful, high-end kitchens for decades.


    How to build hanging shelves with integrated lighting-part 1

    Working on a project that involves opening up the wall between the kitchen and living room while keeping each one a distinct space, Nancy Hiller creates suspended shelves which act as a subtle divider.

    On a Job Site, Improvisation Is the Name of the Game

    If working on site has taught Nancy Hiller anything, it’s how to think outside the box in order to get the job done.

    Consulting With Prospective Clients

    “How do you handle inquiries from prospective customers?” asks a reader. “Do you have any rules for design and project approvals?”

    Sign up for eletters today and get the latest techniques and how-to from Fine Woodworking, plus special offers.

    Sign Up

    Get woodworking tips, expert advice and special offers in your inbox

    Sign Up
    ×
    X
    X

    New Feature

    Fine Woodworking Forums

    Ask questions, offer advice, and share your work

    Get It All!

    UNLIMITED Membership is like taking a master class in woodworking for less than $10 a month.

    Start Your Free Trial

    Subscribe to Fine Woodworking

    Save up to 69%

    Subscribe

    Log in or create an account to post a comment.

    Sign up Log in

    Up Next

    Featured Workshop

    a diagram of a round Shaker stand and an image or a round Shaker stand

    Shaker candle stand with Christian Beckvoort

    He’s built dozens of round Shaker stands over four decades, so there is no one more qualified than Christian Becksvoort to demonstrate making this classic. In this seven-part video series,…

    Featured Projects & Plans

    Build a Contemporary Sideboard

    Chris Gochnour's sideboard combines usefulness, strength, and beauty in a contemporary case piece

    Related Stories

    • Why I fit kitchen cabinet doors and drawers on site

    • Designing built-ins for installation during a pandemic

    • How I bid a small job

    • How to build hanging shelves with integrated lighting-part 1

    Discussion Forum

    Recent Posts and Replies

    • |
    • |
    • |
    • |
    • |
    • |
    View More Create Post

    Member Exclusives

    More Member Exclusives
    • How to upholster a slip seat

      How to upholster a slip seat

      Michael Mascelli demonstrates how to create a finished, professional-looking upholstered slip seat.

    • kerf-bent cabinet

      Kerf-bent wall cabinet

      Philip Morley's small wall cabinet has sides that curve inward at the top, with an asymmetrical arrangement of drawers, door, and open shelves.

    • On Making Chairs Comfortable

      How to fit the seat to the sitter.

    • Chair Woods

      The Best Wood for Chairs

      Lessons on picking the right wood for making an attractive, strong chair that will stand the test of time.

    Highlights

    • Shape Your Skills

      when you sign up for our emails

      Plus tips, advice, and special offers from Fine Woodworking.

      Sign Up
    • Shop Talk Live Podcast

      Shop Talk Live Podcast

      Our biweekly podcast allows editors, authors, and special guests to answer your woodworking questions and connect with the online woodworking community.

    • Woodpecker Sweepstakes

      Woodpeckers Shop Upgrade Giveaway

      Enter now for your chance to win more than $2,000 worth of woodworking equipment from Woodpeckers. Click for full details.

    • Staff Picks Blog

      Our favorite articles and videos

      We have created these special content collections organized to give you a deep dive into a range of topics that matter.

    Built-ins

    View All
    • a craftsperson bent down installing something in a kitchen that is being renovated

      Why I fit kitchen cabinet doors and drawers on site

    • Designing built-ins for installation during a pandemic

    • How I bid a small job

    • How to build hanging shelves with integrated lighting-part 1

    View All

    From the Store

    View More
    • Tool Guide 2022

      Buy Now
    • Complete Illustrated Guide to Woodworking USB

      Buy Now
    • The Why & How of Woodworking

      Buy Now
    • Foundations of Woodworking

      Buy Now
    View More

    Get the latest from Fine Woodworking Magazine

    • #292-NOV/DEC 2021

      • Kerf-bent wall cabinet
      • Online extras from FWW issue #292
      • How to tame curved parts with patterns
    • #291-Sep/Oct 2021

      • Build a modern coffee table
      • Online Extras from FWW Issue #291
      • Editor's Letter: Something old, something new
    • #290-July/Aug 2021

      • Build a Shaker chest of drawers
      • Online Extras from FWW Issue #290
      • From the editor: What we make matters
    • #289-May/June 2021

      • Arts & Crafts Coffee Table with Story-Book Charm
      • Links from Fine Woodworking issue #289
      • Step-by-Step Guide to Tuning Your Block Plane
    • #288-Mar/Apr 2021

      • Phil Lowe: A craftsman and gentleman
      • Online Extras from FWW Issue #288
      • Phil Lowe: craftsman, teacher, friend

    UNLIMITED membership - Get access to it all

    Start Free Trial Upgrade Membership

    Fine WoodWorking

    Follow

    Newsletter

    Get woodworking tips, expert advice and special offers in your inbox

    Sign Up

    Membership & Magazine

    • Members
    • Digital Libraries
    • Join Unlimited
    • Magazine Subscription
    • Magazine Renewal
    • Gift a Subscription
    • Customer Support
    • Manage Preferences

    Taunton Network

    • Fine Homebuilding
    • Green Building Advisor
    • Fine Gardening
    • Threads
    • About
    • Contact
    • Advertise
    • Privacy Policy
    • Careers
    • Copyright
    • Terms of Use
    • Accessibility
    • California Privacy Rights
    • Site Map

    © 2021 The Taunton Press, Inc. All rights reserved.

    Get step-by-step instructions, woodworking tips, expert advice and special offers in your inbox. Sign Up Now!

      Main Menu

    • Projects and Plans
    • How-To
    • Shop Tips
    • Tools & Materials
    • Videos
    • Gallery
    • Magazine
    • Video Workshops
    • Members
    • Forum

      Popular Topics

    • Design
    • Small Projects
    • Beds
    • Chairs, Benches And Stools
    • Built-ins
    • Storage And Shelves
    • Cabinets
    • Carving
    • Casework
    • Desks
    • Tables
    • Shop Storage And Furniture
    • Woodturning Projects
    • Workbenches
    • Surface Prep

      More

    • TV
    • Forum
    • Blogs
    • Webinars
    • Podcasts
    • Customer Support

      Account

    • Log In
    • Join

      Magazine

    • Current Issue
    • Past Issues
    • Digital Libraries
    • Magazine Index
    • Subscribe

      Membership

    • Member Home
    • Start Free Trial
    • Gift Unlimited
    • Log In

      Shop the Store

    • Books
    • DVDs
    • Taunton Workshops

      Events

    • Fine Woodworking Live
    • Fine Woodworking HANDS ON

      Account

    • Log In
    • Sign Up

    Newsletter

    Get woodworking tips, offers, and expert advice in your inbox

    Sign Up

    Follow

    UNLIMITED

    Become an UNLIMITED member and get it all: searchable online archive of every issue, how-to videos, Complete Illustrated Guide to Woodworking digital series, print magazine, e-newsletter, and more.

    Start Your Free Trial

    Upgrade Membership