
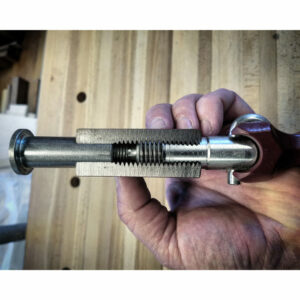
Hammer veneering with hide glue
Patrick Edwards demonstrates how hide glue allows you to quickly add veneer to a piece without clamps or a vacuum bag.
Animal protein glues have been used for centuries going back to the Egyptians. In fact, as far as I can tell through documentation, the earliest use of this glue was 8,000 years ago. It’s been used for so long because it works really well. One of the more traditional applications of hide glue is hammer veneering using only a very simple tool, a veneer hammer, which is really more of a squeegee.
The hammer veneering process
First, you need to practice this technique. It’s best to start out with scraps of veneer that are flat, and stay flat. Don’t start with crotch mahogany or burls–they’re going to fight you until you learn the process. Get some simple pieces of veneer that you can trust and a piece of scrap pine and get veneering.

One thing that’s easy to do with the hammer venturing is to put banding on the edge of a piece of wood. Remember, veneer used to be part of a tree, and as a result it has a heartwood side and a sapwood side. If you wet the veneer and the heartwood is facedown, the sides will curve up and away. I like to apply my veneer with the heartwood side up so that the curve will hold the edges down.
I apply glue to the substrate and then place the veneer, heartwood side down, on top of the substrate. Apply glue to the veneer, flip it over so the heartwood faces up, and bring the two glued surfaces together. Making sure your edges overhang, take your veneer hammer, using it as a squeegee, and squeeze out the air between the veneer and substrate. I expect to see a small bead of glue coming out of each side showing that the right amount of glue has been used and that there’s no vacuum getting broken. After waiting a few hours for the glue to cure, simply trim off the overhang with a veneer saw.
Videos in the Series
-

Choosing and mixing hot hide glue
March 20, 2020
-

How to store hide glue
March 20, 2020
-

Glue blocks and rub joints with hide glue
March 20, 2020
-

Hammer veneering with hide glue
March 20, 2020


Comments
I found this series very helpful. I appreciated the charts and chemistry behind how the glue works and the demos on how to use. Many thanks. And I've ordered my first batch of 192.
It seems to me on the discussion of "hammer veneering with hide glue," fourth paragraph, first and second sentences, that the veneer is reversed as to which side is up or down.
Super, I knew nothing now I am ready glue and veneer the world.
Really that was great! Another bit of info that will help.
What a fascinating series! I can't wait to buy some hide glue, a glue pot and start using it.
I learned tons. Thanks so much.
Thanks very much. Great information and instruction!
RandyG
I have read an awful lot as I have been making things of wood. This series has more information packed into it per minute than any other video series I have watched. I have used OBG in the past but quit because it has a shelf life and I don’t use it every day.
I've used hide glue for fiddle repairs but not for furniture. I don't understand getting some glue on the heartwood side prior to flipping it & hammering it down. does it help with adherence? will it have to be sanded off? does it discolor the final surface? just very curious many thanks for a great series!
Very helpful video series. It would be nice to see how to take apart a piece that has been fully set for some period of time. For repair or reworking. Thank you.
Great series and a great presenter. Well done
Great information and video! How do you clean your veneer saw so it doesn't get gummed up with glue?
Great information!! Can't wait to make my first ashtray. -phil
For a couple of examples of Patrick reversing check out his channel at
https://www.youtube.com/watch?v=5BiPbLjDT3I
This is woodworking gold! So much information packed into such a short time. Probably one of the best video series ever on FWW. Maybe one more video to teach us about how to choose a proper veneer saw and hammer would be helpful.
Great instruction. One question on the veneer saw. When Patrick made the cut to join the two overlapping pieces, was there not a kerf width gap between the two pieces at the joint? Or is the "saw" actually a sharp edged knife?
There is a kerf. He just moves the piece over that amount. The key is that the cut perfectly matches.
Thanks Ben. I thought the pieces were already glued down.
Old Brown Glue; sticky,
tacky too. It's made from cows.
Could be made from ewe.
One of the best presentations on hide glue and hammer veneering. I am interested to know why Patrick does not mention (or recommend) the electric glue pots.
It's a little late, but to answer a few of the questions:
Why put the glue on both sides of the veneer? Because on the top it acts as a lubricant so the veneer hammer can slide over the veneer.
How to clean off the veneer saw? Hot water and a sponge. Easy-peasy.
Regarding kerf, a veneer saw is like a serrated steak knife. The kerf is barely noticeable.
great video. finally a pro that says you have to practice. So smart
Very informative and helpful series. Thank you.
Great videos. I first started with hide glue several years ago and have used it successfully for a number of projects. Here's the first, where I learned by doing - several times ! https://www.lumberjocks.com/projects/171466
Thanks for this series; I learned more in this time than over the years from other sources.
Log in or create an account to post a comment.
Sign up Log in