Skip to content
Fine Woodworking
Main Menu
Subscribe
GET THE MAGAZINE & MORE
Magazine Cover
  • Save 69% off the cover price
  • Or, get everything with UNLIMITED, including 40+ years of the online archive.
Subscribe Now!
Subscribe
  • Projects & Plans
  • How-To
  • Shop Tips
  • Tools & Materials
  • Videos
  • Magazine
  • Video Workshops
  • Members
  • Forum
  • Gallery
  • Blogs
  • More
    • Log In
    • Join
    Fine Woodworking Main Menu Subscribe

    Fine Woodworking Project Guides

    Beginner Projects

    Guide Home
    Chapter
    • Getting Started
    • Cutting Boards & Picture Frames
    • Gifts & Accessories
    • Bookcases & Shelves
    • Step Stools & Tables
    Projects and Plans

    Build Your Own Cornhole Set

    This beanbag game is a backyard favorite. Build your own custom cornhole game boards and get out and enjoy!

    Author Headshot By Asa Christiana Feb 26, 2021
    Let's Play Cornhole

    Fun at parties and picnics. With this travel-friendly design, you can take the game anywhere and be playing in minutes.

    Fun at parties and picnics. With this travel-friendly design, you can take the game anywhere and be playing in minutes.

    This game is no joke, at least not to the American Cornhole Association (www.playcornhole.org), which has an awesomely serious set of rules and standards for all aspects of the game, including player conduct (“An ACA member, while in competition, shall make no disturbing noises or movements…”).

    The Web site provides detailed dimensions for the equipment, and I followed those exactly, with one exception. Because we are using off-the-shelf lumber, I had to go with 2-1/2-in.-wide boards for the frame, making it a whopping 1/2 in. taller than regulations. After you open a few bottles, you won’t know the difference.

    I added one other twist on the ACA guidelines, one that I don’t think they’ll mind. I devised a way to attach the two cornhole platforms back to back, so they become a thin suitcase of sorts, with the bean bags thrown in the middle for storage. Portable party, dude.

    My other brainstorm was how to cut the big 6-in.-dia. holes in the platform without buying a big, pricey hole saw for this one-off job. Instead, you can do it with the jigsaw you already own, using a nail and a small piece of plywood or MDF. It’s your second jig, and it’s for your jigsaw. I’ll leave it to the etymologists to argue about the relationship between the words.


    Materials

    • Makes two platforms:
    • Two pieces 1/2-in. plywood, 2 ft. by 4 ft.
    • Four 3⁄4-in. pine boards, 2-1/2 in. wide by 8 ft. long (width can vary a bit)
    • Four carriage bolts, 3/8 in. by 2 in., with metal washers and lock nuts
    • Four plastic washers
    • One box #8 deck screws, 2 in. long
    • Twelve #8 deck screws, 1-1/4 in. long
    • Four window sash locks
    • Rope for carry handles, 1/2 in. thick
    • 1 qt. latex paint, glossy (more if you want multiple colors)


    Make It Official
    Make It Official

    Circle-cutter is a great jig

    You could drill this big hole with a $30 hole saw or do the job for free with a simple little gizmo for your jigsaw. First you need to do some layout and drilling to get ready.

    Center it side to side and then measure from the top edge to finish the crisscross. Then draw a 6-in.-dia. circle using any compass you have.

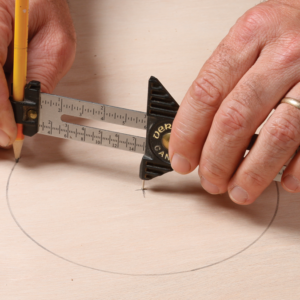
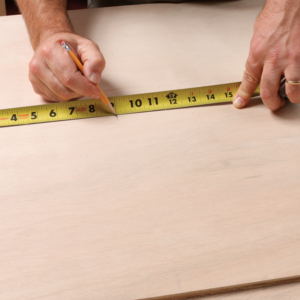
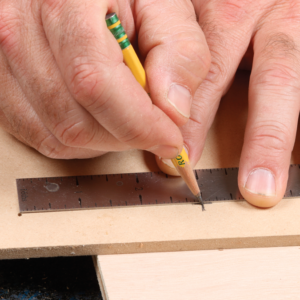
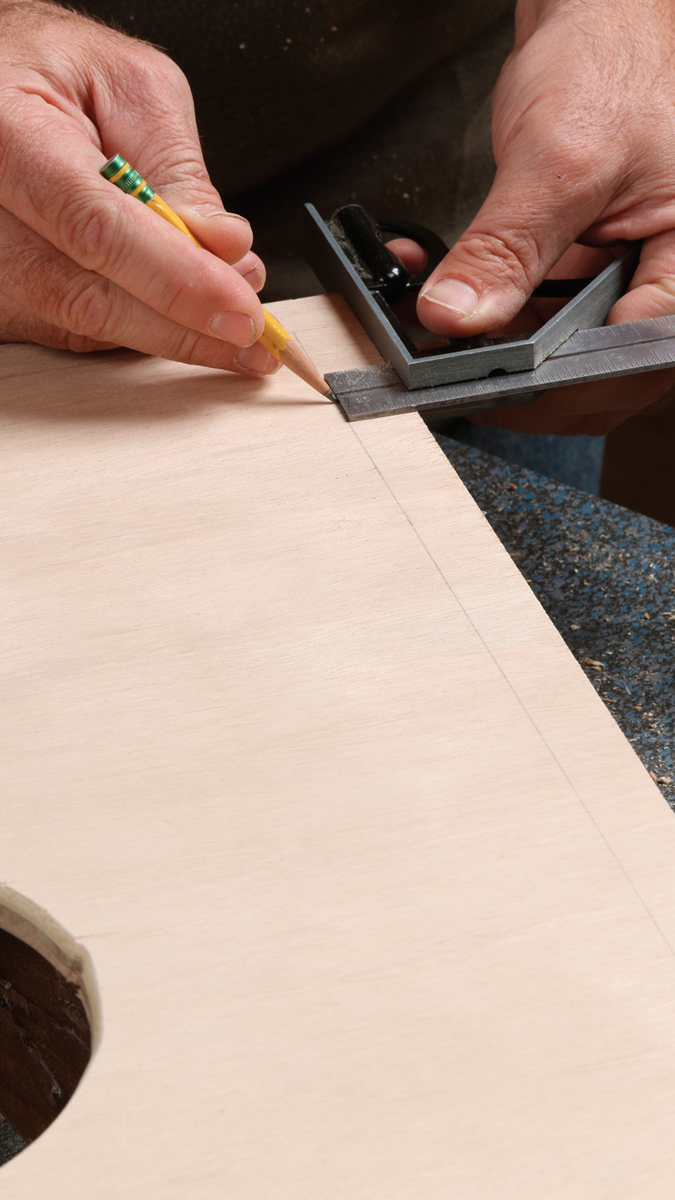
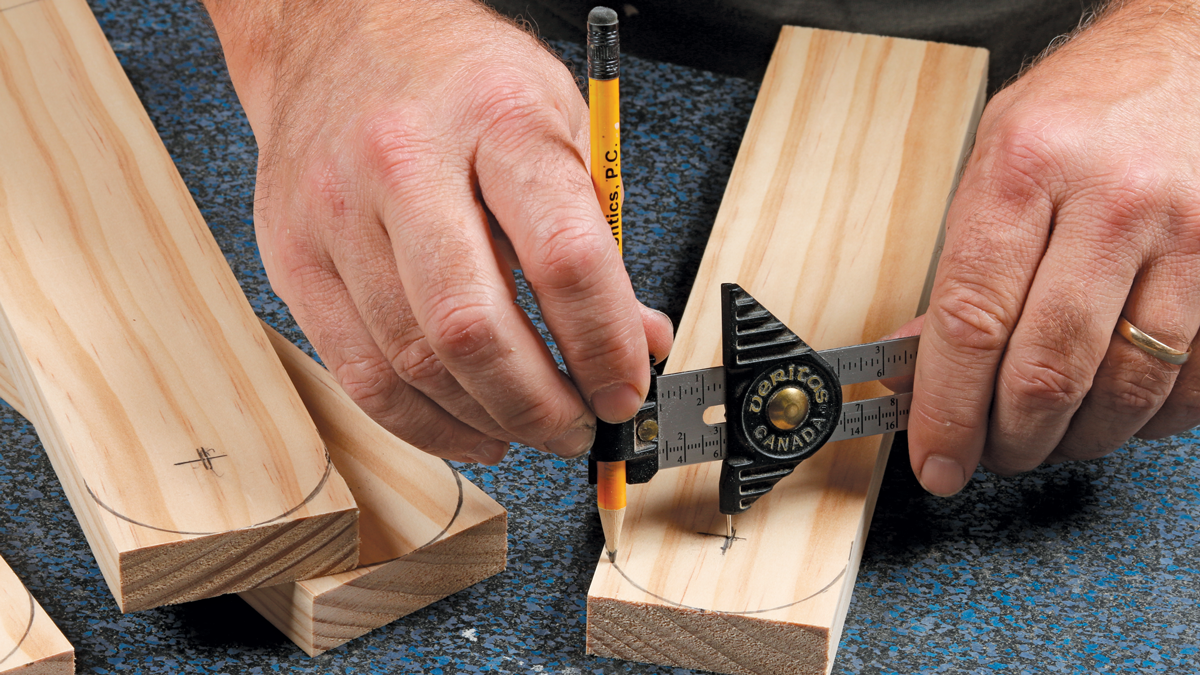
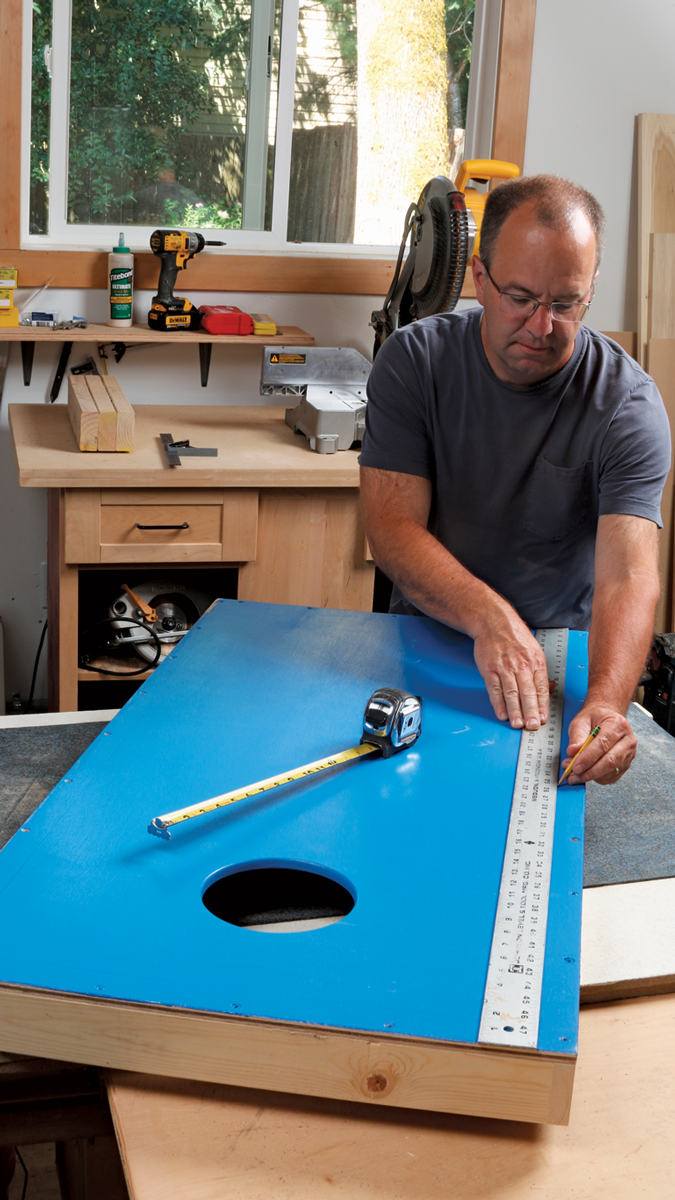
    1. Lay out the hole. Center it side to side and then measure from the top edge to finish the crisscross (left). Then draw a 6-in.-dia. circle using any compass you have (right).

    The circle-cutting jig will pivot on a nail, so find a nail and drill bit that match each other. Drill a hole at the center point.

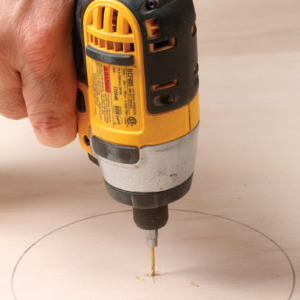
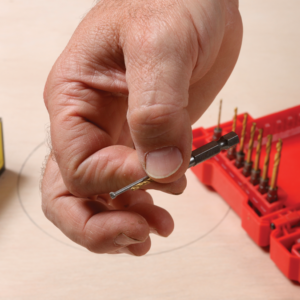
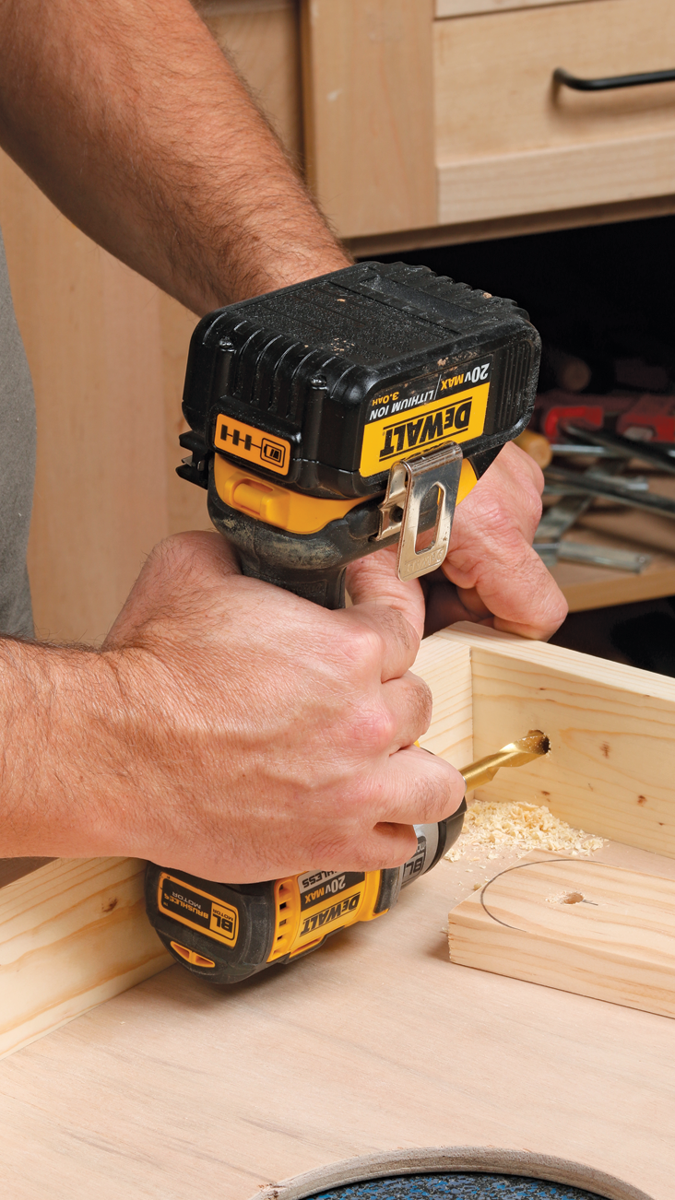
    2. Drill a perfect nail hole. The circle-cutting jig will pivot on a nail, so find a nail and drill bit that match each other (left) and drill a hole at the center point (right).

    Jigsaw needs a starting point.

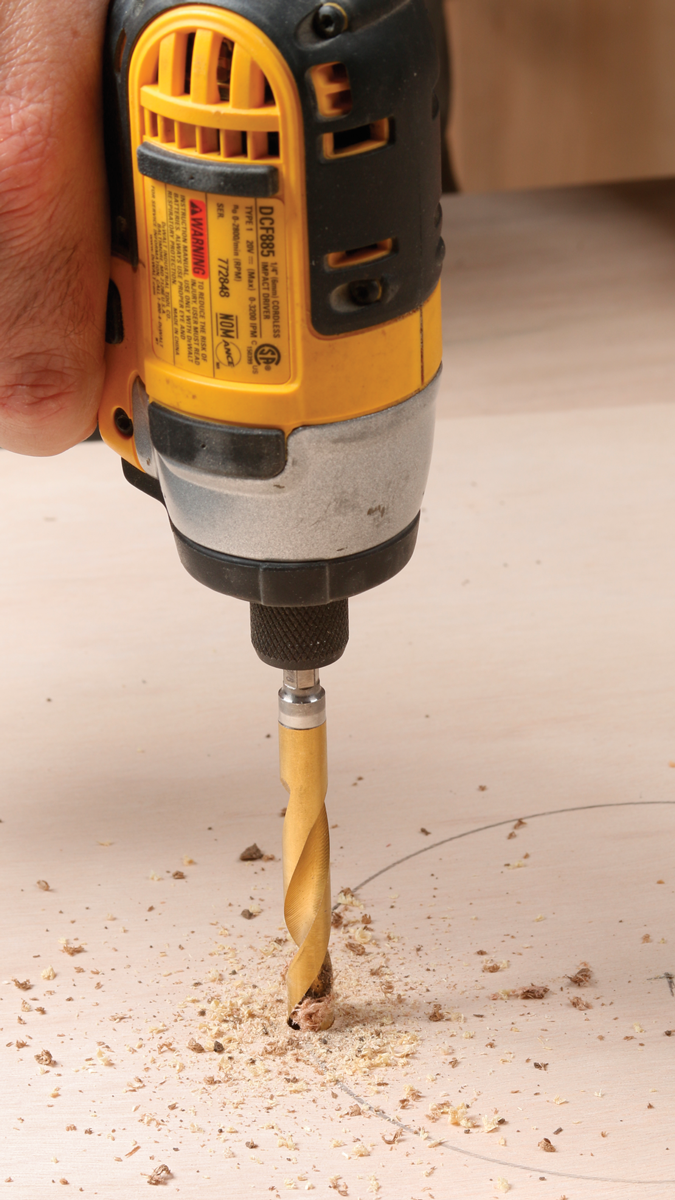
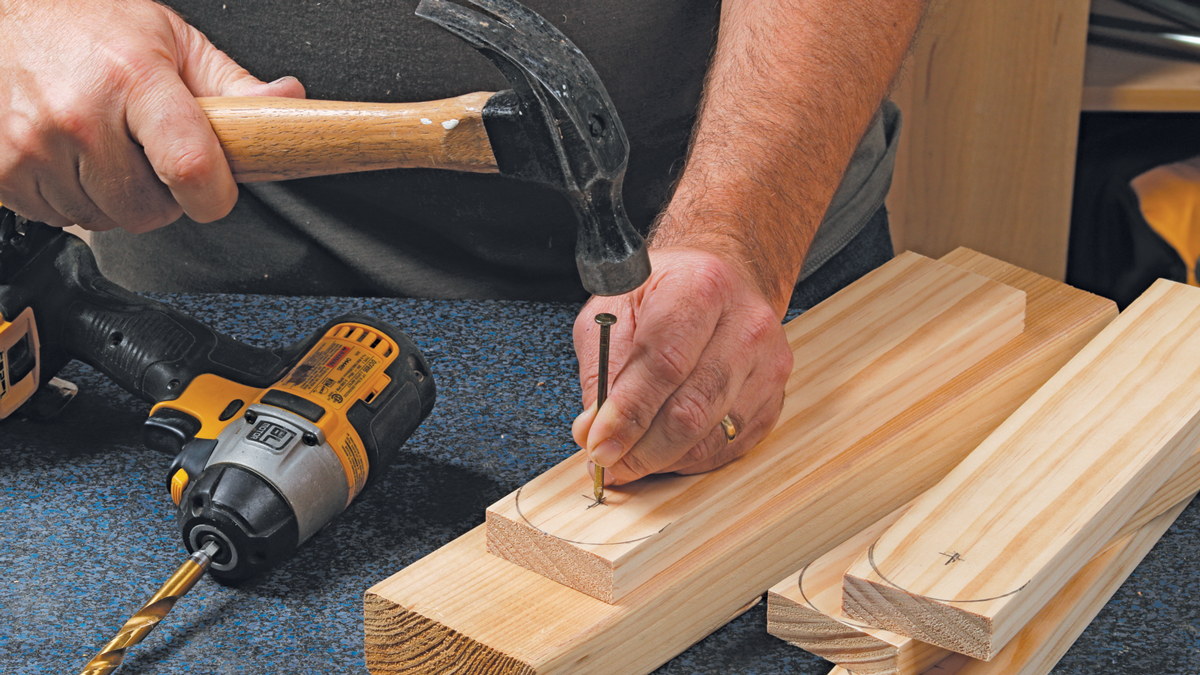
    3. Jigsaw needs a starting point. A 3/8-in. drill bit will work well for most jigsaw blades. You’ll need to overlap the outside of the circle by a little to let the jigsaw blade drop in and line up with the circle.

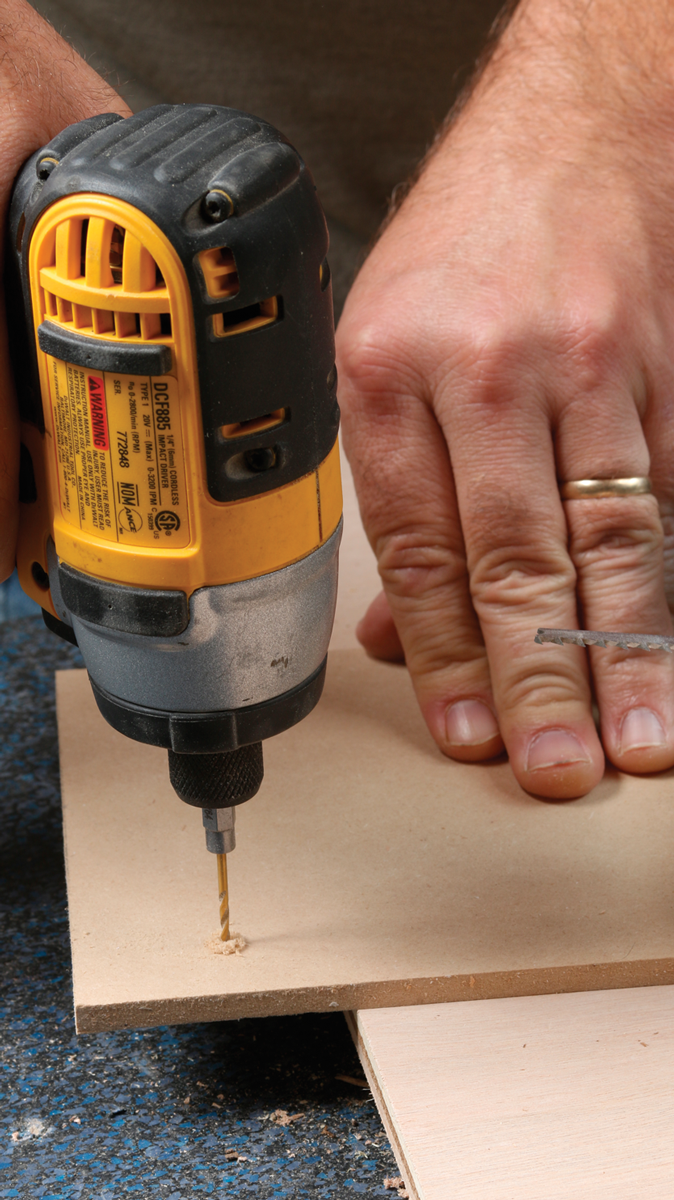
    4. Jigs need a nailhole tool. All you need is a thin piece of plywood or MDF for this jig. Start by drilling a hole for the nail.

    Next hole sets the radius. Now, at the same distance from the edge as the nail hole and exactly 3 in. away, make center marks and drill a 3/8-in. hole.

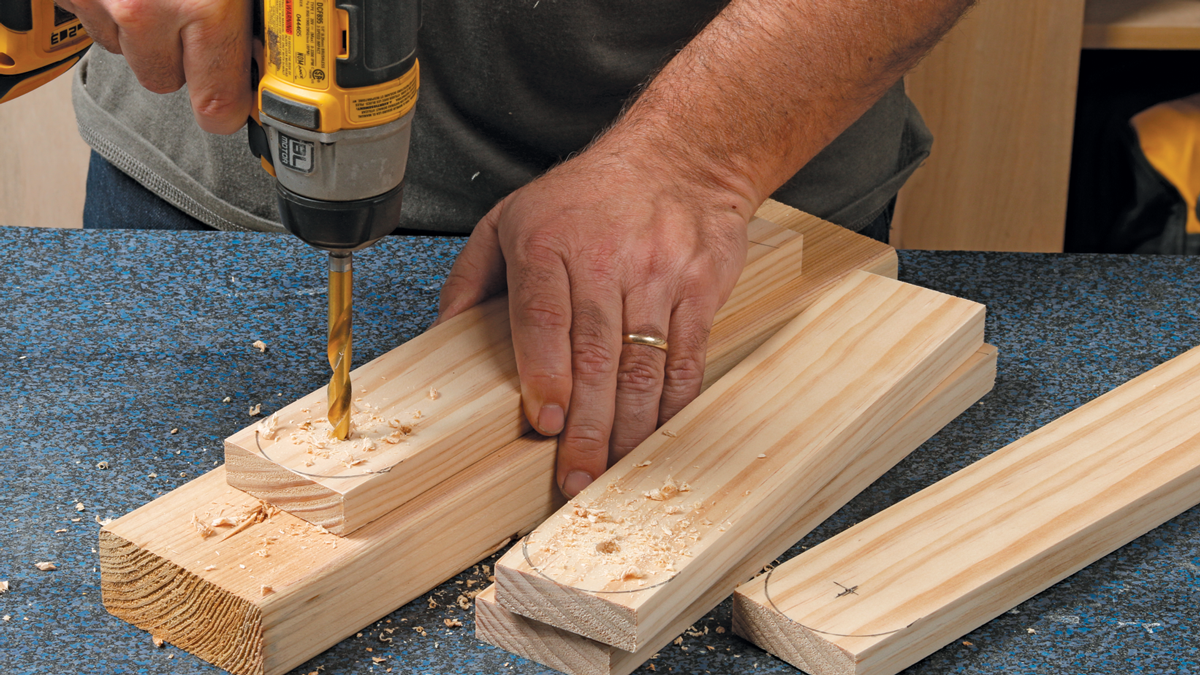
    5. Next hole sets the radius. Now, at the same distance from the edge as the nail hole and exactly 3 in. away, make center marks and drill a 3/8-in. hole.

    Attachment is critical. Double-faced tape is super-handy.

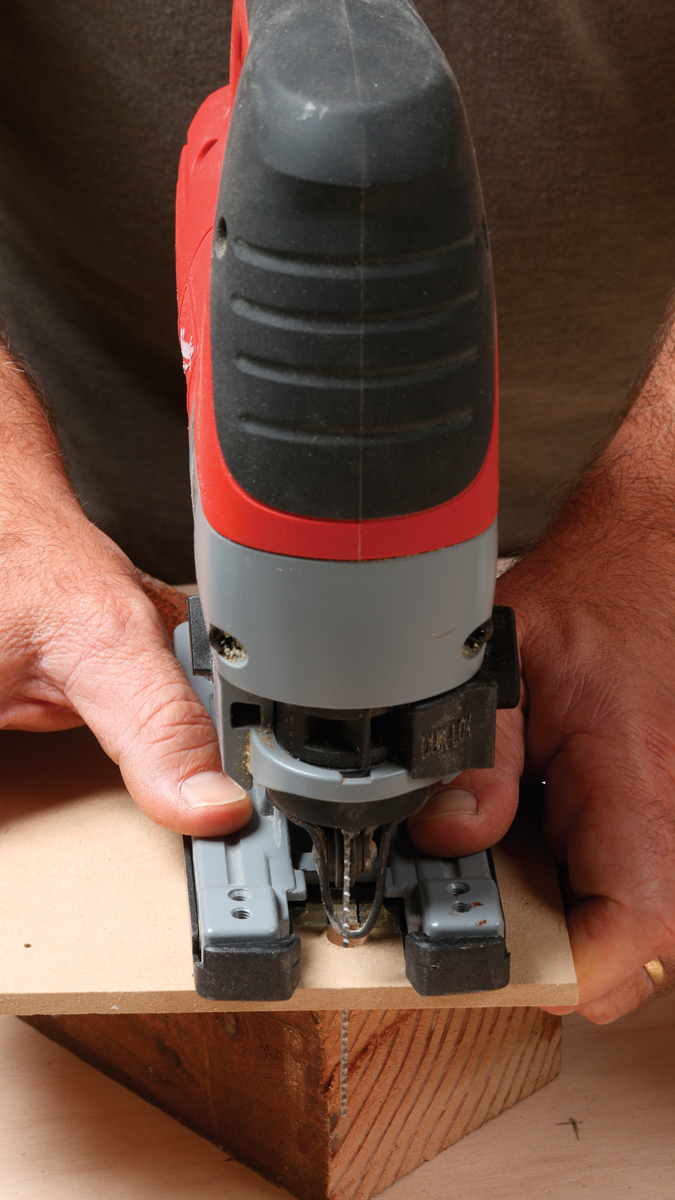
    6. Attachment is critical. Double-faced tape is super-handy. Use it to attach the jigsaw to the jig. The key when attaching the jigsaw is to center the blade in the 3/8-in. hole and, at the same time, line the base of the saw up exactly parallel with the end of the jig (perpendicular to the holes) so the sawblade wants to travel straight as it goes around the circle.

    Drop the blade into the hole, press the pivot nail down, and start cutting! Pull back after you go a few inches to make sure the blade isn’t wandering off the line.

    . If it is, you’ll need to detach the saw and correct its alignment on the jig.

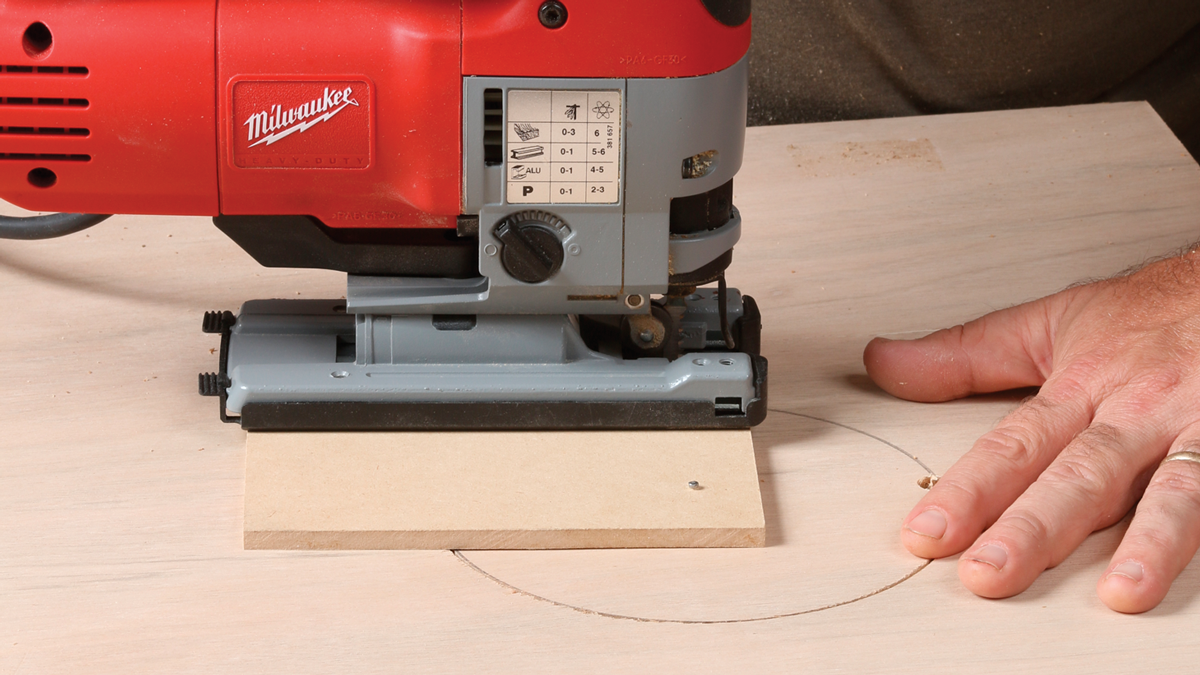
    7. This is the fun part. Drop the blade into the hole, press the pivot nail down, and start cutting! Pull back after you go a few inches to make sure the blade isn’t wandering off the line. If it is, you’ll need to detach the saw and correct its alignment on the jig.

    Drop that stick.

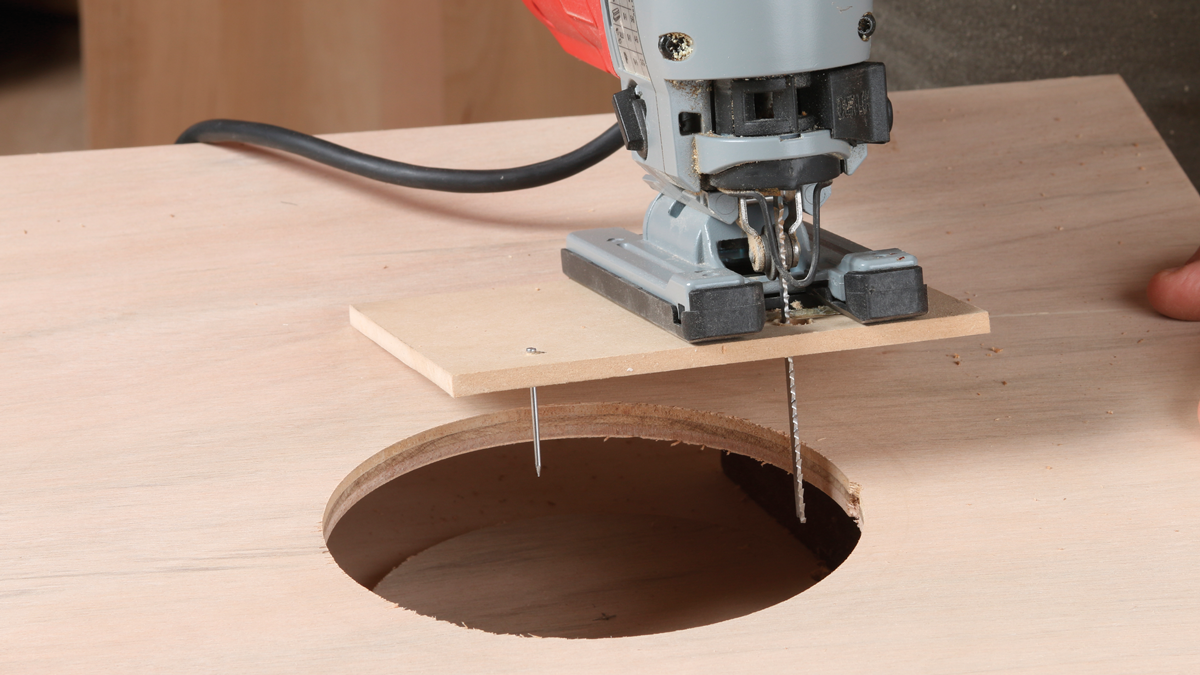
    8. Drop that stick. Go easy at the end for a smooth finish, and watch the disk drop out. You have achieved cornhole! The rest is just window dressing.

    Sand it smooth. Use rough sandpaper to bevel the edge of the circle.

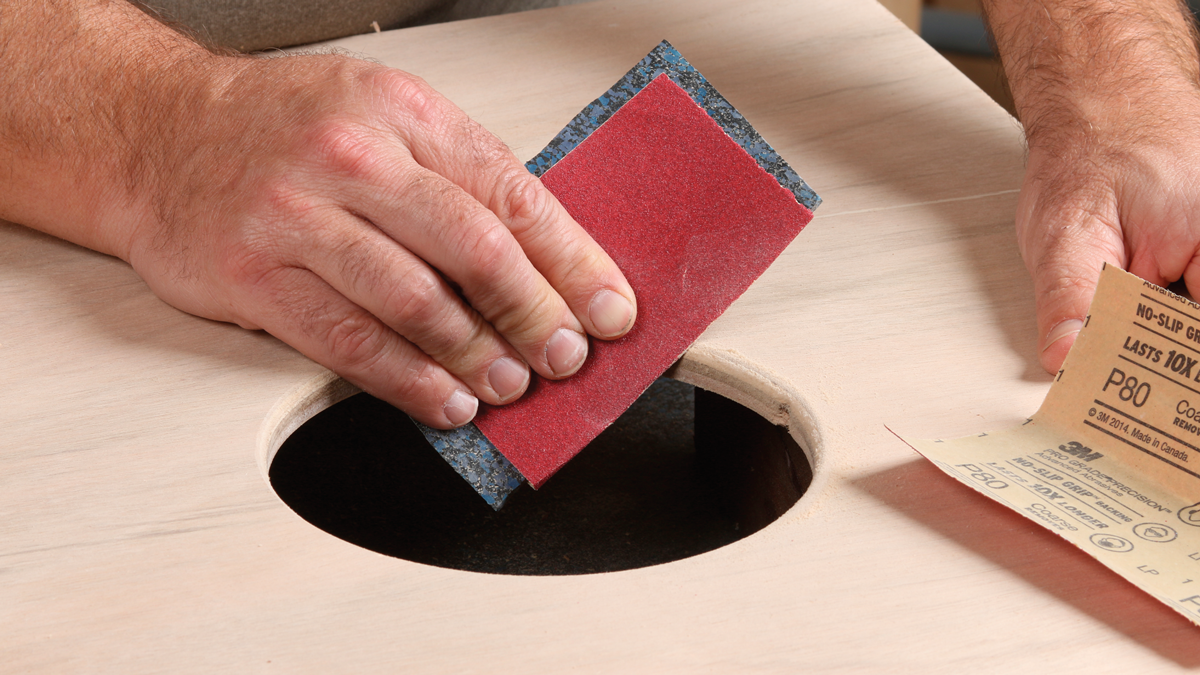
    9. Sand it smooth. Use rough sandpaper to bevel the edge of the circle. Notice the little extra bump from the drilled access hole? Don’t worry—no one else will.


    Screw on the frame

    Drill clearance holes in the platform.

    I’m doing this with a combination drill/countersink bit, which will set the screw heads flush with the surface. The drill bit is just bigger than the screw.

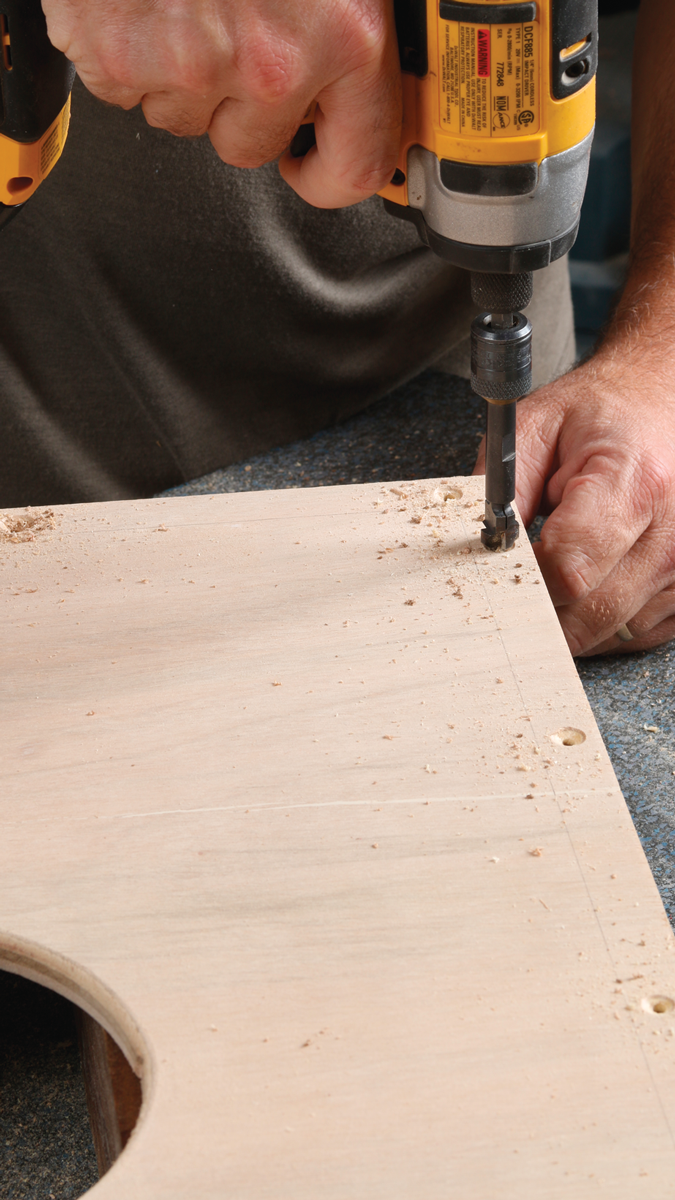
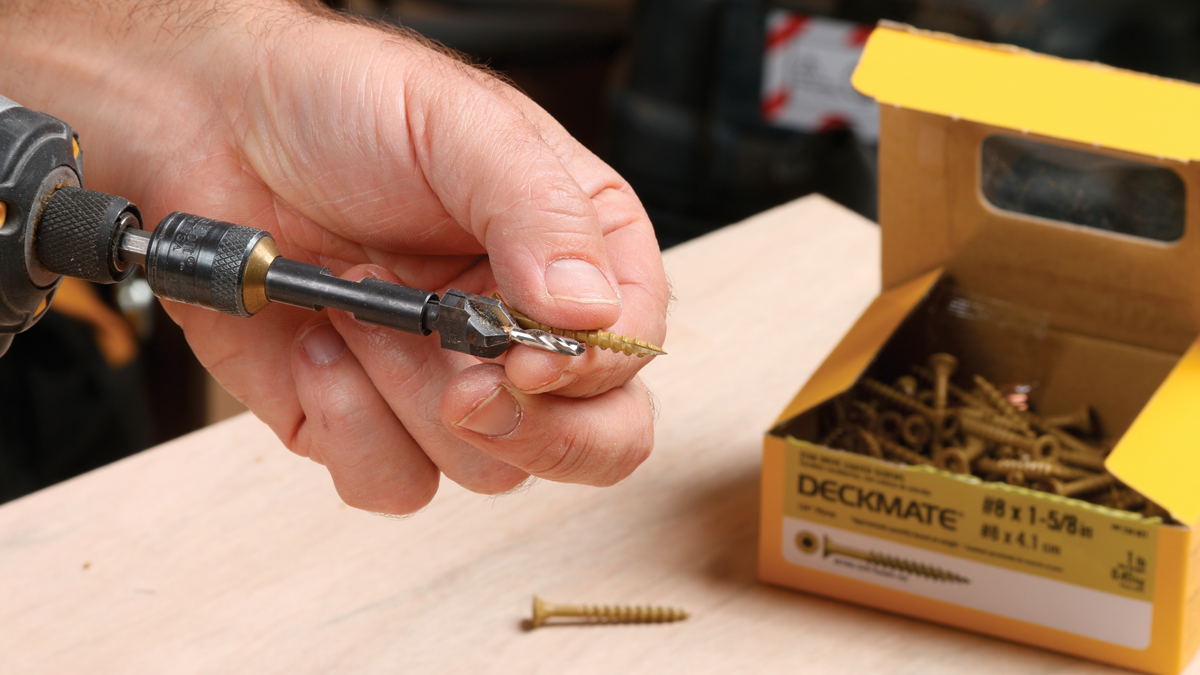
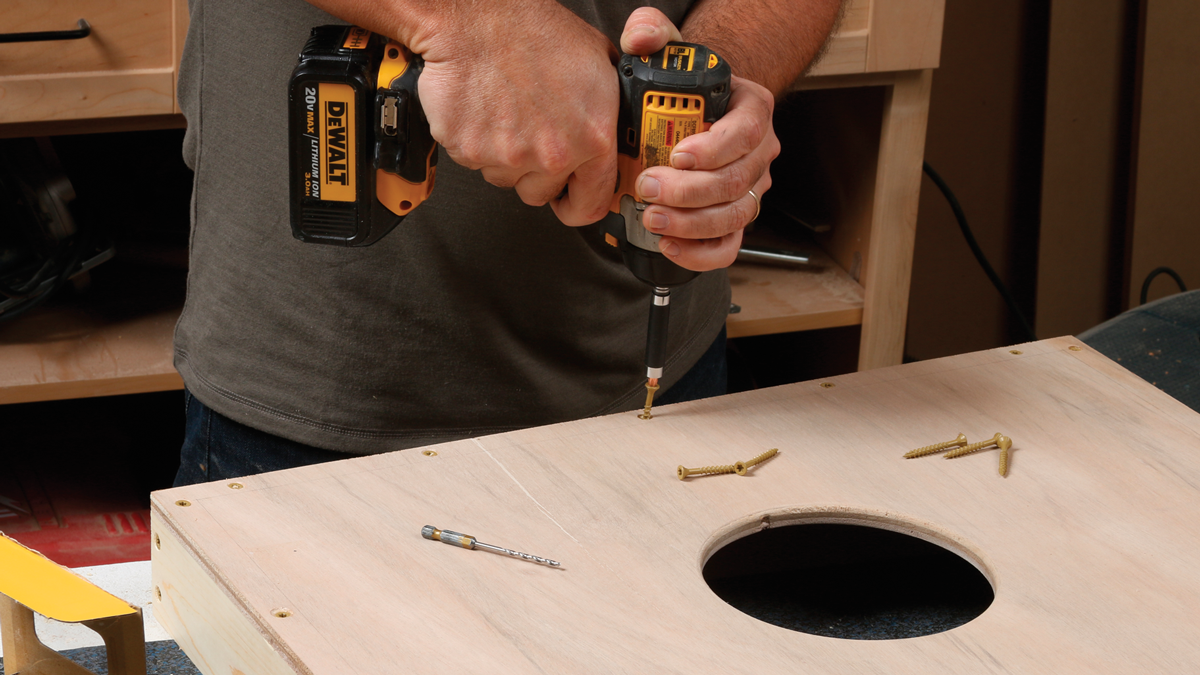
    1. Drill clearance holes in the platform. I’m doing this with a combination drill/countersink bit, which will set the screw heads flush with the surface. The drill bit is just bigger than the screw. Draw some guidelines to show how thick the frame pieces are down below, and consider where the pieces will begin and end when drilling these holes.

    Long pieces first. Cut these 4 ft. long, clamp them in place, and drill small pilot holes down into them to avoid splitting them.

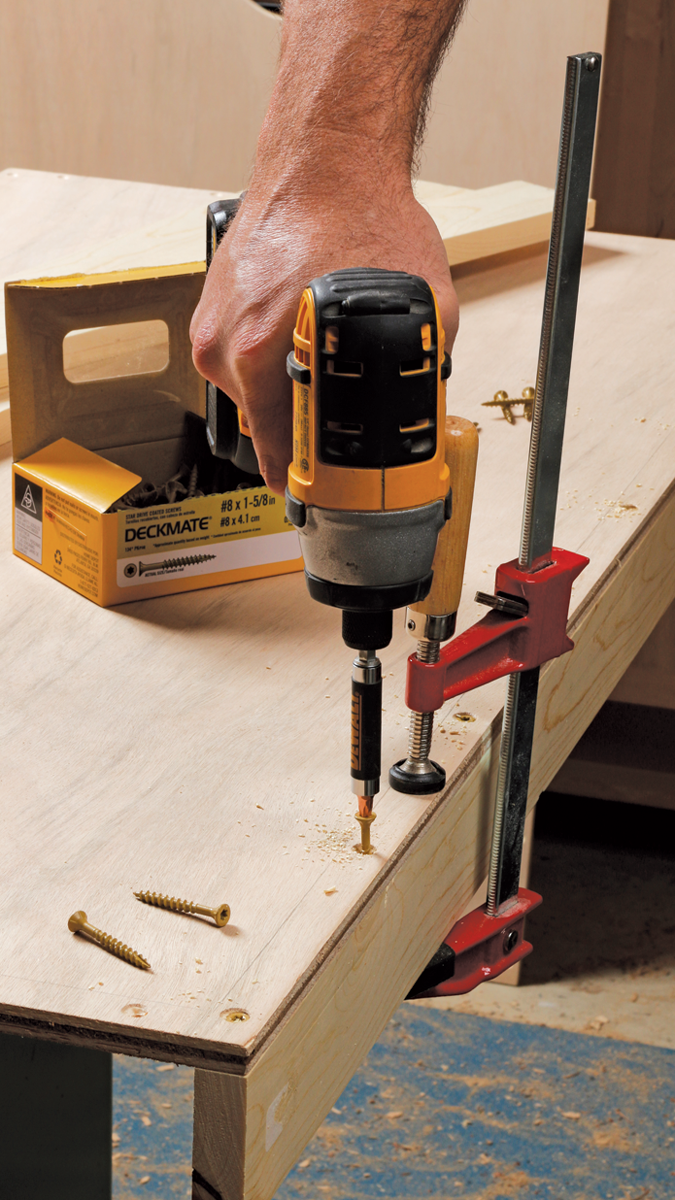
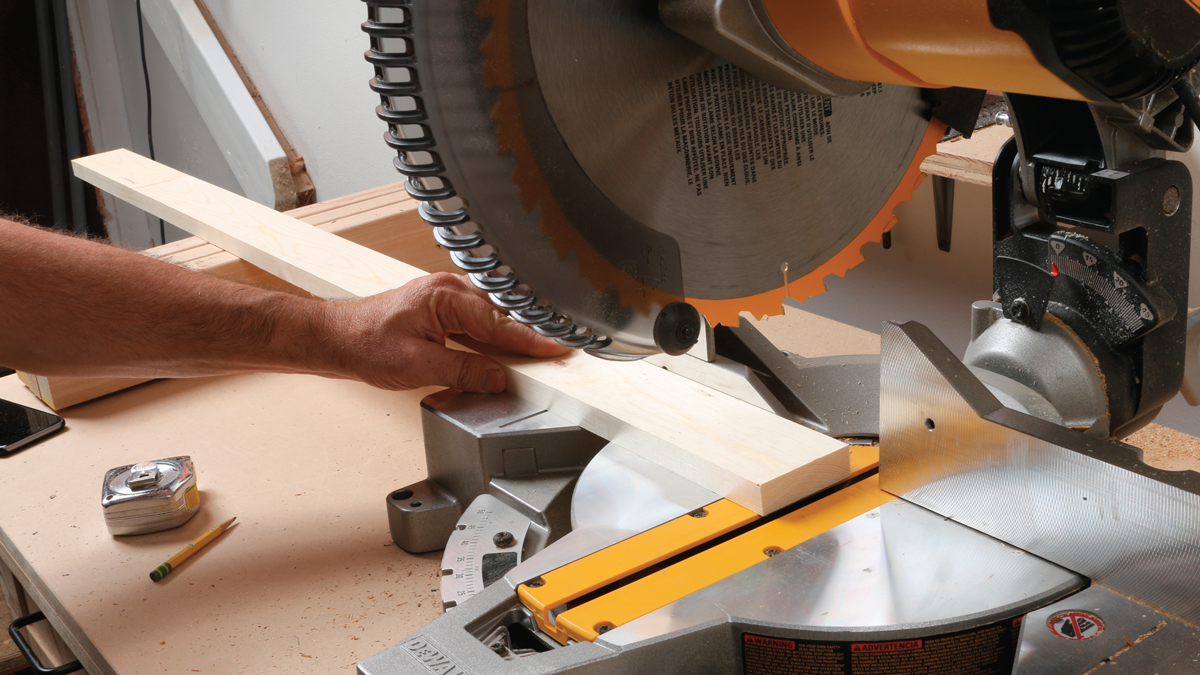
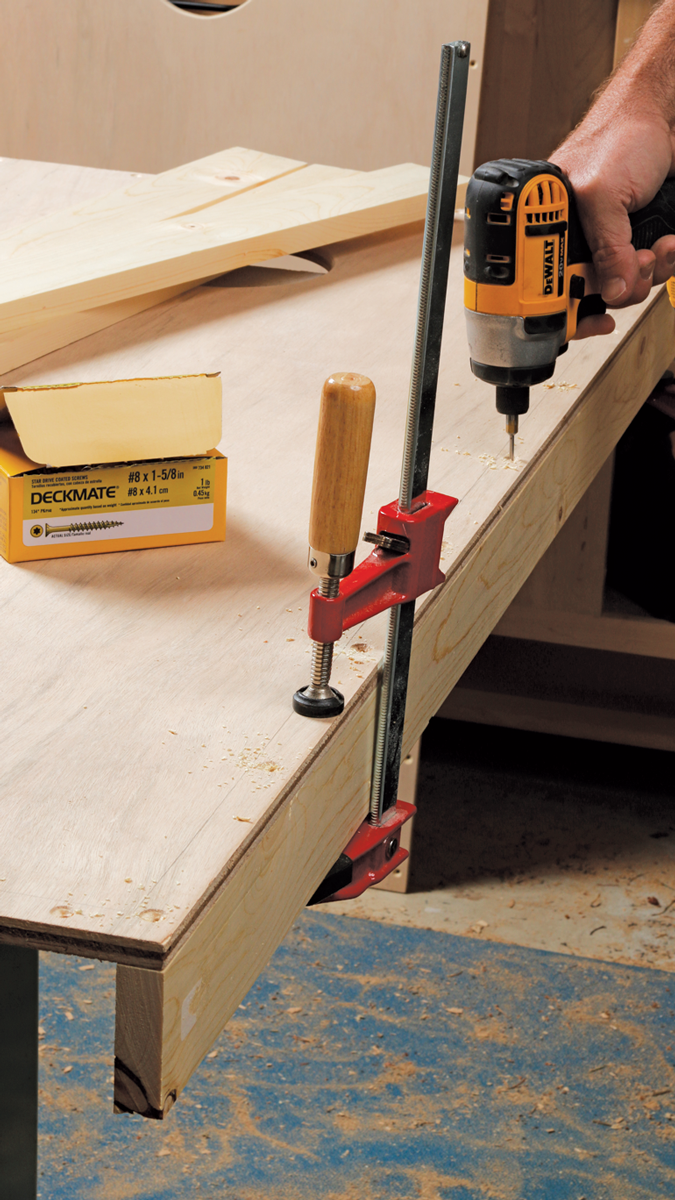
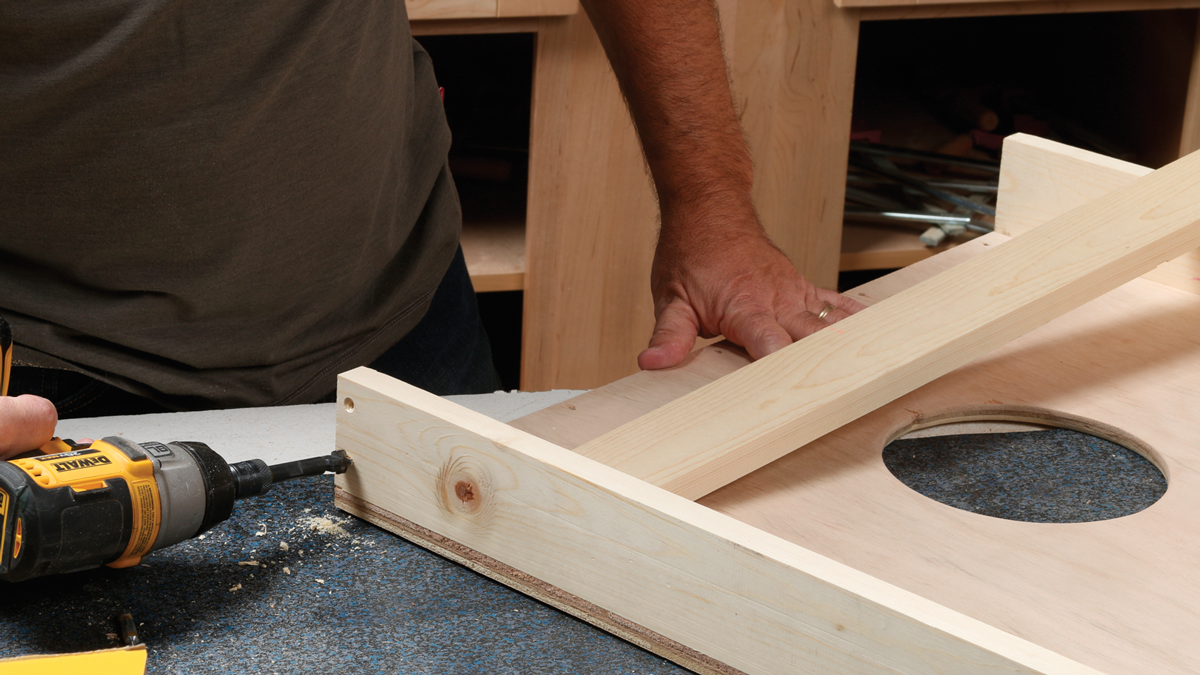
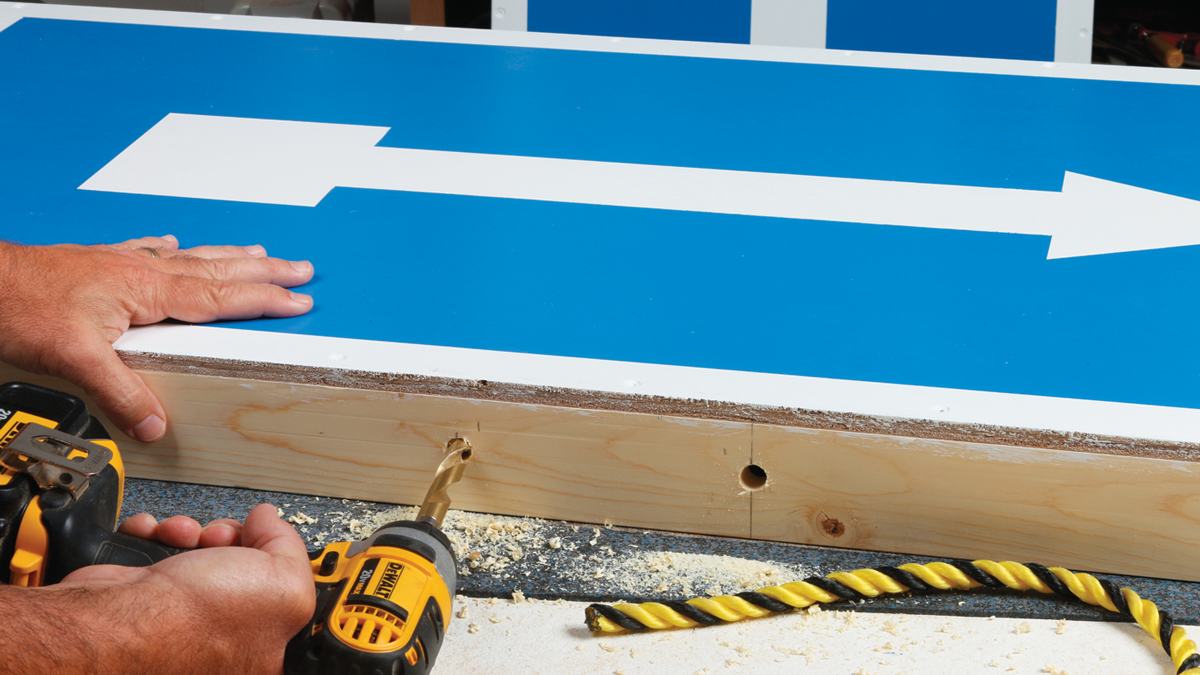
    2. Long pieces first. Cut these 4 ft. long, clamp them in place, and drill small pilot holes down into them to avoid splitting them. Then drive screws with no worries.

    Test-fit the short pieces.

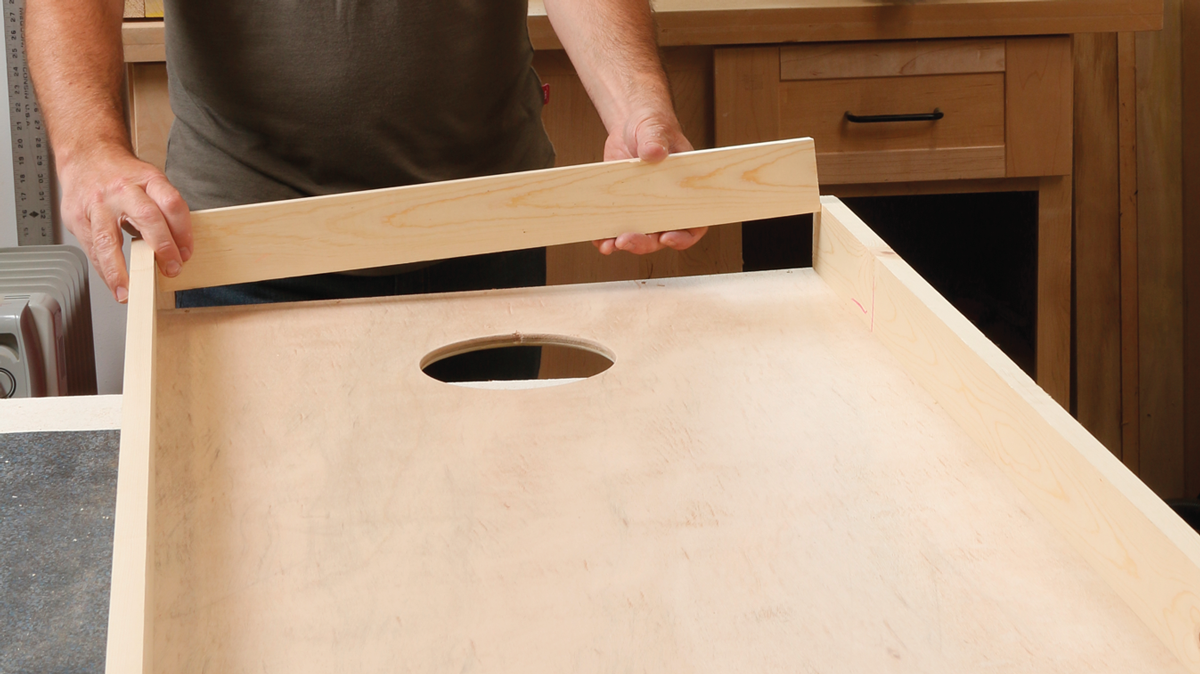
    3. Test-fit the short pieces. Nibble away at these until they drop snugly into place between the long frame pieces, and draw letters on the pieces so you know where they go.

    Screw into the ends first.

    Drill clearance holes with the combo bit as before, then position the pieces and drill smaller pilot holes before driving in the screws. This is the sequence for getting maximum holding power from screws without splitting the wood.

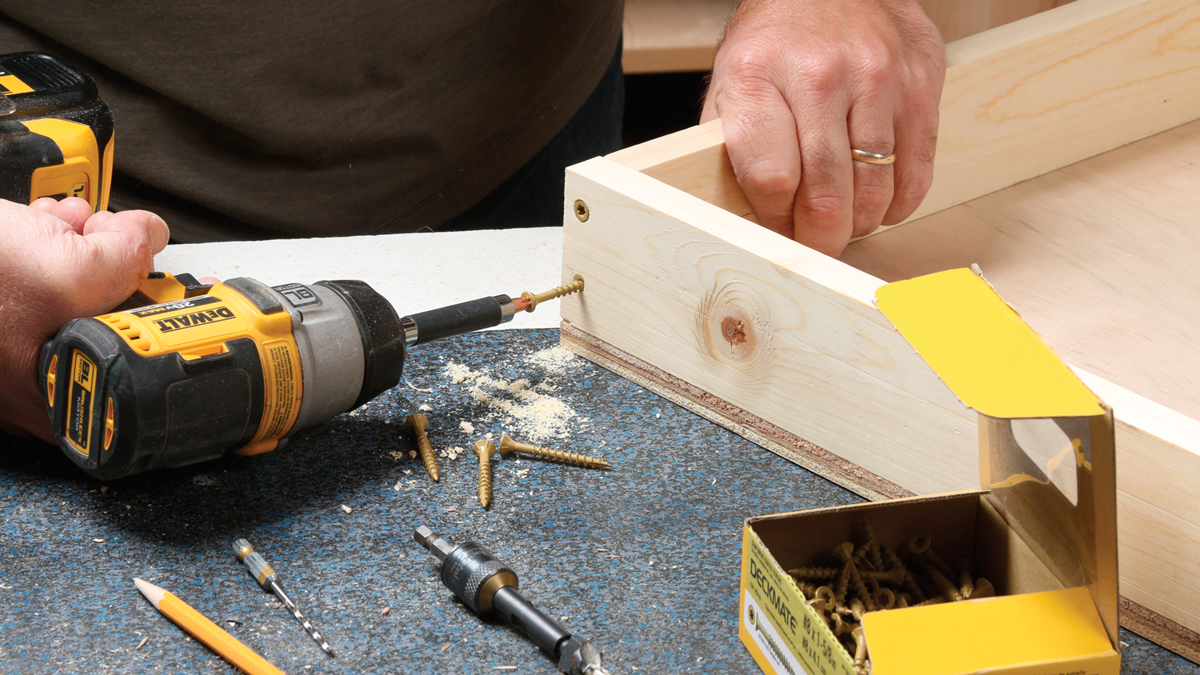
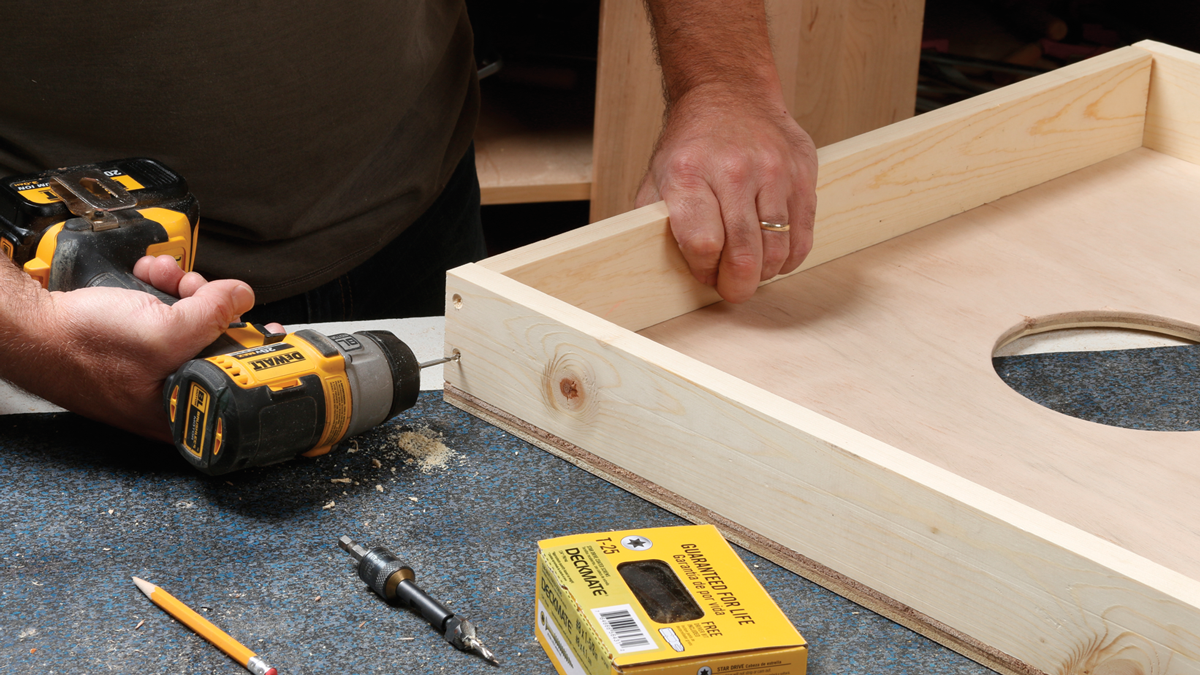
    4. Screw into the ends first. Drill clearance holes with the combo bit as before, then position the pieces and drill smaller pilot holes before driving in the screws. This is the sequence for getting maximum holding power from screws without splitting the wood.

    Now the top side.

    5. Now the top side. Finally, drive screws down through the platform into the end frame pieces, locking them in place. Be sure to drill those pilot holes first.
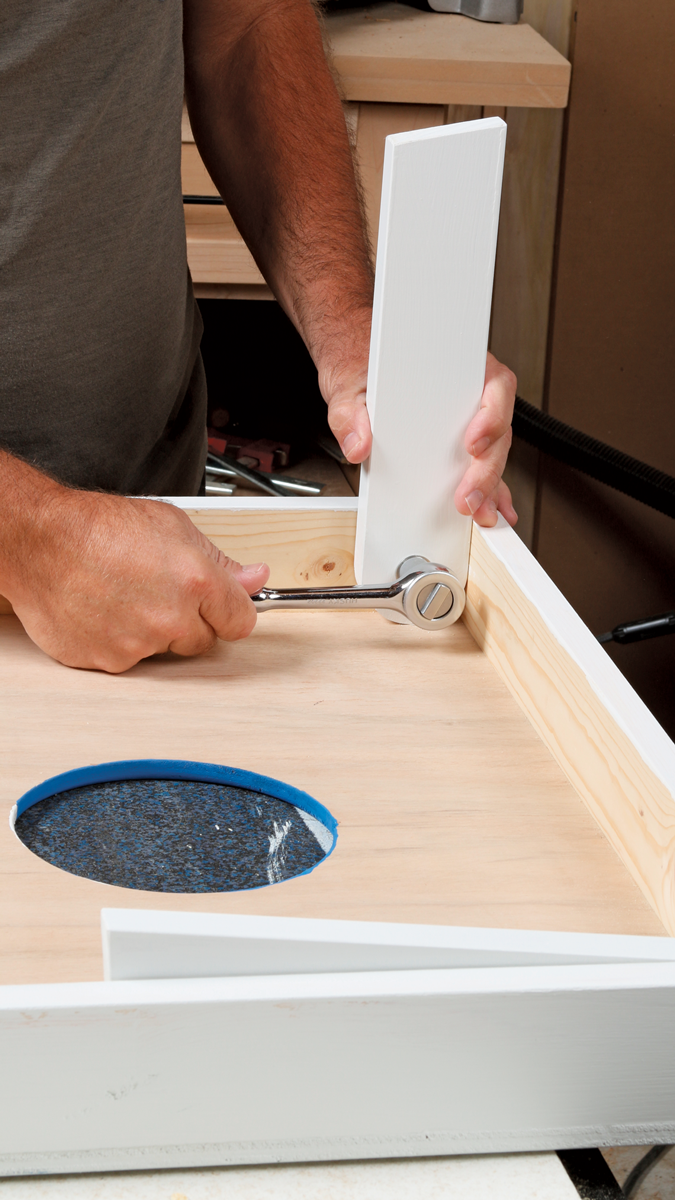
    Bolt on the legs

    Lay out the legs.

    1. Lay out the legs. In order to pivot under the platform, the legs need a half-circle cut on their ends. Mark the center points for these curves and then mark them with any compass.

    Drill the legs. To make sure this big 3/8-in. drill bit doesn’t wander, first make a dent on your marks using a big nail.

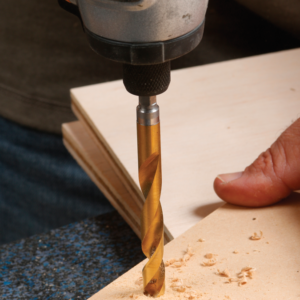
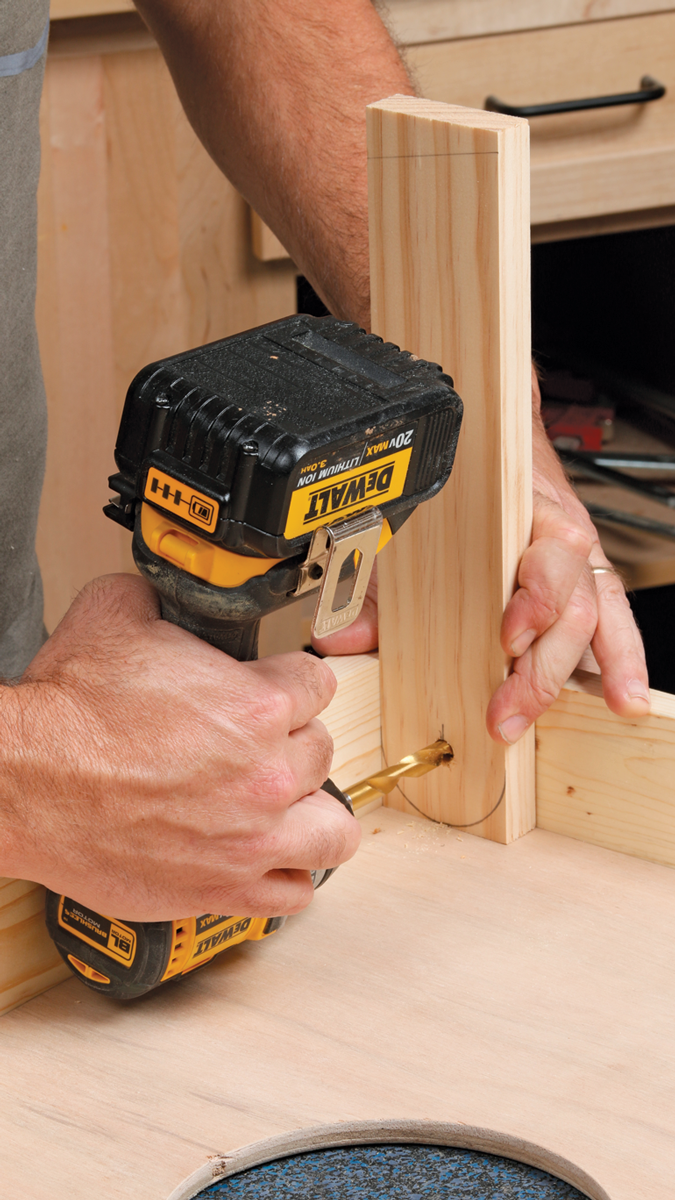
    2. Drill the legs. To make sure this big 3/8-in. drill bit doesn’t wander, first make a dent on your marks using a big nail. Put a piece of scrapwood under the legs when drilling to prevent the drill from chipping out the back side.

    Use the legs as a drill guide. o drill matching holes in the frame, position the legs in the corners and drill through them into the frame.

    3. Use the legs as a drill guide. To drill matching holes in the frame, position the legs in the corners and drill through them into the frame. Just drill a little bit to mark the spot, and then remove the leg to finish the job.

    Saw the curves.

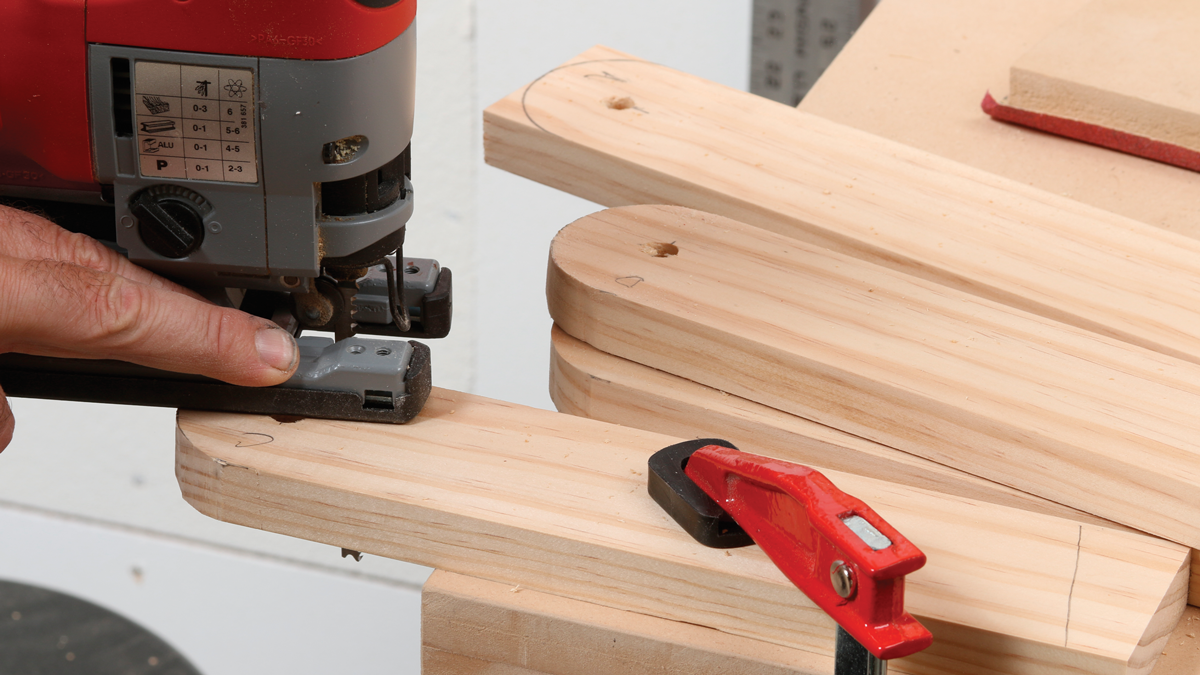
    4. Saw the curves. The jigsaw makes short work of these little curves. Just hold the base down on the leg to keep it flat and square to the cut.

    Chop the ends at the angle. This will make the legs sit flat on the ground.

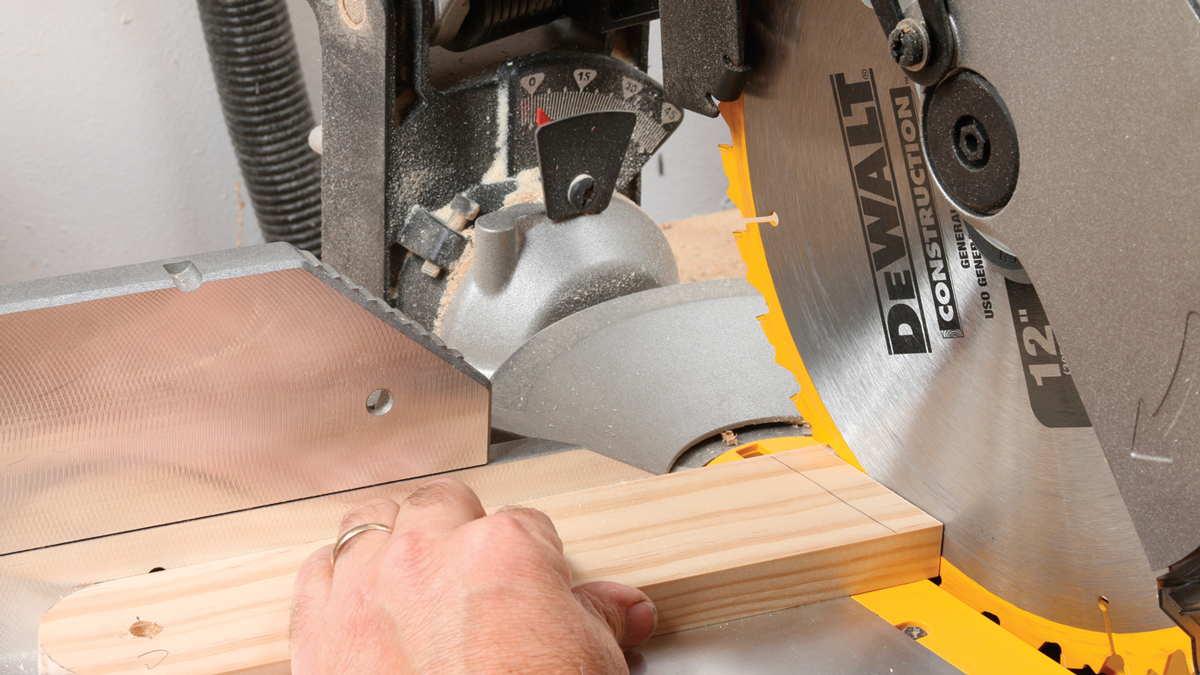
    5. Chop the ends at the angle. This will make the legs sit flat on the ground. You should have already cut them to the right length, so just make the angle end right at the tip. A 11-1/2-degree angle will make them sit flat on the ground.

    Smart bolt setup. Use a 3/8-in. carriage-head bolt, plus a locking nut and two washers, one plastic and one metal.


    The square head of the carriage bolt will sink into the wood on the back side and resist turning, making it easy to tighten everything in place. The plastic washer goes between the wood parts to reduce friction, and then the leg, metal washer, an

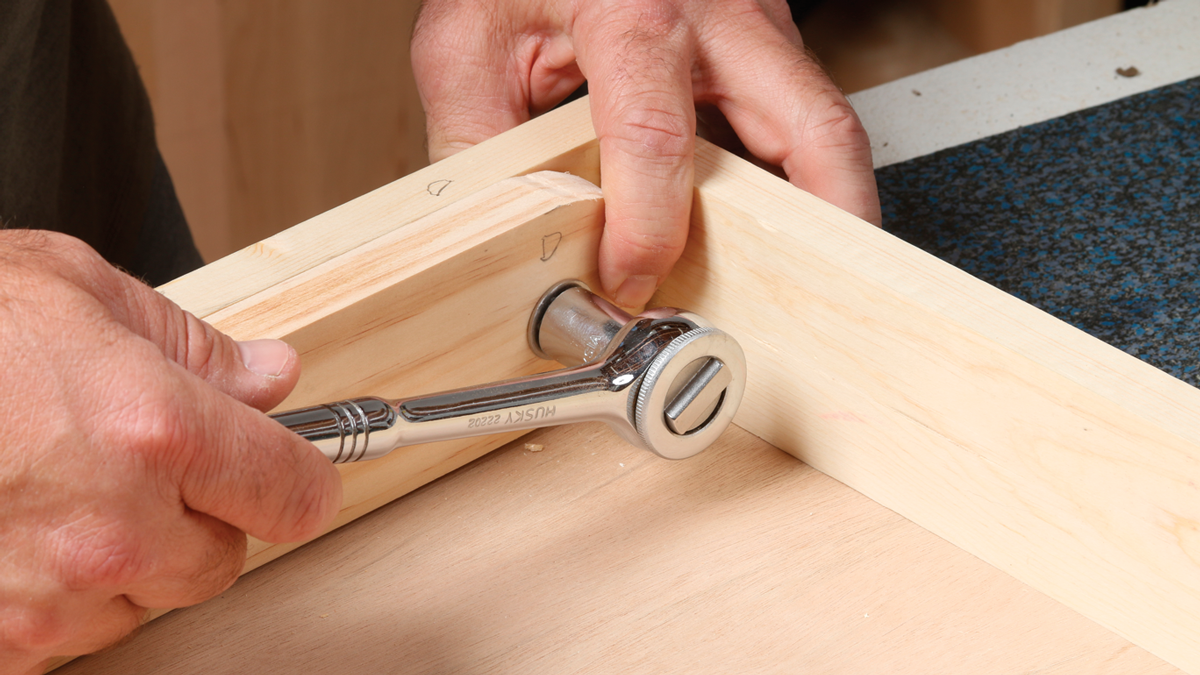
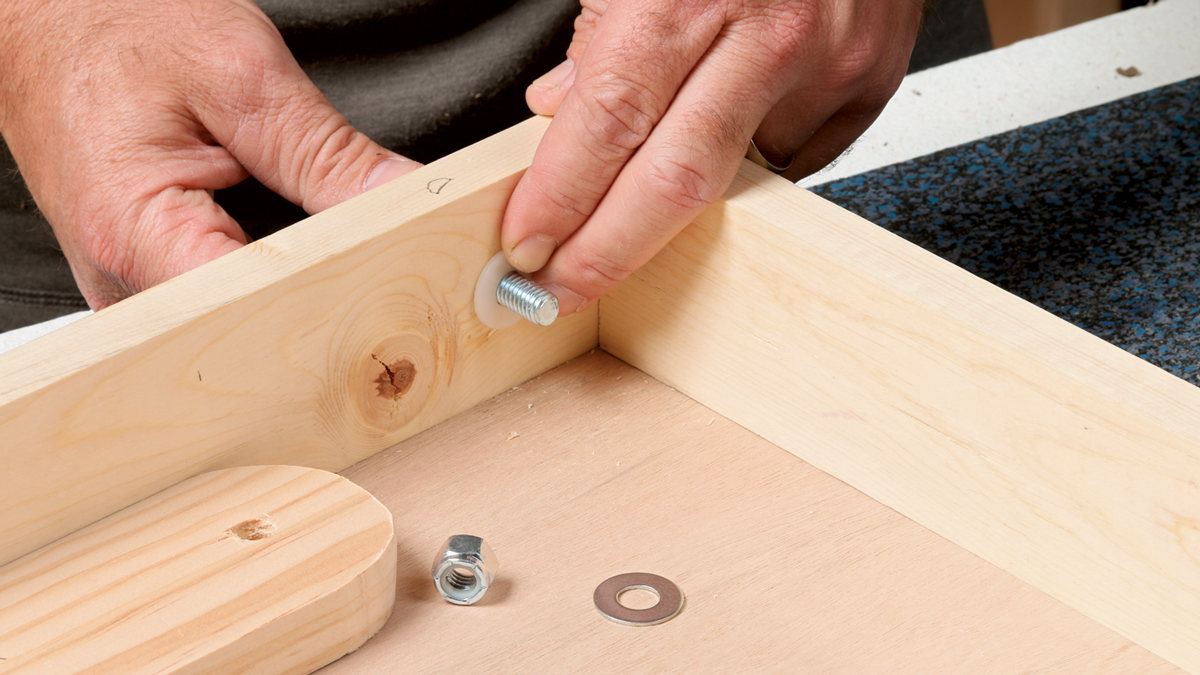
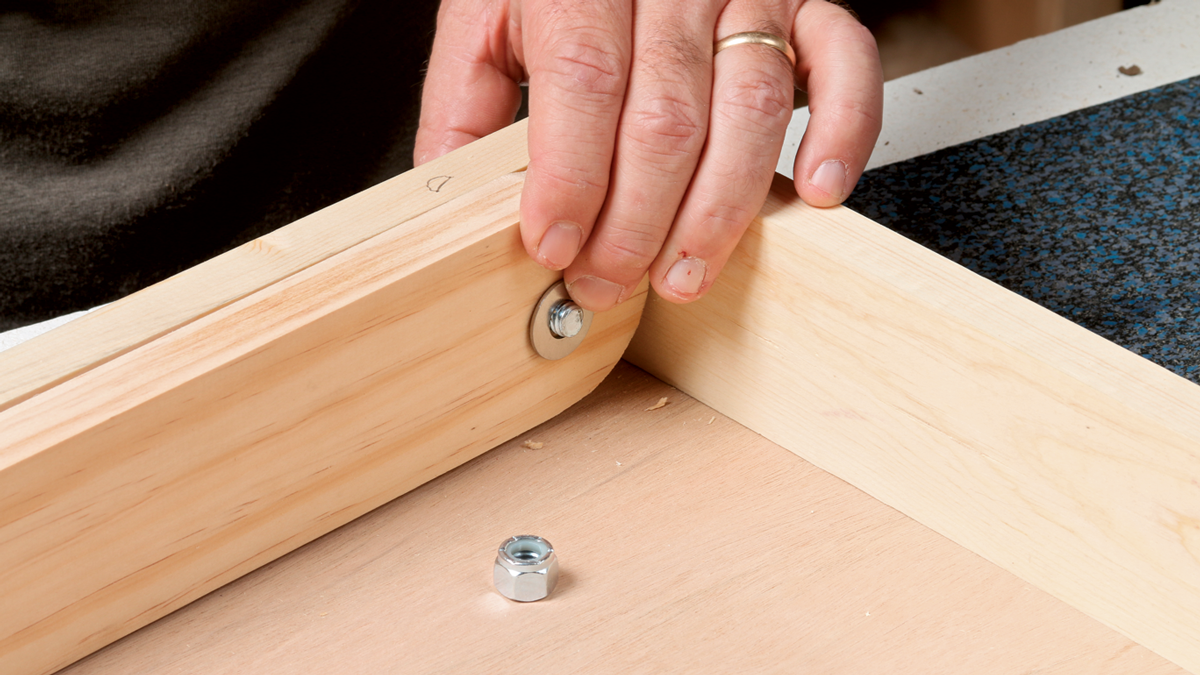
    6. Smart bolt setup. Use a 3/8-in. carriage-head bolt, plus a locking nut and two washers, one plastic and one metal. The square head of the carriage bolt will sink into the wood on the back side and resist turning, making it easy to tighten everything in place. The plastic washer goes between the wood parts to reduce friction, and then the leg, metal washer, and lock nut go on. Tighten the nut firmly and it won’t come loose.

    Test run. Pivot the legs up into their working position.

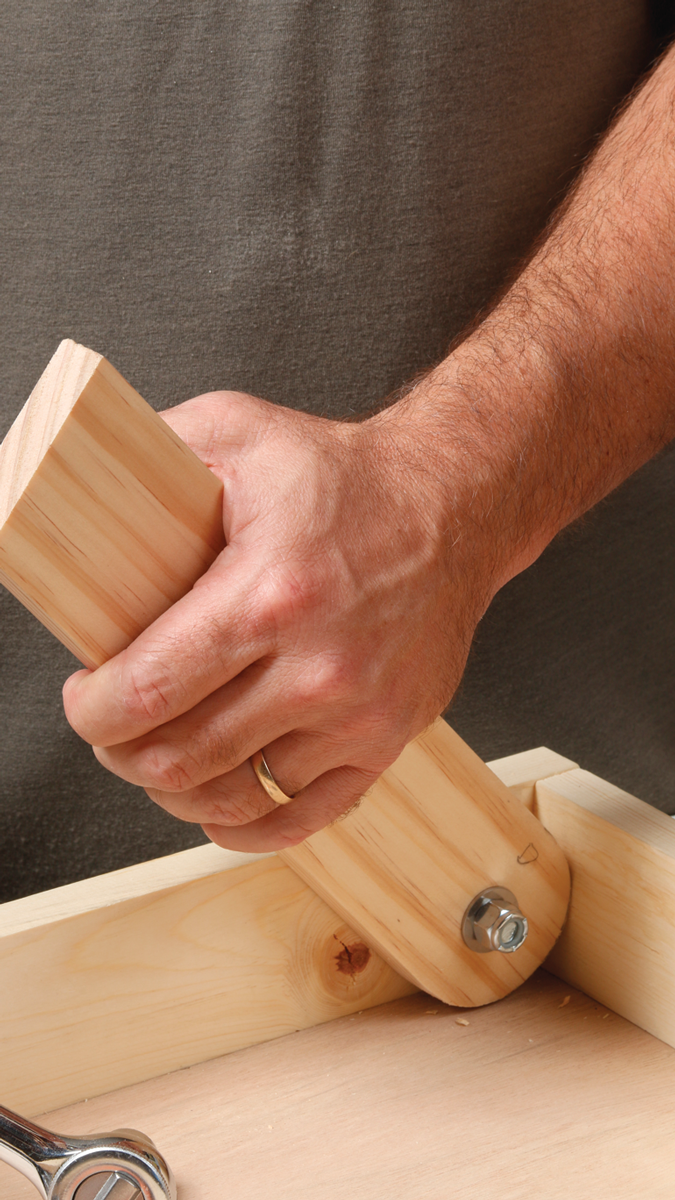
    7. Test run. Pivot the legs up into their working position. Note how the curve lets them pivot, and they come to rest tight against the frame.

    Time for a paint job

    Designing is as fun as building. So use your imagination when it comes time to paint this project. Now’s the time to impress friends with your own nerdy/gross/stylish theme.

    Grab some medium-grit sandpaper and your trusty block and knock off the sharp corners.

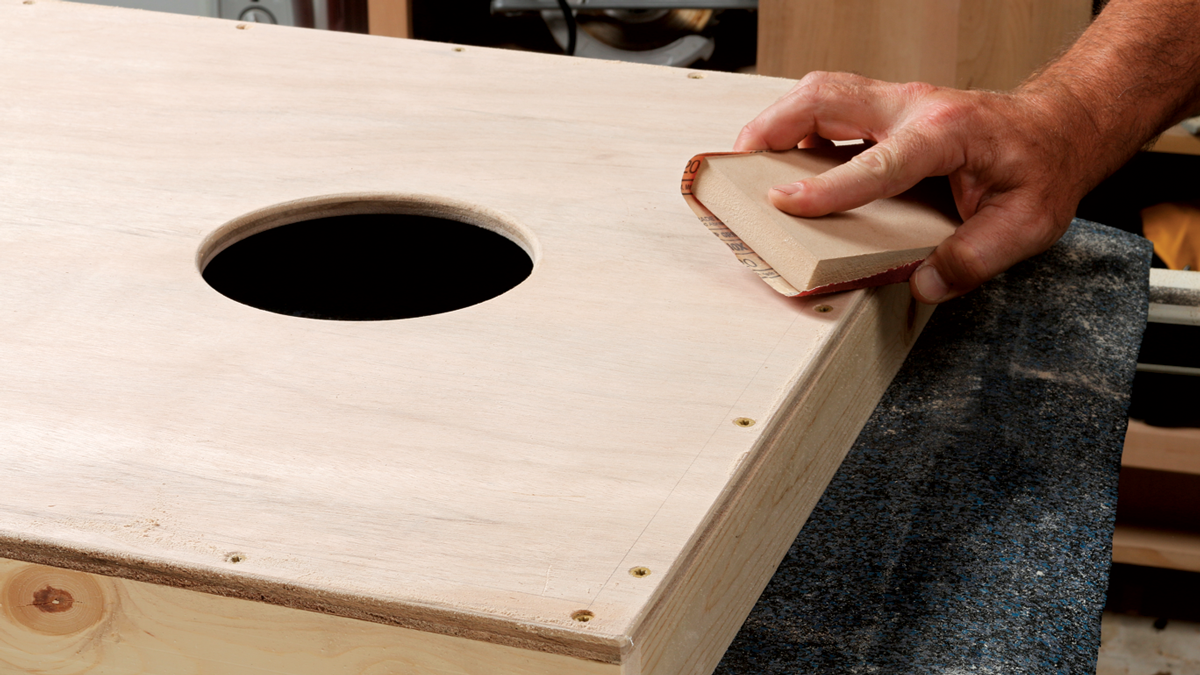
    1. User friendly.  Grab some medium-grit sandpaper and your trusty block and knock off the sharp corners.

    Base color first

    I started with the blue on the platforms. The first coat will feel fuzzy after it dries, so sand it lightly with fine sandpaper and then apply a second coat for a smooth finish.

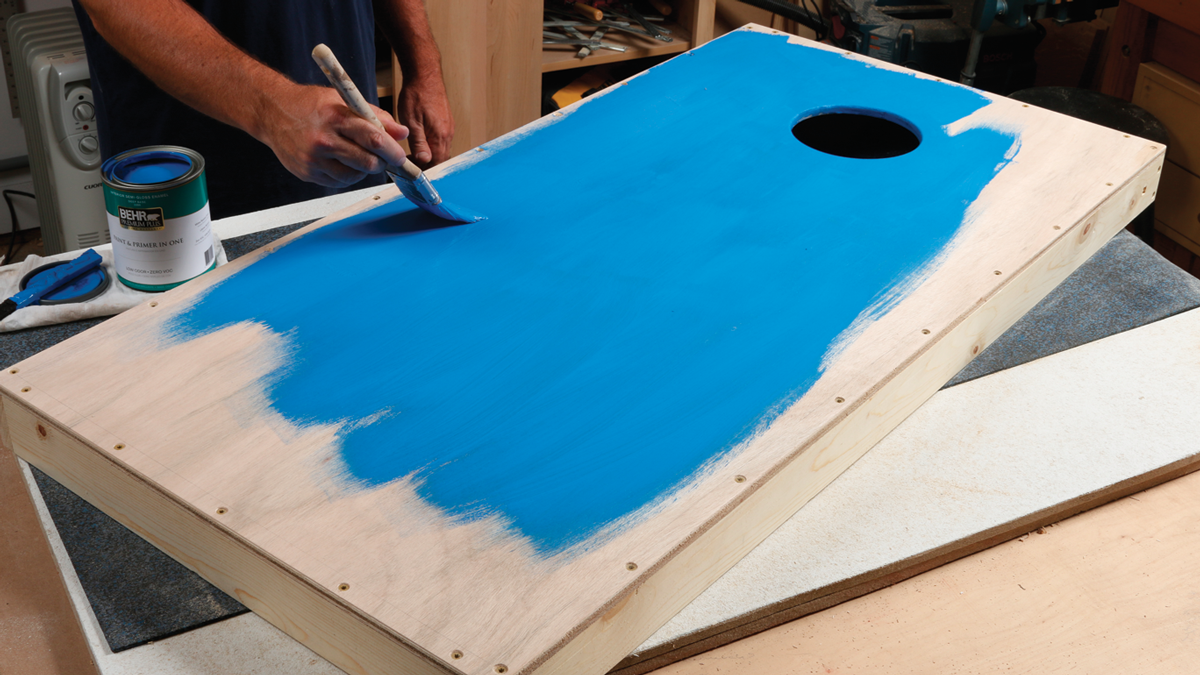
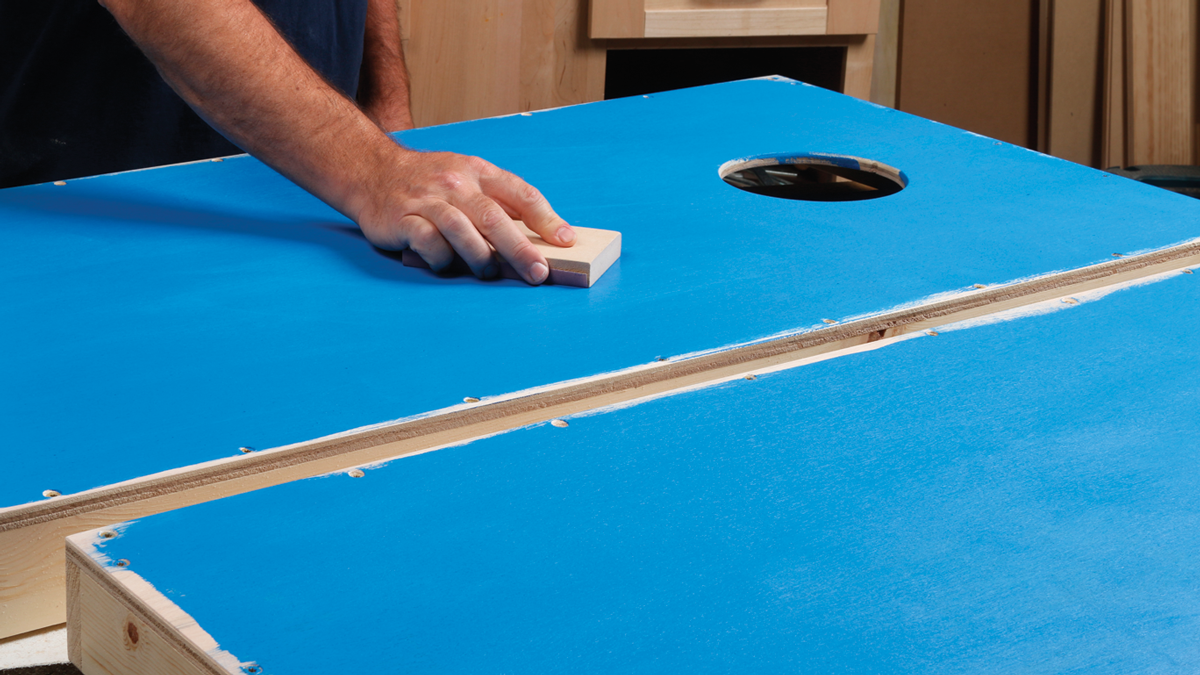
    2. Base color first. I started with the blue on the platforms. The first coat will feel fuzzy after it dries, so sand it lightly with fine sandpaper and then apply a second coat for a smooth finish.

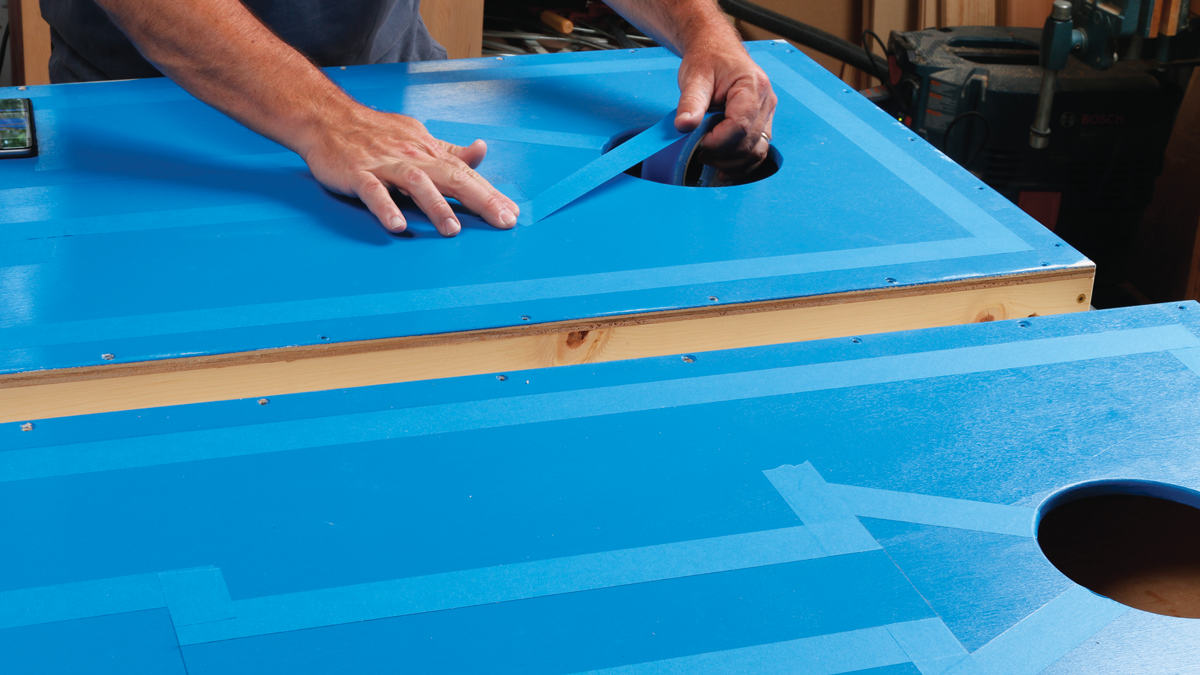
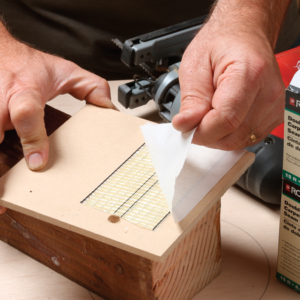
    3. Lay out the pattern. If you want to do more than one color like I did, lay out your next color in pencil and then place wide blue painter’s tape outside the lines. Rub the tape with your fingers to be sure it is adhered firmly and paint won’t get under it.

    Slop on the second color.

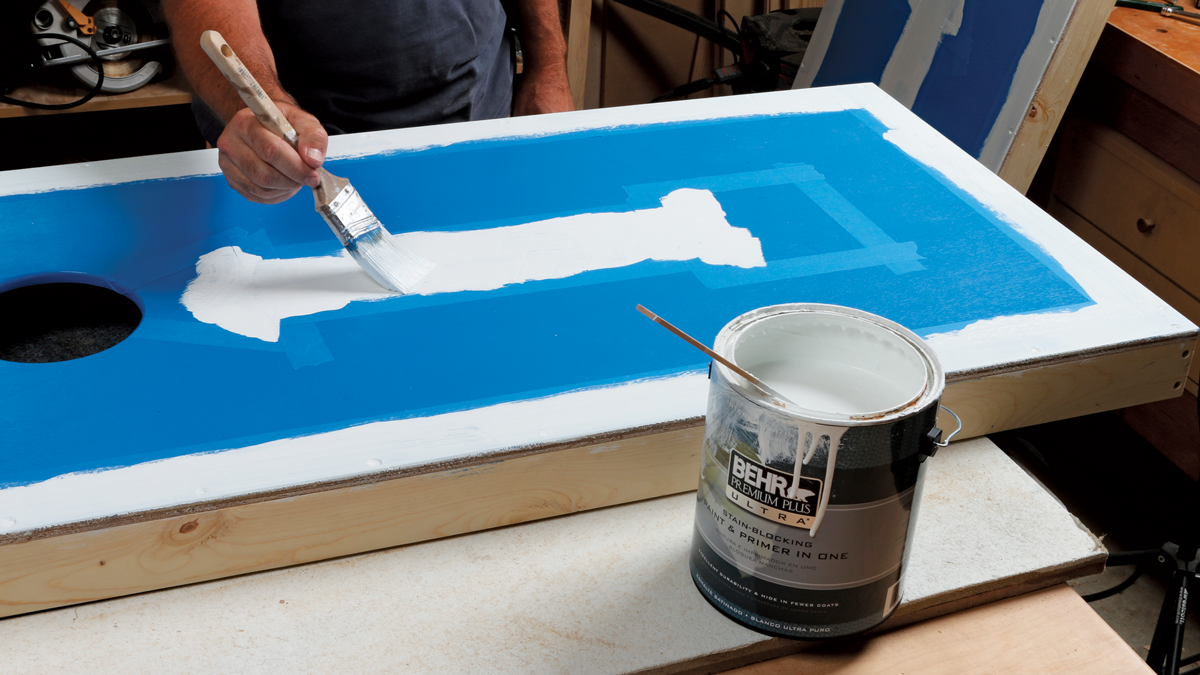
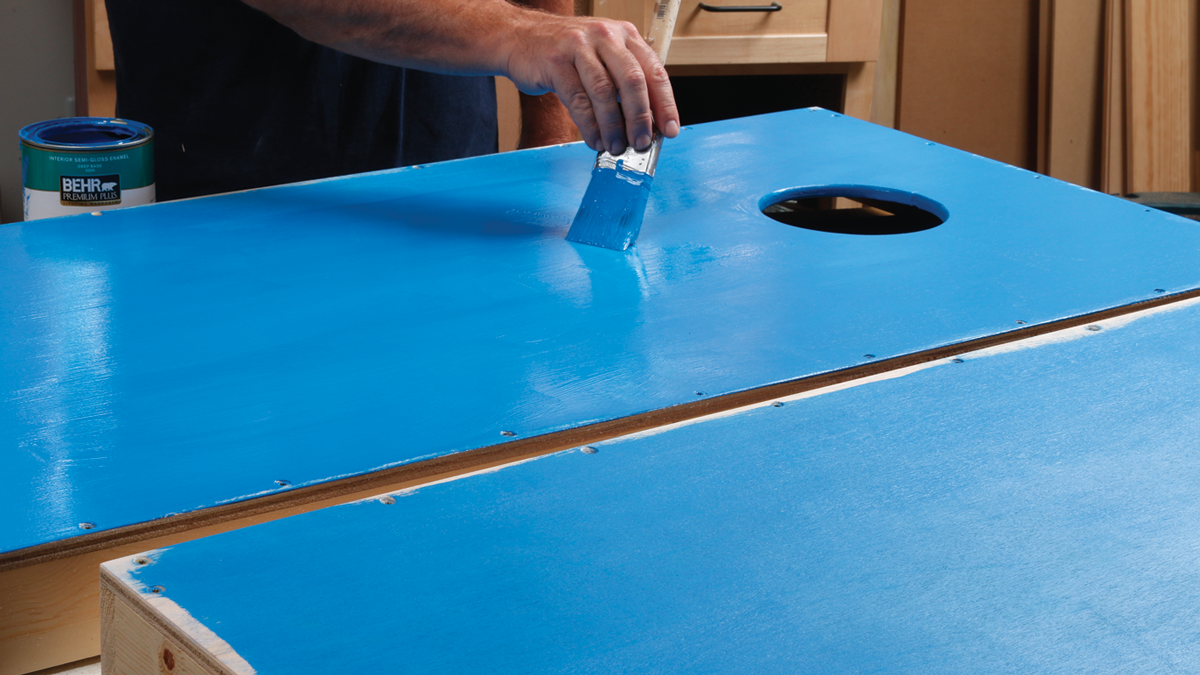
    4. Slop on the second color. Just make sure you don’t go past the tape, and try to lay it down smoothly. Add a second coat and you are done.

    Peel carefully

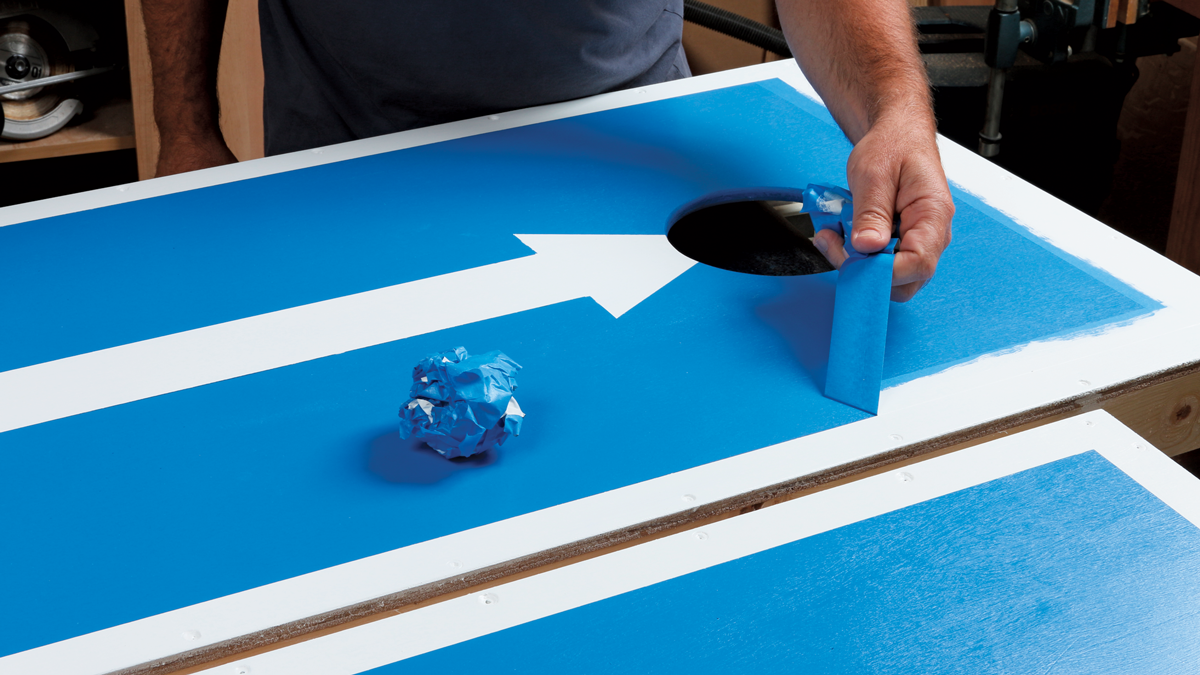
    5. Peel carefully. Once the paint dries, pull the tape away toward the outside, away from the paint, and go slow and steady. You should get an almost perfect border. It’s awesome to see the final pattern emerge.

    Finishing touches

    Add the rope handles. I used 1/2-in. rope, so I drilled 1/2-in. holes for it.

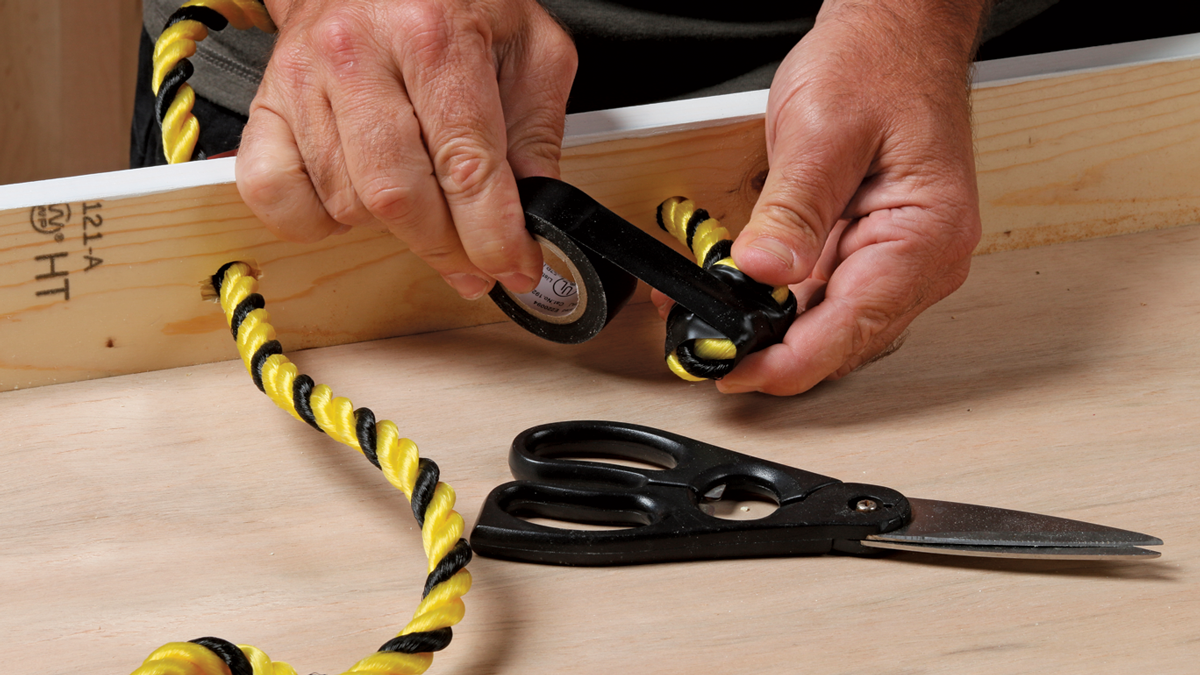
    1. Add the rope handles. I used 1/2-in. rope, so I drilled 1/2-in. holes for it. Then I removed the legs in order to paint them, finished painting the frame, and added the rope handles, knotting the ends. I wrapped the knots with electrical tape to keep them tight.

    2. Re-assemble. Bolt the legs back on. The round carriage-bolt heads are cleaner looking then regular bolts.

    Add the window hardware. I used window sash locks to hold the two platforms together for storage and travel.

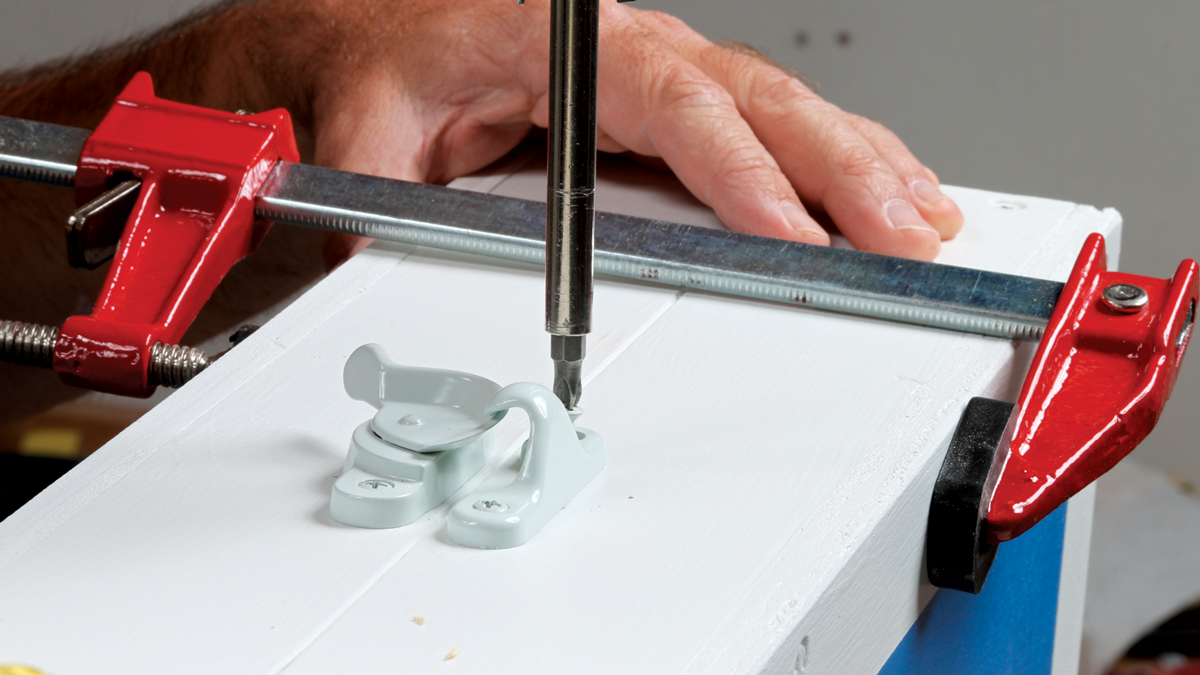
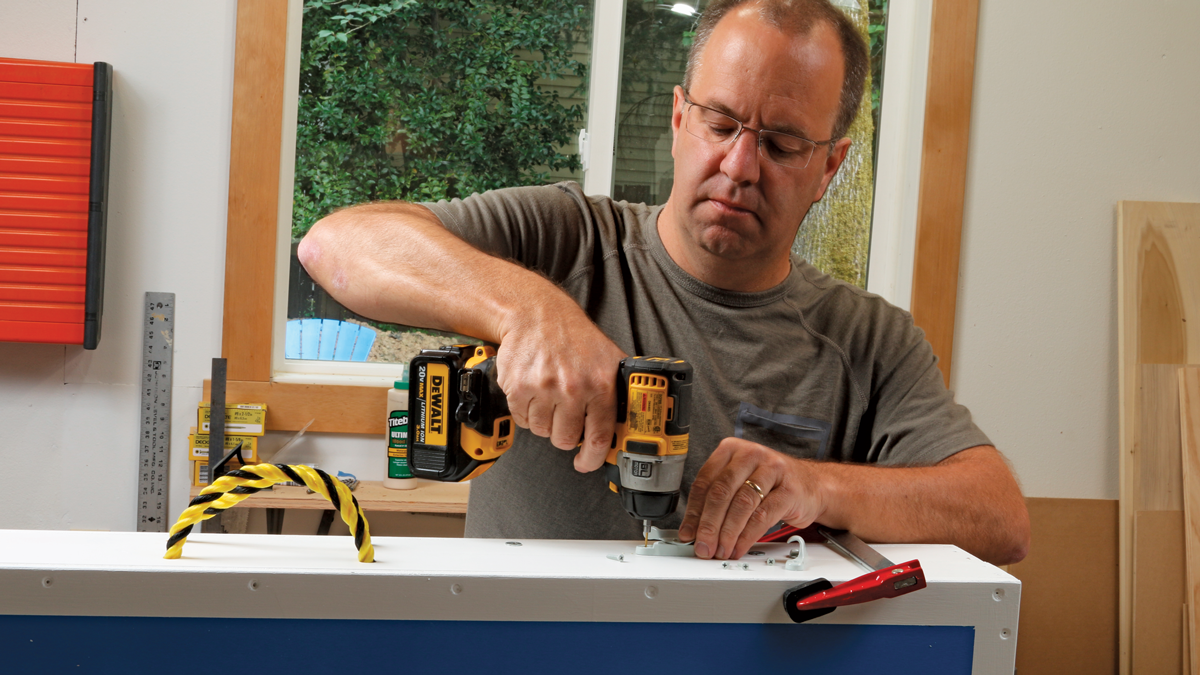
    3. Add the window hardware. I used window sash locks to hold the two platforms together for storage and travel. Get the strongest ones you can find; these are a bit wimpy. Clamp the two platforms together and hold the hardware in place while you drill pilot holes and drive screws. Space the parts as far apart as you can so they grab firmly when closed.

    Sign up for eletters today and get the latest techniques and how-to from Fine Woodworking, plus special offers.

    Sign Up

    Get woodworking tips, expert advice and special offers in your inbox

    Sign Up
    ×
    X
    X
    Previous: Make A Contemporary Swing-Arm Lamp Next: Easy DIY Wooden Doormat

    Guide

    Beginner Projects

    Chapter

    Gifts & Accessories

    Log in or create an account to post a comment.

    Sign up Log in

    Beginner Projects

    Beginner Projects

    Build your woodworking skills from the ground up.

    View Project Guide

    View All Project Guides »

    Become a member and get unlimited site access, including the Beginner Projects Project Guide.

    Start Free Trial

    Getting Started
    • Setting Up Shop
    • Skill Building
    • Sharpening Basics
    Cutting Boards & Picture Frames
    • Cutting Boards
    • Picture Frames
    Gifts & Accessories
    • Woodworking Gift Ideas
    • Simple Boxes
    • Lamps
    • Outdoor Accessories
    Bookcases & Shelves
    • Bookcases
    • Shelving
    Step Stools & Tables
    • Step Stools
    • Nightstands and Tables

    Get the latest from Fine Woodworking Magazine

    • #292-NOV/DEC 2021

      • Kerf-bent wall cabinet
      • Online extras from FWW issue #292
      • How to tame curved parts with patterns
    • #291-Sep/Oct 2021

      • Build a modern coffee table
      • Online Extras from FWW Issue #291
      • Editor's Letter: Something old, something new
    • #290-July/Aug 2021

      • Build a Shaker chest of drawers
      • Online Extras from FWW Issue #290
      • From the editor: What we make matters
    • #289-May/June 2021

      • Arts & Crafts Coffee Table with Story-Book Charm
      • Links from Fine Woodworking issue #289
      • Step-by-Step Guide to Tuning Your Block Plane
    • #288-Mar/Apr 2021

      • Phil Lowe: A craftsman and gentleman
      • Online Extras from FWW Issue #288
      • Phil Lowe: craftsman, teacher, friend

    UNLIMITED membership - Get access to it all

    Start Free Trial Upgrade Membership

    Fine WoodWorking

    Follow

    Newsletter

    Get woodworking tips, expert advice and special offers in your inbox

    Sign Up

    Membership & Magazine

    • Members
    • Digital Libraries
    • Join Unlimited
    • Magazine Subscription
    • Magazine Renewal
    • Gift a Subscription
    • Customer Support
    • Manage Preferences

    Taunton Network

    • Fine Homebuilding
    • Green Building Advisor
    • Fine Gardening
    • Threads
    • About
    • Contact
    • Advertise
    • Privacy Policy
    • Careers
    • Copyright
    • Terms of Use
    • Accessibility
    • California Privacy Rights
    • Site Map

    © 2021 The Taunton Press, Inc. All rights reserved.

    Get step-by-step instructions, woodworking tips, expert advice and special offers in your inbox. Sign Up Now!

      Main Menu

    • Projects and Plans
    • How-To
    • Shop Tips
    • Tools & Materials
    • Videos
    • Gallery
    • Magazine
    • Video Workshops
    • Members
    • Forum

      Popular Topics

    • Design
    • Small Projects
    • Beds
    • Chairs, Benches And Stools
    • Built-ins
    • Storage And Shelves
    • Cabinets
    • Carving
    • Casework
    • Desks
    • Tables
    • Shop Storage And Furniture
    • Woodturning Projects
    • Workbenches
    • Surface Prep

      More

    • TV
    • Forum
    • Blogs
    • Webinars
    • Podcasts
    • Customer Support

      Account

    • Log In
    • Join

      Magazine

    • Current Issue
    • Past Issues
    • Digital Libraries
    • Magazine Index
    • Subscribe

      Membership

    • Member Home
    • Start Free Trial
    • Gift Unlimited
    • Log In

      Shop the Store

    • Books
    • DVDs
    • Taunton Workshops

      Events

    • Fine Woodworking Live
    • Fine Woodworking HANDS ON

      Account

    • Log In
    • Sign Up

    Newsletter

    Get woodworking tips, offers, and expert advice in your inbox

    Sign Up

    Follow

    UNLIMITED

    Become an UNLIMITED member and get it all: searchable online archive of every issue, how-to videos, Complete Illustrated Guide to Woodworking digital series, print magazine, e-newsletter, and more.

    Start Your Free Trial

    Upgrade Membership