
An (almost) foolproof method for hand-cut dadoes
A straight piece of scrap, a backsaw or handsaw, and you'll be cutting straight dadoes in no time.
 Dec 01, 2020

During classes I show a couple of ways to cut dadoes by hand, but below is the approach that’s proven most successful for those new to hand tools. (A “dado,” by the way, is a three-sided trench that runs across the grain; a “groove” is a three-sided trench that runs with the grain. I’m sure you already know this, but it’s part of my spiel when I’m teaching –so you get it, too! I’m adamant that things are called by their proper name; it helps with clear communication.)
The first task is to lay out the dado’s position on the workpiece. I almost always lay out from the bottom of my workpiece; following the same process every time helps to cut down on errors. So, I first mark the bottom edge of the dado with a 0.5mm pencil and adjustable square (always referenced off the front edge), then immediately mark a series of Xs on the other side of my line to clearly delineate the waste area. Then, I set my cutting gauge to my desired depth (in this case, 1/4 in.) and eyeball a 3/4-in.-long mark from my layout line to the other shoulder of the dado. In my example below, that front edge won’t show in the end, so I don’t care if my mark is overlong.

Next, I grab a scrap that is somewhere close to the width of the workpiece (over a little or under a little is OK), and about 3/4 in. thick. One edge – the reference edge of the scrap– gets planed dead straight. That’s the appliance. Pretty fancy, eh?
Clamp the straightedge in place along your layout line, waste – and I can’t stress this enough – to the inside. And here is why I stipulate a 0.5mm pencil: if you use a fat pencil, the range of where across the line’s width to clamp is too great. A 0.5mm pencil is the perfect size for covering about half the line; that leaves just enough of it to see along the edge of the appliance. (If you can’t see the line, how do you know you’re sawing the line?)

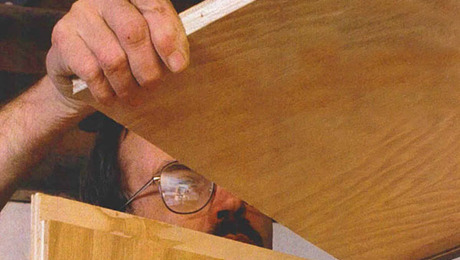
Now grab your crosscut saw (backsaw or handsaw – it makes no appreciable difference) and push the plate against the appliance with a flat-sided block of wood. If the block of wood is long enough, you can simply hold it in place to help keep the plate at 90° to the workpiece as you saw. With a shorter piece, it helps to move the block in tandem with the sawplate. Saw down to your baseline – and check to make sure you’ve hit it on the far side, too. DO NOT REMOVE THE BATTEN. Note: Saw with your dominant hand of course, and use your off hand to press the plate against the appliance. When you cut the other shoulder of the dado, you’ll need to approach the work from the other side to keep your hands in the right place for simple sawing. (And that is why I like having my bench in the middle of the room – otherwise, I’d have to turn the workpiece around.)
Note that I’m using a backsaw below. Because of the handle hang on this saw, if my appliance is thicker than 3/4 in., the saw handle might run into it before I reached full depth. That’s why I recommend a 3/4-in. scrap – but I wouldn’t go narrower, because then there wouldn’t be enough surface on which to easily support the sawplate. The handle is also why I don’t like a scrap that’s much longer than my workpiece; I don’t want to bark my hand against the appliance.

Let me repeat: DO NOT REMOVE THE BATTEN. Push your actual workpiece (in this case, a shelf) up against the batten and mark the outside edges, maybe 1 to 2 in. If the shelf is at all bowed, push it flush and mark at one edge, then push it flush at the other edge and mark. That way, you’re laying out a nice, tight dado that can pull out any bow at assembly.


Now you can move the batten – in fact, you need to. Turn it around (so the jointed edge is facing the waste), and clamp it in place the same way as before, with about half your 0.5mm lines showing. Double check that the waste is to the inside of the appliance, and that your clamps or holdfasts are far enough to the side so as not to impede your sawing. Now triple check. All good? OK – saw as before.

Remove the batten. If your holdfast hole locations allow it, the batten also makes an excellent thing against which to now jam the workpiece while bashing out the waste (see below). I prefer to not clamp the workpiece here, because it gets flipped around once or twice. That’s faster with no clamps.
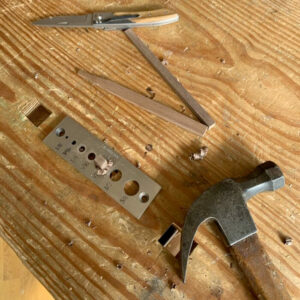
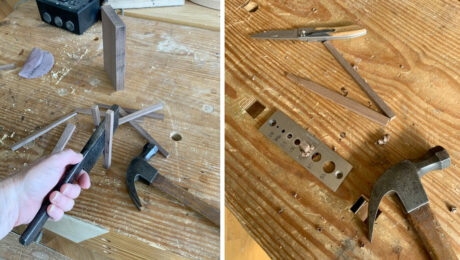
Using the largest chisel you have that will fit cleanly between your two kerfs (here, that’s a 3/4-in. chisel), hold it flat to the work (bevel up), about halfway down into the waste, and knock out as much as you can across the width. Repeat, this time just above the baseline. (You might be able to get it all out in one go, depending on the wood species, dado depth, your daring…) Flip the piece and work in from the other edge.

If you can’t get all the way to the middle working from either side, turn the chisel bevel down to remove the remaining hill. You can also simply remove all the waste with the chisel bevel down. Bevel down is faster, but I find that beginners sometimes dive in far too deeply with the tool in that orientation.

Set a router plane to the final depth of the dado, then use it to zip out the remaining waste, again working in from both sides. A sharp router plane should leave a nice smooth bottom.

Test your shelf (or whatever it is) in the dado. It should be a press fit. That is, it should take some pressure to fully seat it, but you shouldn’t need your heaviest mallet. If it starts into the dado but won’t bottom out, the likely culprit is a dado wall that angles in toward the dado bottom. Check it with a square and remove any offending material (I use a paring chisel for this).

If the walls are square but the dado is slightly too narrow, adjust the shelf, not the dado. Take a pass or two with a block plane across the end on the underside of the workpiece (working in from both edges) and try the fit again. (In effect, you’re making a slightly raised panel.) Don’t take more than a pass or two before testing the fit again. And don’t worry – those plane passes (again, on the underside) will never show in the finished piece.
And if your dado is too big? Shove a wedge in the gap(s) on the underside, and cut it flush. You’ll be able to see a bit of a gap in the front edge of the dado, but that’s better than having the shelf fall out. (And your design might well cover that gap anyway, with a face frame or molding.)
Sure, the above method is a bit fussy. With a little practice, you can simply nibble your way back along the layout line to start the kerf, then saw to depth without a crutch. But sometimes we all need a little help – especially at the outset.
 |
|
 |
|
 |


Comments
This sort of instructional stuff ought to appear more frequently - and in more formats - within FWW. It's basic woodworking but of the more demanding kind that provides not just the basics but a few tweaks and additions that even experienced woodworkers might find "new & improved".
Those video workshops that demo a series of such techniques are very good - but the technique is somewhat buried in an often long series describing the making of a whole piece. Personally I learnt quite a lot about hand tool operations from the Chris Gochnour Enfield Cabinet series - but it's a long watch.
Why not make how-to videos of articles such as this "hand sawn dado" text article? They would be faster to make and eventually build into a library of such techniques, disconnected from any larger subject such as "make this whole cabinet". I know the video workshops are broken down into episodes (which helps) but stand-alone videos will be easier to organise and to find; and won't be complicated by being about a specific piece.
*****
Isn't it about time we had a new video workshop, by the way? Get on with it Mr Strano! :-)
Lataxe
The Becksvoort video workshop just finished up and we just started publishing the master class series with Tom McLaughlin. While that is a little different than a video workshop it will hold us till January when we release a handplane restoration series with Rollie (you heard it here first!).
I drove 400 miles yesterday with an 8-hour shoot in the middle to make sure we are still getting videos done, being safe, and being legal.
Mr S,
Yes, I had forgot the Shaker candle stand vid - naughty-me.
I look forward to the hand plane restoration vid ... but only if it includes the wooden ones. There are already a thousand vids out there about fettling them rusty ole Stanley things.
Me, I'd like to see a bit more FWW stuff about making tools for oneself...... (no, not yet more jigs, though). Wooden bodied tools with lots of brass or steel parts where necessary, costing a fraction of the price of a commercially made one and working better. Not much to ask, surely!? :-)
Lataxe, a gimmepig.
Don’t stop doing the design thing.
Great information - Thank you. Since you are a stickler for correct terminology, may I offer the following correction:
"...a “groove” is a three-sided trench that runs with the grain."
Actually, that type of "trench" when cut on the face is called a plough . Traditionally with a plough plane. A groove is similar but cut on an edge (i.e. tongue and groove).
Hmm...I'll broaden my research to see what I can find. Everything I've read simply says a groove is with the grain, a dado is across.
It seems to me that the o.5mm pencil line could be improved by first using a striking knife. (Two or three gentle [so as to not wander] passes on each line should do it.) It would guide the saw's teeth more accurately, especially on that all important first pass.
Log in or create an account to post a comment.
Sign up Log in